Curling your hair with a straightener might sound counterintuitive, but it’s a game-changer! Whether you want beachy waves or tight spirals, a straightener can deliver stunning results. It offers versatility and precision that can elevate your hair styling game. Let’s explore why using a straightener for curling is not only effective but also a fantastic option for achieving those perfect curls!
Why Use a Straightener for Curling?
Using a straightener for curling your hair offers several advantages that traditional curling irons just can’t match. Here’s why you should consider this technique:
- Versatility: A straightener is not just for straightening; it can create a variety of curl types. Want loose waves? Tight curls? A straightener can do it all!
- Efficiency: Straighteners heat up quickly and can glide through your hair smoothly, allowing you to curl sections in less time compared to a curling iron.
- Control: The flat plates allow more control over the tightness and shape of your curls. You can adjust your technique to achieve different styles effortlessly.
- Less Damage: When used correctly, straighteners can cause less damage to your hair than traditional curling tools, especially if you use a quality product with adjustable heat settings.
- Compact Size: Straighteners are often smaller and easier to handle than bulky curling irons, making them great for travel or quick touch-ups.
So, if you haven’t tried curling your hair with a straightener yet, you’re in for a treat! With a bit of practice, you’ll be able to master this technique and enjoy fabulous curls that last.
Also Read This: How to Watch Rumble on Your TV
Choosing the Right Straightener

When it comes to curling your hair with a straightener, the right tool can make all the difference. With so many options out there, how do you know which straightener is best for you? Let’s break it down!
Plate Material: The material of the straightener plates significantly impacts performance. Here are the most common types:
- Ceramic: Provides even heat distribution, making it perfect for fine or damaged hair.
- Titanium: Heats up quickly and is excellent for thicker hair, but can overheat easily, so be cautious!
- Tourmaline: Often used in combination with ceramic, this material emits negative ions that help reduce frizz.
Plate Width: For tighter curls, a narrow plate (1 inch or less) works wonders. If you’re aiming for loose waves, go for a wider plate (1.5 to 2 inches).
Temperature Control: Look for a straightener with adjustable temperature settings. Fine hair may need lower heat, whereas thick or coarse hair benefits from higher temperatures.
Other Features: Consider additional features such as:
- Auto Shut-off: Safety first! This feature turns the device off after a certain period of inactivity.
- Swivel Cord: Prevents tangling and gives you more maneuverability while styling.
Finding the right straightener tailored to your hair type and styling needs ensures that curling your hair becomes a breeze!
Also Read This: Effortlessly Transfer Videos from Your iPhone to YouTube
Preparation Steps for Curling
Before you dive into curling your hair with a straightener, preparation is key to achieving the perfect curl. Here’s a straightforward guide to get you ready!
1. Start with Clean, Dry Hair: Always begin with hair that's clean and completely dry. Wet hair can cause heat damage and won't hold the curl as well.
2. Apply Heat Protectant: Protecting your hair from heat damage is essential. Use a quality heat protectant spray, focusing on the mid-lengths to ends to shield your strands.
3. Section Your Hair: Divide your hair into manageable sections to make styling easier. Use clips to separate your hair into small sections, about an inch thick. This ensures even curling.
4. Choose Your Curling Technique: Decide if you want tight curls, loose waves, or something in between. For tighter curls, wrap the hair around the straightener tightly. For loose waves, hold the hair for a shorter time before releasing.
5. Practice Good Technique: When you start curling, ensure that you twist the straightener away from your face for the front sections. This creates a beautiful, face-framing effect. Also, remember to keep the straightener moving to avoid hot spots!
By following these preparation steps, you'll set yourself up for success and achieve gorgeous curls that last all day!
Also Read This: Are LinkedIn Messages Truly Private
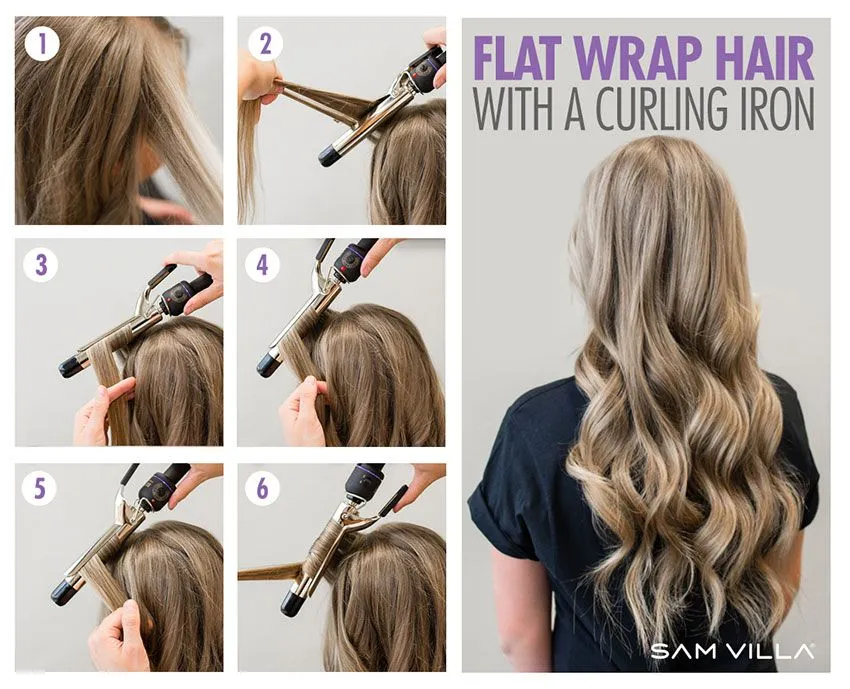
5. Step-by-Step Guide to Curling Your Hair
Curling your hair with a straightener might sound tricky, but once you get the hang of it, you’ll be amazed at how easy and effective it is! Let’s break it down into simple steps:
- Prepare Your Hair: Start with clean, dry hair. Apply a heat protectant to shield your strands from damage. This is crucial for maintaining hair health!
- Section Your Hair: Divide your hair into manageable sections. Use clips to section off the top half, leaving the bottom half down first. This allows for more precise curling.
- Choose Your Straightener: Select a straightener with rounded edges for the best results. A width of 1 inch is ideal for creating tight curls.
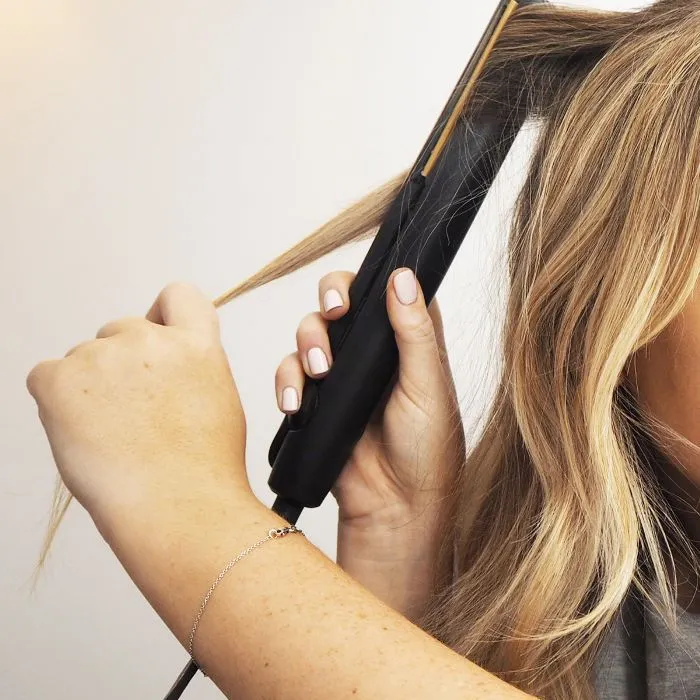
- Start Curling: Take a 1-inch section of hair. Clamp the straightener at the roots, twist it away from your face, and glide it down to the ends. The longer you hold the hair, the tighter the curl will be.
- Release and Set: After a few seconds, release the hair gently. Allow the curl to cool in your hand for a moment before dropping it. This helps to set the curl.
- Repeat: Continue this process around your head, alternating the direction of the curls for a more natural look.
- Finish Up: Once finished, run your fingers through the curls to separate them and create volume. Set with a light-hold hairspray for lasting curls.
Also Read This: Customize Stickers with Canva Sticker Template
6. Tips for Achieving Beautiful Curls
Now that you've got the curling technique down, let’s explore some tips to make your curls stand out beautifully!
- Choose the Right Products: Use styling mousse or curl-enhancing cream before curling for extra hold and definition.
- Temperature Matters: Adjust the heat setting on your straightener based on your hair type. Fine hair should be around 300°F, while thicker hair might need closer to 400°F.
- Practice Makes Perfect: Don’t be discouraged if it doesn’t turn out perfect the first time. Keep practicing to find what works best for you!
- Cool Down: Allow the curls to cool completely before touching them. This locks in the shape and keeps them looking fabulous longer.
- Experiment with Sizes: Try curling smaller sections for tighter curls or larger sections for looser waves. Mix it up for a more textured look!
- Accessorize: Incorporate accessories like hair clips or ribbons to elevate your curl game. They add a fun touch!
Also Read This: How to Change Your Website URL in Behance
7. How to Maintain Curls Throughout the Day
After investing time in curling your hair with a straightener, the last thing you want is for those beautiful curls to fall flat by noon. Here are some effective tips to ensure your curls last all day long:
- Use a Quality Hairspray: A lightweight, flexible hold hairspray can help maintain curls without making them stiff. Spray it on your curls after styling to lock in the shape.
- Pin Curls While Setting: After curling each section, pin it up to cool in the curled position. This helps the curl set better and last longer.
- Avoid Touching Your Hair: The more you touch your curls, the looser they become. Try to keep your hands off your hair to maintain their shape.
- Use a Curl-Enhancing Cream: A small amount of curl cream can help revive and define curls throughout the day. Just rub a bit between your fingers and scrunch it into your hair.
- Choose the Right Products: Opt for sulfate-free shampoos and conditioners that won’t strip your curls of moisture and elasticity. Look for products specifically designed for heat-styled hair.
- Keep Hair Ties Handy: If you find your curls loosening up, a loose bun or ponytail can help. Just make sure it’s not too tight, or it could create unwanted waves.
By following these tips, you can enjoy bouncy, beautiful curls that last from morning until night!
8. Conclusion
Perfectly curling your hair with a straightener can be a game changer, offering you versatility and style without much hassle. However, it’s not just about achieving those curls—it’s also about maintaining them throughout the day and knowing how to care for your hair.
In summary:
- Choose the right products for your hair type.
- Practice techniques like pinning curls and using hairspray to keep them intact.
- Be gentle with your curls and avoid excessive touching or heat exposure.
With the right approach, curling your hair with a straightener can be quick and effective. So go ahead, flaunt those gorgeous curls with confidence! Remember, practice makes perfect, so don’t hesitate to experiment until you find your signature style.