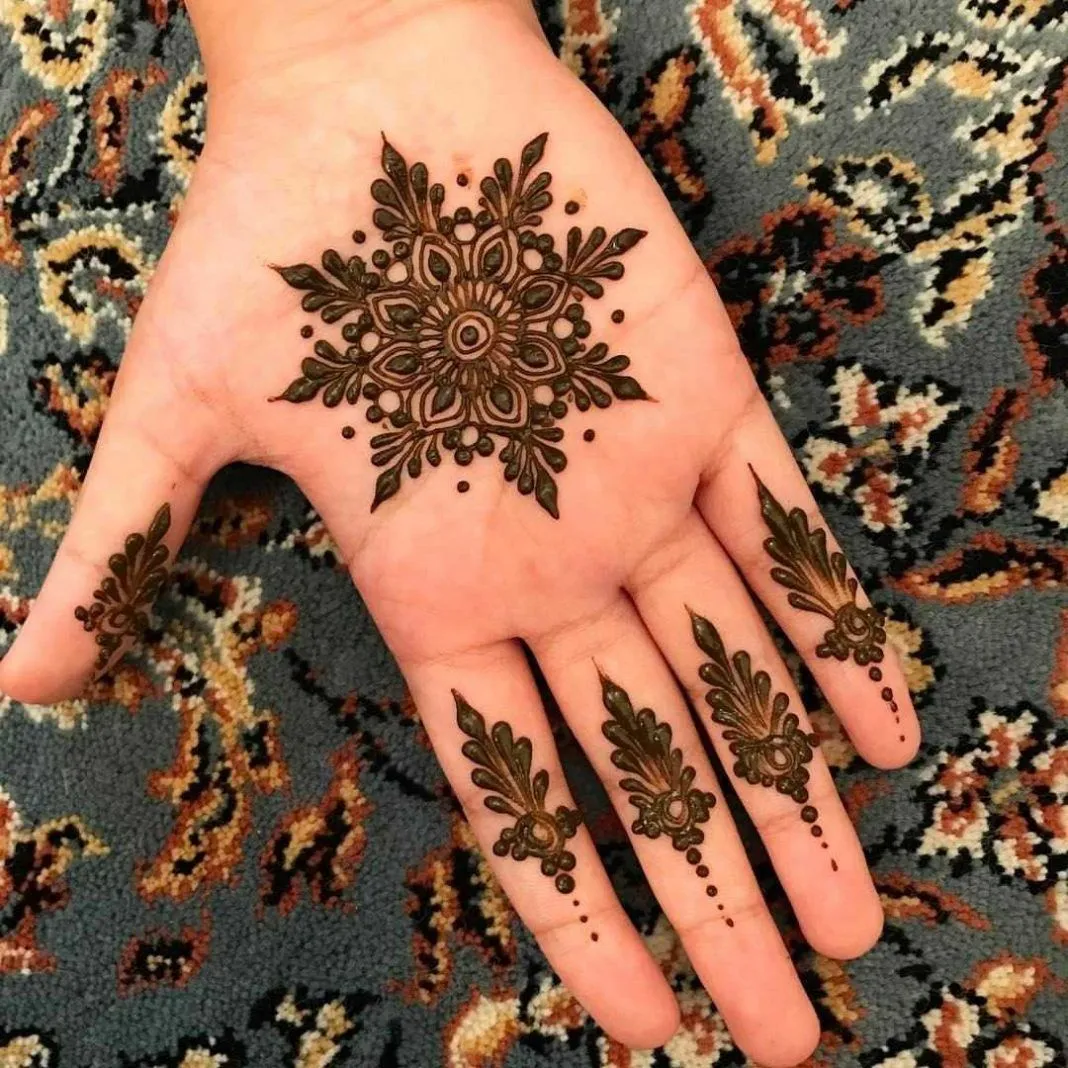
Mehndi, also known as henna, is more than just a beautiful adornment for the skin; it’s a tradition that spans cultures and centuries. Originating from the Middle East and South Asia, mehndi is used in various celebrations, especially weddings, to symbolize joy, prosperity, and love. The intricate designs painted on the hands and feet are not just visually appealing; they carry deep cultural significance.
In recent years, mehndi has gained popularity worldwide, transcending cultural boundaries. People from all walks of life are embracing this art form, using it to express creativity and individuality. Whether it’s a special occasion or simply a desire to beautify one’s hands, mastering the art of mehndi application can be a rewarding experience. In this guide, we’ll explore the essential tools and materials needed to get started on your mehndi journey. Let’s dive in!
Essential Tools and Materials Needed
Before you take the plunge into creating stunning mehndi designs, it's crucial to gather the right tools and materials. Having everything you need on hand will make your application process smoother and more enjoyable. Here’s a handy list of essentials:
- Henna Powder: The star of the show! Look for high-quality, natural henna powder to ensure vibrant and long-lasting designs.
- Essential Oils: Oils like eucalyptus or tea tree oil enhance the stain quality of henna, giving you richer and deeper colors.
- Water: Pure water is essential for mixing the henna paste. Avoid tap water, as impurities can affect the stain.
- Mixing Bowl and Spoon: Use a clean bowl and spoon to mix your henna paste. Plastic or glass is preferable to avoid any reactions.
- Applicator Cone: This is the preferred tool for applying henna. You can buy ready-made cones or make your own using plastic wrap.
- Scissors: Handy for cutting the tip of your applicator cone to achieve the desired thickness.
- Plastic Wrap: Use this to cover your designs after application, allowing the henna to develop for a deeper stain.
- Cotton Balls or Swabs: Great for cleaning up any mistakes during application.
- Tissues or Paper Towels: Useful for wiping excess henna and keeping your workspace tidy.
- Design Reference Book or Images: Keep a collection of designs handy for inspiration and guidance.
With these tools and materials, you’ll be well-equipped to start your mehndi journey. Remember, practice makes perfect, so don’t hesitate to experiment with different designs and techniques!
Also Read This: Exploring OK.ruâs Exciting Gaming Features
Step-by-Step Guide to Applying Mehndi
Applying mehndi can be a delightful experience, especially when you see the beautiful designs emerging on your hands. Here’s a simple, step-by-step guide to help you master the art of mehndi application:
- Gather Your Supplies: Before you begin, make sure you have everything you need. You’ll need:
- Fresh mehndi paste (store-bought or homemade)
- Cones or applicator bottles
- Paper towels or an old cloth for cleaning
- A small brush or toothpick for detailing
- Jojoba oil or lemon sugar mixture for aftercare
Also Read This: Can You Use Nintendo Music in YouTube Videos? Understanding Fair Use
Tips for Creating Intricate Designs
Creating intricate mehndi designs can be a rewarding challenge. Here are some tips to help you elevate your mehndi game:
- Practice Makes Perfect: Don’t be discouraged if your first few attempts don’t turn out as planned. Practice on paper or your own skin until you feel comfortable.
- Use Quality Mehndi: The quality of your mehndi paste can significantly impact your design's outcome. Use natural henna and avoid chemical additives for the best results.
- Study Existing Designs: Look at various mehndi designs to understand different patterns and styles. Break down complex designs into simpler elements that you can practice individually.
- Start Simple: Begin with basic shapes and gradually incorporate more detailing. Even simple designs can look stunning when executed well.
- Keep Your Hands Steady: To create smooth lines, keep your hands steady while applying mehndi. Rest your elbow on a flat surface if needed.
- Experiment with Flow: Vary the pressure you apply to the cone. A lighter touch creates thinner lines, while more pressure yields thicker lines. This can add depth to your designs.
- Use Color Wisely: Consider adding colored accents or glitter to your designs. This can make your mehndi stand out even more, especially for special occasions.
- Seek Inspiration from Nature: Flowers, leaves, and paisley motifs are popular in mehndi. Drawing inspiration from nature can help you create beautiful, organic designs.
Remember, creating intricate mehndi designs takes time and patience, but with practice, you’ll be able to impress everyone with your skills!
Also Read This: Effective Strategies to Eliminate Annoying Ads on Chrome While Watching Dailymotion
5. Aftercare for Long-Lasting Mehndi
So, you've just adorned your hands with stunning mehndi designs, and you're probably eager to show them off! But did you know that the way you care for your mehndi can significantly impact how vibrant and long-lasting those intricate patterns will be? Let’s dive into some essential aftercare tips to help your mehndi shine for as long as possible.
- Avoid Water: The first few hours after application are crucial. Keep your hands away from water to allow the mehndi to set properly. If possible, avoid washing your hands for at least 6-8 hours after application.
- Use Lemon Sugar Mix: A mixture of lemon juice and sugar can help deepen the color. Simply dab it onto your mehndi designs every 30 minutes during the first few hours.
- Avoid Scrubbing: When washing your hands, be gentle. Scrubbing can cause the mehndi to fade prematurely. Instead, rinse lightly with water.
- Moisturize Wisely: After the mehndi has fully dried and set, you can apply a thin layer of unscented oil or lotion. This will help keep your skin hydrated without causing the mehndi to smudge.
- Stay Away from Chemicals: Avoid using any harsh chemicals or soaps on your hands for a few days. This includes hand sanitizers and scented lotions that can strip the color.
By following these simple aftercare tips, you can ensure that your mehndi stays vibrant and beautiful for as long as possible. Enjoy showcasing your lovely designs!
6. Conclusion
Mastering the art of mehndi application is not just about the application itself; it’s also about understanding the importance of care and maintenance. Mehndi is a beautiful tradition that carries deep cultural significance, and when applied correctly, it can be a stunning adornment for any occasion.
As we’ve explored throughout this post, from choosing the right henna to perfecting your application technique and ensuring proper aftercare, each step plays a vital role in achieving those beautiful, intricate designs that everyone admires. Remember, practice makes perfect! The more you experiment with different patterns and techniques, the more skilled you'll become.
So, whether you're preparing for a wedding, a festival, or just want to add a touch of beauty to your everyday life, don’t hesitate to unleash your creativity with mehndi. Embrace the process, enjoy the journey, and most importantly, have fun while creating your stunning hand designs.
And if you ever feel stuck or need inspiration, there’s a world of resources available, from tutorials to design ideas. Keep exploring, keep practicing, and your mehndi skills will flourish beautifully!