As a photographer I understand how crucial it is to have the tools to make our workflow smoother. The ShootProof Lightroom Plugin is one of those treasures that has revolutionized the game for many of us. It effortlessly works with Adobe Lightroom enabling you to upload and organize your photos effortlessly. I still recall the moment I first tried it out; it was as if I had a helper at my disposal streamlining the entire process and making it more efficient. This plugin not saves time but also elevates the way we showcase our work to clients.
Setting Up the Plugin for Optimal Use
Using the ShootProof Lightroom Plugin is easy but let me guide you through the process to make sure you’re all set up for success. Here’s a simple way to get started:
- Download the Plugin: Head over to the ShootProof website and download the Lightroom Plugin. It’s typically a quick process, and you’ll have the files ready in no time.
- Install the Plugin: Open Lightroom, navigate to the "File" menu, and select "Plugin Manager." From there, you can add the downloaded plugin by clicking on "Add." Just follow the prompts, and you'll be good to go.
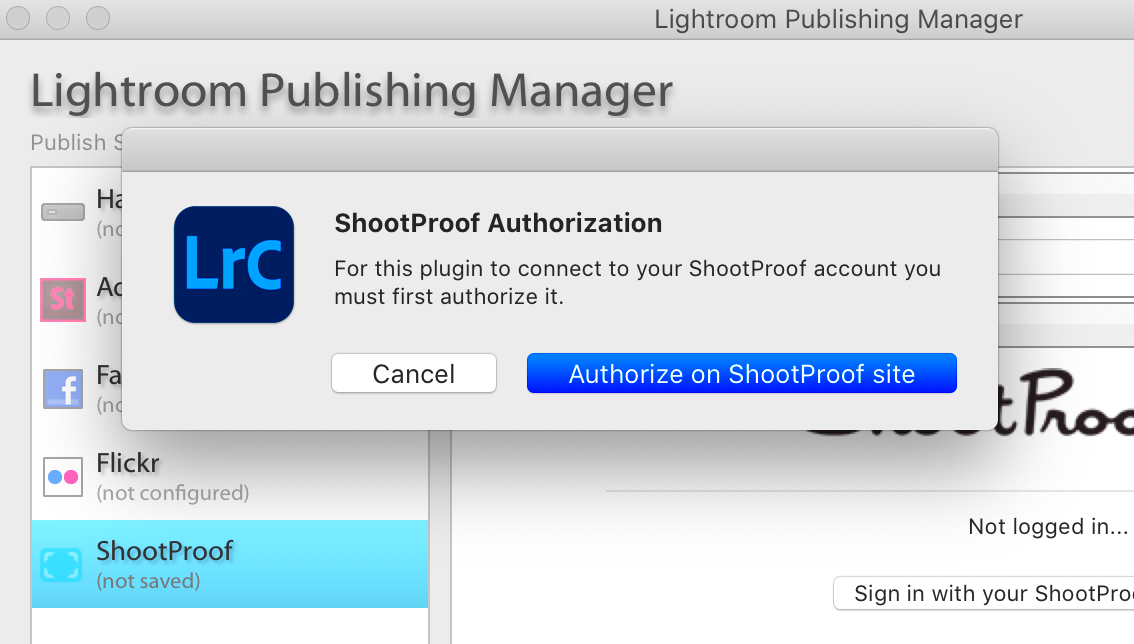
- Authenticate Your Account: Once installed, the plugin will prompt you to log into your ShootProof account. If you don’t have one yet, setting it up is straightforward and only takes a few minutes.
- Customize Settings: After logging in, take a moment to adjust the plugin settings according to your needs. This could include preferences for file formats, watermarking options, or album organization.
By following these actions, you can make sure that the plugin functions at its best, tailored to your specific work routine.
Also Read This: How to Download YouTube Videos to a Thumb Drive
Navigating the User Interface of the Plugin
After setting things up getting used to the ShootProof Lightroom Plugin's interface comes next. I recall my initial experience with it; it felt seamless and easy to navigate similar to having a conversation with a familiar friend who understands your requirements perfectly.
The layout is neat and well structured, allowing you to effortlessly locate what you need. Here are a few notable functionalities.
- Dashboard: This is your control center. Here, you can see recent uploads, access your galleries, and check on orders.
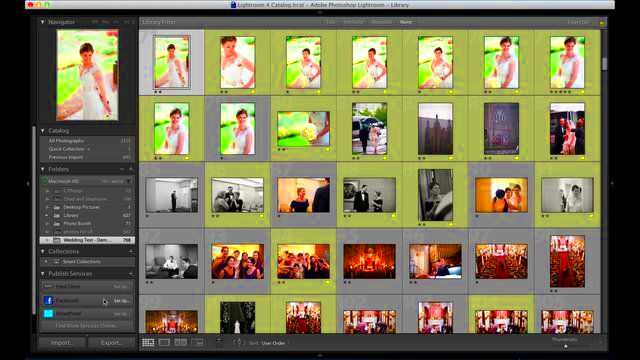
- Upload Section: You can drag and drop images directly from your Lightroom catalog into this section. It’s like watching your photos effortlessly find their place.
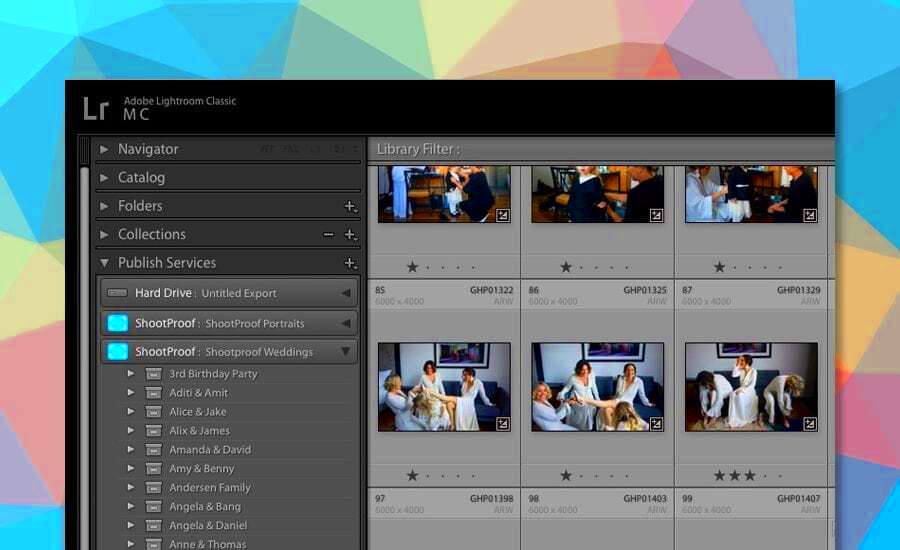
- Gallery Management: Create and manage galleries with a few clicks. You can customize the look and feel to match your brand.
- Client Interactions: View client interactions, such as purchases and comments, making it easy to engage with them.
Feel free to check out all the features as you move around the interface. Theyre there to make your experience better so you can concentrate on what you excel at capturing beautiful photos!
Also Read This: eStockPhoto: High-Quality Travel and Nature Images
Integrating ShootProof with Your Lightroom Workflow
Incorporating ShootProof into your Lightroom routine is like infusing vibrancy into a monochrome masterpiece. It introduces a level of organization and productivity that every photographer longs for. Initially, when I started using it, I was taken aback by the sheer number of images I needed to handle. Nevertheless once I fully embraced the integration my workflow underwent a transformation enabling me to concentrate more on creativity instead of mundane chores.
Here’s a smooth way to incorporate ShootProof into your workflow.
- Linking Galleries: As you edit your images in Lightroom, link them directly to the galleries you’ve set up in ShootProof. This way, every time you make an edit, you can update the gallery instantly.
- Batch Uploading: Instead of uploading images one by one, use the batch upload feature to send multiple images to your galleries at once. It saves precious time and allows you to get back to what you love—shooting!
- Organizing Images: Use keywords and collections within Lightroom to keep track of your work. It’s much easier to upload organized collections to ShootProof, ensuring your clients receive exactly what they need.
- Client Access: By integrating ShootProof, you can grant your clients direct access to their galleries, making it easy for them to view and purchase images.
As time went on I came to understand that incorporating this technology not only boosted my productivity but also strengthened my connections with clients. They value a smooth and streamlined process and by merging these tools I can provide them with exactly that.
Also Read This: How to Download FIFA 14 for PC from Dailymotion
Utilizing Features to Enhance Your Photography Process
The true enchantment of the ShootProof Lightroom Plugin comes from its tailored features designed exclusively for photographers. These tools not only streamline workflows but also enhance the overall journey. I recall a wedding season when these capabilities saved me a significant amount of time enabling me to concentrate on capturing moments instead of getting caught up in logistics.
Here are some key points that you should make the most of
- Watermarking: Protect your images with customizable watermarks. It’s reassuring to know that your hard work is safeguarded, especially when sharing online.
- Online Proofing: Allow clients to select their favorite images directly from their galleries. This feature is a game-changer, enabling a collaborative selection process that fosters a sense of involvement.
- Sales and Packages: Set up packages and pricing options for your clients. It’s incredibly fulfilling to see your work valued and rewarded through sales directly linked to your images.
- Automated Emails: Schedule emails to clients post-upload, notifying them about their galleries. This not only keeps them informed but also enhances your professionalism.
By incorporating these functionalities you not only make your process more efficient but also enhance the overall photography experience for your clients. Keep in mind that a satisfied client often brings in referrals and chances in the future!
Also Read This: Why Teens Are Embracing LinkedIn for Career Growth and Networking
Troubleshooting Common Issues with the Plugin
While no tool is flawless the ShootProof Lightroom Plugin comes with its own set of challenges. However dealing with obstacles doesn't have to be an overwhelming experience. I remember feeling anxious when my uploads got stuck and I worried about losing valuable work. Fortunately I discovered that most problems have simple fixes.
Here are a few issues that often come up and some ways to address them.
- Upload Failures: If your uploads are failing, check your internet connection first. A slow or unstable connection can disrupt the process. If everything seems fine, try restarting Lightroom or the plugin.
- Plugin Not Recognized: Sometimes, Lightroom may not recognize the plugin. Ensure that you’ve installed it correctly through the Plugin Manager. Reinstalling can also help resolve this issue.
- Image Formatting Issues: Make sure your images are in a compatible format. ShootProof typically supports JPEG and TIFF formats, but checking the settings can save time.
- Missing Galleries: If you can’t find your galleries, try refreshing the plugin or logging out and back in to your ShootProof account. It’s a simple fix that works more often than not.
Dont forget that these obstacles along the way are just a natural part of the process. With some patience and creativity you can find solutions and maintain a steady workflow. After all conquering these hurdles only contributes to our development as photographers!
Also Read This: Extracting Audio from YouTube Videos for Your Projects
Best Practices for Maximizing Efficiency
As photographers we constantly seek to streamline our processes and I can personally vouch for the impact of tweaks. After spending hours fine tuning my photo collections I've come across some strategies that can boost your efficiency, with the ShootProof Lightroom Plugin.
Here are a few suggestions that have been really beneficial for me.
- Plan Your Workflow: Before diving into your editing session, take a moment to outline your tasks. Having a clear plan can save you from getting lost in the endless sea of images.
- Use Shortcuts: Familiarize yourself with Lightroom shortcuts. They can dramatically speed up your workflow, allowing you to focus on creativity rather than navigation.
- Organize Images in Collections: Create collections in Lightroom to keep your images organized. This not only simplifies the upload process but also makes it easier for clients to find what they’re looking for.
- Utilize Presets: Save your favorite editing settings as presets. This way, you can apply consistent edits across similar images, saving time without sacrificing quality.
- Regularly Backup Your Work: Nothing is more disheartening than losing hours of work. Make it a habit to backup your images and edits regularly to avoid heartache later.
Back when I was starting out I had to go through some tough lessons to realize this. But trust me when I say that incorporating these strategies will make your work process smoother and keep your clients more satisfied.
Also Read This: Learn to Make Henna Cones at Home
FAQs About the ShootProof Lightroom Plugin
Like with any tool there are often questions that come up when you begin using the ShootProof Lightroom Plugin. Throughout my experience I've gathered some commonly asked questions that can assist in clearing up any confusion you may have.
- Is the ShootProof Lightroom Plugin free? The plugin itself is free to download, but you will need a ShootProof account to access its features. There are different pricing plans available based on your needs.
- Can I use the plugin on multiple computers? Yes, you can use the plugin on multiple devices as long as you log in with your ShootProof account. Just make sure to install the plugin on each computer you use.
- What file formats are supported? ShootProof supports JPEG and TIFF formats. Make sure your images are in these formats for a smooth uploading process.
- How do I contact support if I have issues? ShootProof has a dedicated support team. You can reach out to them through their website, and they typically respond promptly to help you resolve any issues.
- Are there any limits on uploads? Depending on your subscription plan, there may be limits on the number of images you can upload. It’s best to check your plan details for specific limits.
With these frequently asked questions readily available you can smoothly overcome the initial challenges and begin reaping the rewards of the plugin without any bumps along the way.
Conclusion and Final Thoughts
As I conclude my thoughts on the ShootProof Lightroom Plugin I find myself reminiscing about the progress I've made in my photography journey. Incorporating this tool into my routine has brought about a change streamlining my editing process and enriching my interactions with clients. If you're contemplating giving it a shot I sincerely urge you to take the plunge!
Every photographer has their own path and while resources such as the ShootProof Lightroom Plugin can streamline your workflow the real enchantment comes from your imagination and perspective. Keep in mind that it's not solely about the pictures you capture; it's also about the narratives you convey through them. So make the most of this tool, play around with its functionalities and feel free to put your personal touch on it.
Ultimately, the real happiness in photography lies in sharing your creations with people. The ShootProof Lightroom Plugin can assist you in streamlining that journey letting you concentrate on what you cherish the most – seizing the exquisite moments of life and spreading them with the universe.