Oil painting is a captivating art form that dates back centuries, offering artists a unique medium to express their creativity. With its rich colors and versatility, oil paint allows for an incredible range of textures and techniques, making it a favorite among both beginners and seasoned professionals. The beauty of oil painting lies in its slow-drying properties, which provide artists ample time to blend colors and adjust their work before it sets. Whether you're looking to create vibrant landscapes, delicate portraits, or abstract pieces, understanding the basics of oil painting is essential for bringing your artistic vision to life.
Materials Needed for Oil Painting
Before you dive into the world of oil painting, it’s crucial to gather the right materials. Having the appropriate tools will not only enhance your experience but also improve your final artwork. Here’s a detailed list of the essential materials you’ll need:
- Oil Paints: Invest in a quality set of oil paints. Beginners can start with a basic palette, including colors like titanium white, ultramarine blue, cadmium red, and lemon yellow.
- Canvas: Choose a pre-stretched canvas or canvas board. The texture of your canvas can affect the final look of your painting.
- Brushes: Select a variety of brushes, including flat, round, and filbert shapes. Look for brushes specifically designed for oil paints, typically made from hog bristle or synthetic fibers.
- Palette: A wooden or glass palette is ideal for mixing your colors. Make sure it's large enough to accommodate various shades.
- Palette Knife: Useful for mixing paints and applying them directly on the canvas, the palette knife adds texture and allows for unique techniques.
- Mediums: Consider using mediums like linseed oil or turpentine to modify the paint’s consistency and drying time. Each medium has different properties, so research which one suits your style.
- Rags or Paper Towels: Keep these handy for cleaning brushes and wiping excess paint.
- Varnish: A final coat of varnish helps protect your painting and enhances its colors.
By gathering these essential materials, you're setting yourself up for success in your oil painting journey. Remember, the right tools can make all the difference in achieving stunning results!
Also Read This: Maximizing Reach on YouTube Shorts with Hashtags
Preparing Your Canvas for Oil Painting
Before diving into the vibrant world of oil painting, it's essential to properly prepare your canvas. This not only enhances the final look of your artwork but also ensures that the paint adheres well and dries correctly.
Here’s a step-by-step approach to prepare your canvas:
- Choose the Right Canvas: Start with a quality canvas—either stretched or canvas boards. For beginners, pre-stretched canvases can be a convenient option.
- Gesso Application: Apply a layer of gesso, which is a primer that seals the canvas and provides a nice surface for painting. Use a wide brush to cover the entire canvas evenly. Let it dry completely.
- Sanding (Optional): If you prefer a smoother surface, lightly sand the dried gesso with fine-grit sandpaper. Wipe off any dust with a clean cloth.
- Additional Layers: Depending on your desired texture, apply one or two more layers of gesso, sanding in between. This will create a more refined surface for your artwork.
- Sketch Your Design: Lightly sketch your composition on the canvas using a pencil or charcoal. This step helps in planning your painting and ensures proper proportions.
By following these steps, your canvas will be ready to embrace the rich, luscious strokes of oil paints. A well-prepared canvas is the first step toward creating a stunning masterpiece!
Also Read This: Behance code viewing tutorial
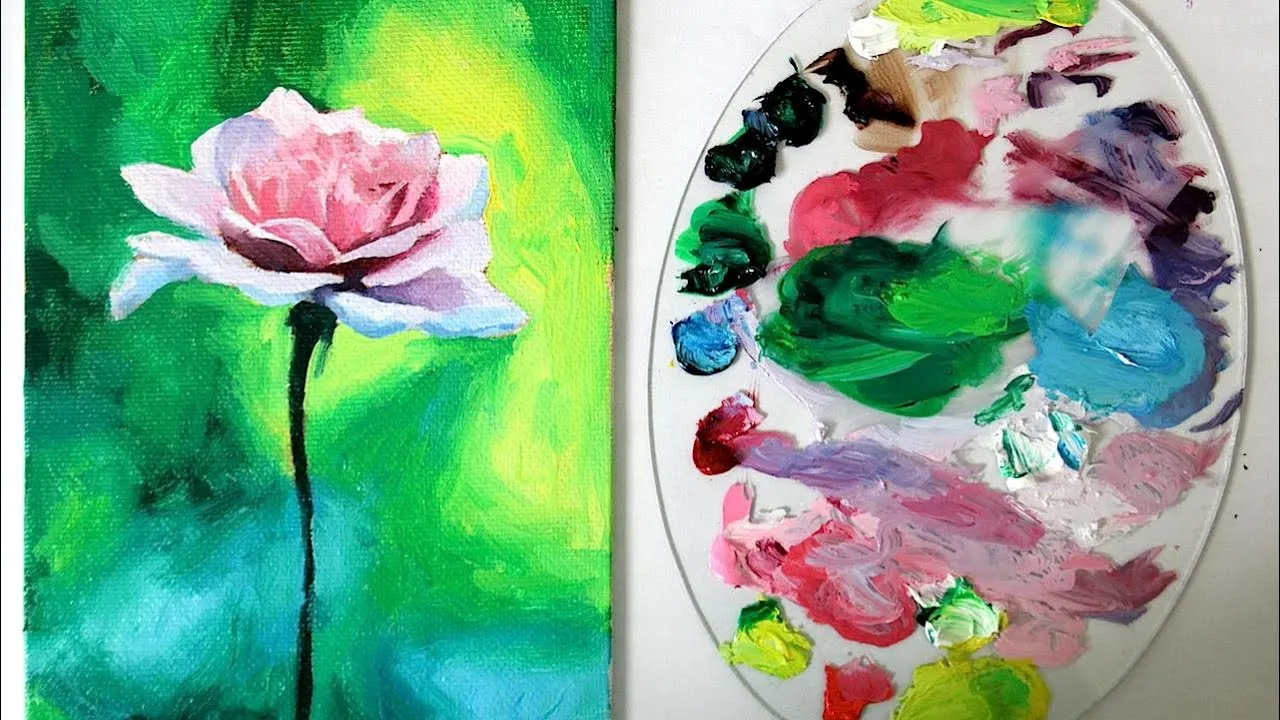
Understanding Color Mixing and Palette Setup
Color mixing is the heart of oil painting, and understanding it can dramatically elevate your artwork. Let’s break down the essentials of color mixing and how to set up your palette effectively.
Start by selecting a limited palette of primary colors—red, blue, and yellow. This trio allows you to create a vast array of hues:
- Secondary Colors: Mix primary colors to create orange (red + yellow), green (blue + yellow), and purple (red + blue).
- Tertiary Colors: Combine primary and secondary colors for hues like red-orange or blue-green.
When setting up your palette:
- Choose a Suitable Palette: A wooden or glass palette works best. Ensure it’s clean and free of any previous paint residues.
- Organize Colors: Lay out your colors in a logical order—typically, from warm to cool. For example, place yellows on one side, transitioning through reds and blues, finishing with greens and purples.
- Mixing Area: Designate a central area on your palette for mixing colors. This way, you can create custom shades without cluttering your space.
Remember, practice makes perfect! Experiment with different mixtures and keep notes on your favorite combinations. This will help you become more confident in your color choices and enhance the overall beauty of your art.
Also Read This: Inserting YouTube Videos into Synergy LMS System – A Detailed Guide
5. Step-by-Step Painting Techniques
Getting started with oil painting can feel a bit overwhelming, but once you break it down into manageable steps, it becomes an enjoyable experience! Here’s how to navigate through your painting journey:
- Preparation of Your Canvas: Before you dive into painting, make sure your canvas is primed properly. This prevents the oil from soaking in and keeps your colors vibrant. You can use a store-bought primer or create your own with gesso.
- Sketch Your Composition: Lightly sketch your design on the canvas using a pencil or thin brush with diluted paint. This serves as your guide throughout the process.
- Start with a Tonal Underpainting: Use a neutral color (like a warm brown or ochre) to create an underpainting. This establishes the tonal range and helps you visualize the final piece.
- Block in Colors: Begin applying your main colors in a loose manner. Focus on covering the canvas without getting bogged down in details. Use larger brushes to make this phase quicker and more enjoyable.
- Developing Depth and Detail: Once the initial layer is dry, start adding details, highlights, and shadows. Don’t hesitate to switch to smaller brushes for precision.
- Final Touches: Step back and assess your painting. Add any final details, adjust colors, and make sure the composition feels balanced. Remember, sometimes less is more!
Also Read This: A Comprehensive Guide to Understanding VectorStock Licensing Options
6. Layering and Glazing in Oil Painting
Layering and glazing are two essential techniques in oil painting that can transform your artwork from ordinary to extraordinary. Here’s what you need to know:
Layering refers to the process of building up layers of paint to create depth and texture. Here’s how to do it effectively:
- Fat over Lean: Always apply “fat” (more oil) layers over “lean” (less oil) layers. This helps the paint dry properly and prevents cracking.
- Drying Time: Allow each layer to dry completely before adding the next. You can use a fan or a heater to speed up the process if you’re in a hurry.
- Texture Play: Experiment with different brushes and tools to create varied textures in your layers, adding richness to your piece.
Glazing, on the other hand, is about transparency and luminosity:
- Choosing Colors: Use transparent or semi-transparent paints, mixing them with a medium like linseed oil. This allows the underlying layers to shine through.
- Application: Apply a thin layer of glaze over dried paint to unify colors and enhance depth. You can use a soft brush to achieve a smooth application.
- Building Effects: You can layer multiple glazes for complex color effects; just be patient and allow each layer to dry!
By mastering these techniques, you’ll add incredible depth and vibrancy to your oil paintings, making them truly stunning!
How to Use Oil Paints on Canvas With Step-by-Step Painting Tips for Stunning Art
Oil painting is a timeless medium that offers depth, richness, and vibrancy to artwork. If you're looking to create stunning art on canvas, mastering the use of oil paints can elevate your skills. Here’s a comprehensive guide to help you get started on your artistic journey.
Materials Needed
- Oil Paints: Choose a quality set of oil paints.
- Canvas: Pre-stretched or canvas boards are ideal.
- Brushes: A variety of sizes and shapes (round, flat, filbert).
- Palette: For mixing colors.
- Palette Knife: Useful for mixing and applying paint.
- Mediums: Linseed oil or turpentine to alter paint consistency.
- Rags or Paper Towels: For cleaning brushes and hands.
Step-by-Step Painting Process
- Prepare Your Canvas: Ensure your canvas is clean and primed.
- Sketch Your Design: Lightly outline your composition with a pencil.
- Mix Colors: Use your palette to blend and create the desired hues.
- Start Painting: Begin with the background and work towards the foreground.
- Layering: Apply paint in thin layers, allowing each to dry before adding more.
- Details: Add finer details with smaller brushes for depth and texture.
- Final Touches: Step back to assess your work and make adjustments as needed.
Conclusion and Final Tips
Using oil paints on canvas can be a rewarding experience, allowing for creativity and expression. Remember to be patient, as oil paints require time to dry and develop their full vibrancy. Experiment with techniques and enjoy the journey of creating stunning art!