iTunes has long been a staple in the world of digital media management, especially for Apple users. For iPhone owners, it serves as a bridge connecting their devices to a vast library of music, movies, apps, and more. With the ability to sync, transfer, and manage content seamlessly, iTunes makes it easier to keep your iPhone organized and your media accessible. In this guide, we’ll explore how to use iTunes effectively on your iPhone, ensuring you get the most out of your digital content.
Setting Up iTunes on Your Computer
Before you can dive into using iTunes on your iPhone, you need to have it properly set up on your computer. Here’s a step-by-step guide to help you get started:
- Download and Install iTunes: If you haven’t already, download the latest version of iTunes from the Apple website. Follow the prompts to install it on your computer.
- Launch iTunes: Once installed, open iTunes. You’ll be greeted with a user-friendly interface that allows you to navigate through your media library.
- Create or Sign In to Your Apple ID: If you don’t have an Apple ID, you can create one directly in iTunes. This account is essential for purchasing content and accessing iCloud services. Simply go to the 'Account' menu and select 'Sign In' or 'Create New Apple ID.'
- Connect Your iPhone: Use a USB cable to connect your iPhone to your computer. Make sure to unlock your device and, if prompted, tap 'Trust This Computer' to establish a connection.
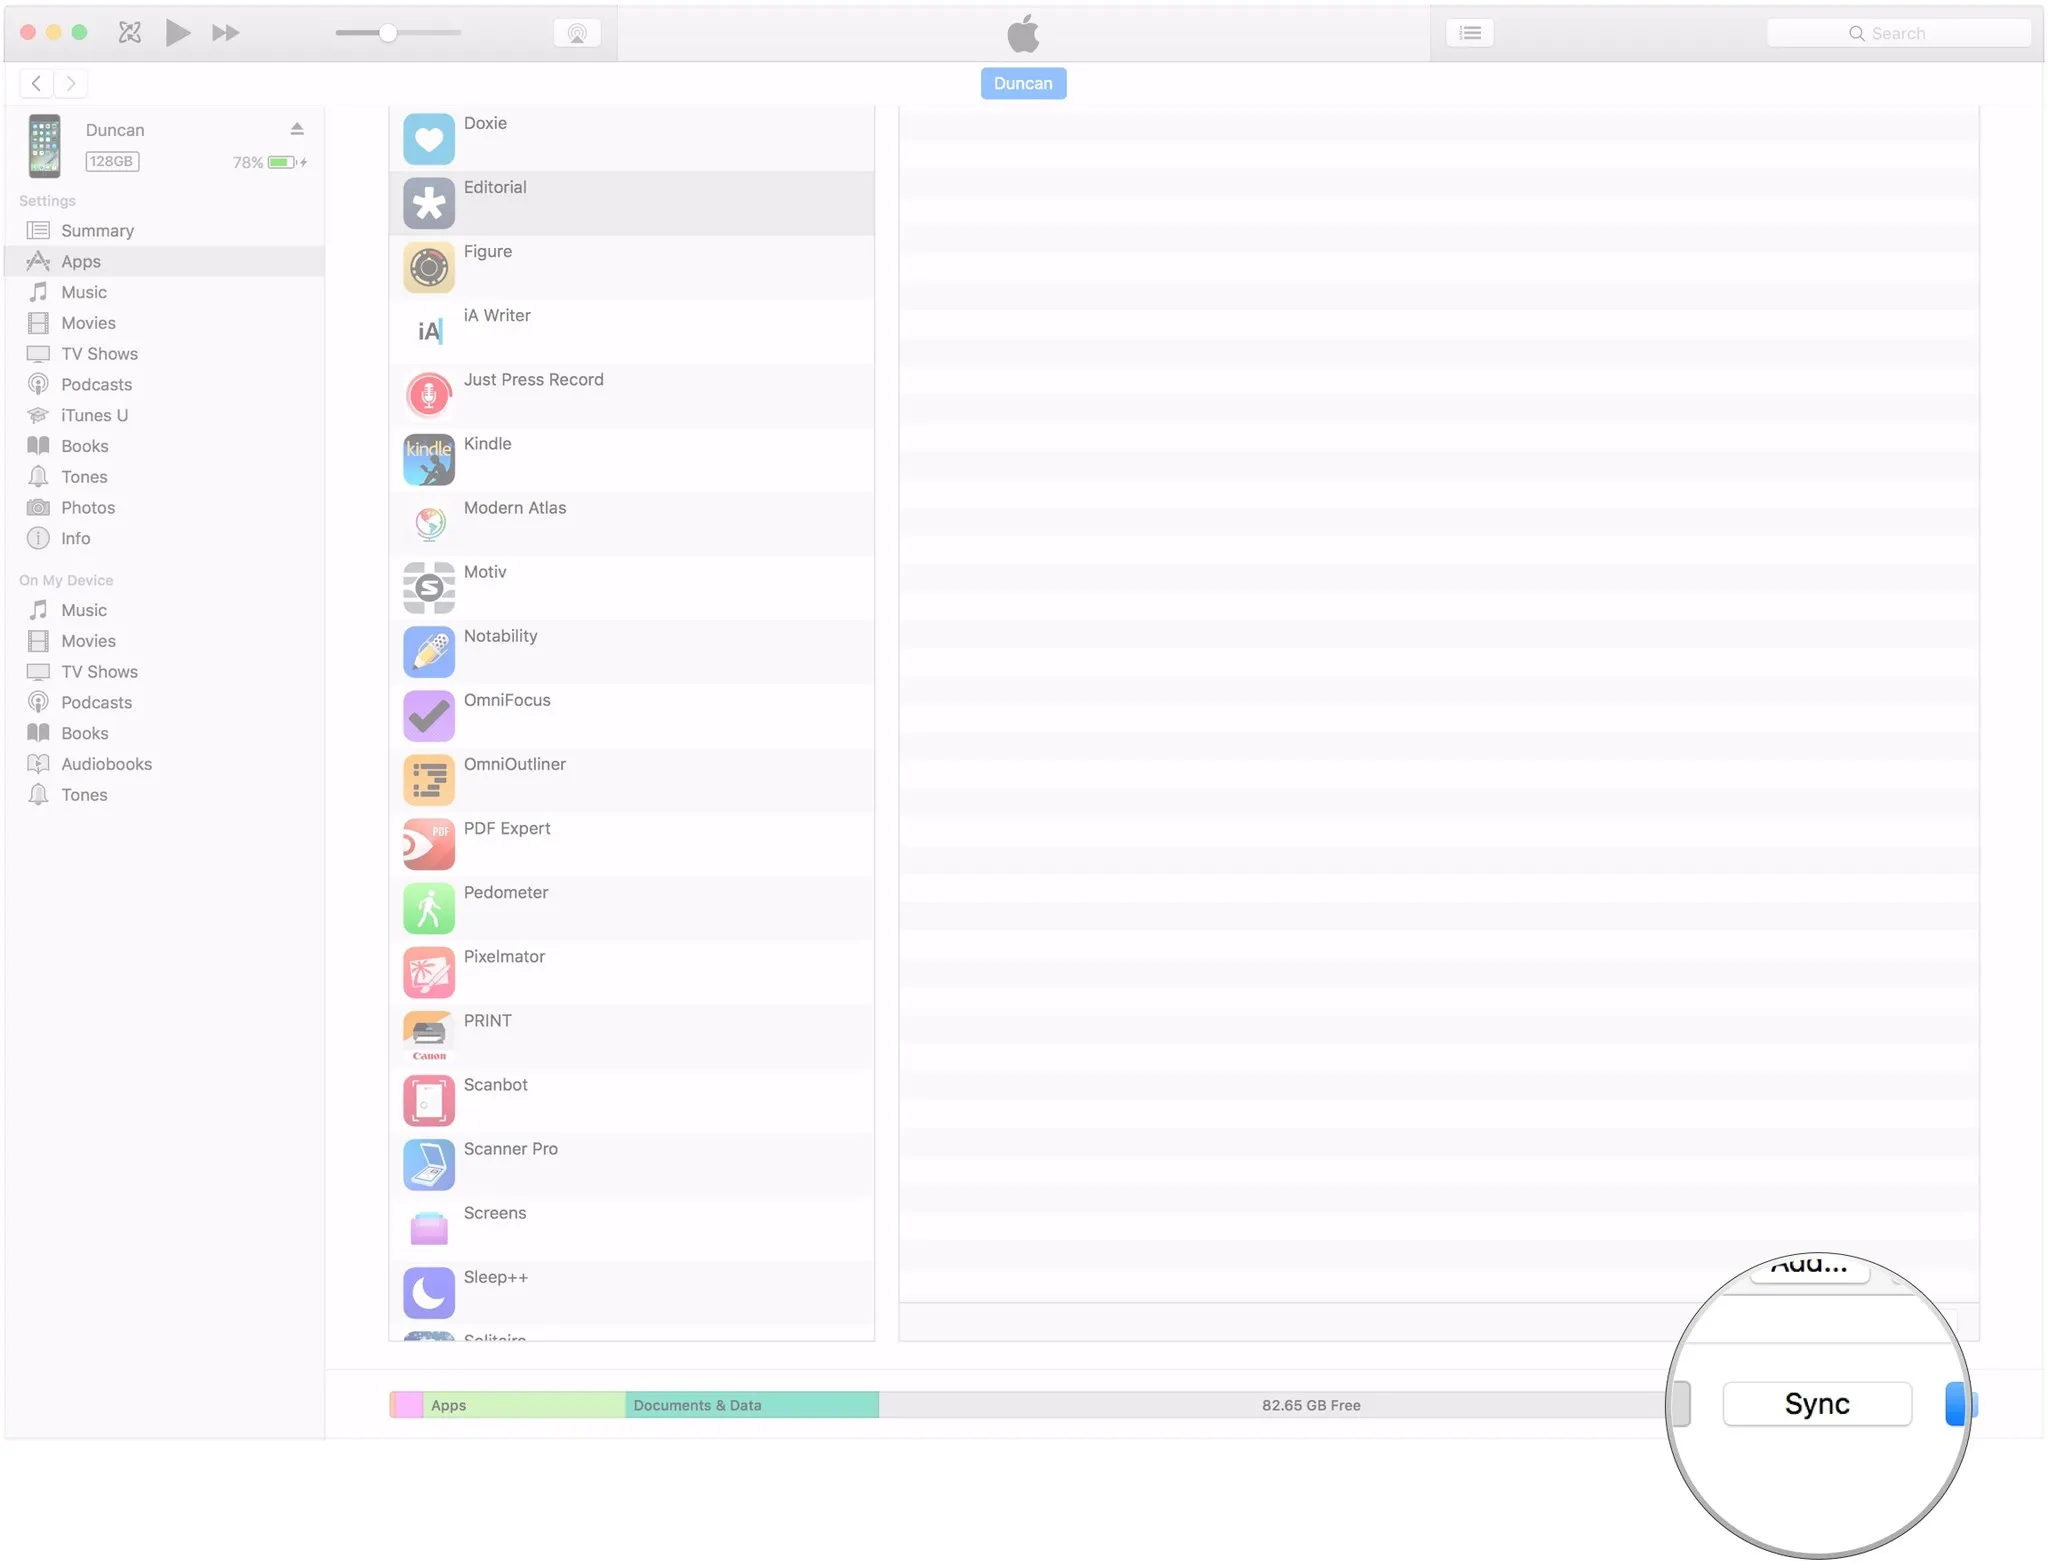
- Sync Settings: In iTunes, select your device from the upper left corner. Here, you can customize your sync settings for music, movies, TV shows, and more. Choose what content you want to sync between your iPhone and iTunes.
With these steps, you’ll be ready to manage and transfer your media effortlessly, ensuring your iPhone is always up to date with your favorite content!
Also Read This: How to Temporarily Disable Your Behance Profile
Connecting Your iPhone to iTunes
Connecting your iPhone to iTunes is a straightforward process, and it opens up a world of possibilities for managing your media. Here’s how to get started:
- Install iTunes: First, ensure you have the latest version of iTunes installed on your computer. You can download it from the Apple website. If you’re using a Mac, it’s typically pre-installed.
- Connect Your iPhone: Use a USB cable to connect your iPhone to your computer. The moment you do this, iTunes should automatically launch. If it doesn’t, simply open it manually.
- Trust the Computer: On your iPhone, a prompt will appear asking if you want to trust this computer. Tap “Trust” and, if necessary, enter your passcode. This step is crucial for establishing a connection.
- Select Your Device: Once connected, you’ll see your iPhone icon appear in the upper-left corner of the iTunes window. Click on it to access your device settings.
This process not only allows you to manage media but also backs up your device and updates your software. It’s a gateway to a seamless iPhone experience.
Also Read This: How to Connect Bluetooth Headset to Mobile
Syncing Music and Videos with iTunes
Now that your iPhone is successfully connected to iTunes, let’s dive into syncing music and videos. This feature ensures that your favorite tunes and films are always at your fingertips.
- Choose Your Content: In the iTunes sidebar, select “Music” or “Movies” to view your library. Here, you can check the boxes next to the items you want to sync.
- Sync Settings: Click on the iPhone icon, then navigate to the “Music” or “Movies” tab. You’ll see options like “Sync Music” or “Sync Movies.” Make your selections according to your preferences.
- Start Syncing: Once you’ve made your selections, hit the “Apply” button at the bottom right. iTunes will begin syncing your chosen content.
- Monitor Progress: Keep an eye on the progress bar at the top of iTunes. Once it’s complete, you’ll see a message confirming that the sync was successful.
And there you have it! Syncing your music and videos with iTunes is as easy as pie. Now you can enjoy your favorite entertainment wherever you go!
Also Read This: How Long Do You Wait to Resubmit on Shutterstock and Improve Your Chances
5. Transferring Photos and Files Using iTunes
Transferring photos and files between your iPhone and iTunes is a breeze once you know the steps. Here’s how you can smoothly sync your precious memories and important documents:
- Connect Your iPhone: Use a USB cable to connect your iPhone to your computer. Open iTunes if it doesn’t launch automatically.
- Select Your Device: In iTunes, click on the device icon located at the top left corner. This takes you to your device’s summary page.
- Navigate to Photos: Click on the “Photos” tab in the sidebar. Here, you can choose to sync all photos or selected folders from your computer.
- Sync Your Photos: To transfer, check the box next to “Sync Photos,” then select the folder you want to sync. Click “Apply” to start the transfer.
For files, it’s just as simple:
- File Sharing: Click on the “File Sharing” section in iTunes. Select the app you want to transfer files to or from.
- Add or Save Files: Click “Add File” to copy files from your computer to the app, or select files to save them to your computer.
And voilà! You’ve successfully transferred your photos and files using iTunes, backing up your memories and documents effortlessly.
Also Read This: Guide to Adding and Using Proxy Servers on Telegram
6. Managing Apps and Backups with iTunes
Managing apps and backups with iTunes is essential for keeping your iPhone organized and secure. Let’s break it down:
- Installing and Updating Apps: In the iTunes sidebar, click on “Apps.” Here, you can view and manage all your apps. To install new apps, simply go to the App Store and download them. Updates are automatically handled when you connect your device.
- Backing Up Your iPhone: Regular backups are a lifesaver. To back up your iPhone, click on your device icon in iTunes, then under “Backups,” you can choose “This Computer” for local backups or “iCloud” for cloud backups. Click “Back Up Now” to start.
Here’s a quick overview of backup types:
| Backup Type | Storage | Accessibility |
|---|---|---|
| iCloud Backup | Cloud | Accessible from any device with your Apple ID |
| iTunes Backup | Local (Computer) | Requires the specific computer for access |
By managing your apps and backups through iTunes, you ensure that your iPhone is running smoothly and that your data is safe. Regular maintenance makes a world of difference!
Also Read This: Adding Your Telegram Username to Your Profile
Troubleshooting Common iTunes Issues
Using iTunes on your iPhone can sometimes be a smooth sailing experience, but occasionally, you might encounter a few bumps along the way. Don't worry! Here are some common issues and their troubleshooting tips to help you get back on track.
- iTunes Won't Sync: If your iTunes isn't syncing with your iPhone, ensure that both devices are connected to the same Wi-Fi network. Restart both your computer and iPhone to refresh the connection. If the issue persists, try signing out of iTunes on your iPhone and then signing back in.
- iTunes Doesn't Recognize iPhone: This can happen for various reasons. Make sure you’re using the latest version of iTunes. Also, try a different USB port or cable. If you’re on a Mac, check if your device is listed under “Finder” in the sidebar.
- Error Messages: Encountering error messages like “iTunes could not connect to this iPhone” can be frustrating. A simple fix is to update iTunes. If that doesn’t work, disconnect your iPhone, restart your computer, and reconnect it.
- Slow Performance: If iTunes is running slow, consider clearing out old backups or media files you no longer need. This can free up space and improve performance.
By following these simple troubleshooting steps, you'll be back to managing your content in no time!
Conclusion: Maximizing Your iTunes Experience on iPhone
In conclusion, iTunes is a powerful tool that can greatly enhance your iPhone experience. By mastering its features, you can easily sync, transfer, and manage your content with ease. Here are some final tips to help you maximize your iTunes experience:
- Stay Updated: Always keep your iTunes and iPhone updated to the latest versions. This ensures smooth functionality and access to new features.
- Explore Libraries: Make use of iTunes' extensive media library. Organize your playlists and use tags to easily find your favorite songs or albums.
- Use iCloud Integration: For seamless access to your music across devices, consider integrating iCloud Music Library.
- Backup Regularly: Don’t forget to back up your iPhone regularly using iTunes. This protects your data and ensures you don’t lose any important files.
With these tips in your toolkit, you can enjoy everything iTunes has to offer, making your iPhone a hub of entertainment and organization!