Have you ever felt swamped by the amount of pictures piled up in your Lightroom library? I recall moments when my collection seemed endless. It’s not simply about keeping photos; it’s about arranging them to enhance your creative flow. Today I’m thrilled to walk you through the steps of transferring your Lightroom catalog to ShootProof. This platform has the potential to revolutionize your photo sharing journey making it smoother and more pleasurable. So let’s get started!
Understanding ShootProof and Its Benefits

ShootProof isn’t merely a platform for hosting images; it serves as a haven for photographers and their clients. Having explored different photo sharing platforms I can honestly say that ShootProof distinguishes itself in multiple ways.
- User-Friendly Interface: The platform is intuitive, making it easy for both photographers and clients to navigate.
- Secure Client Galleries: Your images are safe, and clients can view their galleries with peace of mind.
- Customizable Proofing Options: You have the flexibility to present your work in a way that aligns with your brand.
- Sales Integration: If you’re looking to monetize your work, ShootProof offers built-in sales features to streamline the process.
ShootProof takes care of the nitty gritty so you can immerse yourself in your craft without getting bogged down by the logistics. Think of it as having a dependable ally by your side as you navigate your artistic path.
Also Read This: How to Burn a CD from YouTube to Save Your Favorite Tracks
Preparing Your Lightroom Catalog for Upload

Before getting into uploading your photos it's important to get your Lightroom catalog ready. You can think of this as tidying up your area before kicking off a new project. Heres a guide on how to go about it:
- Organize Your Photos: Create collections in Lightroom for the images you want to upload. This makes it easier to manage and select the right photos.
- Edit and Enhance: Take a moment to polish your images. Ensure they reflect your best work, as this is what potential clients will see.
- Export Settings: When exporting your images for upload, use settings that maintain quality. A common choice is JPEG format at high quality, with a resolution of 300 DPI.
- File Naming Conventions: Use descriptive names for your files. This helps in identifying them later, especially when you’re dealing with numerous images.
Taking these actions will help ensure a seamless uploading process. Through my own experiences, I've discovered that a bit of planning can be incredibly beneficial saving you both time and energy in the future.
Also Read This: Finding Your LinkedIn Posts and Tracking Engagement Made Easy
Step-by-Step Guide to Upload Your Lightroom Catalog

With your Lightroom catalog all set up, it’s time to transfer those stunning photos to ShootProof. I still recall the emotions I felt when I first shared my work, it was like sending my little ones off into the world. To help you make the process smooth here’s a simple step by step guide for a successful upload.
- Login to ShootProof: Start by logging into your ShootProof account. If you don't have one yet, signing up is quick and easy.
- Create a New Gallery: Once you're in, click on 'Create New Gallery.' This is where you’ll house your images, so give it a name that resonates with your work.
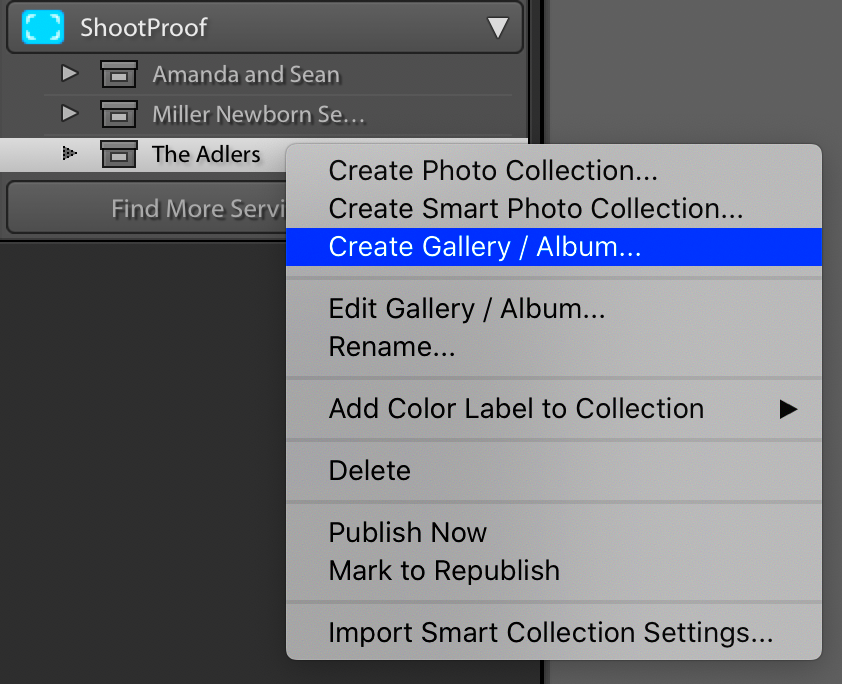
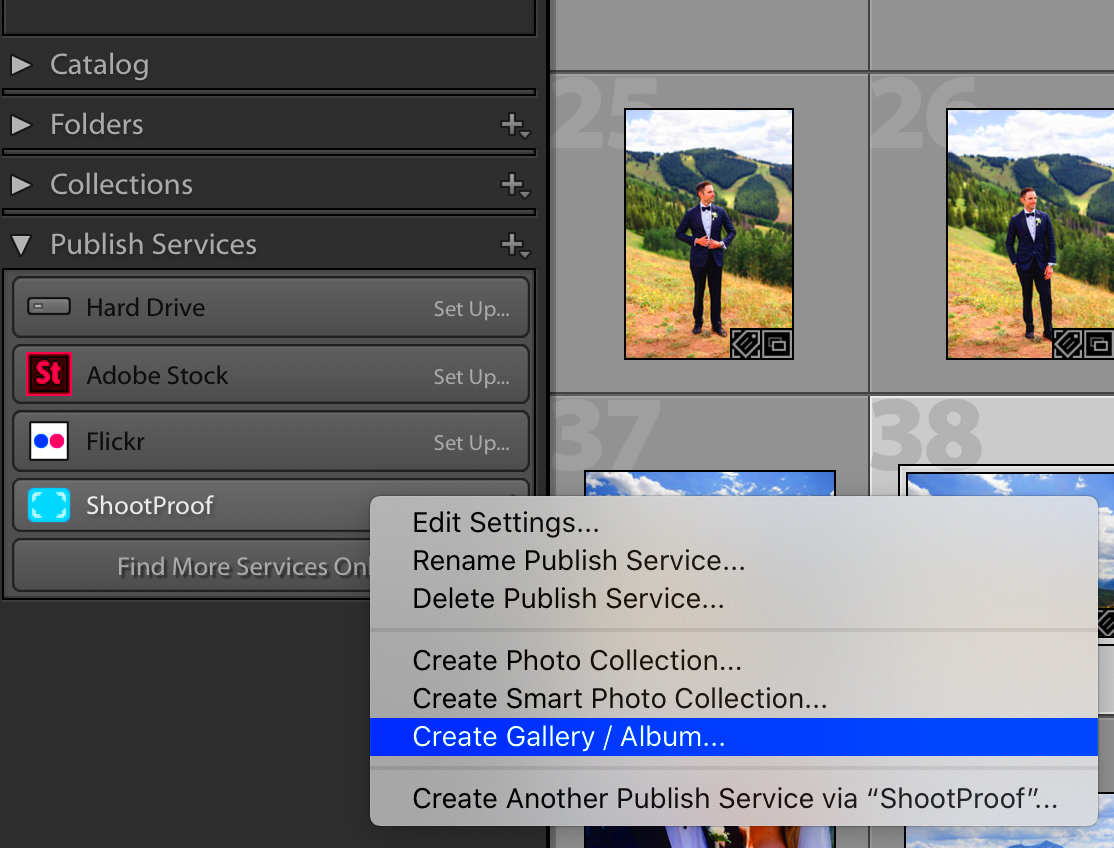
- Choose the Upload Method: You can upload images directly from your computer or sync your Lightroom catalog. Select the option that suits you best. I often opt for the Lightroom option as it saves time.
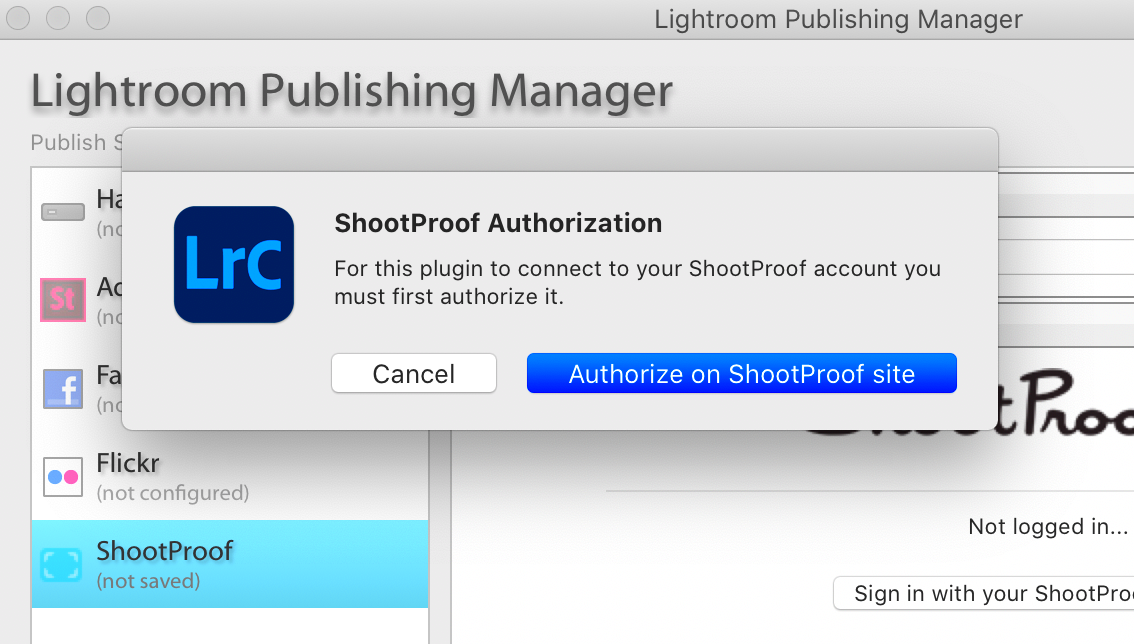
- Follow the Prompts: If you’re syncing, follow the on-screen prompts. They’ll guide you through the process, ensuring you don’t miss a beat.
- Review Your Upload: After the upload, take a moment to review your images in the gallery. This is your chance to make sure everything looks just right.
- Set Privacy Settings: Decide who can view your gallery. You can keep it private or share it with clients. I find this step crucial for maintaining control over my work.
Once you've gone through these stages you can kick back and feel at ease because your efforts are showcased in a way that's pleasing to the eye and all set to be seen!
Also Read This: How Getty Images Acquires Photos Through Contributor and Licensing Processes
Troubleshooting Common Upload Issues
Even with good intentions things don’t always work out as expected. I’ve encountered my share of challenges during uploads but finding solutions can often be a process. Here are some common problems and their resolutions.
- Slow Upload Speeds: If your internet connection is sluggish, try uploading smaller batches of images. This can help ease the load on your connection.
- File Size Limitations: Check the file size of your images. ShootProof has specific size limits; compress your images if needed.
- Unsupported File Types: Ensure your images are in a supported format. ShootProof accepts JPEG and PNG, so convert any unsupported files beforehand.
- Sync Errors: If syncing from Lightroom fails, double-check your settings. Ensure your Lightroom catalog is up-to-date and properly configured.
Whenever I faced a challenge I would pause for a moment and tackle it with a composed mindset. Keep in mind that every problem comes with a remedy and if you stay patient you can navigate through these obstacles along the way.
Also Read This: Backlinks on Behance
Best Practices for Managing Your ShootProof Catalog
Now that your photos are securely stored on ShootProof its time to streamline your collection. This can greatly impact how you showcase your artistry and engage with your clients. Here are a few tips I've picked up along the way.
- Regularly Update Your Gallery: Keep your galleries fresh by adding new work and removing older images that no longer represent your style.
- Use Descriptive Titles and Captions: Help clients understand your work by providing context. A well-written caption can turn a simple photo into a story.
- Organize Your Galleries: Consider categorizing galleries by events, types of photography, or client type. This makes navigation easier for your viewers.
- Engage with Your Clients: Utilize ShootProof’s features to communicate with clients. Sending updates or personalized messages can enhance the client experience.
- Backup Your Work: Always have a backup of your original images. I learned this the hard way when I lost some cherished photos due to a technical glitch.
By embracing these strategies you can transform your ShootProof account into a streamlined tool that not only highlights your artistry but also strengthens your client connections. Keep in mind that maintaining your portfolio is a journey so stay dedicated and nurture that creative flair!
Also Read This: How to Embed Vimeo in Behance
How to Optimize Your Photos for ShootProof
When I began posting my photos on the internet I was taken aback by the impact that the way I presented them had on how people engaged with them. Enhancing your pictures for ShootProof involves not focusing on quality but also on showcasing your creations in the best way possible. Here are a few key suggestions to help your images stand out.
- Choose the Right Format: JPEG is often the best choice for photographs due to its balance between quality and file size. For graphics or images requiring transparency, consider using PNG.
- Adjust Resolution: Aim for a resolution of 72 DPI for web viewing. Higher resolutions can make the file size unnecessarily large, affecting upload speed.
- Color Profiles Matter: Use the sRGB color profile for your images. This ensures that your colors appear vibrant and consistent across different devices and screens.
- Compress Without Sacrificing Quality: Tools like TinyPNG can help reduce file sizes without a noticeable drop in quality. This is especially useful if you have many images to upload.
- Add Watermarks Thoughtfully: While it’s important to protect your work, ensure that your watermark is subtle and doesn’t distract from the image itself.
When you focus on these aspects you can deliver a captivating visual journey for your clients. I recall the moment I enhanced my pictures; it was akin to slipping into an ensemble that gave me a boost in confidence. Your pictures are worthy of that level of thoughtfulness and dedication!
Also Read This: Imago Stock Photos: Stunning Website Content
Frequently Asked Questions
Throughout my experience of uploading to ShootProof I’ve come across a lot of questions. Here are a few queries that I frequently receive along with my thoughts on them.
- What is the maximum file size I can upload? ShootProof typically allows images up to 100 MB, but I recommend keeping them under 20 MB for smoother uploads.
- Can I change the gallery settings after uploading? Absolutely! You can modify privacy settings, add or remove photos, and even change the gallery name whenever you like.
- How long does it take to upload a large catalog? It varies based on your internet speed, but generally, uploading a sizable catalog can take anywhere from a few minutes to a couple of hours.
- Is there a mobile app for ShootProof? Yes! The ShootProof app allows you to manage your galleries on the go, making it easier to connect with clients.
These frequently asked questions are based on experiences and grasping these points can help ease your upload process. Keep in mind that you’re not in this alone; we’re all navigating this learning journey together!
Wrapping Up Your Upload Journey
Kudos to you! You've smoothly gone through the upload procedure and fine tuned your Lightroom catalog for ShootProof. This adventure isn't solely about showcasing photos; it's about establishing a bond with your viewers. Looking back on my experiences I realize that the true happiness lies in witnessing clients interact with my creations.
As you conclude your upload experience, take a moment to reflect on these last insights
- Stay Engaged: After your upload, continue to engage with your clients. Share updates, ask for feedback, and create a community around your work.
- Keep Learning: The world of photography and digital platforms is ever-evolving. Stay curious and keep exploring new features or tools that can enhance your workflow.
- Celebrate Your Progress: Take a moment to appreciate how far you’ve come. Each upload is a stepping stone in your creative journey, and every photo tells a story.
ShootProof is a weapon for your creative endeavors. Embrace its capabilities and let your imagination run wild. Wishing you the best in spreading your passion to the world!
