Have you ever thought about making glue at home using something as simple as milk? It might sound surprising, but milk is a fantastic base for creating a natural adhesive. Not only is it easy to make, but it’s also a fun and educational project that you can do with kids or just for yourself! In this post, we're going to walk you through the process of making glue from milk, step by step. So, roll up your sleeves and let’s dive into the materials you'll need to get started!
Materials Needed
Before we jump into the actual glue-making process, let's gather all the materials you'll need. Fortunately, most of these items are probably already in your kitchen or easily accessible at your local store. Here's a handy list:
- Milk: You can use any type of milk—whole, skim, or even non-dairy alternatives will work. Aim for about 1 cup.
- Vinegar: This will help to curdle the milk. You’ll need about 4 tablespoons.
- Heat Source: A stove or a microwave to warm up the milk. A small saucepan is ideal.
- Strainer or Cheesecloth: To separate the curds from the whey once the milk has curdled.
- Mixing Bowl: For combining your ingredients.
- Wooden Spoon or Whisk: To stir the mixture.
- Optional: Food coloring or essential oils if you want to add some flair to your glue.
With these materials at hand, you’re ready to embark on your glue-making adventure! It's a simple process that not only yields a useful product but also gives you a great story to share about homemade crafts.
Also Read This: Unveiling Rare and Unpublished Images from WireImage
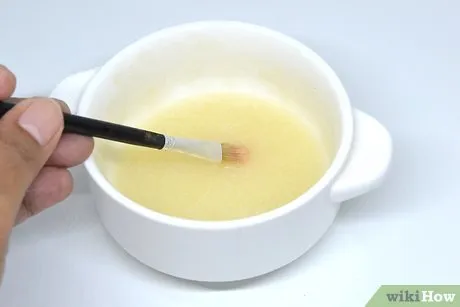
Step-by-Step Instructions
Making glue from milk is a fun and easy project that you can do at home. It's not only a great way to create a useful adhesive, but it's also an interesting science experiment. So, let’s dive into the steps!
- Gather Your Ingredients: You’ll need:
- 1 cup of milk
- 1 tablespoon of vinegar or lemon juice
- 1/4 teaspoon of baking soda
- Optional: A few drops of food coloring for fun!
Also Read This: Creating a YouTuber Character in Infinite Craft
Tips for Best Results
To ensure your homemade milk glue turns out perfectly, here are some handy tips to keep in mind:
- Use Full-Fat Milk: The higher the fat content, the better your glue will hold together. Whole milk is ideal for this project!
- Don’t Rush the Heating: Heating the milk slowly helps it curdle better. If you heat it too quickly, you may end up with burnt milk instead of glue.
- Experiment with Ratios: If you find your glue is too thick, add a little more milk. If it’s too runny, consider adding more curds. Adjusting the ratios can help you achieve your desired consistency.
- Keep It Fresh: Always store your glue in the refrigerator and remember to give it a good stir before using it again.
- Test Before Use: Before applying your glue to important projects, do a small test on scrap materials to ensure it holds as you expect.
With these steps and tips, you're all set to create your own glue from milk. Have fun and happy crafting!
Also Read This: Understanding YouTube's Memory Usage for Streaming and Uploading
5. Uses for Milk Glue
Milk glue, also known as casein glue, is a fascinating and versatile adhesive that has been used for centuries. It’s not just a fun DIY project; this natural glue has a variety of applications that can be incredibly useful in different settings. Let’s dive into some of the amazing uses for milk glue!
- Craft Projects: Whether you're making homemade greeting cards or building a model, milk glue is perfect for all sorts of crafting activities. Its strong bonding capabilities make it a go-to choice for paper and cardboard crafts.
- Woodworking: Casein glue was historically used in furniture making because it dries clear and provides a strong bond. It's an excellent choice for joinery in woodworking projects.
- Education: Teachers can use milk glue in classroom activities to demonstrate chemical reactions and the properties of natural materials. It's a safe and non-toxic option for children's projects.
- Bookbinding: This glue is ideal for repairing old books or creating new ones. It can hold pages together securely without the risk of damaging the paper.
- Textile Applications: Milk glue can be used for fabric crafts, providing a flexible bond that can hold fabrics together without sewing. It’s great for patchwork or fabric collage projects.
As you can see, milk glue is not only easy to make but also incredibly versatile. It’s a wonderful alternative to synthetic adhesives, especially for those looking to use more natural products in their projects.
6. Conclusion
In summary, making glue from milk is not only a fun and educational project but also a practical solution for various crafting needs. By using simple ingredients like milk, vinegar, and baking soda, you can create a strong, natural adhesive that has a plethora of applications.
Whether you're a teacher looking for safe materials for your classroom, a parent wanting to engage your kids in a creative activity, or a DIY enthusiast searching for eco-friendly options, milk glue is an excellent choice. Plus, it’s a great way to explore the science behind adhesives!
So why not give it a try? Gather your ingredients, follow the steps, and enjoy the satisfaction of making something useful from simple, everyday items. With milk glue in your crafting arsenal, the possibilities are endless!