Are you looking to get fit without breaking the bank or heading to the gym? Well, you’re in luck! In this tutorial, we’ll guide you through an easy DIY project to create your very own dumbbells at home. Not only is this a cost-effective solution, but it’s also a fun way to customize your workout equipment to suit your needs. Let’s dive into the materials you’ll need to get started on your fitness journey!
Materials Needed
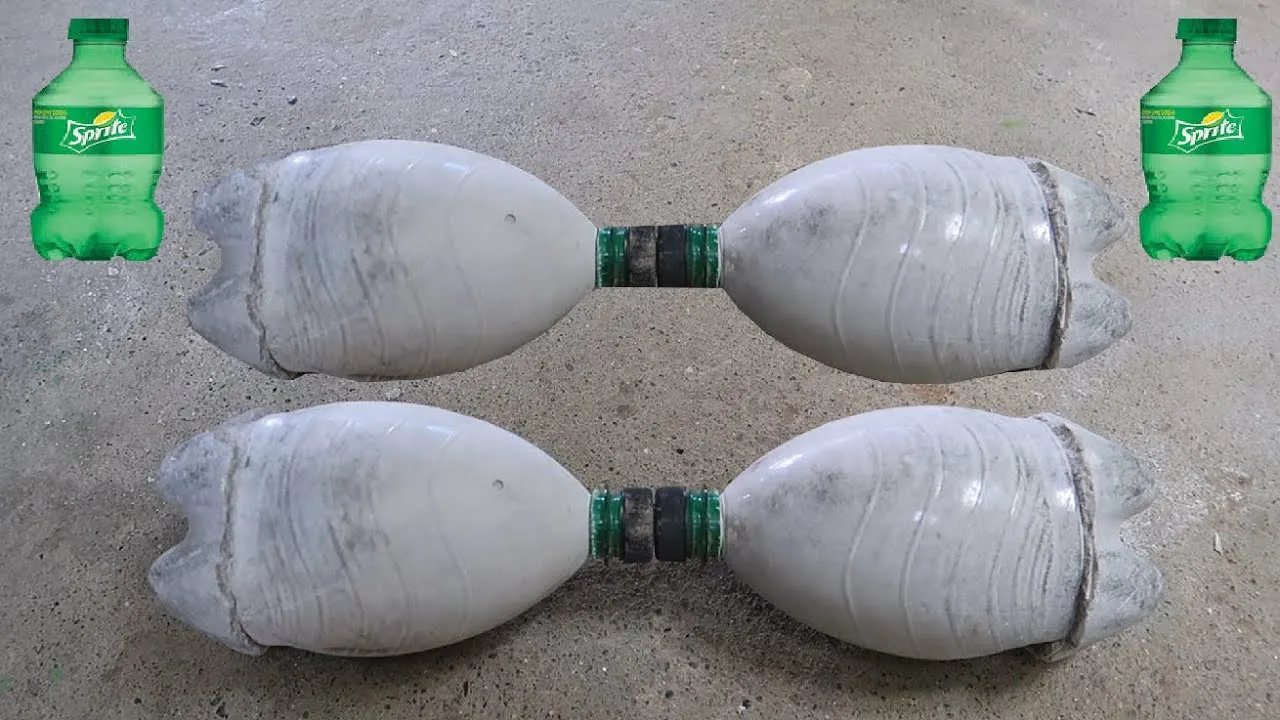
Creating dumbbells at home requires a few simple materials that you likely already have or can easily acquire. Here’s a handy list to make your shopping trip or rummaging through your garage a breeze:
- Water Bottles or Milk Jugs: These will serve as the main body of your dumbbells. You can use empty water bottles (1-2 liters) or milk jugs (1 gallon). The size depends on how much weight you want.
- Sand, Rocks, or Water: This will act as the weight. Sand is generally a great choice because it can be easily poured into the bottles or jugs.
- Duct Tape or Strong Adhesive: For securing any loose parts and ensuring everything stays together during your workouts.
- Old Towels or Rags: These can be wrapped around the handles for a better grip. Comfort is key when you’re lifting weights!
- Bucket or Container: If you’re using sand or rocks, a bucket can help you transport and mix the materials easily.
- Measuring Cup: To measure out the sand or water for consistency in weight.
Gathering these materials will set you on the path to creating your own dumbbells. You’ll be amazed at how simple it is to craft a functional piece of fitness equipment right in your home. Ready to get started? Let’s move on to the next steps!
Also Read This: Unlocking Earnings: A Guide to Shutterstock Contributor Earnings
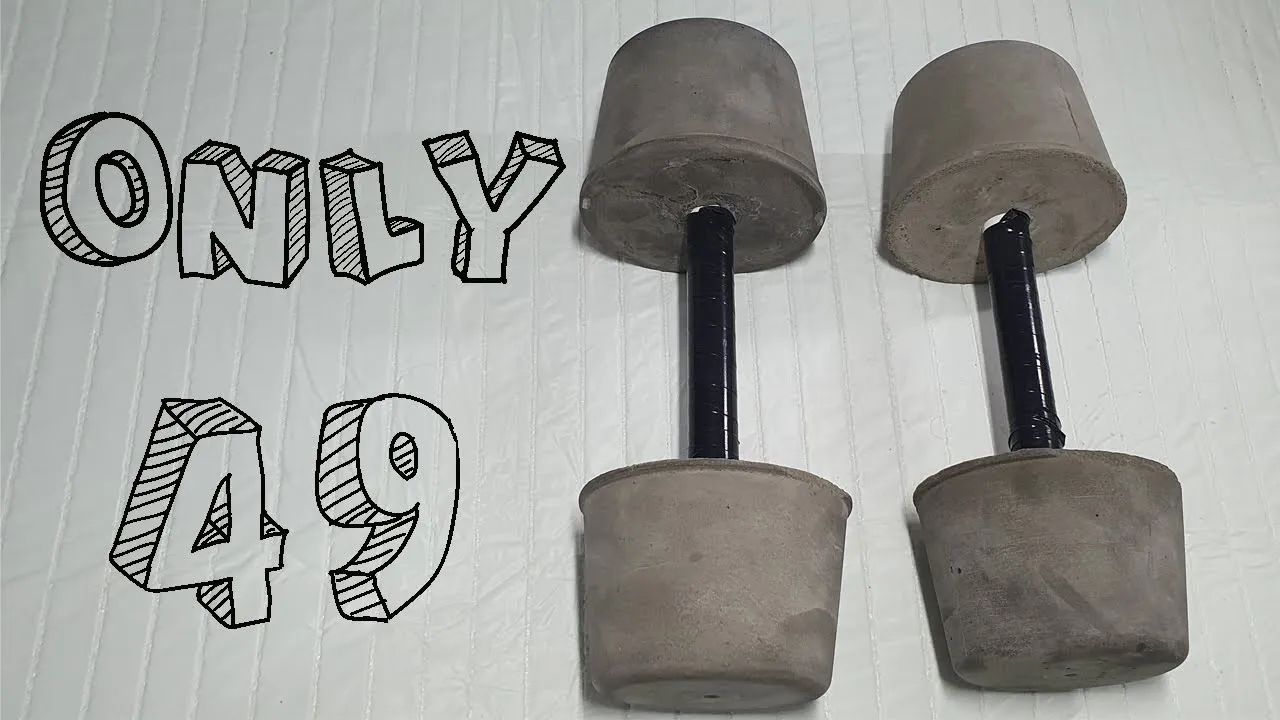
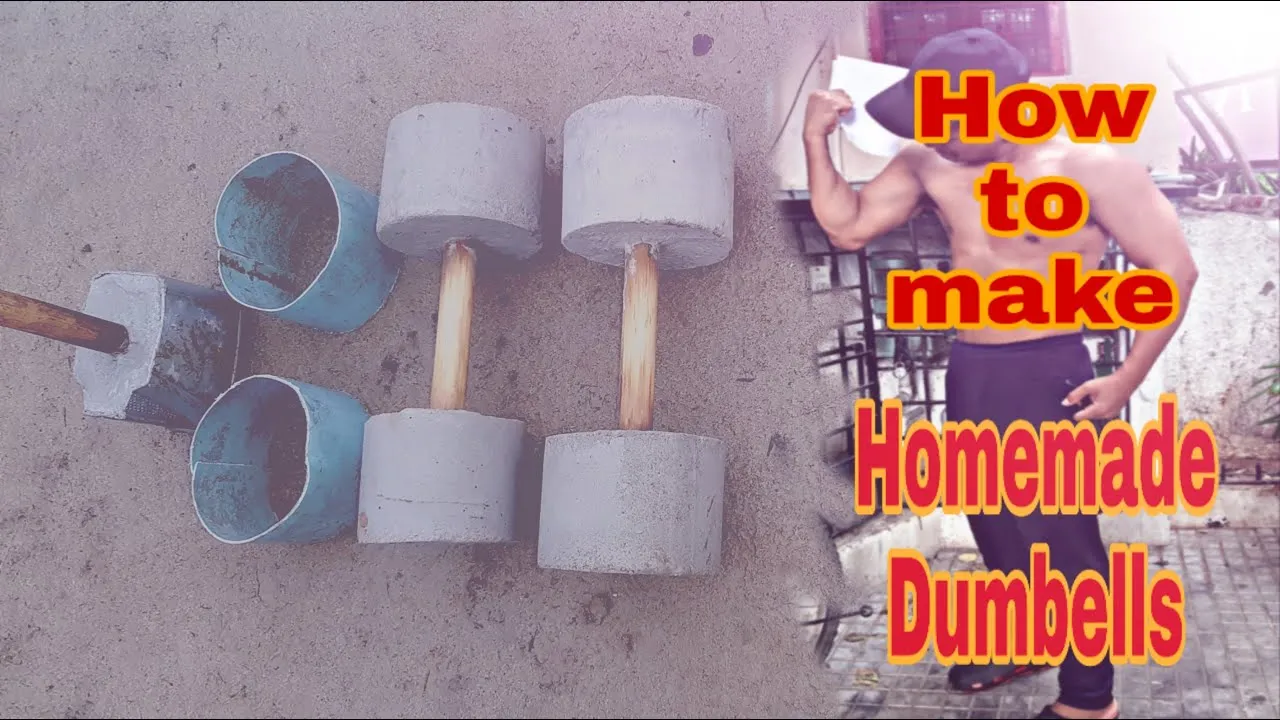
Step-by-Step Guide to Making Dumbbells
Creating your own dumbbells at home can be a fun and rewarding project! Plus, it allows you to customize the weights to fit your fitness level. Let's break it down into simple steps.
- Gather Your Materials: You'll need:
- Two plastic containers (like milk jugs or water bottles)
- Sand, gravel, or water (to fill the containers)
- Strong tape (like duct tape)
- Optional: Handles (you can use old broomsticks or PVC pipes)
- Water for lighter weights
- Sand for a heavier option
- Gravel for a mix of weight and sturdiness
And just like that, you have your very own DIY dumbbells ready for action. Enjoy your workout!
Also Read This: How to Hyperlink in LinkedIn Post for Better Engagement
Tips for Choosing the Right Weight
Choosing the right weight for your dumbbells is crucial for effective workouts. Here are some handy tips to help you make the best choice:
- Consider Your Fitness Level: If you’re a beginner, start light! A weight that feels manageable will help you build strength without risking injury. Aim for weights between 2-5 pounds.
- Assess Your Goals: Are you looking to build muscle, tone up, or just maintain fitness? For muscle building, opt for heavier weights (around 8-15 pounds), while toning can often be achieved with lighter weights.
- Test It Out: When you first try your dumbbells, do a few sets of basic exercises like bicep curls or shoulder presses. If you can easily do more than 12-15 reps, consider increasing the weight.
- Listen to Your Body: Pay attention to how your body responds during workouts. If you’re straining too much or not feeling challenged, it may be time to adjust your weights.
- Gradually Increase Weight: As you get stronger, don’t hesitate to increase the weight. A little at a time can make a big difference in your progress!
Finding the right weights takes a bit of trial and error, but once you figure it out, you’ll be well on your way to achieving your fitness goals!
Also Read This: Access Premium Content: Download Getty Images Without Watermark
5. Safety Precautions
When you're diving into the world of DIY dumbbells, safety should always be your top priority. After all, we want to build strength, not risk injury! Here are some essential safety precautions to keep in mind:
- Wear Protective Gear: It’s a good idea to wear gloves to protect your hands from sharp edges or splinters. Safety goggles can also be beneficial, especially if you’re working with power tools.
- Choose the Right Materials: Ensure that the materials you select for your dumbbells are sturdy and can handle the weight you intend to lift. Avoid using anything that could break or crumble under pressure.
- Work in a Well-Ventilated Area: If you're using glue or paint, make sure to work in a space with plenty of airflow. This helps to avoid inhaling any harmful fumes.
- Check Your Work Area: Before starting your project, ensure your workspace is clear of unnecessary clutter. This can help prevent accidents and allow you to move freely.
- Test Your Dumbbells: Once you've assembled your DIY dumbbells, give them a thorough inspection. Test their strength and stability by lifting them gently before jumping into your workout.
Remember, taking a few extra minutes to ensure safety can save you from potential injuries down the line. Happy lifting!
6. Conclusion
In conclusion, making your own dumbbells at home can be a rewarding and cost-effective way to enhance your fitness routine. Not only do you get to customize the weight and design according to your preferences, but you also gain a sense of accomplishment from creating something with your own hands.
Throughout this DIY process, you’ve learned how to gather materials, assemble your dumbbells, and the importance of safety precautions. Here’s a quick recap of what you’ve achieved:
- Identified materials that are readily available at home.
- Followed a simple step-by-step guide to create your own dumbbells.
- Implemented safety measures to ensure a smooth building experience.
So, the next time you’re looking to mix up your workouts or save some cash, consider going the DIY route! You’ll not only get a solid set of weights but also enjoy the pride that comes from crafting your own fitness equipment. Now, go ahead and lift those dumbbells with confidence!