Bead bracelet making is a wonderfully creative and fulfilling craft that anyone can enjoy, whether you're a seasoned DIY enthusiast or just starting out. It’s not only a fantastic way to express your personal style but also a delightful opportunity to create gifts for friends and family. The best part? You can do it all from the comfort of your home! With just a few simple materials and a sprinkle of imagination, you can create beautiful, personalized pieces that showcase your unique flair. Let’s dive into the exciting world of bead bracelet making together!
Materials Needed for Bead Bracelets
Before you start creating your bead bracelet masterpiece, it's essential to gather all the necessary materials. Here’s a handy list to ensure you have everything you need:
- Beads: Choose a variety of sizes, colors, and shapes. Glass, wooden, and acrylic beads are all great options.
- Stringing Material: You can use elastic cord, nylon thread, or wire, depending on the type of bracelet you want to make.
- Clasp (if needed): For non-elastic bracelets, a lobster clasp or toggle clasp will work well.
- Scissors: These are essential for cutting your stringing material to the desired length.
- Pliers: If you’re using wire, pliers will help you secure clasps and adjust your design.
Here's a simple table summarizing the materials:
| Material | Purpose |
|---|---|
| Beads | To create the bracelet's design and style |
| Stringing Material | To hold the beads together |
| Clasp | To secure the bracelet when wearing |
| Scissors | To cut the string or cord to size |
| Pliers | To manipulate wire or clamps (if applicable) |
Gathering these materials will set the foundation for your bracelet-making journey. Happy crafting!
Also Read This: Creative Freedom: How to Download iStock Photos for Free
3. Step-by-Step Guide to Creating Your Bracelet
Making a beautiful bead bracelet at home is a fun and creative process! Let’s break it down into easy steps so you can get started right away. Here’s how you can create your own unique bracelet:
- Gather Your Materials: Before you begin, make sure you have everything you need:
- Beads of your choice
- Elastic string or jewelry wire
- Scissors
- Crimp beads (if using wire)
- A ruler or measuring tape
- Optional: Clasps for added security
- Measure Your Wrist: Use a ruler to measure the circumference of your wrist. Add an extra inch to your measurement to allow for tying knots or adding clasps.
- Cut Your String: Cut a piece of elastic string or wire according to the measurement you got from the previous step. Make sure it’s long enough to accommodate your beads.
- Design Your Pattern: Lay out your beads in the order you want them on a flat surface. Get creative with colors and shapes!
- String the Beads: Start threading the beads onto your string, one by one, until you’ve reached the desired length. Leave a little space at the end for tying knots or adding a clasp.
- Finish Your Bracelet: If using elastic, simply tie a strong knot to secure the ends. If using wire, crimp the ends or attach a clasp for a polished finish.
And voilà! You have a stunning bracelet that showcases your personality. Enjoy wearing your unique creation or gift it to someone special!
Also Read This: Addressing Web Filter Violations in Fortiguard Downloader
4. Different Bracelet Designs You Can Try
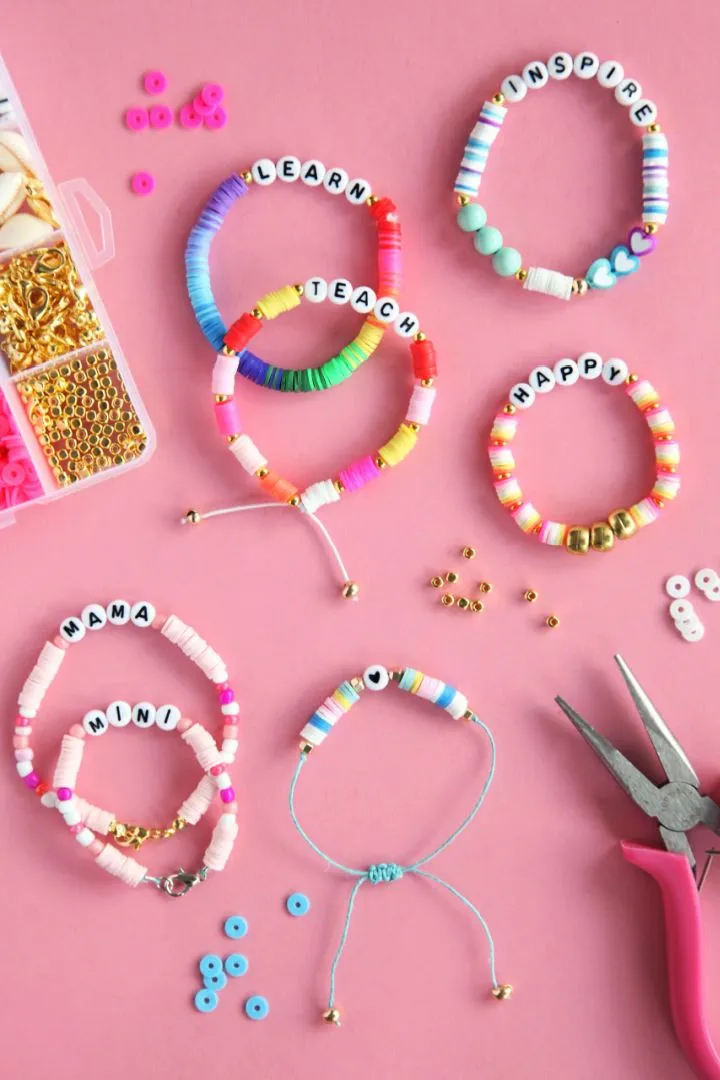
Once you've mastered the basics of bracelet-making, it’s time to explore various designs! Each style allows for personal expression and creativity. Here are some popular bracelet designs to inspire you:
| Design Name | Description |
|---|---|
| Simple Bead Bracelet | A classic design featuring a single row of uniform beads. Great for beginners! |
| Patterned Bracelet | Mix different colors and shapes to create a unique pattern. Think stripes, polka dots, or floral designs! |
| Charm Bracelet | Add charms or pendants between beads for a personal touch. These can be meaningful symbols or fun trinkets. |
| Multi-strand Bracelet | Create a layered look by combining several strands, each with different beads or colors. |
| Friendship Bracelet | A colorful bracelet using knots and patterns that symbolize friendship. Perfect for sharing with your besties! |
Feel free to mix and match these designs or add your own flair! The beauty of bracelet making is that there are no rules—just let your creativity flow!
Also Read This: How to Download High-Quality Audio from YouTube to Your iPhone
Tips for Choosing the Right Beads
Choosing the right beads for your bracelet can be a delightful yet daunting task. With so many options available, it’s essential to consider a few key factors to ensure your creation turns out beautifully. Here are some tips to guide you:
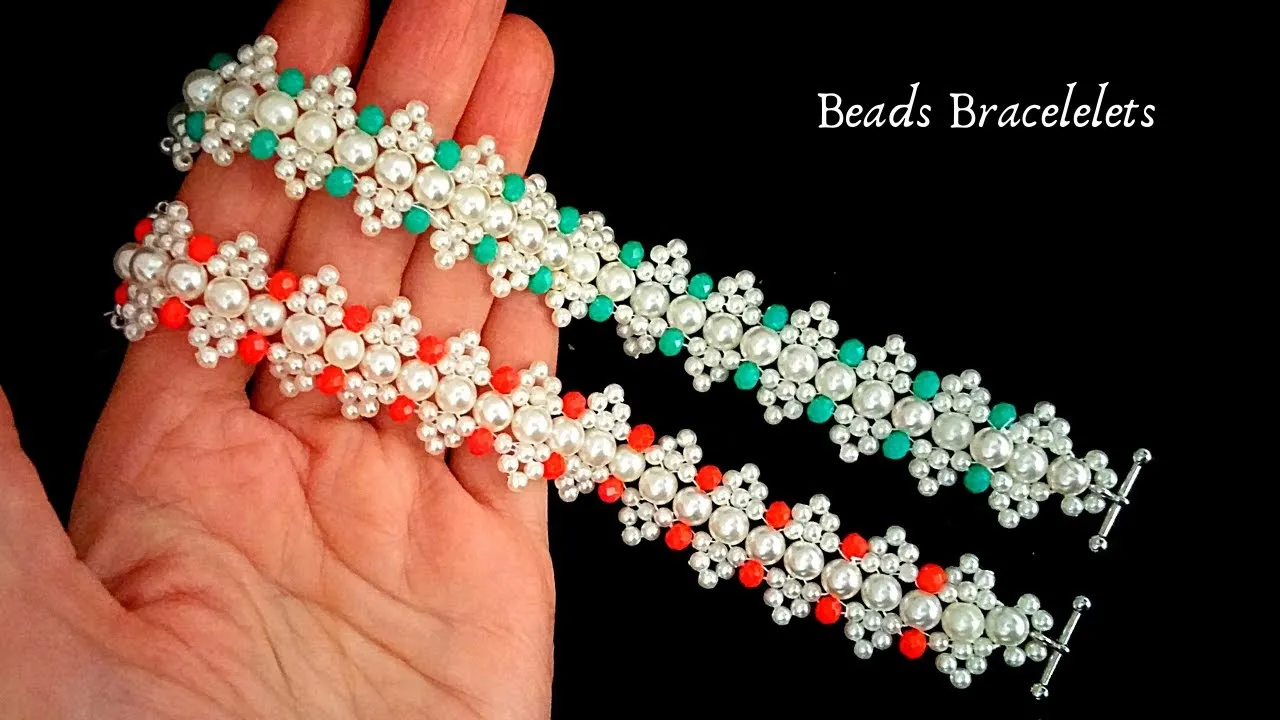
- Material Matters: Beads come in various materials, such as glass, wood, plastic, and metal. Think about the look and feel you want. For a natural vibe, wooden beads are fantastic, while glass beads can add a splash of color and shine.
- Size and Shape: Consider the size of the beads in relation to your wrist. Larger beads may look stunning but can be heavy. Mixing different shapes—like round, square, and faceted—adds visual interest.
- Color Palette: Choose colors that resonate with you or match your favorite outfits. Complementary colors can create a striking effect, while monochromatic schemes can offer elegance.
- Theme and Style: Think about the occasion. For casual outings, playful beads with fun patterns might work, while classic designs are perfect for formal events.
- Durability: If you plan to wear your bracelet daily, opt for beads that can withstand wear and tear. Look for quality materials that won’t easily scratch or break.
Remember, selecting beads is about expressing your unique style, so have fun mixing and matching until you find the perfect combination!
Also Read This: How to Use Adobe Stock in Illustrator
How to Care for Your Beaded Bracelets
Taking care of your beaded bracelets is essential to keep them looking fresh and vibrant. Here are some straightforward tips to ensure your creations stand the test of time:
- Regular Cleaning: Gently clean your bracelets with a soft cloth to remove dirt and oil. For deeper cleaning, use a damp cloth with mild soap, but be careful not to soak the beads.
- Avoid Water: Try to keep your bracelets away from water. Excess moisture can weaken string or elastic, especially with wooden or paper beads.
- Store Properly: When not wearing your bracelets, store them in a cool, dry place. A soft pouch or a jewelry box lined with fabric can prevent them from scratching or tangling.
- Handle with Care: Be mindful when taking on and off your bracelets. Avoid pulling on them too hard, as this can weaken the string and lead to breakage.
- Repair Promptly: If a bracelet breaks, don’t despair! Gather the beads and string and consider re-stringing or making a new design. It’s a great way to refresh your collection!
By following these care tips, your beaded bracelets can remain a cherished accessory for years to come.
How to Make Bracelets with Beads at Home
Creating beautiful beaded bracelets at home can be an enjoyable and rewarding hobby. Whether you're looking to make a unique gift or simply want to express your creativity, the process is straightforward and requires minimal materials. Below, you'll find a step-by-step guide to help you get started.
Materials Needed
- Beads: Choose a variety of beads in different colors and sizes. Popular options include glass beads, wooden beads, and plastic beads.
- Stringing Material: Use elastic cord, nylon thread, or jewelry wire depending on the desired flexibility and durability.
- Tools: A pair of scissors, and if using wire, needle-nose pliers may be helpful.
- Optional: Clasps, charms, and spacers for added decoration.
Step-by-Step Instructions
- Choose Your Design: Plan your bracelet design by arranging beads in a pattern you like.
- Cut the String: Measure and cut the stringing material to your desired length, adding a few extra inches for tying knots.
- String the Beads: Begin threading the beads onto your material according to your planned design.
- Secure the Ends: Once all beads are strung, tie the ends securely, making sure the bracelet fits comfortably around your wrist.
- Add Finishing Touches: If desired, attach clasps or charms to enhance your bracelet's look.
Tips for Success
| Tip | Description |
|---|---|
| Mix Materials | Combine different types of beads for a unique texture and appearance. |
| Stay Organized | Keep your beads sorted in compartments to avoid confusion. |
| Practice Patience | Take your time in threading beads to ensure quality design. |
Bracelet making is a fantastic way to express your creativity and can be a relaxing pastime. Gather your materials, follow the steps, and let your imagination run wild. Enjoy the satisfaction of crafting something beautiful and personal!