If you're looking to add a sprinkle of joy to your baking, adorable teddy bear cookies are just the treat! Soft, chewy, and cute as a button, these cookies are perfect for any occasion, from birthday parties to cozy family gatherings. Not only are they delightful to look at, but they’re also fun to make, especially with kids. So, roll up your sleeves and let's dive into the sweet world of baking these charming little bears!
Ingredients Needed
Getting the right ingredients is key to making your teddy bear cookies irresistible. Here’s what you’ll need:
- 2 ¾ cups all-purpose flour
- 1 teaspoon baking soda
- ½ teaspoon salt
- 1 cup unsalted butter, softened
- 1 cup granulated sugar
- 1 cup packed brown sugar
- 2 teaspoons vanilla extract
- 2 large eggs
- 2 cups semi-sweet chocolate chips (for eyes and decorations)
- 1 cup mini M&M's (for noses and other decorations)
### Optional Decorations:
| Decoration | Purpose |
|---|---|
| Royal icing | For adding details and extra cuteness |
| Colored sprinkles | For extra fun and color |
Make sure to gather these ingredients beforehand so you can jump right into baking. Trust me, the end result will be worth it!
Also Read This: Complete Guide for Beginners to Repost a Short on YouTube
Step-by-Step Instructions
Making adorable teddy bear cookies is not only a fun activity but also a delightful treat that everyone will love. Here’s a straightforward guide to help you bake and decorate these charming cookies.
- Gather Your Ingredients: Start by collecting all the ingredients you'll need. This includes:
- 2 ¾ cups all-purpose flour
- 1 teaspoon baking soda
- ½ teaspoon salt
- 1 cup unsalted butter, softened
- ¾ cup granulated sugar
- ¾ cup packed brown sugar
- 1 teaspoon vanilla extract
- 1 large egg
Also Read This: Is iStock Currently Down – Troubleshooting and Understanding Service Outages
Tips for Decorating Your Teddy Bear Cookies
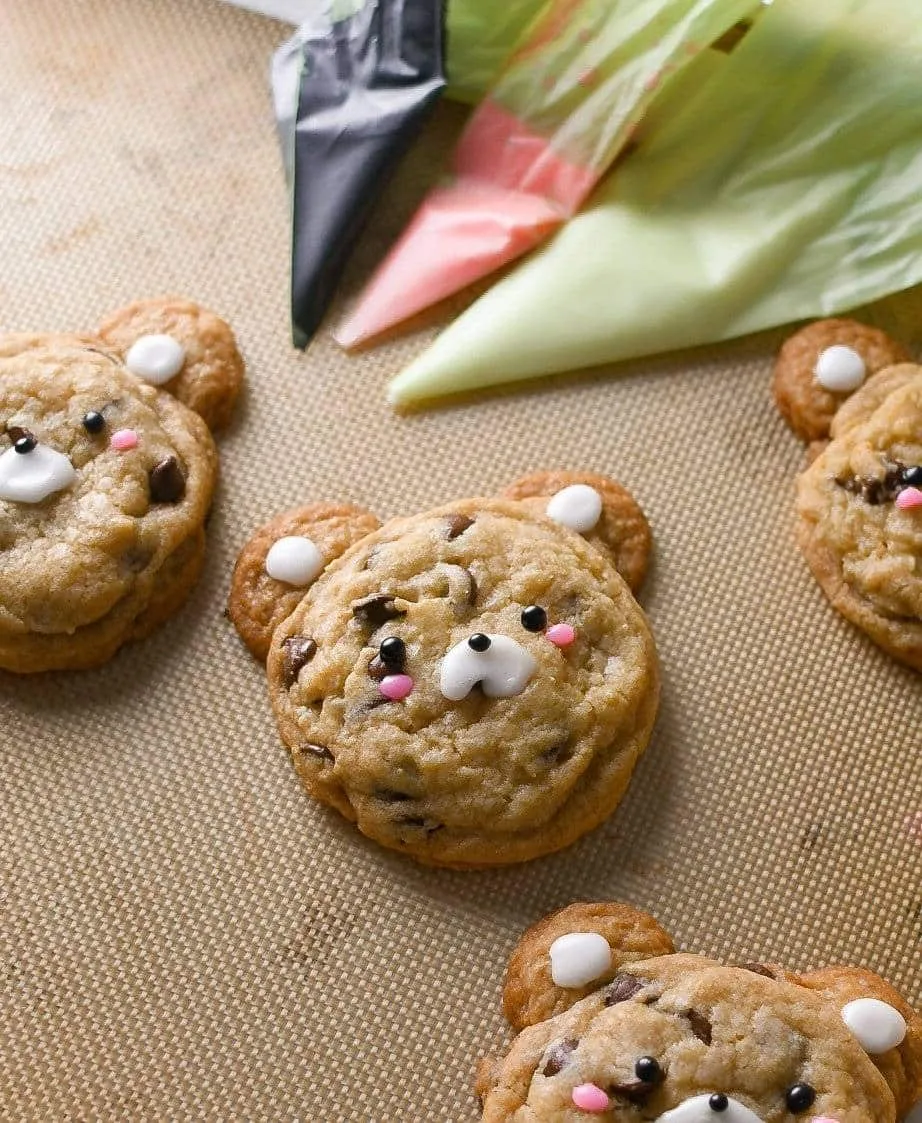
Now that you've baked your adorable teddy bear cookies, it’s time to make them even cuter with some creative decorations! Here are some tips to get you started:
- Use Royal Icing: For a smooth finish, consider using royal icing. It dries hard and allows for intricate designs. You can tint it with food coloring to create different shades!
- Get Creative with Faces: Use mini chocolate chips or M&M's for eyes and a jellybean or a small piece of fondant for the nose. Place them carefully to give your bears personality.
- Add Texture: Use a toothpick or a fine brush to add details like fur or bow ties. Dip the end in food coloring or melted chocolate for fun textures.
- Experiment with Sprinkles: Add colorful sprinkles on the icing while it's still wet for a festive touch. This can create a playful look!
- Keep it Simple: Don’t overcomplicate your designs. Sometimes, less is more. A simple smile and a dusting of powdered sugar can be just as charming!
Remember, the goal is to have fun and enjoy the process. Your teddy bear cookies will be a hit, whether they’re perfectly decorated or a little quirky!
Also Read This: How Much Paid Shutterstock
5. Storing Your Cookies
Once you've baked those adorable teddy bear cookies, it's important to store them properly to maintain their freshness and delightful appearance. Here are some tips to keep your cookies tasting great:
- Cool Completely: Before you even think about storing your cookies, make sure they are completely cool. Placing warm cookies in a container can create moisture, leading to soggy treats.
- Use Airtight Containers: Store your cookies in an airtight container. This helps prevent air from ruining the texture. You can use plastic containers, glass jars, or resealable bags.
- Layering: If you're stacking your teddy bear cookies, place a sheet of parchment paper between the layers. This prevents them from sticking together and keeps their cute shapes intact.
- Room Temperature: Keep your cookies at room temperature if you plan to eat them within a week. For longer storage, consider refrigerating them.
- Freezing for Later: Want to save some cookies for a special occasion? Freeze them! Just wrap each cookie in plastic wrap and then place them in a freezer bag. They can last up to three months in the freezer.
By following these simple storage tips, you can ensure your teddy bear cookies remain as delightful and tasty as the day they were baked!
6. Conclusion
Making adorable teddy bear cookies is not just about baking; it’s about creating memories and spreading joy! Whether it’s for a birthday, a holiday, or just a fun afternoon, these charming cookies are sure to bring smiles.
Embrace your creativity by decorating them with different colors and toppings. Remember, the secret to a perfect cookie lies in the quality of your ingredients and the love you put into the process.
As you embark on this cookie-baking adventure, invite family and friends to join in. It’s a sweet way to bond and unleash everyone’s inner child. Don’t forget to share your delightful creations on social media—everyone loves a good cookie pic!
Now that you have all the tips and tricks, it’s time to gather your ingredients and get baking. Your adorable teddy bear cookies are waiting to be made, enjoyed, and shared!