Making a rubber band bracelet by hand is a fun and creative way to express your style. Whether you're a beginner or a crafting pro, this project is simple and satisfying! You can customize your bracelet with different colors and patterns, making it a perfect gift or a trendy accessory for yourself. Plus, it’s a great way to spend time with friends or family. Let’s dive into what you’ll need to get started on this colorful project!
Materials Needed
Before you embark on your rubber band bracelet-making journey, gather the following materials to ensure a smooth crafting experience:
- Rubber Bands: Choose a variety of colors to make your bracelet unique. You can find packs at craft stores or online.
- Hook or Loom Tool: While you can use your fingers, a hook or a loom tool makes the process easier. Look for a crochet hook or a specially designed loom hook.
- Clip or C-Clip: This small clip secures your bracelet once it’s finished. It’s usually made of plastic and comes in various colors.
- Scissors: You’ll need scissors to trim any excess bands or to cut the rubber bands if required.
- Workspace: A flat surface like a table or desk will give you enough room to spread out your materials. Consider using a placemat to keep everything organized.
By gathering these materials, you’ll be fully equipped to get creative and start crafting beautiful rubber band bracelets!
Also Read This: How to Record Programs on YouTube TV – A Beginner's Step-by-Step Guide
Step-by-Step Instructions
Making a rubber band bracelet is a fun and creative project that anyone can enjoy! Here’s a simple guide to get you started:
- Gather Your Materials: You’ll need the following:
- Colorful rubber bands
- A loom (optional)
- A hook or a crochet needle
- A clip or clasp to secure the bracelet
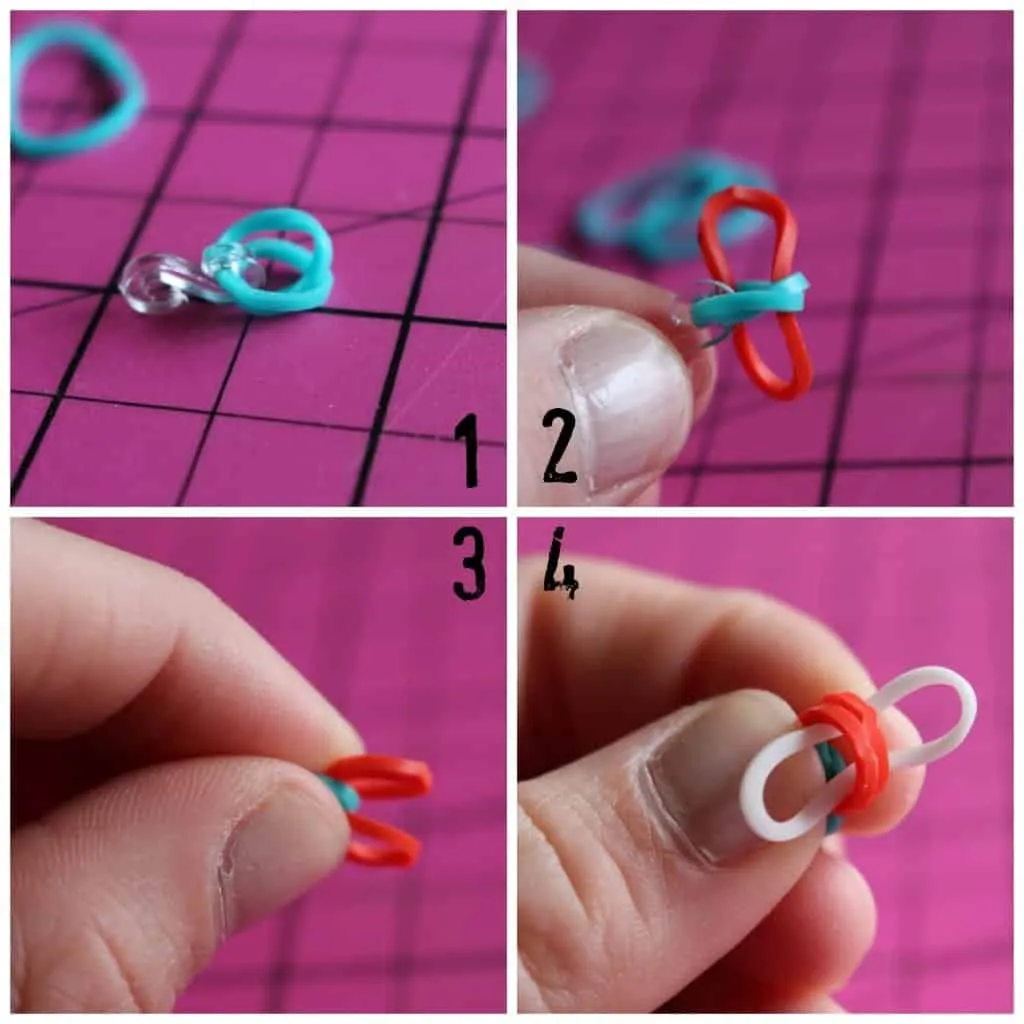
- Start with the Base: If you’re using a loom, set it up with the pegs facing towards you. If not, you can start by forming a small chain with rubber bands on your fingers or using the hook.
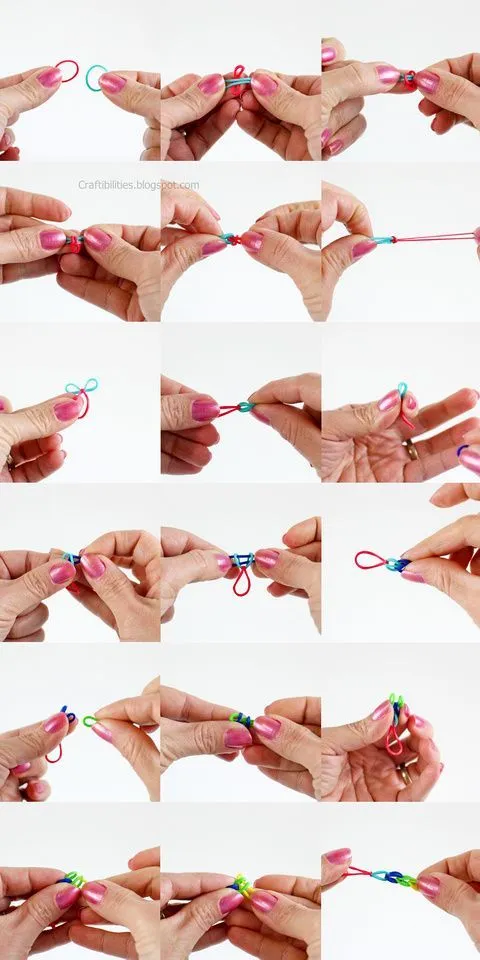
- Creating the Pattern: Begin by placing your first rubber band on the loom in a figure-eight shape or twist it around your fingers. For a basic pattern, layer rubber bands in different colors to create a vibrant look.
- Weaving the Bands: Use the hook to grab the bottom band and pull it over the top one, then add a new band. Repeat this process until the bracelet reaches your desired length.
- Securing the Bracelet: Once you’ve finished weaving, carefully remove the bracelet from the loom or your fingers. Attach the clip or clasp at each end to keep it secure.
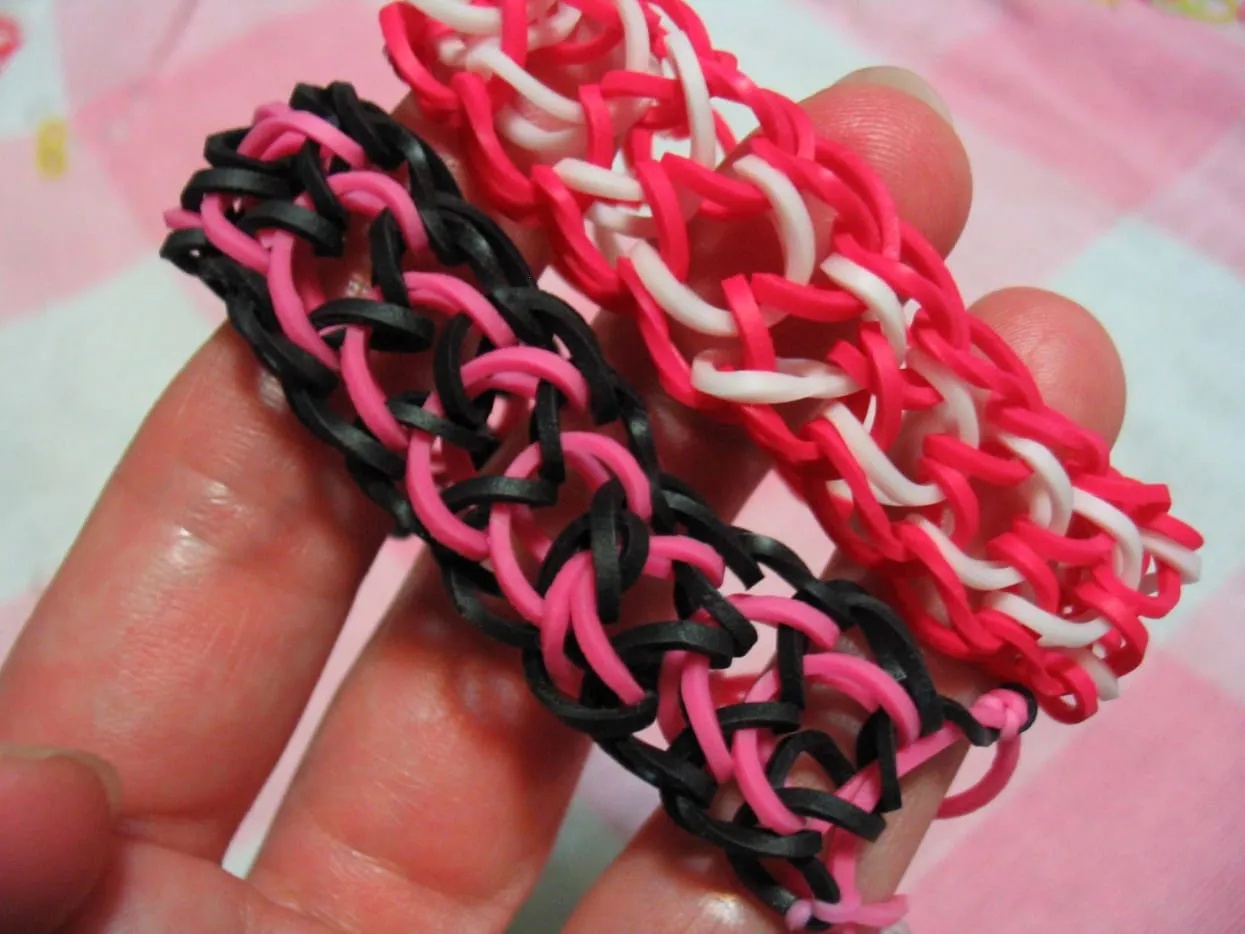
- Final Touch: Give your bracelet a little stretch and admire your handiwork! You can make matching sets or gifts for friends!
Also Read This: Reviews Matter: Adding Reviews to Your Shopify Store
Tips for Success
Here are some handy tips to ensure your rubber band bracelet-making experience is smooth and enjoyable:
- Choose Quality Bands: Opt for high-quality rubber bands. They tend to be more durable and vibrant in color.
- Practice Patience: If you’re new to this, don’t rush! Take your time and enjoy the process.
- Experiment with Patterns: Try different shapes and styles! You can mix and match colors for unique designs.
- Keep Your Workspace Organized: A tidy area will help you focus and find your materials easily.
- Watch Tutorials: If you’re stuck, check out video tutorials online. They can offer visual guidance that’s super helpful!
With these instructions and tips, you’re all set to create beautiful rubber band bracelets by hand. Happy crafting!
Also Read This: Best Practices for Engagement When Reposting on LinkedIn
Creative Variations
Once you’ve mastered the basics of making rubber band bracelets, the fun really begins! There are countless creative variations you can explore to express your unique style. Here are some exciting ideas to get your imagination rolling:
- Rainbow Twist: Use a mix of vibrant colors to create a stunning rainbow effect. Alternate colors every few bands to make a colorful spiral.
- Charm Additions: Consider adding charms or beads to your bracelet. Simply slide them onto the rubber bands before you weave them together for a personalized touch.
- Patterned Designs: Experiment with patterns like stripes, chevrons, or polka dots by strategically placing bands of different colors in a specific sequence.
- Double Loop Technique: For a thicker bracelet, try the double loop technique where you loop two bands together before weaving. This gives a more substantial feel and a unique look.
- Seasonal Themes: Change up your colors and designs according to the season or holidays. Think pastel colors for spring, warm tones for fall, or spooky colors for Halloween!
Each variation adds a new layer of creativity and fun. Feel free to mix and match these ideas, and don’t be afraid to come up with your own unique designs!
Conclusion
Creating rubber band bracelets by hand is not just a fun activity; it’s a fantastic way to express your creativity and make personalized gifts for friends and family. With just a few simple materials and techniques, you can craft beautiful, one-of-a-kind accessories that showcase your style.
Remember, practice makes perfect! Don’t be discouraged if your first few attempts don’t turn out as expected. Embrace the learning process and enjoy experimenting with different styles and variations.
So grab your rubber bands, a hook, and let your imagination flow! Whether you’re making a simple band or diving into intricate patterns, the joy is in the creation. Happy crafting!