Paper aeroplanes are not just simple toys; they’re a gateway to understanding the principles of aerodynamics and the joy of crafting. Whether you're a child or an adult, making a paper aeroplane can spark creativity and provide hours of entertainment. Plus, it's a wonderful way to bond with family and friends!
What’s incredible about paper aeroplanes is their simplicity. With just a piece of paper and a little bit of folding magic, you can create a plane that soars through the air. They come in various designs, from the classic dart to more intricate models that require a bit more finesse. This tutorial will guide you through the basic steps to create your very own paper aeroplane, so you can unleash your inner pilot!
Materials Needed for Crafting
Before we dive into crafting, let’s gather the materials you’ll need. Don’t worry; you probably already have most of these items at home!
- Paper: Any type of paper will do! Printer paper, construction paper, or even recycled paper from old notebooks can work wonders.
- Scissors: Sharp scissors can help you make precise cuts if you wish to customize your plane's wings or tail.
- Ruler: A ruler will help you measure and create straight lines for more advanced designs.
- Pencil or Pen: Use this for marking where to fold or cut.
- Optional Decorations: Stickers, markers, or washi tape can add a personal touch to your aeroplane!
Once you have these materials at hand, you're ready to embark on an exciting journey of paper flight. Let’s get folding and see how high your creations can soar!
Also Read This: How to Make Your Car Rumble and Add a Custom Exhaust Sound
Step-by-Step Instructions
Creating a paper aeroplane is not only fun but also a fantastic way to unleash your creativity. Follow these simple steps, and you'll have your very own soaring masterpiece in no time!
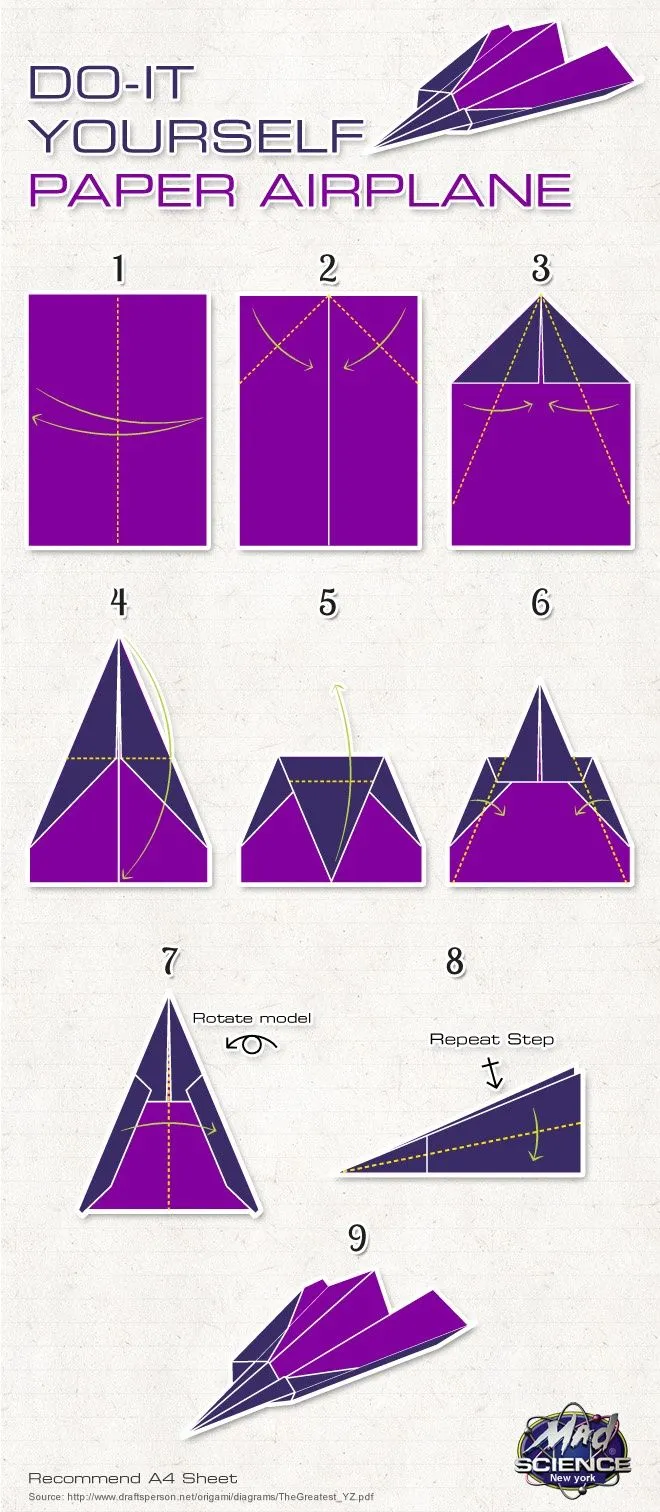
- Gather Your Materials: You only need a sheet of A4 or letter-sized paper. Plain or colored paper works well. Grab a ruler and a pencil for precision, and you'll be all set!
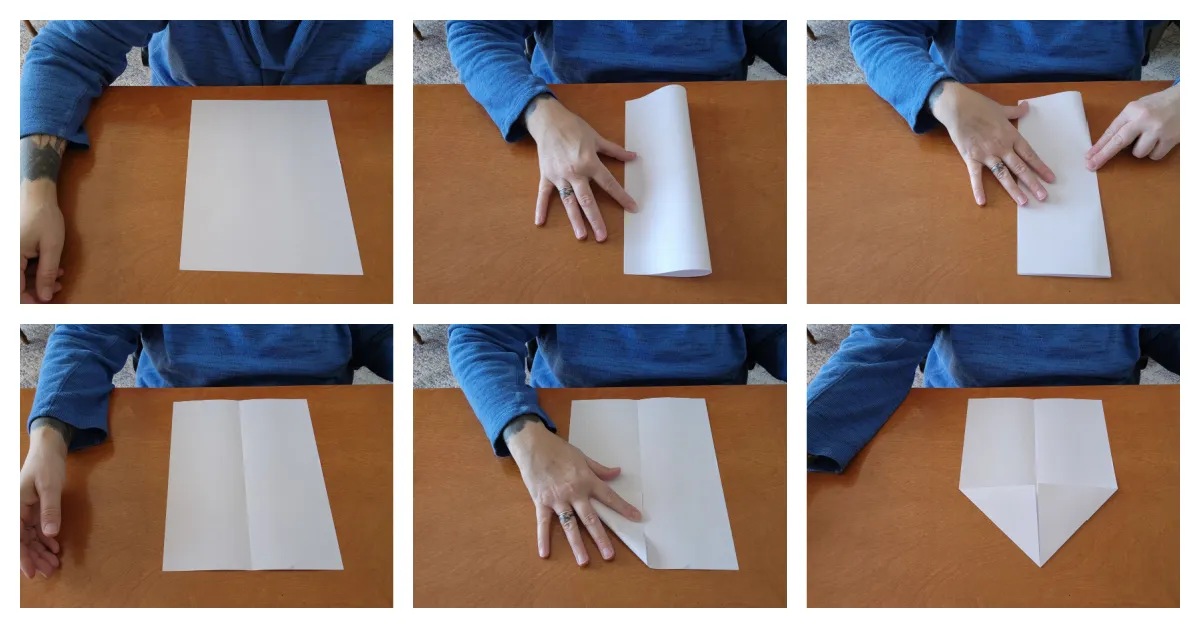
- Fold the Paper in Half: Start by folding the paper lengthwise. Make sure the edges align perfectly, then press down firmly to create a crisp crease. Unfold the paper to reveal a guideline.
- Fold the Corners: Take the top two corners and fold them inward towards the center crease. The edges should meet at the center line, creating a triangular shape at the top.
- Make Another Fold: Fold the triangle shape down, making sure it covers the previous folds. This will create a stronger nose for your plane.
- Fold the Edges: Now, fold the outer edges of the paper in towards the center crease again, forming a narrower triangle. This step is crucial for aerodynamics!
- Shape the Wings: Fold the whole plane in half along the original crease. Then, fold down both wings, ensuring they are symmetrical. A good tip is to align the bottom of the wings with the bottom of the plane's body.
- Final Touches: Adjust the wings slightly upwards to help with lift. Give your plane a test flight and make any minor adjustments to the wings as necessary.
Also Read This: How Do You Access High-Quality Shutterstock Images for Free Using Downloaders?
Tips for Making Your Paper Aeroplane Fly Better
Want your paper aeroplane to soar like a pro? Here are some handy tips that can help enhance its flying capabilities:
- Choose the Right Paper: Thicker paper can add weight, which helps with stability, while lighter paper can enhance flight distance. Experiment with different types!
- Perfect Your Folds: Make sure your folds are precise and sharp. Clean, crisp creases can significantly impact the aerodynamics of your plane.
- Adjust Wing Shape: Wider wings can increase lift, while narrower wings can improve speed. Try making a few different designs to see what works best!
- Test and Tweak: Don’t hesitate to make adjustments after test flights. If it nose-dives, try bending the tail up a little. If it stalls, angle the wings down slightly.
- Launch Technique: How you throw the plane matters! A gentle, straight throw at a slight upward angle is typically best for distance and stability.
Remember, practice makes perfect! Keep experimenting with different designs and techniques to discover what makes your paper aeroplane truly take flight!
Also Read This: Effortless File Transfer of Adobe Stock Images to Your Projects
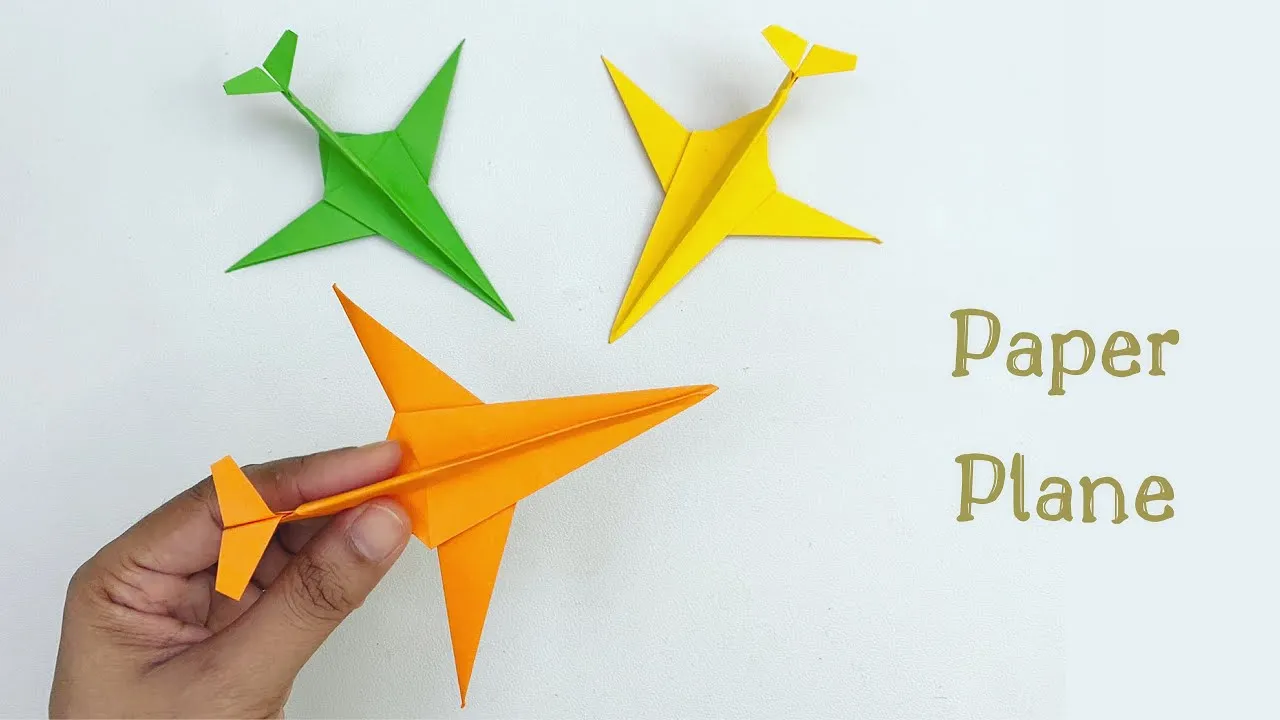
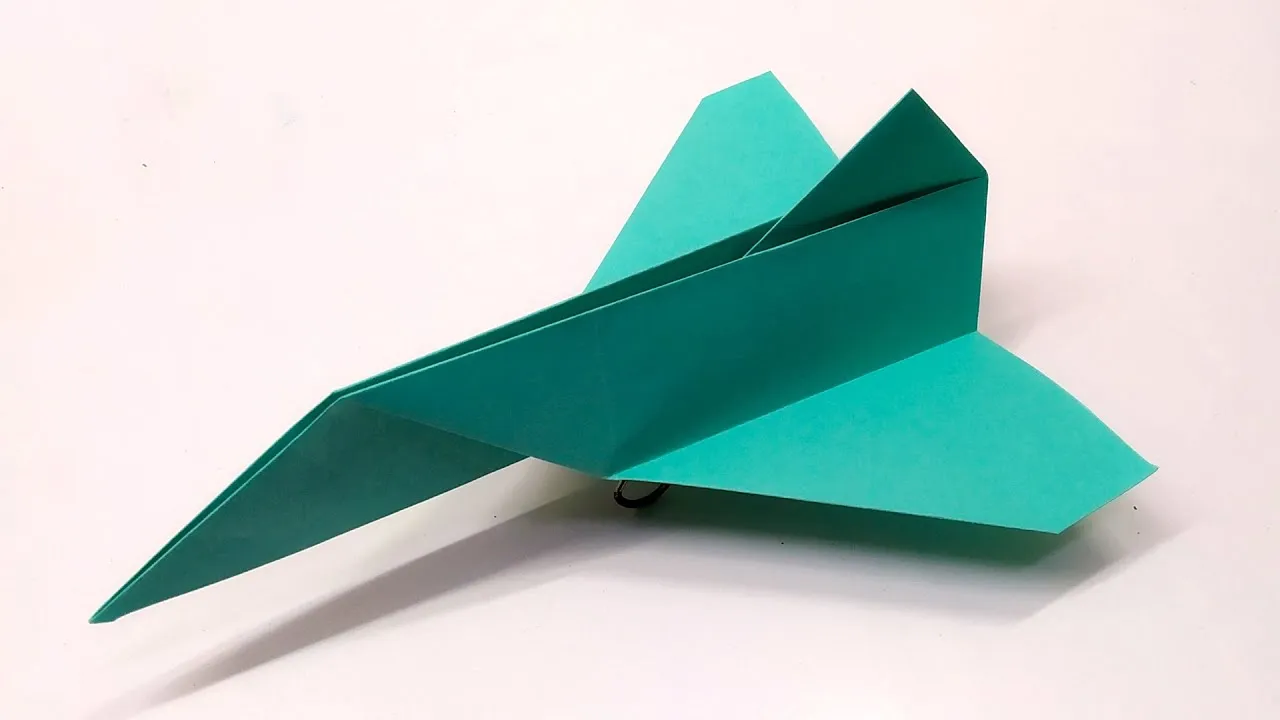
5. Experimenting with Different Designs
Once you've mastered the basic paper aeroplane design, the fun really begins! Experimenting with different designs can lead to a variety of flight patterns and distances. Here’s how to get started:
- Wing Shape: Try altering the shape of the wings. Wider wings can create more lift, making your plane glide better, while narrower wings might allow for faster speeds.
- Body Length: Adjusting the length of the body can also impact performance. A longer body often offers more stability, while a shorter one can be more agile.
- Folding Techniques: Explore different folding techniques. For example, instead of just folding the wings down, try folding them up at an angle. This can give your plane a unique aerodynamic advantage.
- Weight Distribution: Adding small weights (like paper clips) to the nose or wings of your plane can drastically change how it flies. Experiment with various placements to find the perfect balance.
Document your findings! Create a simple table to track the performance of each design:
| Design | Distance Flown | Flight Time | Stability |
|---|---|---|---|
| Standard | 10 meters | 3 seconds | Good |
| Wide Wings | 12 meters | 4 seconds | Very stable |
| Weighted Nose | 15 meters | 5 seconds | Stable |
Embrace your creativity, and remember, sometimes the most unexpected designs can be the most successful!
6. Conclusion and Final Thoughts
Making paper aeroplanes is not just a fun activity; it’s a wonderful way to learn about the principles of aerodynamics and design. Throughout this journey, you’ve explored basic designs, experimented with modifications, and discovered how small changes can lead to significant improvements in flight performance.
As you wrap up this crafty adventure, consider these key takeaways:
- Creativity is Key: Don’t hesitate to innovate. The best designs often come from a bit of trial and error.
- Science in Action: Every fold and tweak can teach you something about physics—so embrace the learning process!
- Share the Fun: Challenge friends or family to join in. You can have friendly competitions to see whose design flies the farthest!
Lastly, remember that practice makes perfect. The more you experiment, the better your skills will become. So, grab some paper, ditch the rules, and let your imagination take flight! Happy flying!