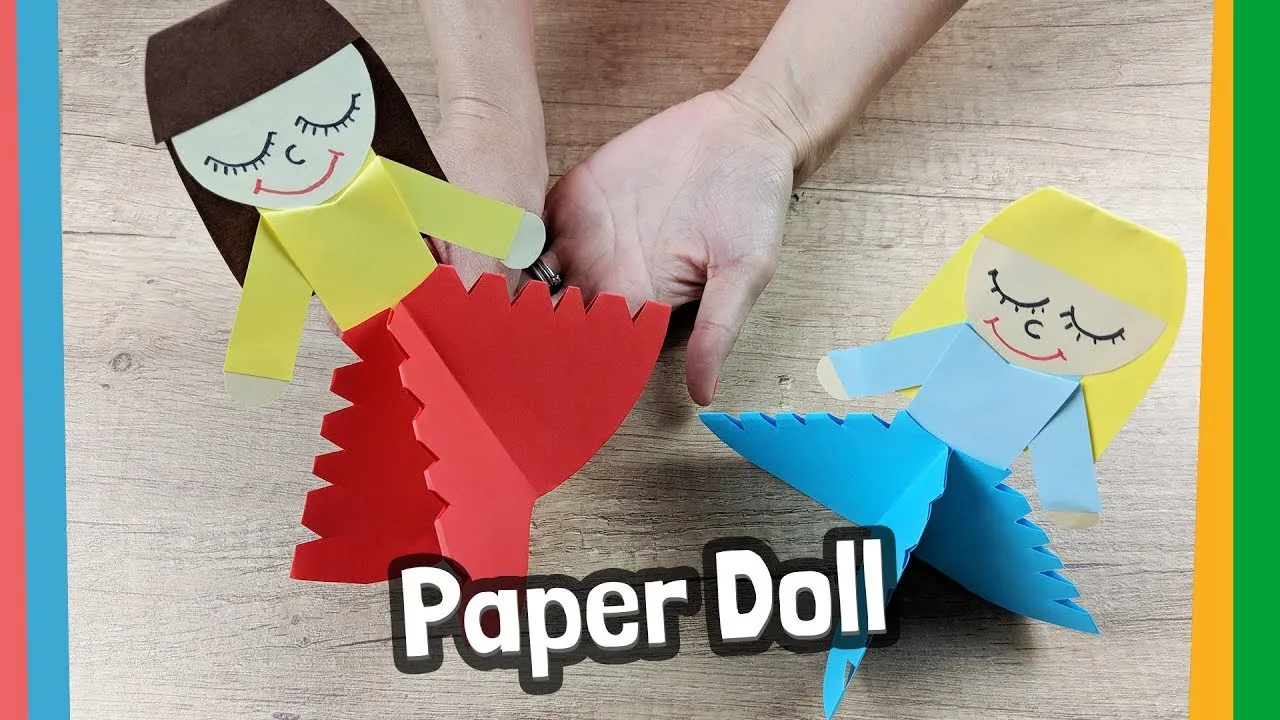
Making a doll with paper is a fun and creative activity that can spark the imagination of both kids and adults alike. It’s a simple yet satisfying craft that allows you to express your artistic side while creating something unique. Whether you’re looking to spend a rainy afternoon crafting with your children or you want to explore a new hobby, this guide will walk you through the steps to create your very own paper doll. So, gather your materials and let’s get started!
Materials Needed
Before diving into the crafting process, it’s essential to gather all the materials you’ll need. Here’s a handy list to ensure you have everything at your fingertips:
- Paper: You can use any kind of paper—construction paper, cardstock, or even recycled paper. Choose colors that inspire you!
- Scissors: A good pair of scissors is crucial for cutting out your doll and its accessories.
- Glue or Tape: Use glue sticks, liquid glue, or tape to assemble your doll’s parts together.
- Pencil and Eraser: A pencil will help you sketch your doll before cutting, and an eraser can fix any mistakes.
- Markers or Colored Pencils: These are perfect for adding details like facial features, clothing designs, and hair.
- Craft Stick or Straw (optional): For added stability, you can use a craft stick or straw to give your doll a sturdy base.
- Decorative Items (optional): Think about using sequins, buttons, or fabric scraps to embellish your doll and give it a personal touch.
With these materials ready, you’re well on your way to creating an adorable paper doll that you can customize to your liking!
Also Read This: Can YouTubers See Who Unsubscribed
Step-by-Step Instructions
Making a doll with paper is a fun and creative project that can be enjoyed by both kids and adults. Follow these easy steps to create your own paper doll!
- Gather Your Materials: You'll need:
- Colored paper or cardstock
- Scissors
- Glue or tape
- Markers or colored pencils
- Optional: embellishments like glitter, stickers, or fabric scraps
Also Read This: Where to Watch A Christmas Spark Full Movie on YouTube
Tips for Customization
Once you've mastered the basic paper doll, why not take it a step further? Here are some fun tips for customizing your creation!
- Experiment with Different Materials: Instead of just using colored paper, try patterned scrapbooking paper, wrapping paper, or even old magazines for a unique look.
- Mix and Match Outfits: Create multiple outfits for your doll by making separate clothing pieces. You can design dresses, shirts, pants, and even shoes that can be swapped out for different occasions!
- Use Stencils: If drawing isn't your strong suit, use stencils for the face and clothing designs. This can help create cleaner lines and more professional-looking features.
- Add Accessories: Think outside the box! You can make tiny paper hats, bags, or even pets to accompany your doll. These little details can make your doll come to life.
- Personal Touch: Make the doll resemble someone you know, or create a character from your favorite story. Personalizing your doll will make it feel even more special!
- Involve Others: This can be a great group activity! Invite friends or family to create their own dolls, and you can have a fun doll show afterward!
Remember, the sky's the limit when it comes to creativity. Enjoy the process and don’t rush—crafting should be a relaxing and enjoyable experience!
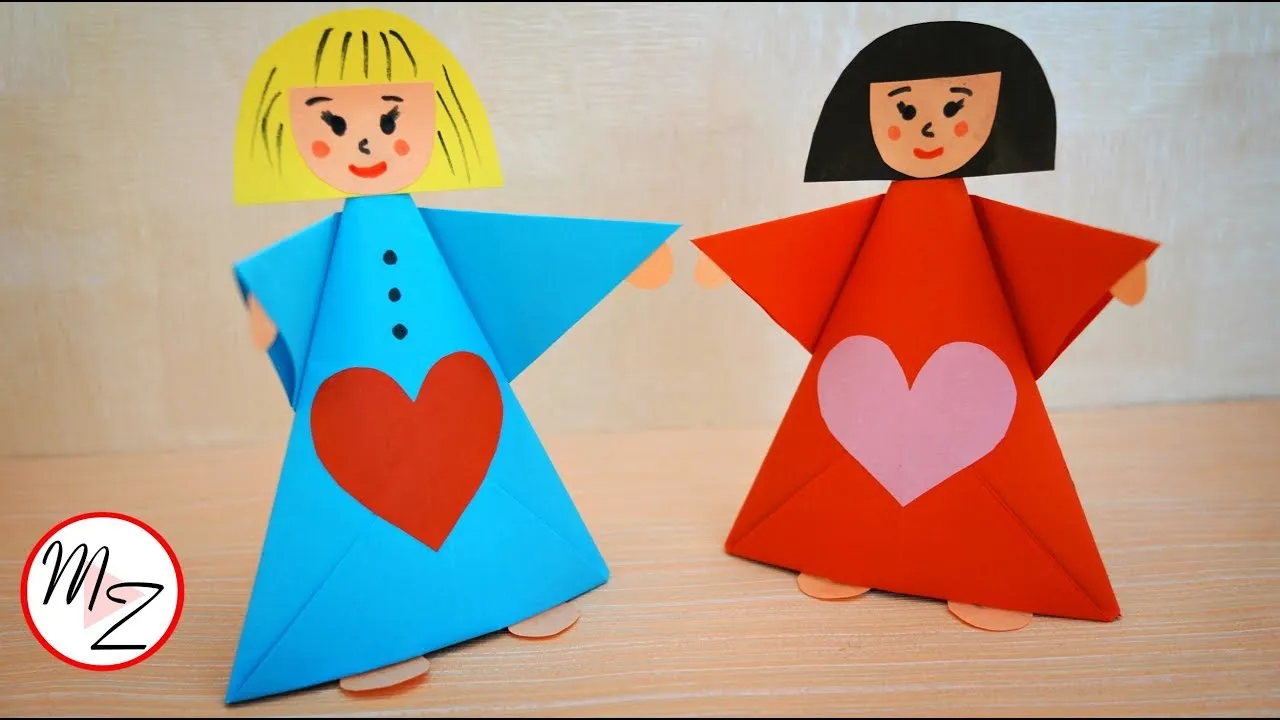
How to Make a Doll with Paper
Creating a paper doll is a fun and engaging craft project that can be enjoyed by people of all ages. Not only does it encourage creativity, but it also helps develop fine motor skills. In this guide, we will walk you through the steps to make your very own paper doll using simple materials that you probably already have at home.
Materials Needed
- Colored paper or cardstock
- Scissors
- Glue or tape
- Pencil
- Markers or crayons
- Optional: Decorative items like stickers, glitter, or fabric scraps
Step-by-Step Instructions
- Choose Your Design: Decide on the style of the doll you want to create. You can sketch a simple outline on a piece of paper.
- Cut Out the Body: Use colored paper to cut out the shape of the doll's body. A basic doll shape typically includes a head, torso, arms, and legs.
- Add Details: Use markers or crayons to decorate the doll. Add facial features, hair, and clothing designs for personalization.
- Assemble the Doll: If you want to create a three-dimensional effect, cut out separate pieces for the arms and legs and attach them with glue or tape.
- Embellish: Use decorative items to enhance your doll. Stickers, glitter, or fabric scraps can bring your creation to life!
Tips for Success
| Tip | Description |
|---|---|
| Be Creative | Experiment with different colors and designs to make your doll unique. |
| Use Recycled Materials | Consider using old wrapping paper or magazines for a sustainable approach. |
| Involve Others | This is a great project to do with friends or family for added fun! |
In conclusion, making a paper doll is a delightful and straightforward craft that allows for endless creativity. By following these steps and using your imagination, you can craft a unique doll that reflects your personal style and artistic flair.