Have you ever wanted to experience the thrill of 3D movies but didn’t want to splurge on those expensive glasses? Well, you’re in luck! Making your own 3D glasses at home is not only a fun DIY project, but it's also a great way to dive into the world of 3D visual effects. In this guide, we’ll walk you through the simple steps to create your very own pair of 3D glasses using materials you probably already have around the house. So, grab your supplies and let’s get started on this creative journey!
Materials Needed
Before we dive into the steps, let's gather all the materials you’ll need to create your homemade 3D glasses. The good news is that most of these items are common household products. Here’s a handy list of what you’ll need:
- Cardboard or Thick Paper: This will serve as the frame for your 3D glasses. You can use old cereal boxes or any sturdy paper you have lying around.
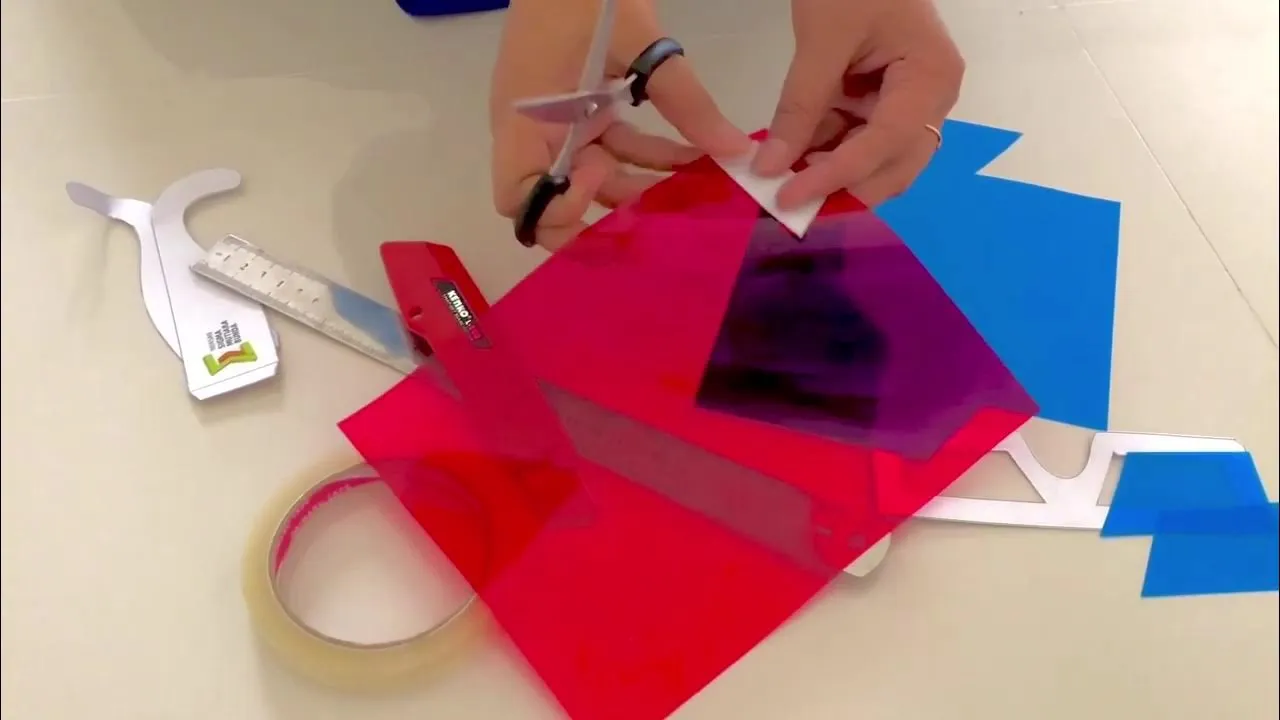
- Red and Blue Cellophane or Plastic Wrap: These colors are crucial for creating the anaglyph effect that allows you to see in 3D. If you don’t have cellophane, colored transparency sheets work too.
- Scissors: You’ll need these to cut the cardboard into the shape of glasses.
- Glue or Tape: Use glue or tape to secure the cellophane onto the cardboard frame.
- Pencil: For marking measurements and designs on the cardboard.
- Ruler: A ruler will help you make straight lines and ensure your glasses are symmetrical.
With these materials gathered, you’re all set to start creating your own 3D glasses. Let’s move on to the next steps!
Also Read This: How to Find the Adobe Stock Contributor Named Storm and Other Contributors
Step-by-Step Instructions
Creating your own 3D glasses at home can be a fun and rewarding project! While it may sound complicated, the process is fairly straightforward. Here’s a step-by-step guide to help you through:
- Gather Your Materials: You will need:
- Two different colored transparent plastic sheets (red and cyan are popular choices)
- Cardboard or sturdy paper for the frame
- Scissors
- Glue or tape
- A ruler
- A pencil
And there you have it! Your very own pair of homemade 3D glasses. Enjoy your movie nights or gaming sessions in a whole new dimension!
Also Read This: Unraveling the Sweetness: Cookies and Shutterstock – What You Need to Know
Tips for Success
Making 3D glasses at home can be a delightful experience, but a few tips can help ensure your project goes off without a hitch. Here are some handy pointers to keep in mind:
- Choose Quality Materials: The quality of your lenses will significantly affect your viewing experience. Opt for good-quality colored plastic sheets that are not too dark, as this could distort the image.
- Get the Measurements Right: Taking accurate measurements for your frame and eye holes can make a big difference in comfort and effectiveness. Use a ruler for precision, and maybe even sketch your design first.
- Experiment with Lens Colors: While red and cyan are classic choices, feel free to experiment with other color combinations. Different colors can yield various effects, so don’t shy away from trying something new!
- Use Online Resources: If you're unsure about any steps, YouTube and DIY blogs are great places to find visual guides. Sometimes seeing someone else do it can clarify the process!
- Practice Patience: If your first pair doesn’t turn out perfectly, don’t get discouraged! Making adjustments and iterations is part of the learning process.
By following these tips, you’ll be well on your way to creating a fantastic pair of 3D glasses that enhances your viewing experience. Happy crafting!
Also Read This: A Guide to Fortiguard Downloader’s Subscription Services
Testing Your 3D Glasses
Once you've crafted your very own 3D glasses, it's time to put them to the ultimate test! Testing is crucial to ensure that your creation works correctly and provides that immersive 3D experience you're aiming for. Here’s how to go about it:
1. *Find the Right Content: Look for 3D movies or videos. You can find many free options on platforms like YouTube where they offer 3D content. Be sure to check if the video is compatible with the type of 3D glasses you've made (anaglyph, polarized, etc.).
2. Set Up Your Viewing Area: Choose a comfortable spot in your home where you can sit back and enjoy your 3D experience. Ensure the lighting is appropriate; dim lighting usually works best for viewing 3D content.
3. Wear Your Glasses Properly: Make sure your glasses sit comfortably on your nose and that the colored lenses (if applicable) are positioned correctly. The red lens should be over the left eye, and the cyan or blue lens should be over the right eye for anaglyph glasses.
4. Adjust Your Screen: If you're using a TV, projector, or computer, adjust the screen's brightness and contrast settings to enhance the 3D effect. Sometimes, a bit of tweaking can make a huge difference in how the 3D appears.
5. Evaluate the Experience*: While watching, pay attention to how the images appear. Are they popping out? Do you feel immersed in the scene? If not, you may need to revisit your glasses and make adjustments.
Testing is not just about confirming functionality; it’s about enjoying a new dimension of viewing! So grab some popcorn, sit back, and enjoy the show.
Conclusion
Creating your own 3D glasses at home can be an incredibly fun and rewarding project. Not only do you get to unleash your creativity, but you also gain a deeper appreciation for the technology behind 3D viewing. By following the steps outlined, you can easily craft a pair of glasses tailored to your preferences.
Remember, the key to enjoying 3D content lies not just in making the glasses, but also in testing them thoroughly to ensure a great viewing experience. Here’s a quick recap of what we’ve covered:
- Gathering the necessary materials is crucial.
- Following a clear step-by-step guide helps streamline the creation process.
- Testing your glasses with appropriate 3D content is essential for the best experience.
So, whether you're watching a thrilling 3D adventure or simply experimenting with your DIY skills, remember to have fun along the way! Your homemade 3D glasses can open up a whole new world of cinematic enjoyment, and who knows—you might even impress your friends with your craftiness. Happy viewing!