When I embarked on my photography adventure I was captivated by the rich hues and intricate details I could bring to life using Lightroom. However I quickly understood that freezing a moment in time was just part of the challenge; showcasing it to the world held significance too. Exporting your Lightroom pictures plays a role as it enables you to showcase your creations in a light, particularly on platforms such as Behance. By selecting the export settings you can preserve the quality and essence of your images ensuring they shine brightly, amidst a sea of competition.
When it comes to exporting, it's like getting your photos ready for a fancy event. Just as we carefully choose our outfit for a special occasion we need to think about how our images will be received. This not shows our talent but also shows our consideration for the audience. The export settings can bring out the details of your work captivating viewers with the narrative you want to convey. So let's explore the process of getting your photos ready for export!
Preparing Your Photos in Lightroom for Export
Before you click that export button there are a few important steps to follow. Getting ready can greatly impact the appearance of your images once they’re on the web. Here are some key factors to keep in mind.
- Check Your Edits: Ensure that your adjustments—like exposure, contrast, and saturation—are finalized. A well-edited photo is the best starting point.
- Organize Your Images: Group your images into collections if you’re exporting multiple photos. This not only streamlines the process but also helps in keeping your projects organized.
- Consider Watermarking: If you want to protect your work, think about adding a subtle watermark. It’s like signing your artwork, giving it a personal touch.
As a person who tends to overlook these details I cant emphasize enough the importance of this step! Believe me when I say that investing a little time in preparation will spare you from a lot of pain down the road.
Also Read This: Is CoryxKenshin Leaving YouTube What Fans Should Be Aware Of
Selecting the Right File Format for Behance
Selecting the appropriate file format for your images is crucial, just like the editing process. Each format serves a specific function and understanding when to use can enhance your showcase on Behance. Here’s a brief overview.
| File Format | Best Use | Pros | Cons |
|---|---|---|---|
| JPEG | General sharing and online portfolios | Widely accepted, good quality, small file size | Lossy compression can reduce quality |
| PNG | Images needing transparency | High quality, supports transparency | Larger file sizes compared to JPEG |
| TIFF | High-quality prints and professional work | Lossless compression, excellent quality | Very large file sizes |
When it comes to sharing my work on Behance I usually choose JPEG format. It offers a good mix of quality and file size. But if I have a project that demands the highest quality TIFF is the better option. Ultimately it boils down to how you want to showcase your work and how you want others to perceive it!
Also Read This: How to Add a Custom URL to Behance
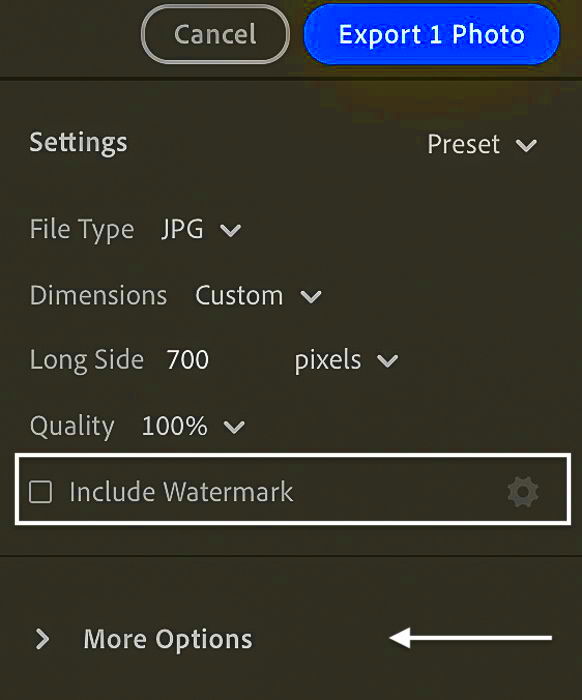
Adjusting Export Settings for Optimal Quality
In the beginning when I began sharing my pictures from Lightroom I tended to neglect the export options. I would hit the "Export" button without giving it much thought only to discover that my gorgeous photos didn't appear quite as breathtaking online as they did in Lightroom. It was then that I understood the importance of tweaking the export settings to achieve quality. These settings are akin to the touch of spice in a curry—just a dash can elevate the entire dish.
Here are a few important settings to take note of
- Image Sizing: If you’re exporting for the web, it’s usually best to keep the long edge around 1400 pixels. This ensures your images load quickly while maintaining decent quality.
- Resolution: A resolution of 72 pixels per inch (ppi) is generally sufficient for online images. Higher resolutions are better for print, but they’ll make your files much larger.
- Quality: Set the quality slider to around 80-90%. This strikes a balance between file size and image clarity.
By tweaking these preferences you’re not simply saving images; you’re capturing the core of your artistic intent. I recall the moment when I modified my export configurations and noticed the improvement in sharpness and intricacy. It was akin to witnessing my pictures, in their genuine form!
Also Read This: How to Use Dailymotion on Smart TV to Enjoy Your Favorite Videos on a Bigger Screen
Exporting Your Photos from Lightroom
Once you’ve got your images ready and your settings tweaked, it’s time to export your pictures from Lightroom. This is the moment you’ve been gearing up for, so let’s make it worthwhile! The export procedure is pretty simple, but with so many choices available, it’s easy to feel overwhelmed. Believe me, I’ve been in that situation before!
Here’s a simple step-by-step guide:
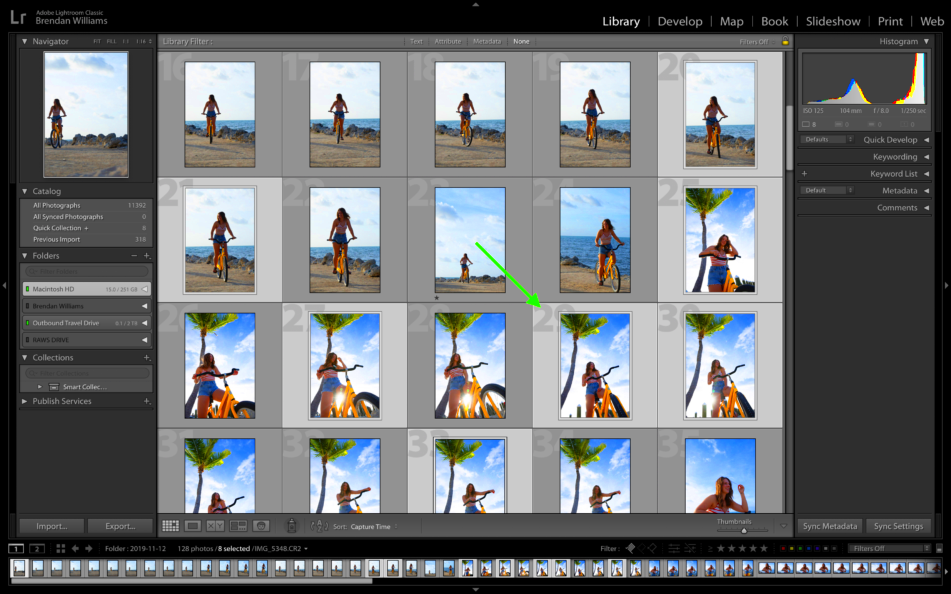
- Select Your Images: In the Library module, choose the images you wish to export.
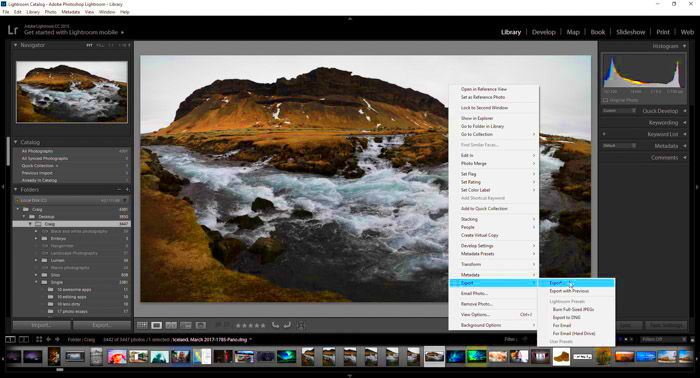
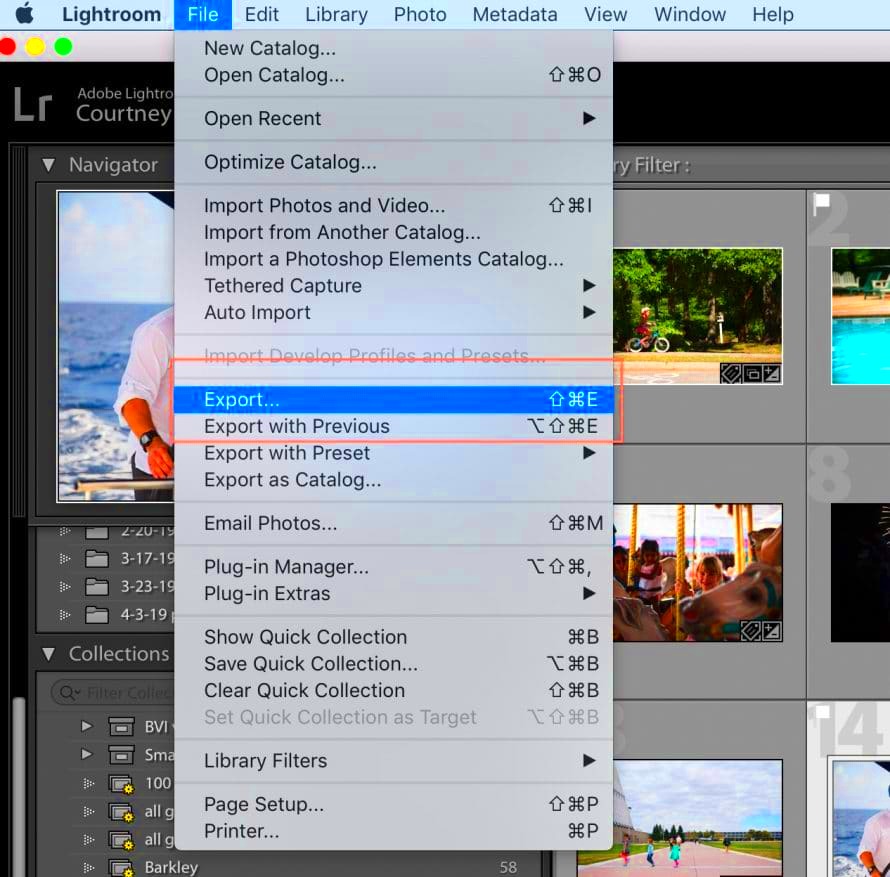
- Click on Export: Go to the File menu and select “Export,” or simply right-click on the selected images and choose “Export.”
- Choose the Destination: Decide where you want to save the exported files. You can create a new folder for easy access.
- Set Your Export Settings: This is where all the adjustments you made earlier come into play. Make sure everything is set as you intended.
- Click Export: Once you’re satisfied with your choices, hit the “Export” button. You’ll see a progress bar, and soon your photos will be ready!
It's akin to seeing your kids head off to school brimming with excitement and expectations. Every snapshot holds a fragment of your soul poised to leave its imprint on the universe.
Also Read This: Adding Images to a Picfair Album: What You Need to Know
Creating a Stunning Behance Project
Once your pictures are all set and prepped for sharing, it's time to embark on an impressive project over at Behance. This presents an opportunity to display your craftsmanship in the most favorable way. I can still recall the mix of nerves and excitement I felt when I launched my very first project on Behance, as I couldn't wait to unveil my designs to a worldwide audience.
Here are some ideas to help you make your project really shine.
- Choose a Compelling Title: Your project title should reflect the essence of your work. Something catchy can draw viewers in!
- Write an Engaging Description: Share the story behind your photos. What inspired you? What emotions do you want to convey? Personal anecdotes can create a deeper connection.
- Organize Your Images: Arrange your photos in a way that tells a story. You can group similar images together or create a flow that guides viewers through your creative process.
- Use High-Quality Thumbnails: Make sure your project cover image is eye-catching. It’s the first thing people will see, so make it count!
The moment I unveiled my project an overwhelming rush of excitement surged through me. It was thrilling to share my creation with others and feel a sense of connection to a broader network of fellow artists. Keep in mind that your project reflects your unique artistic expression—so dont hold back, let it glow!
Also Read This: How to Use Behance Effectively
Uploading Your Exported Photos to Behance
After all the effort you’ve invested in refining and exporting your pictures the thrill of sharing them on Behance is truly something special. I can still recall the mix of excitement and anxiety I felt when I pressed that “Upload” button for the time. It’s akin to sending your little one off to school, for the first time filled with optimism and a touch of apprehension about how theyll be welcomed.
Uploading your exported pictures is a simple task, but getting it right is crucial to leave a lasting impact. Here are some tips to ensure a seamless upload.
- Log into Your Behance Account: If you don’t have an account yet, creating one is quick and easy. Once logged in, click on the “Create a Project” button.
- Select Your Photos: Click on the “Upload Files” option. You can choose multiple images at once, which saves time.
- Organize Your Uploads: As you upload, you can rearrange your images. Think of the order as a story—what do you want to share first?
- Add Captions: This is your chance to add context to each image. A well-written caption can enhance the viewer’s understanding and connection to your work.
- Preview Your Project: Before you hit publish, take a moment to preview how everything looks. This is your chance to make adjustments.
- Publish: When you’re satisfied, hit the “Publish” button and share your project with the world!
When I released my work for the time I felt a surge of pride. It was akin to stepping onto a stage to unveil my tale to an eager crowd. Cherish that sensation; it marks a momentous tribute to your artistic flair!
Also Read This: Design Airbnb Manuals with Canva Airbnb House Manual Template
Best Practices for Showcasing Your Work on Behance
With your project now up and running it’s crucial to consider how to present it in the best light. Behance offers a space for showcasing creativity but making a lasting impression takes some thought. Through my experiences I’ve picked up some tips that can enhance the impact of your project on its audience.
Here are some tips to elevate your showcase:
- High-Quality Images: Always upload images at the highest quality possible. Blurry or pixelated photos can detract from your overall presentation.
- Create a Consistent Theme: Whether it’s color palettes, styles, or subjects, maintaining consistency can tie your project together beautifully.
- Engage with Your Audience: Respond to comments and messages. Engaging with viewers can foster a sense of community and encourage others to appreciate your work.
- Utilize Tags Wisely: Use relevant tags to help others find your work. Think about keywords that best describe your project.
- Regularly Update Your Portfolio: Keep your Behance profile fresh by adding new projects. This shows you’re active and continuously creating.
Looking back on my journey, I truly believe that dedicating moments to present your creations can foster deeper connections. Each endeavor presents a chance to engage with people and share your story!
Also Read This: Maximize Your Contribution by Adding Photos to Adobe Stock from Lightroom
Frequently Asked Questions
While exploring the realm of Behance I frequently encountered moments of curiosity. This platform can be a bit daunting initially but having the answers to inquiries can greatly enhance your journey. Here are some commonly asked questions that I think will be beneficial for you.
- What file formats can I upload to Behance? Behance supports various formats, including JPEG, PNG, GIF, and even video formats like MP4. Make sure your images are in a format that maintains quality!
- How do I promote my Behance project? Share your project on social media platforms, or consider engaging in relevant groups and communities to spread the word.
- Can I delete or edit my project after publishing? Yes, you can edit your project anytime. Simply go to your project and select “Edit” to make changes.
- How do I make my project stand out? Use a captivating cover image, write engaging descriptions, and ensure your layout is visually appealing.
- Is there a way to track views and likes on my projects? Yes, Behance provides analytics for your projects, helping you understand what resonates with your audience.
Discovering the answers to these inquiries was like shedding a burden. Embrace your thirst for knowledge and dont hold back from delving deeper into the platform to uncover more insights!
Wrapping Up Your Lightroom to Behance Journey
As I take a moment to think about my path from using Lightroom to showcasing my work on Behance I can't help but feel proud of what I've accomplished. It's not merely about the images you capture; it's about the narratives you weave and the bonds you establish throughout the journey. Sharing your creations on platforms such as Behance can be an enriching experience that leads to fresh possibilities, constructive feedback and a lively community of like minded artists.
Based on my personal journey I’ve come to realize that the creative process goes beyond just hitting that upload button. Here are a few insights that have contributed to my growth as an artist.
- Stay Open to Feedback: Engaging with comments and critiques can be daunting, but it’s a valuable way to learn and improve. I once received feedback that completely shifted my perspective on a project, and I’m grateful for it.
- Keep Evolving: Your style will evolve over time. Embrace this change; it’s a natural part of your artistic growth. I often look back at my earlier work and see how far I’ve come.
- Network and Collaborate: Behance is not just a portfolio; it’s a community. Reach out to other artists, collaborate on projects, and share ideas. These connections can lead to exciting new ventures.
- Document Your Progress: Keep a record of your creative journey. It’s fulfilling to look back and see how much you’ve learned and how your work has matured.
As you conclude your transition from Lightroom to Behance keep in mind that this marks merely the start of your path. Each project presents a chance to showcase your individuality and forge connections with like minded individuals who share your love for artistry. Take pride in your successes gain insights from your encounters and above all continue to create!