As a creative sharing your work is equally important as creating it. Behance is an excellent platform for artists to display their skills and connect with a larger audience. I still recall the moment I first uploaded my creations to Behance; it was like stepping into a worldwide art gallery. However before unveiling your masterpieces you must export them from Photoshop. This step is vital as it guarantees that your artwork appears at its best on both desktops and mobile devices. Choosing the export method can greatly improve the quality of your presentation. So lets explore how to get it right!
Preparing Your Photoshop File for Export
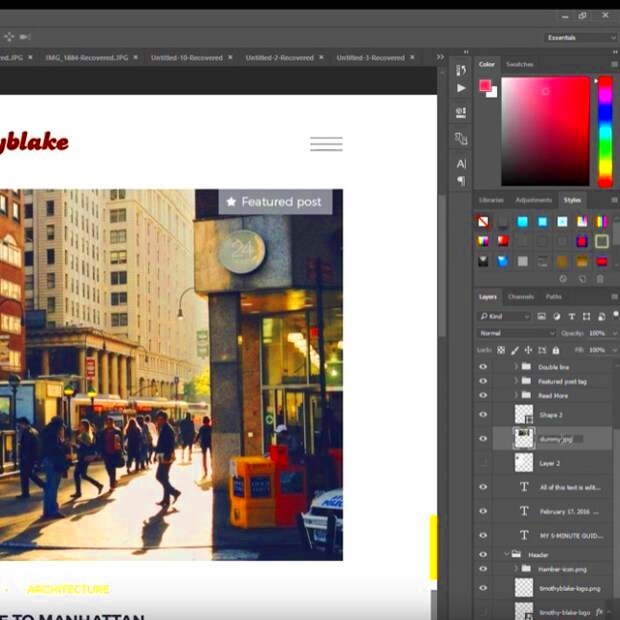
Before you click that export button, it’s crucial to ensure your Photoshop file is ready. Here’s a walkthrough to help you out:
- Organize Your Layers: Make sure your layers are clearly labeled and organized. This will make it easier to make adjustments if necessary.
- Check Your Canvas Size: Ensure your canvas size matches the dimensions you want for your Behance project. This helps in maintaining the aspect ratio when exporting.
- Flatten the Image (If Necessary): If your artwork doesn’t require individual layers, flattening can reduce file size and simplify the export process.
- Color Settings: Use RGB color mode for vibrant colors online. It makes a noticeable difference in how your artwork appears on screens.
While these actions may appear insignificant they play a crucial role in ensuring an export procedure. I discovered this through experience when I had to redo a project due to the disarray of my layers!
Also Read This: Effective Ways to Lose Shoulder Fat with Dailymotionâs Top Workout Tips
Selecting the Right Export Settings
With your file all set, it’s time to choose the export settings that will make your artwork stand out on Behance. Here are some factors to keep in mind.
- File Format: Choose the appropriate file format based on your project type. JPEG is great for photos, while PNG is better for graphics with transparency. If you have text in your project, keep that in mind as well.
- Quality Settings: Always opt for maximum quality when exporting images. You might be tempted to reduce the file size, but this can affect the final presentation.
- Resolution: A resolution of 72 dpi is standard for web images. However, if your artwork has intricate details, consider exporting at a higher resolution for clarity.
Picking the perfect settings can make all the difference between an impressive display and a mediocre one. Just tweaking the quality settings has breathed life into my creations. It truly transforms the game!
Also Read This: Understanding LinkedIn Video Length Limits
Exporting Your Artwork from Photoshop
Now its time to get to the fun part exporting your creation from Photoshop! This is when all your efforts turn into a digital file that can be shared with everyone. I remember my first export vividly; I was both anxious and excited to unveil my artwork. It felt like releasing a part of my soul, into the cosmos. To make sure the export goes smoothly just follow these steps.
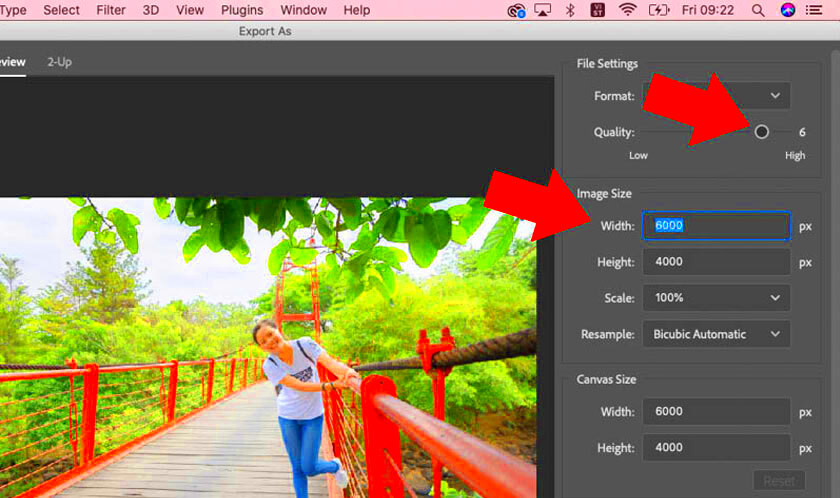
- Access the Export Menu: Navigate to File > Export. Here, you'll find various options like Export As and Quick Export as PNG.
- Choose Your Format: Select the file format that best suits your artwork. JPEG is perfect for photos, while PNG is ideal for images that require transparency.
- Adjust Settings: If you're using Export As, you can tweak the dimensions, quality, and format settings. Always keep quality at the forefront!
- Save Your File: Choose a destination on your computer where you can easily find the exported file later. I often create a dedicated folder for my Behance projects.
When you press that export button, pause for a second to appreciate what you've made! It really is a rush. Just keep in mind that exporting larger files may take a while, so hang in there.
Also Read This: Understanding the Rarity and Causes of Voluntary Ear Rumbling
Uploading Your Artwork to Behance
Once you have your artwork ready to go, it's time to showcase it on Behance. I get that uploading can seem a bit intimidating at first, but believe me it's a process. I used to get those nervous butterflies in my stomach whenever I hit that upload button but now it's become second nature for me. So here's a simple guide to help you kick things off,
- Log into Your Behance Account: If you don’t have an account yet, creating one is easy and free.
- Start a New Project: Click on the Create a Project button. This is where the magic begins!
- Upload Your Files: Drag and drop your exported files or use the upload button. You can upload multiple files at once, which is a real time-saver.
- Arrange Your Images: Once uploaded, you can rearrange the order of your images. Think about the flow of your project—what story do you want to tell?
Keep in mind that the more energy you invest in your presentation the stronger impact it will have on your audience. I make it a point to weave a narrative into my work to give it a unique flair.
Also Read This: Has Rey Mysterio Won a Royal Rumble
Adding Project Details on Behance
With your artwork now in place its time to include those important project specifics. This is an opportunity to engage with your audience and offer some background on your creation. I like to view this part as welcoming someone into my imaginative realm. Here are the steps to accomplish that,
- Title Your Project: Choose a captivating title that reflects your work. This is the first thing people will see, so make it count!
- Write a Description: Describe your project, including your inspiration, process, and any challenges you faced. Be genuine and let your personality shine through.
- Add Tags: Use relevant tags to help people find your work. Think about what keywords a viewer might search for.
- Choose a Cover Image: Select an eye-catching cover image that represents your project. This image often acts as the first impression of your work.
After you’ve inputted all the information take a breather to review your project. I tend to feel a bit sentimental during this part witnessing everything unite. Lastly click on publish and see your creation carve out its spot in the universe!
Also Read This: YouTube TV vs Fubo Which Streaming Service is Better for You
Promoting Your Work on Behance
So you've shared your art on Behance now comes the exciting part promoting it! I still recall the rush of nerves and thrill when I sent my project link to loved ones for the time. It was like taking the spotlight and unveiling my creativity to everyone. Here are some clever ways to make your creations stand out.
- Engage with the Community: Behance is a social platform, so interact with other artists. Leave thoughtful comments on their work and appreciate their projects. Building relationships can lead to more visibility for your own work.
- Utilize Social Media: Share your Behance projects on platforms like Instagram, Facebook, and Twitter. I often create teaser posts that link back to my Behance portfolio, encouraging my followers to check it out.
- Join Groups and Challenges: Participate in Behance groups and challenges. These can provide exposure and help you connect with like-minded creatives. I’ve made wonderful connections this way!
- Use High-Quality Images: Always upload high-resolution images. A visually striking project is more likely to capture attention. I’ve noticed that when I invest in quality presentation, my engagement spikes.
Keep in mind that it takes time and energy to promote your work but the rewards are worth it. Seeing others enjoy your art is an incredibly satisfying experience for any artist.
Also Read This: How to Directly Download Videos from Dailymotion
Frequently Asked Questions
As you begin your adventure on Behance you may find yourself wondering about a few things. I know I had my share of questions when I first got started! Here are some frequently asked questions that could assist you.
| Question | Answer |
|---|---|
| Can I edit my project after publishing? | Absolutely! You can always go back and make changes, add new images, or update details. |
| How can I delete a project? | Simply go to your project page, click on the settings icon, and select delete. It’s that easy! |
| Is there a limit to the number of projects I can upload? | No, you can upload as many projects as you want. Just ensure that each project maintains quality. |
| Can I download other artists' work? | Respect copyright laws. Always ask for permission before downloading or using someone else's artwork. |
If you grasp the ins and outs of Behance it can enhance your overall experience. Feel free to connect with the community for any additional inquiries you may have!
Wrapping It Up
As we conclude this guide I trust that you now have a greater sense of confidence in exporting your art from Photoshop to Behance and promoting it successfully. Sharing your creativity with others is an adventure, brimming with opportunities for growth and forging connections. I vividly remember the moment I received feedback on my work; it sparked a fire, within me that continues to burn brightly to this day.
Every artist has their own distinct voice and narrative to share. Celebrate your uniqueness and dont hesitate to show it off. Whether youre a veteran in the field or just beginning your journey Behance offers an amazing space to connect with other creative minds and get noticed. So dont hold back share your artwork interact with others and let your imagination brilliance shine through! Your next big break could be just a click, away.