Cutting your own side bangs at home can be both fun and a little daunting! With the right tools and techniques, you can achieve a stylish new look without the need for a salon visit. A tutorial on Dailymotion can guide you through the process, making it easier to follow along. Whether you want subtle face-framing layers or bold, dramatic bangs, we’ve got you covered. Let’s get started on this hair adventure!
Gathering Your Supplies
Before you dive into cutting your side bangs, it’s essential to gather all the necessary supplies. Having everything ready will make the process smoother and help you avoid any last-minute scrambles. Here’s a list of what you’ll need:
- Sharp Hair Cutting Scissors: Invest in a good pair of scissors specifically designed for hair cutting. Dull scissors can lead to uneven cuts.
- Fine-Toothed Comb: This will help detangle your hair and section it off neatly before cutting.
- Hair Clips: Use these to secure the rest of your hair away while you focus on your bangs.
- Mirror: A good-sized mirror is crucial. Ideally, you want one that allows you to see the front and sides of your hair.
- Spray Bottle with Water: Keeping your hair slightly damp can make it easier to cut and less frizzy.
- Hair Measuring Tool (optional): If you want precise measurements, a hair measuring tool can be handy.
Once you have all your supplies gathered, you’ll feel more prepared and confident to tackle the task of cutting your side bangs at home. Ready to move on to the next step? Let’s go!
Also Read This: How to Accept a Family Invitation for YouTube Premium
Preparing Your Hair
Before diving into the cutting process, it’s essential to prepare your hair properly. Proper preparation ensures that you achieve the best results and avoid any mishaps. Here’s how you can get started:
- Wash and Dry: Begin by washing your hair with a gentle shampoo and conditioner. This removes any product buildup, making it easier to cut. Ideally, start with slightly damp hair, as it’s easier to manage and style.
- Detangle: Use a wide-tooth comb or a brush to remove any knots. Start from the ends and work your way up to prevent breakage.
- Section Your Hair: Create a clear separation for your bangs. Use hair clips to keep the rest of your hair out of the way. You can use a comb to section off the front portion where you want your bangs to be.
- Choose the Right Tools: Make sure you have sharp hair scissors or shears. Dull scissors can create split ends and uneven cuts. A fine-toothed comb and a mirror are also essential for a precise cut.
- Decide on the Length: Before cutting, decide how long you want your bangs. A good rule of thumb is to start longer and gradually cut shorter, as you can always trim more off if needed.
Taking the time to prepare your hair properly sets the stage for a successful bang trim. Now that you’re ready, let’s move on to the exciting part: the cutting process!
Also Read This: Canva Image Cutting
Step-by-Step Cutting Process
Now that your hair is prepped and ready, it’s time to cut those bangs! Follow these steps carefully for the best outcome:
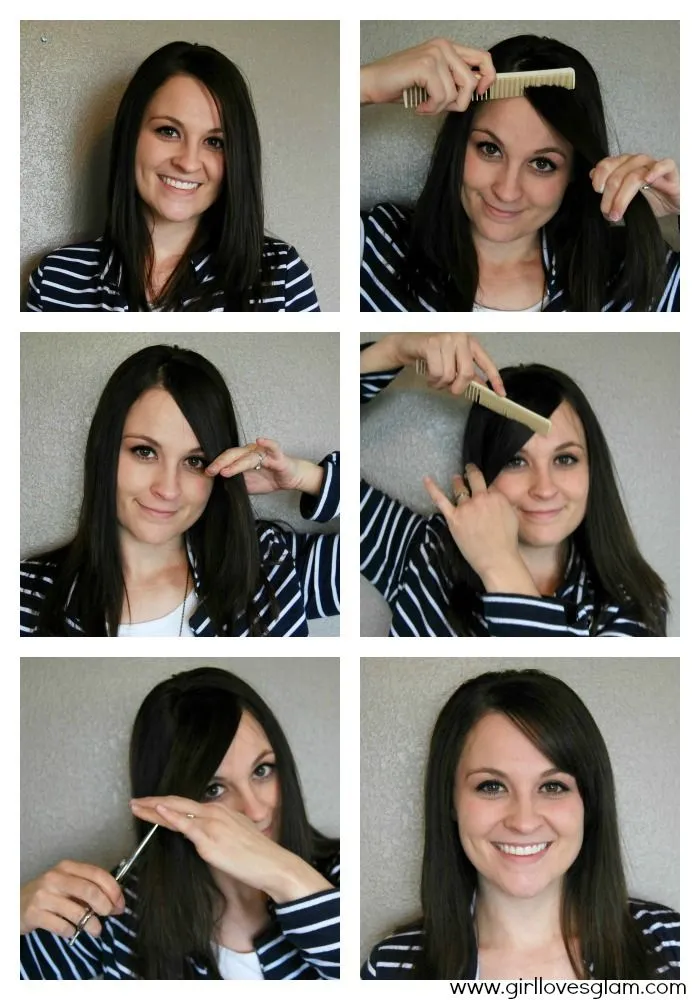
- Gather Your Hair: Using a comb, pull the section of hair you've chosen for your bangs forward. Make sure the section is even and not too thick—about 1-2 inches wide works well.
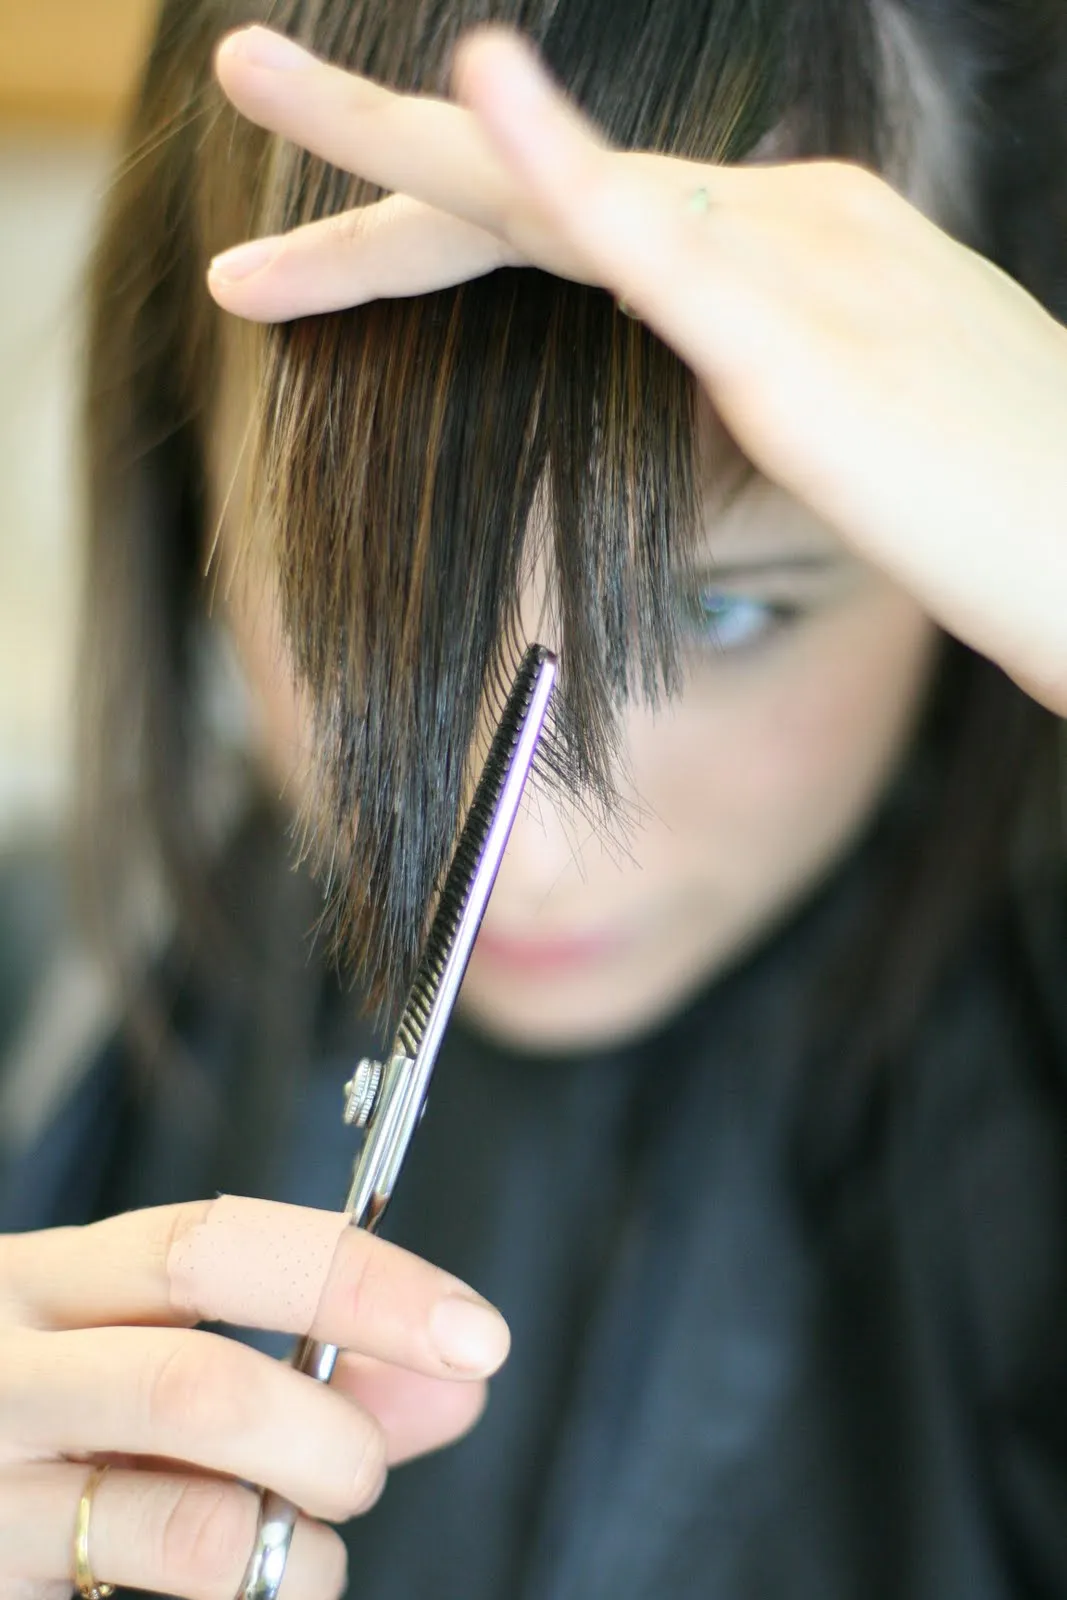
- Start with Snipping: Hold the scissors vertically and begin snipping the ends of your bangs. This technique creates a softer, more natural look compared to cutting straight across.
- Check Length: After the initial cut, check how the bangs look. You can always trim more if necessary, but it's difficult to add length back once it's cut.
- Refine the Shape: To get the desired shape, you can angle the scissors slightly as you cut. This helps to blend the bangs into the rest of your hair, creating a seamless look.
- Final Touches: Once you’re satisfied with the length and shape, give your bangs a light comb to remove any loose hairs. You might also want to style them using a blow dryer and round brush for added volume!
And there you have it! By following these steps, you’ll achieve beautiful side bangs that frame your face perfectly. Happy cutting!
Also Read This: Customize Your Slides Using Canva Slides Template
5. Styling Your New Side Bangs
Congratulations on successfully cutting your side bangs! Now, it’s time to style them to perfection. Styling your bangs can elevate your entire look, making them an exciting addition to your hairstyle. Here are some methods to try:
- Blow-Drying: Use a round brush while blow-drying to give your bangs volume. Start by parting your bangs and drying them from the roots to the tips.
- Flat Iron: For a sleek look, use a flat iron. Be sure to use a heat protectant spray first to avoid damage. Slide the flat iron gently through your bangs for a polished finish.
- Curling Iron: For soft, romantic waves, use a curling iron. Wrap sections of your bangs around the barrel, hold for a few seconds, then release for a bouncy effect.
- Texturizing Spray: A light texturizing spray can add some dimension and movement to your bangs. Simply spritz a little product onto your bangs and tousle them lightly with your fingers.
- Pinning Back: If you want a different look, try pinning your bangs back with some cute clips. This can create a chic, effortless vibe.
Experiment with these styles to find what works best for you. Don’t hesitate to mix things up; after all, bangs are all about fun and versatility!
Also Read This: Easy Guide to Uploading Your Photos to Getty Images
6. Tips for Maintaining Your Bangs
Maintaining your side bangs is crucial to keeping them looking fresh and stylish. Here are some handy tips to ensure your bangs stay fabulous:
- Regular Trims: Aim for a trim every 4-6 weeks to keep your bangs in shape. This prevents them from becoming too long or unruly.
- Washing: Don’t wash your bangs every day. Instead, focus on washing your hair and refreshing your bangs with dry shampoo in between washes to avoid excess oil.
- Styling Products: Use lightweight styling products to avoid weighing your bangs down. Look for sprays or creams that provide hold without making your hair stiff.
- Heat Protection: Always use heat protectant when using styling tools. This helps keep your bangs healthy and prevents split ends.
- Adjust Your Part: If your bangs start to look flat or lifeless, try changing your part. A slight shift can add volume and a fresh look.
By following these tips, you’ll keep your side bangs looking sharp and stylish, making every day a good hair day!
How to Cut Side Bangs at Home with a Step-by-Step Dailymotion Tutorial
Cutting your own side bangs at home can be a fun and rewarding experience. With the right tools and techniques, you can achieve a professional-looking style without the salon price tag. This guide will walk you through the process, ensuring you get the perfect side bangs that frame your face beautifully.
Before you start, gather the following tools:
- Sharp hair cutting scissors
- Comb
- Hair clips
- Mirror
- Water spray bottle
Follow these simple steps to cut your side bangs:
- Prepare Your Hair: Start with clean, dry hair. If your hair is curly or wavy, consider straightening it first for more accurate cutting.
- Section Your Hair: Use the comb to create a triangular section at the front of your hair where you want the bangs. Clip the rest of your hair away.
- Wet Your Bangs: Lightly mist the section with water to make it easier to cut.
- Cut at an Angle: Hold the scissors vertically and cut the bangs at an angle. This technique helps create a softer, more blended look.
- Check for Evenness: After your first cut, unclip the rest of your hair and check to see if your bangs are even. Make adjustments as necessary.
- Style: Once satisfied with the length and shape, style your bangs using a round brush and hairdryer for a polished finish.
For a more visual guide, consider watching a Dailymotion tutorial that demonstrates these steps in action. This can provide additional tips and tricks for achieving the best results.
Conclusion: Cutting side bangs at home can be easy and enjoyable if you follow the right steps and use the proper tools. With practice, you'll become more confident in your hair cutting skills, giving you the freedom to change your look whenever you desire.