Making your own eyeliner at home can be a fun and rewarding experience. Not only does it allow you to customize the color and texture to suit your personal preferences, but it also gives you complete control over the ingredients you use. This way, you can create a product that's not only effective but also safe for your skin. So, let’s dive into the benefits of homemade eyeliner and why you might want to give it a try!
Benefits of Homemade Eyeliner
Creating your own eyeliner comes with a plethora of benefits that make it a worthwhile endeavor. Here are some key advantages:
- Natural Ingredients: By making your own eyeliner, you can ensure that only natural, non-toxic ingredients go into it. This is especially important for those with sensitive skin or allergies.
- Customization: You have the freedom to choose your desired color, texture, and finish. Want a matte black? Or perhaps a shimmery bronze? It’s all up to you!
- Cost-Effective: Store-bought eyeliners can be pricey, especially if you’re looking for high-quality products. Homemade eyeliner can save you money in the long run.
- Eco-Friendly: Making your own cosmetics reduces packaging waste and allows you to choose sustainable ingredients, helping the environment.
- Fun and Creative: Crafting your own eyeliner can be a creative outlet. You can experiment with different formulas and colors, making the process enjoyable.
In summary, homemade eyeliner not only provides a safer and more personalized product but also offers a delightful experience of creativity and sustainability. So why not give it a shot? Your eyes will thank you!
Also Read This: A Scampagnata Alamia e Sperandeo – A Unique Photo Series on Alamy
3. Ingredients Needed
Creating your own eyeliner at home is not only a fun and creative project but also a great way to customize your beauty routine. To get started, you’ll need a few simple ingredients that you probably already have in your kitchen or can easily find at your local store. Here’s a handy list of what you’ll need:
- Activated Charcoal or Cocoa Powder: This will be the main color component of your eyeliner. Activated charcoal gives a deep black shade, while cocoa powder can provide a softer brown hue.
- Carrier Oil: You can choose from oils like coconut oil, almond oil, or olive oil. This will help to bind the powder and create a smooth consistency.
- Beeswax or Candelilla Wax: This is optional, but adding a wax will help your eyeliner stay put longer and ensure it has a nice, creamy texture.
- Vitamin E Oil: This is great for preserving your eyeliner and also adds nourishment to your skin.
- Small Mixing Bowl: You’ll need a bowl to mix your ingredients together.
- Small Container: To store your homemade eyeliner, you can use an old eyeliner pot or a small glass jar.
With these ingredients on hand, you’re all set to make your own eyeliner. It’s a straightforward process that allows you to experiment with different shades and textures. So, let’s get into the nitty-gritty of how to whip it all together!
Also Read This: How Much Money Do You Earn on Shutterstock
4. Step-by-Step Instructions
Now that you have all your ingredients ready, let’s dive into the step-by-step process of making your very own eyeliner. It’s easier than you might think!
- Measure Your Ingredients: Start by measuring out 1 tablespoon of activated charcoal or cocoa powder. If you’re making a colored eyeliner, feel free to mix in a bit of eye-safe mica powder for some shimmer.
- Add the Carrier Oil: Next, add 1 teaspoon of your chosen carrier oil to the powder. This will help create a smooth paste. You can adjust the amount of oil depending on how thick or thin you want your eyeliner to be.
- Incorporate the Wax (if using): If you want a longer-lasting formula, melt 1 teaspoon of beeswax or candelilla wax in a microwave-safe bowl. Once melted, mix it into your paste. This will give your eyeliner a sturdier consistency.
- Mix Thoroughly: Use a small spatula or a spoon to mix the ingredients well until you achieve a smooth and creamy texture. Make sure there are no lumps!
- Add Vitamin E Oil: Finally, stir in a few drops of Vitamin E oil. This not only helps to preserve the eyeliner but also adds a bit of nourishment for your skin.
- Transfer to Container: Carefully transfer your mixture into a small container. Allow it to cool and set if you used wax.
And there you have it! Your homemade eyeliner is ready to use. Feel free to experiment with different colors and textures by adjusting the ingredients. Enjoy your new creation!
Also Read This: How to View Downvotes on YouTube Videos
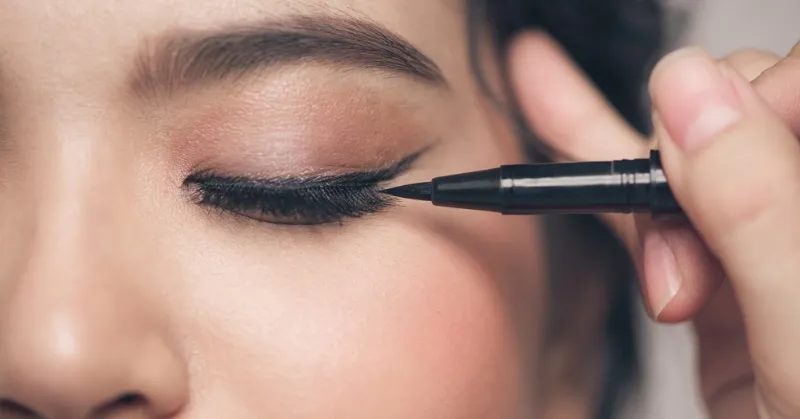
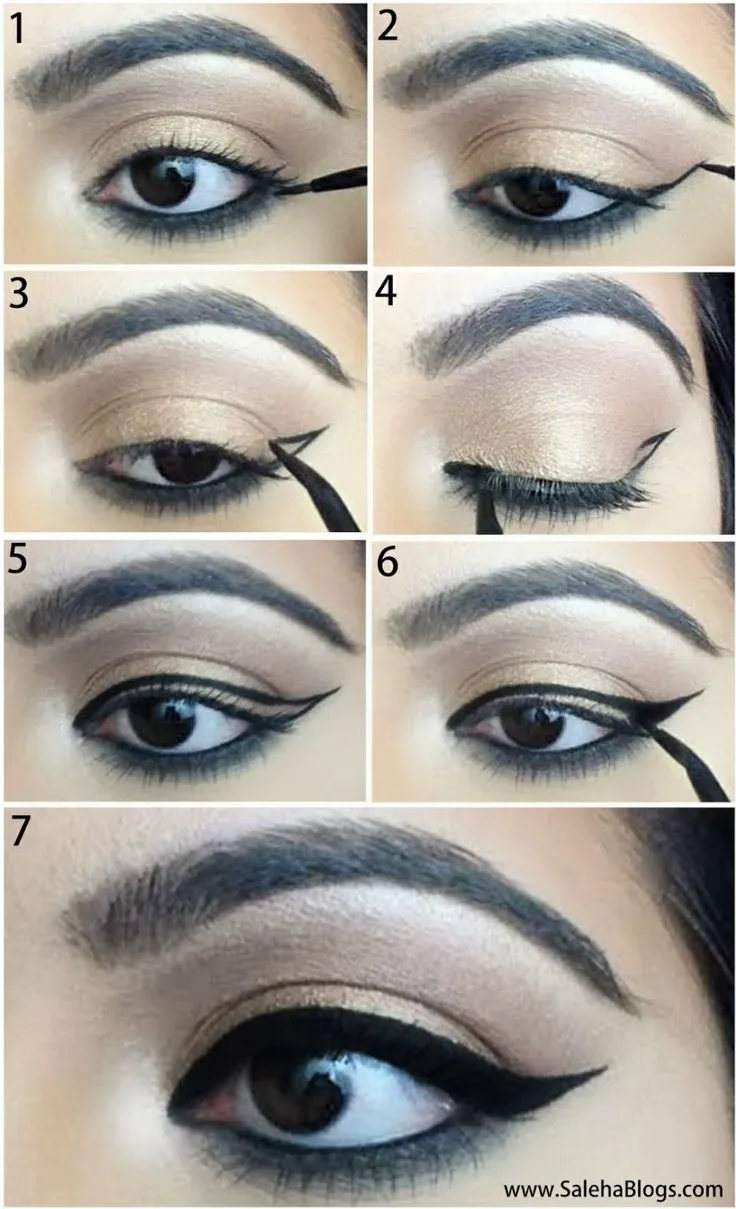
5. Tips for Application
Applying eyeliner can be a bit tricky, especially if you’re new to it or trying a homemade version. But don’t worry! I’ve got some handy tips that will make the process smoother and help you achieve that perfect look.
- Start with Clean Eyes: Always begin with a clean face. Remove any excess oil or makeup residue to ensure your eyeliner adheres well.
- Choose the Right Tool: Depending on the consistency of your homemade eyeliner, you might want to use a fine brush, a felt-tip applicator, or even a cotton swab for more precision.
- Practice Your Technique: If you’re going for a winged look, practice on the back of your hand first. This helps you get the feel for the pressure and angle you’ll need.
- Use Small Strokes: Instead of trying to draw a straight line in one go, use small, short strokes. This approach allows for more control and helps you avoid mistakes.
- Fix Mistakes Quickly: If you make a mistake, don’t panic! Use a clean brush or a cotton swab dipped in makeup remover to gently correct it.
- Set with Powder: If you find that your eyeliner tends to smudge, consider setting it with a matching eyeshadow. This can help keep it in place all day.
With these tips, you’ll be on your way to mastering your eyeliner application. Remember, practice makes perfect, so don’t hesitate to experiment!
Also Read This: Understanding Local Channel Issues on YouTube TV and How to Fix Them
6. Storage and Shelf Life
Once you've created your fantastic homemade eyeliner, you might be wondering how to store it and how long it will last. Proper storage is crucial to maintain its quality and effectiveness.
| Type of Eyeliner | Storage Method | Shelf Life |
|---|---|---|
| Liquid Eyeliner | Store in a cool, dry place away from sunlight. | 1-2 months |
| Gel Eyeliner | Keep in an airtight container, preferably in the fridge. | 2-3 months |
| Pencil Eyeliner | Sharpen regularly and store in a cool place. | 6 months to 1 year |
Pro Tip: Always label your homemade eyeliner with the date you made it. This way, you’ll know when it’s time to toss it out. If you notice any changes in texture, color, or smell, it’s best to err on the side of caution and dispose of it.
By following these storage tips, you can ensure your eyeliner remains effective and safe to use for as long as possible. Happy crafting!
How to Create Your Own Eyeliner at Home
Creating your own eyeliner at home can be a fun and rewarding experience. Not only can you customize the color and texture, but you also have control over the ingredients, making it a healthier choice for your skin. Below are some simple recipes and tips to help you make your own eyeliner.
Ingredients You Will Need
- For Powdered Eyeliner:
- Activated charcoal or cocoa powder (for color)
- Arrowroot powder (for texture)
- Essential oil (like lavender or tea tree for preservation)
- For Gel Eyeliner:
- 1 tablespoon of activated charcoal or cocoa powder
- 1 teaspoon of aloe vera gel
- 1/2 teaspoon of coconut oil
- 1/2 teaspoon of beeswax (optional for a firmer texture)
Instructions
Follow these easy steps to create your eyeliner:
- For Powdered Eyeliner:
Mix the activated charcoal or cocoa powder with arrowroot powder in a small bowl until you achieve the desired color intensity. Add a few drops of essential oil to the mixture and stir well.
- For Gel Eyeliner:
In a small saucepan, combine the activated charcoal, aloe vera gel, and coconut oil. Heat gently until everything is melted and well combined. Remove from heat and let it cool slightly before applying.
Storage Tips
Store your homemade eyeliner in a clean, airtight container. Keep it in a cool, dry place to prolong its shelf life.
Benefits of Homemade Eyeliner
- Customizable colors and textures.
- Free from harmful chemicals and preservatives.
- Environmentally friendly as you can use natural ingredients.
By creating your own eyeliner at home, you not only save money but also ensure that you're using safe and natural ingredients on your skin. Enjoy experimenting with different colors and formulations!