Welcome to the colorful world of Rainbow Loom! If you’re looking to elevate your bracelet-making skills, the Starburst Design is a fantastic project to tackle. This vibrant design not only showcases your creativity but also impresses friends and family with its intricate pattern. Whether you’re a beginner or have some experience under your belt, this guide will walk you through each step, making the process enjoyable and rewarding. Let’s get started on crafting your stunning Starburst bracelet!
Materials Needed
Before diving into the crafting process, it’s essential to gather all the necessary materials. Having everything at your fingertips ensures a smooth and enjoyable experience. Here’s what you’ll need:
- Rainbow Loom Kit: The loom itself is crucial. Ensure you have the standard or mini loom, depending on your preference.
- Rubber Bands: Choose a variety of colors, as the Starburst design is all about vibrancy! You’ll need a good mix—some popular choices include:
- Neon Pink
- Electric Blue
- Bright Yellow
- Vivid Green
- Hook Tool: This handy tool helps in pulling and securing rubber bands during the creation process.
- Clip or C-Clip: Needed to secure the ends of your bracelet once finished.
- Work Surface: A flat surface to keep your loom steady while you work.
- Optional Accessories: Consider using beads or charms if you want to add an extra flair to your design!
Having all these materials ready will set you up for success. Now that you're equipped, let’s move on to the fun part—creating your Starburst design!
Also Read This: How to Chromecast Rumble Content to Your TV
Step-by-Step Instructions
Creating the Rainbow Loom Starburst design is a fun and rewarding experience. Let’s dive into the step-by-step process to help you craft this beautiful piece!
- Gather Your Supplies: You will need:
- Rainbow Loom or any compatible loom
- Rubber bands (various colors)
- Hook tool
- Clip or S-clips
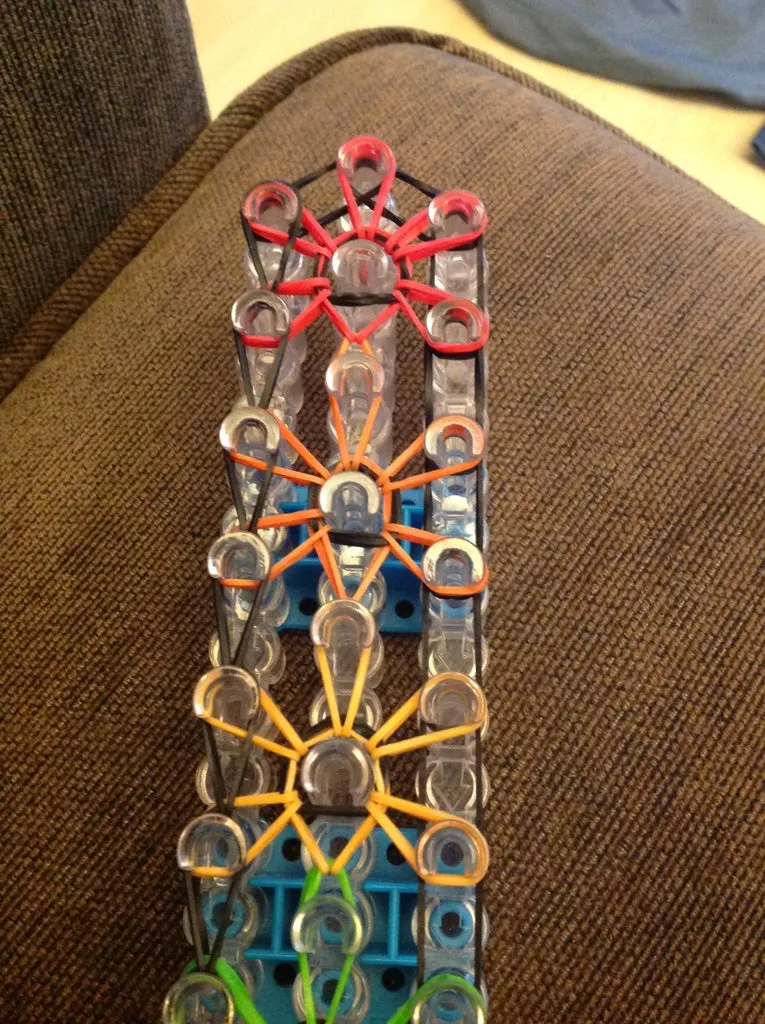
- Setting Up the Loom:
Position your loom with the arrow pointing towards you. This will be your working orientation.
- Start Placing Bands:
Begin by placing the first rubber band on the first peg, stretching it diagonally to the second peg. Continue placing bands in a star-like pattern until you've covered the first layer. Use different colors for a stunning effect!
- Building Layers:
Once your first layer is complete, continue adding rubber bands in a similar pattern, making sure to keep the layers tight and in alignment. The more layers you add, the more pronounced the starburst effect will be.
- Hooking the Bands:
Using your hook tool, gently pull the bottom rubber bands over the top ones, starting from the outermost layer and working your way inwards. This step requires patience, as it sets the foundation of your design.
- Finishing Touches:
Once you’ve hooked all the bands, secure the end with a clip or S-clip. Carefully remove your creation from the loom and give it a final stretch!
Also Read This: Link Your Website to Your Dailymotion Channel for Effective Promotion
Tips for Perfecting Your Starburst Design
Now that you know how to create the Starburst design, here are some handy tips to ensure your piece turns out perfectly!
- Choose Quality Bands: Not all rubber bands are created equal. Opt for high-quality, thick bands to avoid breakage during the process.
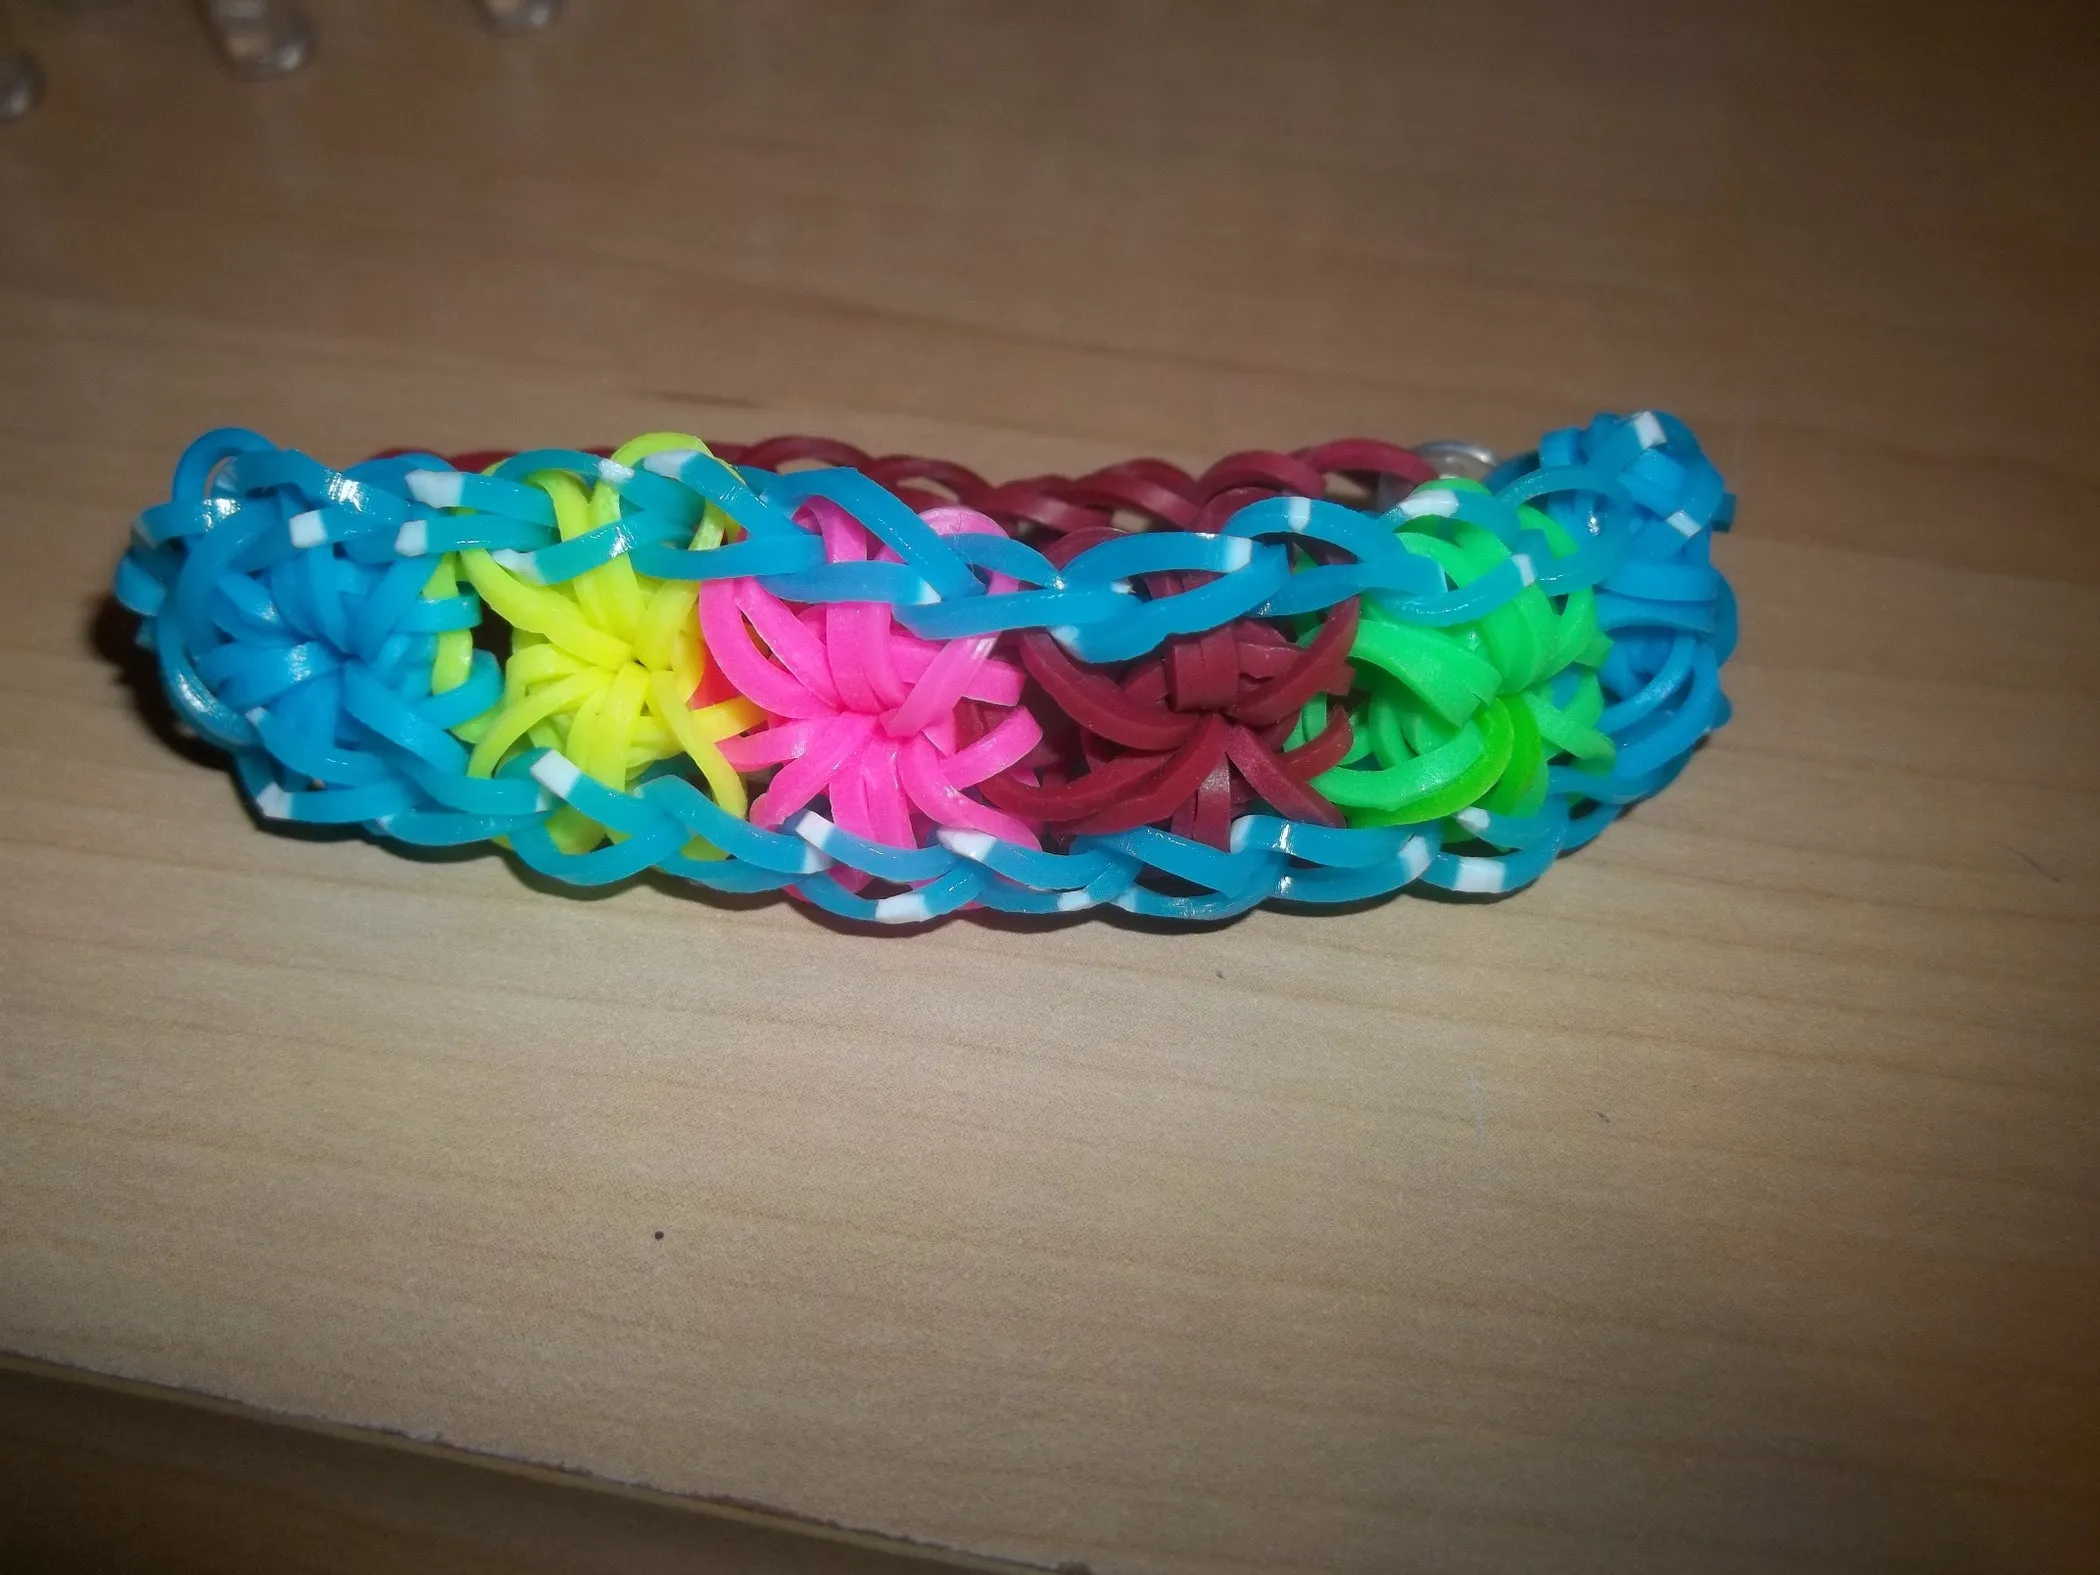
- Color Coordination: Plan your color scheme ahead of time. Using contrasting colors can make your design pop! For instance, a bright pink with a sunny yellow can create a cheerful look.
- Maintain Tension: Keep a consistent tension on the rubber bands as you place them. If they're too loose, your design will look sloppy; too tight, and they may break.
- Practice Hooking Technique: The hooking step is critical. Practice pulling the bands gently to avoid snapping them. A steady hand goes a long way!
- Experiment: Don’t be afraid to try different patterns and color combinations! Each design will be unique, and it’s all about expressing your creativity.
By following these steps and tips, you’ll be well on your way to creating stunning Rainbow Loom Starburst designs that will impress your friends and family!
Also Read This: How to Download Videos from Facebook, Instagram, and YouTube
Common Mistakes to Avoid
Creating the Rainbow Loom Starburst Design can be a delightful experience, but it's easy to make a few blunders along the way. Here are some common mistakes to watch out for:
- Not Using the Right Tension: One of the most frequent issues is pulling the bands too tightly or too loosely. If they're too tight, it can make your design stiff and difficult to finish. On the other hand, if they're too loose, the bracelet may fall apart. Aim for a happy medium!
- Skipping Steps: In the excitement of crafting, it can be tempting to skip a step. This often leads to uneven designs or parts that just don’t connect properly. Always double-check your instructions before moving on.
- Using Worn-Out Bands: Old or stretched-out rubber bands can ruin the integrity of your design. Make sure to use fresh, unblemished bands for a vibrant and durable Starburst.
- Incorrect Hook Usage: If you're using a hook, ensure you're using the right technique to pull the bands. Many new loomers tend to pull the bands from the wrong side, which can create a tangled mess.
- Ignoring Color Patterns: The beauty of the Starburst Design lies in its colors. Ignoring the color placement can result in a less visually appealing piece. Plan your colors before you start!
Also Read This: Enhance Your Projects' Searchability on Behance with Effective Tagging
Conclusion
The Rainbow Loom Starburst Design is not just a fun project; it's a fantastic way to express your creativity and make something special. By following the steps carefully and avoiding common pitfalls, you’ll find that creating this design can be incredibly rewarding.
Remember, practice makes perfect. Don’t be discouraged if your first few attempts don’t turn out exactly as you envisioned. Every loom artist has been there! Embrace the learning process, and soon you'll be crafting stunning pieces with ease.
So gather your bands, grab your loom, and let your imagination run wild! You'll not only master the Starburst Design but also develop your unique style that reflects who you are. Happy looming!
How to Create the Rainbow Loom Starburst Design
The Rainbow Loom Starburst design is a vibrant and eye-catching creation that is perfect for both beginners and experienced loomers. This design showcases the beautiful patterns and colors that can be achieved with simple rubber bands and a loom. Follow this guide to create your very own Starburst bracelet!
What You’ll Need
- Rainbow Loom kit
- Assorted rubber bands (choose 3-4 colors)
- Hook tool
- Clip or C-clip to fasten the bracelet
Step-by-Step Instructions
- Setting Up the Loom: Place your loom in the vertical position with the arrows pointing towards you.
- Placing the Rubber Bands: Start by placing the first rubber band diagonally from the first peg on the left to the second peg on the right. Continue adding bands in this manner to create a starburst pattern.
- Creating the Starburst Effect: Use different colors for each layer to enhance the starburst effect. Alternate colors as you move down the loom.
- Adding More Layers: Repeat the diagonal placements and color changes until you reach the desired length of your bracelet.
- Using the Hook: Carefully use the hook to pull the bottom rubber bands over the top ones, creating a woven effect.
- Finishing Up: Once the bracelet reaches the desired length, secure it with a clip or C-clip.
Tips for Success
Here are some helpful tips to ensure your Starburst design turns out flawlessly:
- Use high-quality rubber bands to prevent breakage.
- Experiment with different color combinations for unique designs.
- Practice patience as you work through the steps.
Creating the Rainbow Loom Starburst Design can be a fun and rewarding experience. With just a few simple steps and some creativity, you can make a stunning bracelet that showcases your personal style.