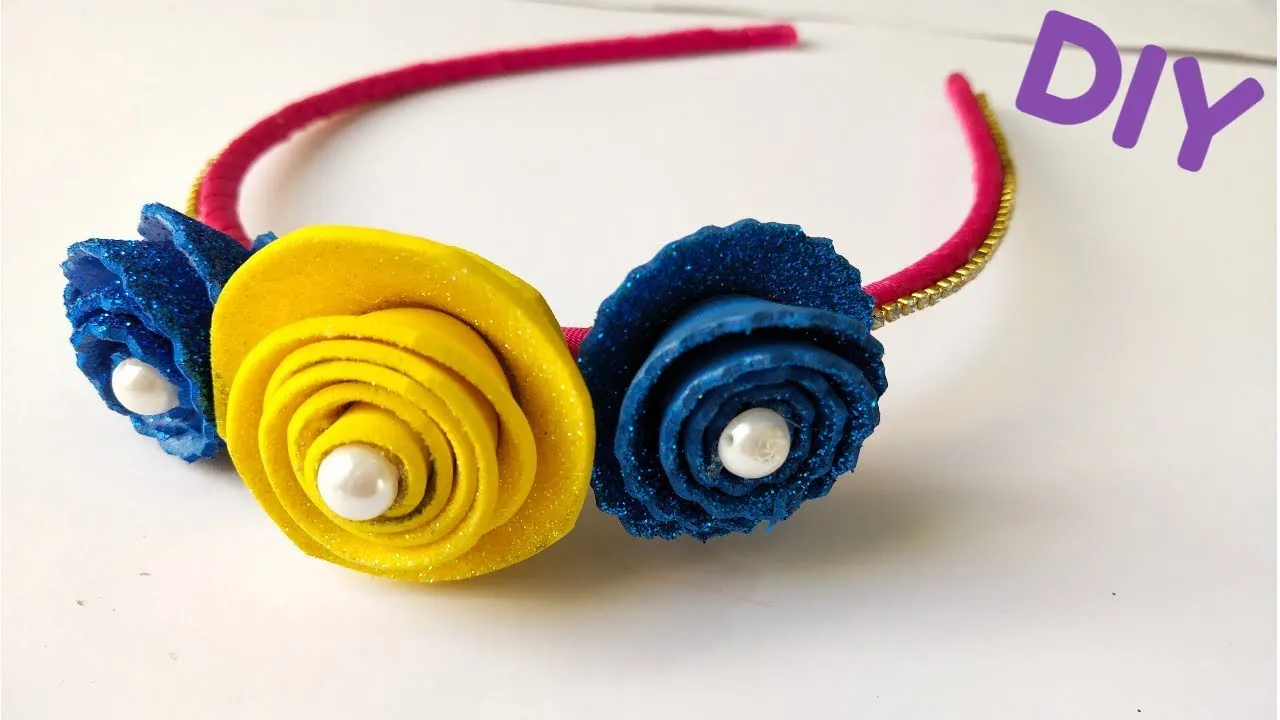
Creating your own hair bands with ribbons is not just a fun and creative activity; it’s a fantastic way to add a personal touch to your accessories. Whether you’re gearing up for a special event, looking to match an outfit, or simply wanting to express your unique style, homemade hair bands can be both practical and stylish. Plus, it’s a great way to recycle old materials or use up leftover craft supplies. In this guide, we’ll walk you through the materials you'll need and the steps to make beautiful ribbon hair bands that are sure to turn heads!
Materials Needed
Before diving into the craft, let’s gather all the necessary materials. Here’s a detailed list to help you get started:
- Ribbons: Choose ribbons in various colors, patterns, and widths. Satin, grosgrain, or even lace ribbons work beautifully. Aim for at least 1-2 yards per hair band.
- Hair Bands: You can use plain elastic hair ties or fabric-covered bands as a base.
- Scissors: A good pair of scissors will help you cut your ribbons cleanly.
- Hot Glue Gun: This is essential for attaching the ribbons securely. Make sure to have extra glue sticks on hand!
- Measuring Tape: To measure the right length of your ribbons and ensure they fit perfectly on the hair bands.
- Embellishments (Optional): Consider adding beads, flowers, or other decorative elements to enhance your hair bands.
- Fabric Sealer (Optional): If you’re using fabric ribbons, a fabric sealer can prevent fraying.
Having these materials ready will make the crafting process smooth and enjoyable. Now that you’re equipped with everything you need, let’s get crafting!
Also Read This: The Advantages of Choosing VectorStock for Professional Design Projects
3. Step-by-Step Instructions
Creating your own hair bands with ribbons is not only fun, but it also allows you to express your unique style. Let’s break down the process into easy-to-follow steps!
- Gather Your Materials:
- Wide ribbons (choose your favorite colors or patterns)
- Elastic band (1/4 inch wide works well)
- Scissors
- Hot glue gun (or needle and thread for a more secure option)
- Measuring tape
- Optional: beads, embellishments, or additional decorative elements
- Measure and Cut the Ribbon:
Decide how long you want your hair band to be. A common length is around 20 inches. Cut the ribbon accordingly, leaving extra for knotted ends if desired.
- Prepare the Elastic:
Cut a piece of elastic about 8-10 inches long. This will provide a snug fit for your hair band.
- Attach the Ribbon:
Using your hot glue gun, carefully glue one end of the ribbon to one end of the elastic. Ensure it’s secure and let it dry. Repeat this for the other side, wrapping the ribbon around the elastic, and securing it with glue.
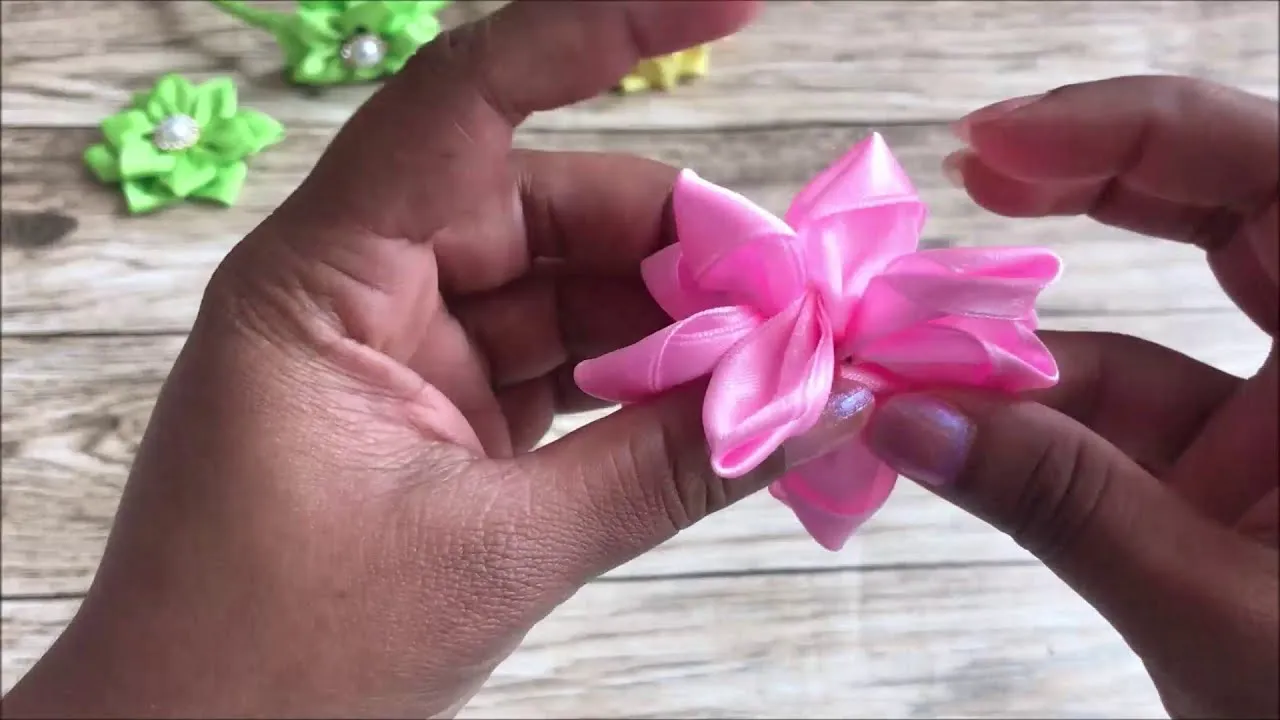
- Customize and Embellish:
Now, it's time to get creative! Add beads or embellishments using glue. You can even braid or twist multiple ribbons together for a more textured look.
- Final Touches:
Check for any loose ends or glue spots. Trim any excess ribbon for a polished finish. Voilà! Your custom ribbon hair band is ready to wear!
Also Read This: How to Find Free Getty Images for Your Projects
4. Tips for Customizing Your Hair Bands
Customization is where the real fun begins! Here are some tips to help you create unique hair bands that reflect your personality:
- Mix and Match Ribbons: Don’t be afraid to combine different textures and colors. For example, pair a shimmering satin ribbon with a playful polka dot one. The contrast can be visually stunning!
- Layering: Try layering several ribbons together. Use different widths and lengths for added dimension. This creates a dramatic effect and makes your hair band stand out.
- Personalized Embellishments: Add charms or initials to your hair bands. You can sew or glue on decorative elements like stars, hearts, or your initials for a personal touch.
- Seasonal Themes: Adapt your hair bands to the seasons! Use pastel colors for spring, bright colors for summer, earthy tones for fall, and deep hues for winter.
- Functional Customization: If you have long hair, consider adding a small clip or snap to your hair band for added functionality. This can help keep your hair secure throughout the day.
With these tips, you’ll be able to create stunning, one-of-a-kind hair bands that make a statement!
How to Create Hair Bands with Ribbons
Creating hair bands with ribbons is a fun and creative DIY project that allows you to customize your accessories to match your style. Whether you're looking to make them as gifts or for personal use, this guide will walk you through the steps to create beautiful and unique hair bands.
Materials Needed
- Elastic hair band (plain or covered)
- Ribbons of your choice (various colors and patterns)
- Scissors
- Hot glue gun or needle and thread
- Measuring tape
- Optional: Decorative embellishments (beads, flowers, etc.)
Step-by-Step Instructions
- Measure the Ribbon: Cut a length of ribbon about 2-3 times longer than the hair band. This will give you enough ribbon to wrap around and create a secure hold.
- Attach the Ribbon: Take one end of the ribbon and secure it to the hair band using hot glue or by sewing it in place.
- Wrap the Ribbon: Start wrapping the ribbon around the hair band, ensuring it is tight and even. Continue wrapping until the hair band is fully covered.
- Secure the End: Once you reach the end of the hair band, secure the ribbon with hot glue or stitches. Cut off any excess ribbon.
- Add Embellishments: If desired, glue or sew on decorative embellishments to personalize your hair band further.
Tips for Success
| Tip | Description |
|---|---|
| Choose Quality Ribbon | Opt for ribbons made of durable materials to ensure longevity. |
| Experiment with Patterns | Mix and match different ribbon patterns for a unique look. |
| Practice Makes Perfect | Try making a few before perfecting your technique! |
In conclusion, making hair bands with ribbons is an enjoyable and straightforward craft that can enhance your accessory collection. With a few materials and some creativity, you can create personalized hair bands that reflect your style and make great gifts for friends and family.