Are you looking for a fun and creative way to spice up your wardrobe? Making your own ribbon headbands is a delightful DIY project that can give your accessories a personal touch. Not only is it a simple craft that you can do at home, but it also allows you to express your unique style. Plus, it’s a fantastic activity you can do with friends or family. Let’s dive into the materials you'll need to get started on your very own ribbon headbands!
Materials Needed
Before you start your DIY adventure, you’ll want to gather all the necessary materials. Here’s a handy checklist to ensure you have everything you need:
- Ribbons: Choose a variety of ribbons in different colors, patterns, and widths. Satin, grosgrain, or even lace ribbons can add a unique flair!
- Headband Base: You can use plain plastic or fabric-covered headbands as your base. These can be found at most craft stores or online.
- Scissors: A sharp pair of scissors is essential for cutting your ribbons to the desired lengths.
- Hot Glue Gun: This will be your best friend! A hot glue gun helps secure the ribbons in place effectively.
- Embellishments (optional): Think beads, flowers, or charms to add a little extra pizzazz to your headband.
- Measuring Tape: Useful for measuring your ribbons to make sure they’re the perfect length.
- Fabric Sealant (optional): This can help prevent the ends of your ribbons from fraying.
Once you have all your materials ready, you’re set to unleash your creativity and make some fabulous ribbon headbands that everyone will admire!
Also Read This: Choosing the Right Stock Photo Service: Adobe Stock vs. Shutterstock
Step-by-Step Instructions
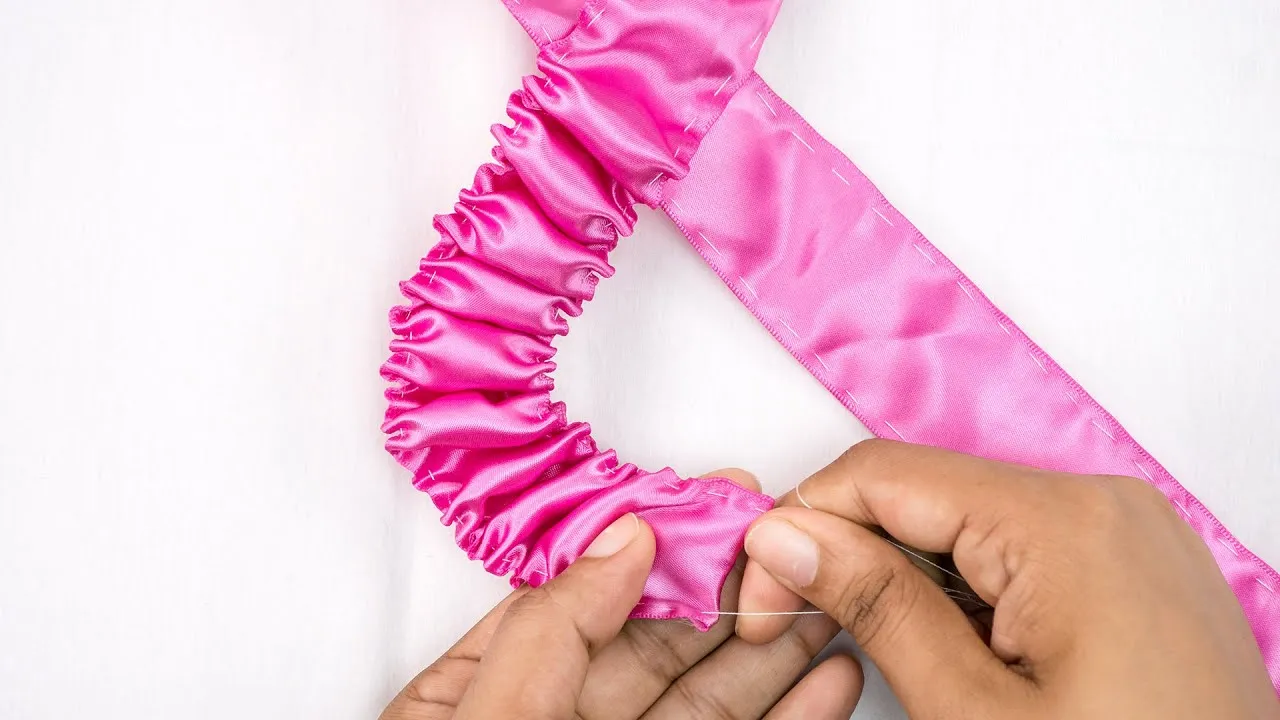
Creating your own ribbon headbands is not only a fun DIY project, but it also allows you to express your creativity. Here’s a simple step-by-step guide to help you craft beautiful headbands that you can wear or give as gifts.
- Gather Your Materials: Before you dive in, make sure you have everything you need. Here’s a quick list:
- Wide ribbon (choose colors and patterns you love)
- Elastic band (about 1 inch wide)
- Scissors
- Hot glue gun or needle and thread
- Measuring tape
- Decorative elements (like beads, flowers, or sequins)
Also Read This: Overview of Alamy Stock Photos for Photography Enthusiasts
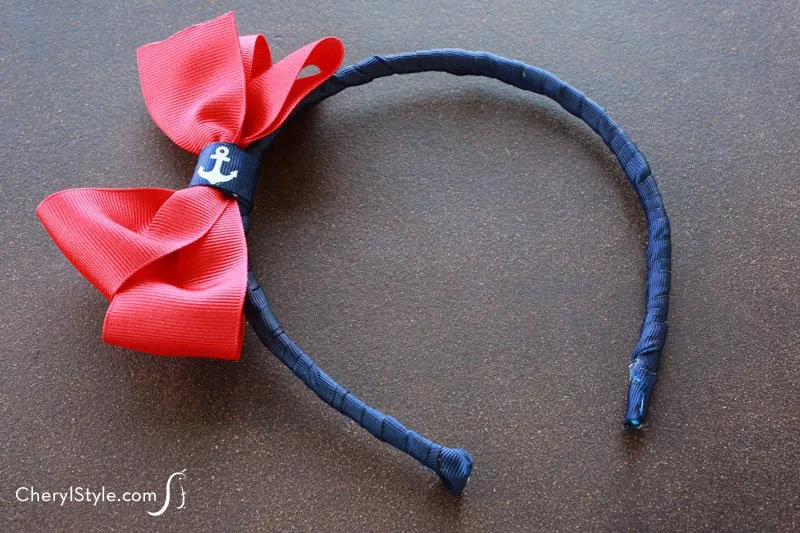
Tips for Personalizing Your Headbands

Personalizing your ribbon headbands can elevate your DIY project from nice to absolutely fabulous! Here are some tips to make your headbands truly one-of-a-kind:
- Choose Your Colors: The color scheme of your headband can reflect your personality. Feel free to mix and match different colors or patterns for a more eclectic look.
- Incorporate Themes: If you’re making headbands for a specific occasion—like holidays or birthdays—choose ribbons and decorations that fit that theme. Think red and green for Christmas or pastel colors for a spring celebration!
- Use Different Textures: Don’t just stick to flat ribbon! Experiment with lace, burlap, or even fabric scraps to add dimension and interest to your headbands.
- Accessorize: You can personalize your headbands further by adding accessories like feathers, pom-poms, or charms. These little details can make a huge difference.
- Initials or Names: For a more personalized touch, consider adding initials or names using fabric paint or iron-on letters. This adds a unique flair that’s perfect for gifts!
- Make It Functional: You can personalize your headbands not just for style but also for comfort! Consider adding a soft lining on the inside if you plan to wear it for long periods.
With these tips and instructions, you're all set to create beautiful, personalized ribbon headbands that are sure to turn heads!
Also Read This: Join the Community: A Comprehensive Guide to Become a Shutterstock Contributor
5. Frequently Asked Questions
Creating fun ribbon headbands can spark a lot of curiosity, especially if you’re new to DIY projects. Here are some of the most common questions people have about making these stylish accessories:
- What materials do I need? You’ll primarily need ribbons, headbands (plain or elastic), scissors, and glue. Optional items can include beads, flowers, or other embellishments to give your headband a unique touch.
- Can I use any type of ribbon? Absolutely! Different types of ribbons like satin, grosgrain, or even lace can add various textures and looks to your headband. Just make sure they're comfortable to wear!
- How long does it take to make a headband? Depending on your design and experience level, it can take anywhere from 15 minutes to an hour. The fun is in the creativity—take your time!
- Are these headbands suitable for kids? Yes! These headbands can be perfect for kids, but make sure to supervise them during the crafting process, especially when using scissors or glue.
- Can I wash my ribbon headband? It’s best to avoid washing them. Instead, spot clean with a damp cloth if they get dirty. Most ribbons don’t hold up well in the washing machine!
If you have any other questions or need more tips, feel free to reach out! The DIY community is always here to help.
6. Conclusion
Making your own ribbon headbands is not just a fun and creative project; it's also a fantastic way to express your personal style! Whether you’re looking to create a unique accessory for yourself or a thoughtful gift for someone else, the possibilities are endless. Here’s a quick recap of what you’ve learned:
- Materials: Gather your ribbons, headbands, and tools.
- Design: Choose colors and patterns that resonate with you.
- Craft: Follow the steps to assemble your headband.
- Embellish: Add personal touches to make it truly yours.
So, what are you waiting for? Grab those ribbons and get crafting! Remember, it's all about having fun and letting your creativity shine. Who knows, you might end up starting a new trend among your friends!