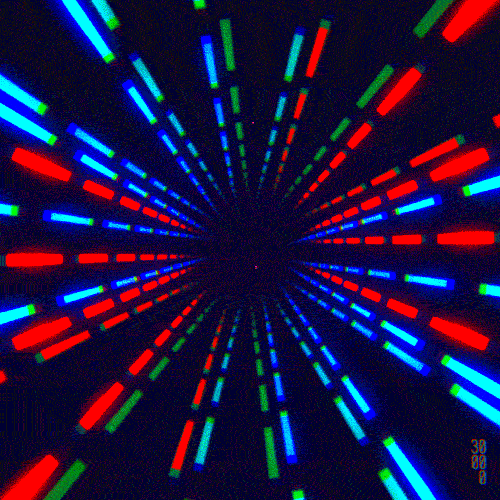
The allure of loop GIFs lies in their ability to enchant audiences. Unlike static images these animations stir feelings, narrate tales and capture attention in ways that still visuals cannot match. The moment I came across a meticulously designed infinite loop GIF I was spellbound by its capacity to convey a story with just a handful of frames. It struck me that incorporating these loops into my work on platforms like Behance could attract viewers and create a memorable impact.
In essence an infinite loop GIF consists of a sequence of images that repeat endlessly. This uninterrupted flow brings a sense of fluidity that captivates the audience. These GIFs can serve purposes ranging from displaying art to promoting products. Their charm resides in their elegance and adaptability. If you’re a designer, artist or photographer honing the skill of crafting infinite loop GIFs can take your creations to a level.
Choosing the Right Tools for Your GIF
When it comes to crafting an eye catching GIF with an endless loop choosing the appropriate tools is key. Here are a few well known choices.
- Photoshop: A go-to for many creators, it offers advanced features for GIF creation.
- GIMP: This free alternative is great for those who want powerful editing without spending a dime.
- EZGIF: An online tool that simplifies the GIF-making process, perfect for quick projects.
- GIF Brewery: For Mac users, this tool allows you to create high-quality GIFs from video files.
Every tool comes with its own set of advantages, so picking one that aligns with your work process is crucial. I have a preference for Photoshop due to its flexibility and the level of control it provides for every frame. Nonetheless when time is of the essence EZGIF comes to my rescue! It really boils down to discovering what suits you best.
Also Read This: Understanding the Cost and Value of LinkedIn Premium
Creating Your GIF from a Video or Images

Now that you have picked your instrument its time to unleash your imagination. Here is a guide to help you craft your never ending loop GIF.
- Gather Your Media: Choose the images or video clips you want to use. Aim for a cohesive theme or story.
- Import Your Files: Open your chosen tool and import the images or video. In Photoshop, you can use the 'Import Video Frames to Layers' option.
- Edit Your Frames: Trim unnecessary parts, adjust colors, or add effects to enhance your visuals. Remember, less is often more.
- Set Loop Options: In the GIF settings, select the option to loop infinitely. This is what gives your GIF its continuous charm!
- Export Your GIF: Once you’re satisfied with the outcome, export your GIF. Ensure you choose the right settings for quality without making the file too large.
Making my GIF for the time was a blend of thrill and nervousness. I played around with various frames and the satisfaction of watching it all come together was unmatched. It felt like breathing life into my creativity. Don't hurry through this journey; savor the moments as you tinker with different aspects until you discover a flow that aligns perfectly with your artistic vision.
Also Read This: Canva Image Outline Creation
Setting Up Your Infinite Loop
Making a GIF that loops forever is similar to crafting a spellbinding story. Each frame brings in richness and feeling. After collecting your pictures or video snippets the next part involves crafting that enchanting loop. Its not merely about positioning the frames; its about achieving a smooth transition that captivates your viewers. I still recall the moment I managed to create a loop for the time – seeing my GIF play repeatedly was akin to reliving a cherished movie scene again and again.
Here’s a guide on how to set up your endless loop efficiently.
- Arrange Your Frames: Place your frames in a logical order that tells a story or illustrates a concept. The first and last frames should be similar for a smooth transition.
- Timing Is Key: Adjust the timing for each frame. Too fast, and the viewer won’t catch the details; too slow, and they might lose interest. A range of 0.1 to 0.3 seconds per frame often works well.
- Add Transitions: Consider adding subtle transitions between frames for a more polished look. Fading or sliding effects can enhance the visual appeal.
- Preview Your Loop: Always preview your GIF before finalizing it. Make sure the transition feels natural and engaging.
The magic of creating a loop is in the exploration. Play around with frame variations tweak the timing and incorporate effects until you discover a flow that resonates with you. It might require some patience but witnessing your creation come to life makes it all worthwhile.
Also Read This: How to Create a GIF for Behance
Optimizing Your GIF for Behance
Making a GIF that grabs attention is just part of the challenge; it's crucial to fine tune it for sites like Behance to make sure it shines. With a plethora of skilled artists displaying their creations your GIF should stand out not only in appearance but also in its functionality. I discovered this lesson the hard way when I uploaded a GIF that was too big and took ages to load leaving potential viewers feeling annoyed.
Here are some tips to enhance your GIF.
- Reduce File Size: Use compression tools to decrease your GIF’s file size without sacrificing quality. Aim for under 5MB to ensure quick loading times.
- Limit the Color Palette: While vibrant colors are appealing, a reduced color palette can significantly lower file size. Stick to a maximum of 256 colors.
- Optimize Dimensions: Resize your GIF to fit Behance’s display requirements. A width of around 800 pixels is often sufficient.
- Test Loading Times: Before finalizing, test how quickly your GIF loads on various devices. You want it to be accessible to all viewers.
When it comes to optimizing your GIF finding the right balance between quality and performance is key. Take your time with this step as it can greatly impact how your work is viewed. A GIF that is optimized not only improves the user experience but also showcases your professionalism as a creator.
Also Read This: Beginner's Guide to Plucking on Dailymotion
Uploading Your GIF to Behance
Once you’ve crafted and fine tuned your GIF it’s time to dive into the thrilling step uploading it to Behance! This is where all your efforts bear fruit and you can showcase your masterpiece to a worldwide audience. I still remember the rush of excitement when I uploaded my GIF for the time. The anticipation was intense. Watching it go live on my profile felt like revealing a part of my soul to the universe.
Follow these simple steps to ensure a smooth upload of your GIF.
- Log into Your Behance Account: If you don’t have an account, creating one is quick and easy.
- Create a New Project: Click on the “Create a Project” button. This is where you’ll showcase your GIF alongside any relevant information.
- Add Your GIF: Click on the “Add File” button and select your optimized GIF from your computer. Ensure it appears correctly in the preview.
- Write a Captivating Description: Share the inspiration behind your GIF, what it represents, and any techniques you used. A good description can engage viewers.
- Publish Your Project: Once everything looks good, hit the “Publish” button. You can also share your project on social media for greater visibility.
Once you hit that publish button take a breather and think about how far you’ve come. Sharing your creations can be an exhilarating yet nerve racking experience but it also opens doors to connect with fellow artists and receive valuable input. So, soak it all in and keep in mind that each upload brings you closer to personal development!
Also Read This: How to Get Verified on Telegram
Common Issues and Troubleshooting
Even the most experienced creators encounter challenges when it comes to making GIFs. And believe me, I’ve had my moments that left me feeling puzzled. Whether it’s dealing with glitches or formatting problems being able to troubleshoot is crucial in the creative journey. Being aware of potential issues not saves you time but also enriches your overall experience.
When making your GIF that loops endlessly you might run into some common problems. But dont worry, I have some handy solutions for you.
- GIF Not Looping: Sometimes, your GIF may not loop as intended. Double-check the settings in your GIF creation tool. Ensure you select the option for infinite looping before exporting.
- Large File Size: If your GIF is too large and takes ages to load, consider reducing the number of frames or the color palette. Tools like EZGIF can help compress your GIF without losing quality.
- Loss of Quality: If your GIF looks pixelated or blurry, revisit your original images. Start with high-quality sources and adjust the export settings to retain clarity.
- Incorrect Dimensions: Always preview your GIF before finalizing. If it appears cut off or distorted on Behance, adjust the dimensions to fit the platform’s requirements.
Whenever I encounter these problems I remind myself that finding solutions is part of the creative process. Every obstacle presents a chance to acquire knowledge and develop. Continue trying new things and don’t hesitate to reach out for assistance through platforms or community groups. Keep in mind that every creator has encountered challenges!
Also Read This: Easy Steps for Submitting Your Photos to Shutterstock
FAQs
As you explore the realm of looped GIFs, you might find yourself wondering about certain things. Here are a few common queries that I’ve come across, along with my thoughts on them.
- Can I use video files to create GIFs? Absolutely! Many tools allow you to convert video clips into GIFs. Just remember to keep the length short for best results.
- What’s the ideal duration for an infinite loop GIF? Ideally, aim for a duration of 3 to 10 seconds. This timeframe keeps viewers engaged without overwhelming them.
- Is there a limit to the number of frames I can use? While there’s no strict limit, too many frames can result in larger file sizes. A good practice is to keep it between 10 to 30 frames for optimal performance.
- Can I edit my GIF after uploading it to Behance? Unfortunately, you cannot edit a GIF once it’s published. If changes are needed, you’ll have to create a new project with the updated GIF.
It’s completely natural to have questions and want some answers. Connecting with fellow creators on platforms like forums or social media can offer helpful perspectives. Keep in mind that growth is an ongoing journey and you’re not in this alone!
Conclusion
Making a GIF that loops endlessly is a fulfilling process that lets you showcase your creativity in different ways. Whether its grasping the fundamentals or resolving typical challenges every stage contributes to a wonderful voyage of personal expression. I vividly remember the excitement of presenting my GIF on Behance and how it brought me together with fellow creators. Its a sensation that every artist should have the chance to feel.
As you start your journey in making GIFs feel free to try things out and learn from every piece you create. Whether you’re displaying your art telling a story or freezing a moment in time keep in mind that it’s your distinct viewpoint that makes your creations stand out. Embrace the journey relish the small triumphs and continually challenge the limits of your imagination. Your never ending loop GIF isn’t merely a project; it’s a fragment of your soul shared with the universe. So go ahead unleash your creativity share it with others and let your imagination run wild!