Applying nail polish might seem like a simple task, but achieving that salon-quality look at home requires some finesse and the right tools. Whether you're prepping for a special occasion or just want to treat yourself, mastering the art of nail polish application can elevate your style. In this guide, we'll explore the essential tools you'll need and share tips on how to make your nails look professionally done. Let’s dive in!
Essential Tools for Nail Polish Application
Before you start painting your nails, it's crucial to gather the right tools. Having the right equipment can make a world of difference in the quality of your manicure. Here’s a list of must-have tools for a flawless nail polish application:
- Nail File: A nail file helps shape your nails and prevents them from snagging. Opt for a glass file for smoother edges.
- Nail Buffer: Buffing your nails gives them a shiny finish and helps the polish adhere better.
- Cotton Balls or Pads: Perfect for removing old polish and cleaning up any mistakes during application.
- Nail Polish Remover: Look for an acetone-free formula to avoid drying out your nails.
- Base Coat: A clear base coat is essential for protecting your nails from staining and improving polish longevity.
- Top Coat: This adds shine and acts as a protective layer over your polish, ensuring it lasts longer.
- Nail Polish Brush: Some brands offer specialized brushes for easier application. A wider brush can make painting quicker and neater.
- Quick Dry Spray or Drops: These can significantly reduce drying time, so you won’t have to wait forever before doing anything with your hands.
Investing in these tools will set you up for success. With the right equipment at your disposal, you’ll be well on your way to achieving salon-quality nails right from the comfort of your home!
Also Read This: The Top Facebook Marketing Mistakes to Avoid
Preparing Your Nails for Polish
Getting your nails ready for polish is a crucial step that many often overlook. Proper preparation can make a world of difference in achieving that salon-quality finish. Here’s how to prepare your nails effectively:
- Clean Your Nails: Start by removing any old polish with a non-acetone remover. This gentle formula will help prevent your nails from drying out.
- Shape Your Nails: Use a nail file to shape your nails to your desired length and style. Whether you prefer square, round, or almond shapes, a good file can do wonders.
- Push Back Cuticles: Soft cuticles can help prevent polish from chipping. Use a cuticle pusher to gently push them back. If necessary, apply some cuticle oil to soften them first.
- Buff the Surface: Lightly buffing your nails can help create a smooth canvas for the polish. This step removes ridges and allows the polish to adhere better.
- Wash and Dry: After buffing, wash your hands to remove any dust and oils. Pat them dry thoroughly.
- Apply Base Coat: A base coat is essential as it protects your nails and helps the polish stick. Choose a base coat that suits your nail type, whether you're dealing with brittleness or peeling.
By following these steps, you’ll set a solid foundation for your nail polish, ensuring it looks flawless and lasts longer!
Also Read This: Effortless Methods to Move Videos from Dailymotion to YouTube
Choosing the Right Nail Polish
Selecting the right nail polish can feel overwhelming with so many options out there. However, the right choice can elevate your nail game significantly. Here are some tips to help you choose wisely:
- Consider the Finish: Nail polishes come in various finishes, including matte, glossy, and satin. If you want a classic look, a glossy finish is a safe bet, while matte finishes can give a modern twist.
- Check the Formula: Look for polishes that are 5-free or even 10-free, meaning they don’t contain harmful chemicals. Brands like Zoya and Essie offer great options.
- Pick Your Color: Choose a color that complements your skin tone. For instance, cooler skin tones often look good in blues and purples, while warmer tones can pull off reds and corals beautifully.
- Test for Opacity: If you want a rich color, opt for polishes that are opaque in one or two coats. Sheer polishes often require more coats, which can lead to unevenness.
- Read Reviews: Before purchasing, check online reviews or swatches. Platforms like Instagram and Pinterest can be great for seeing how a color looks on different skin tones.
With these considerations in mind, you’ll be well on your way to selecting the perfect nail polish for that stunning, salon-quality look!
Also Read This: Effective Ways to Reach Out to Recruiters on LinkedIn
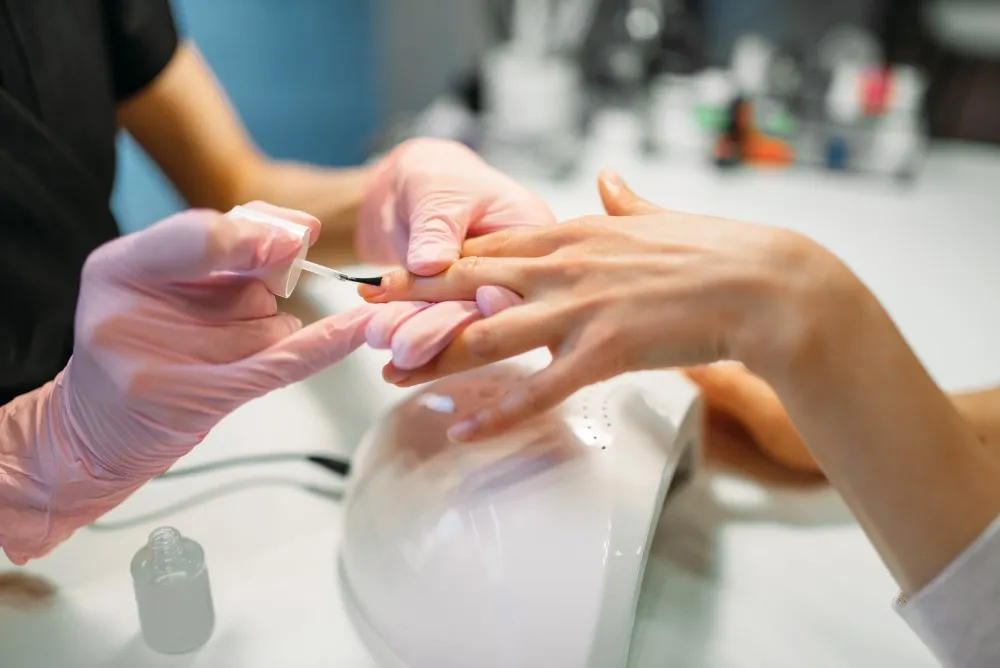
5. Step-by-Step Guide to Applying Nail Polish
Getting that salon-quality finish at home is easier than you think! Follow these simple steps to achieve perfectly polished nails.
- Prep Your Nails: Start with clean, dry nails. Remove any old polish and wash your hands. Gently push back your cuticles and buff the surface of your nails.
- Apply a Base Coat: This step is crucial. A base coat not only helps your polish to stick but also protects your nails from staining. Use a thin layer and let it dry completely.
- Choose Your Polish: Pick a high-quality nail polish. Shake the bottle to mix the contents well. This helps in achieving an even application.
- Start with the First Stroke: Dip your brush in the polish, then wipe one side against the bottle to remove excess. Begin at the center of the nail, starting from the cuticle and moving towards the tip. Use three strokes: one down the center and one on each side.
- Two Coats are Best: Allow the first coat to dry completely before applying a second coat. This ensures better coverage and color intensity.
- Finish with a Top Coat: Once your color is dry, apply a clear top coat to seal everything in. This enhances shine and prolongs the life of your manicure.
- Clean Up: Use a small brush dipped in remover to tidy up any polish that may have strayed onto your skin.
Also Read This: How to Update UBlock Origin for Better Ad Blocking on YouTube
6. Tips for Achieving a Flawless Finish
Achieving that perfect salon finish at home is all about the details. Here are some insider tips that can elevate your nail game:
- Work in Thin Layers: Thick coats can lead to smudging and uneven surfaces. Always aim for thin layers, allowing each to dry completely.
- Keep Your Hands Steady: Rest your elbow on a flat surface to stabilize your hand while applying polish.
- Use a Fan: To speed up the drying process, use a fan or blow dryer on a cool setting. This prevents the polish from getting messed up.
- Try Nail Tape: If you're feeling adventurous, nail tape can help you create clean lines or fun designs without the fuss.
- Don't Rush: Give yourself plenty of time! Rushing can lead to mistakes. Enjoy the process and take your time.
- Moisturize: Keep your cuticles hydrated with cuticle oil. Healthy cuticles enhance the overall look of your nails.
Also Read This: Understanding XP Gains in Team Rumble in Fortnite and Tips for Faster Leveling
7. Common Mistakes to Avoid
Achieving salon-quality nails at home can be a bit tricky, especially if you’re unaware of the common pitfalls. Here are some mistakes to keep in mind so you can avoid them and achieve a flawless finish!
- Skipping the Base Coat: Not using a base coat can lead to stains on your nails and uneven polish application. A base coat helps the polish adhere better and extends the life of your manicure.
- Applying Thick Layers: Thick layers of polish may seem like a time-saver, but they often lead to smudging and uneven drying. Instead, apply 2-3 thin coats for an even and smooth finish.
- Neglecting Drying Time: Rushing through the drying process can ruin your hard work. Always allow each layer to dry completely before applying the next, and consider using a quick-dry topcoat for added speed.
- Forgetting the Cuticles: Ignoring your cuticles can lead to a messy look. Remember to push them back gently and clean the nail bed before applying polish.
- Improper Storage of Nail Polish: Storing your nail polish in a warm environment can cause it to thicken and become difficult to apply. Keep them in a cool, dark place to maintain their consistency.
- Not Cleaning the Brush: Using a dirty brush can lead to uneven application. Wipe off the brush on the rim of the bottle to remove excess polish before applying.
Also Read This: Exploring Investment Opportunities in Rumble Stock and Its Dividend Potential
8. Maintaining Your Manicure
Your beautiful manicure deserves some care to keep it looking fresh and fabulous for longer. Here are some tips for maintaining your nails after your DIY session:
- Moisturize Regularly: Keeping your hands and cuticles well-moisturized can prevent chipping and peeling. Use a good quality hand cream or cuticle oil daily.
- Avoid Harsh Chemicals: Household cleaning products can strip your polish and damage your nails. Always wear gloves when doing chores to protect your manicure.
- Touch Up Chips: If you notice any chips, don’t panic! Simply apply a small amount of the same polish to the chipped area and seal it with a topcoat for a quick fix.
- Limit Water Exposure: Prolonged exposure to water can weaken your polish. Try to keep your hands dry as much as possible, especially after initial application.
- Schedule Regular Refreshes: To keep your nails looking their best, plan to remove and reapply polish every week or two, even if it’s just a touch-up!
How to Apply Nail Polish Perfectly for Salon-Quality Nails
Nail polish can elevate your look, but achieving that perfect salon-quality finish at home can be challenging. With a few essential tips and tricks, you can master the art of applying nail polish like a pro. Here’s a step-by-step guide to help you achieve flawless nails.
Essential Tools
Before you start, ensure you have the following tools:
- Nail Polish Remover: For clean nails.
- Nail File: To shape your nails.
- Base Coat: Protects nails and enhances polish longevity.
- Nail Polish: Choose your favorite color.
- Top Coat: Provides shine and durability.
- Cotton Swabs: For quick clean-ups.
- Nail Brush: For precision application.
Step-by-Step Application
- Prep Your Nails: Remove any old polish and shape your nails with a file.
- Clean and Dry: Wash your hands and ensure your nails are completely dry.
- Apply Base Coat: This step is crucial as it helps the polish adhere better and prevents staining.
- First Coat of Nail Polish: Apply a thin layer, starting from the center of the nail and moving to the edges.
- Second Coat: Once the first coat is dry, apply a second thin layer for full coverage.
- Top Coat: Finish with a top coat for added shine and protection.
Tips for Perfection
To achieve the best results, keep these tips in mind:
- Always shake the nail polish bottle before use.
- Use a light hand to avoid thick layers.
- Wait a few minutes between coats for better adhesion.
By following these simple steps and using the right tools, you can achieve salon-quality nails at home. Remember, practice makes perfect, so don’t hesitate to experiment with different techniques and colors until you find your ideal style!