In the early days of my photography adventure I didn’t grasp the importance of having a watermark. It was only when a friends beautiful photo was used without consent that I came to see how crucial it is to safeguard your creations. A watermark serves as a safety measure, protecting your originality. Its akin to putting your signature on a work of art silently watching over your in the vast sea of the online world.
Watermarks serve several key purposes:
- Protection from Theft: In an age where sharing images is effortless, a watermark can deter unauthorized use of your work.
- Brand Recognition: A well-designed watermark can promote your brand, making it memorable for viewers.
- Professionalism: Adding a watermark elevates the perception of your work, showcasing your commitment to your craft.
To put it simply a watermark is more than just a picture; it represents who you are and what your brand stands for. As we explore the process of crafting a watermark through ShootProof remember the unique touch it brings to your photography adventure.
Getting Started with ShootProof
Discovering ShootProof was like coming across a hidden gem for photographers. This platform provides a range of features beyond photo organization; it serves as a complete package for showcasing and selling your work. Whether you’re an experienced pro or a passionate hobbyist ShootProof streamlines your process and empowers you to retain ownership of your visuals.
To get started, follow these steps:
- Create an Account: Head over to ShootProof’s website and sign up. The process is straightforward, and you’ll find it user-friendly.
- Upload Your Photos: Once you’ve created your account, start uploading your images. The platform supports various file formats, so you don’t have to worry about compatibility.
- Explore the Dashboard: Familiarize yourself with the dashboard. You’ll find options for galleries, contracts, invoices, and, importantly, watermarking.
Now that you’ve got the hang of these steps you’re all set to safeguard your pictures and craft beautiful watermarked images. Let’s explore the next stage of this adventure in more detail.
Also Read This: Complete Guide to Uploading Videos on Dailymotion
Step-by-Step Guide to Adding a Watermark

Now that you’re acquainted with ShootProof let’s dive into the thrilling aspect – adding a watermark to your images. I still recall the rush I felt when I first accomplished this seeing my name woven into my creations was truly empowering. Here’s a step by step guide on how to make it happen.
- Access the Watermark Settings: Navigate to the 'Settings' section in your ShootProof account and select 'Watermark.'
- Create a New Watermark: Click on 'Add Watermark' and choose between text or image options. If you opt for text, type in your name or business name. For image watermarks, upload a logo or a unique design.
- Customize Your Watermark: Adjust the size, opacity, and position of your watermark. This step is crucial—ensure it’s visible yet not overwhelming. Play around with different placements until it feels just right.
- Apply Watermark to Your Photos: Once satisfied, apply the watermark to your selected images. ShootProof allows batch processing, so you can save time if you have multiple photos to watermark.
- Preview Before Finalizing: Before hitting 'Save,' preview how your watermarked images will look. This is your chance to make any final tweaks.
By taking these actions you can protect your photos while adding a personal flair that showcases your individuality. So why not add that watermark and let your artistic side shine through!
Also Read This: Creative Ways to Style Spikes Without Gel
Customizing Your Watermark Design

Initially I believed that adding a watermark to my pictures would be straightforward. However personalizing it proved to be an artistic adventure on its own. It goes beyond placing your name on an image; it involves crafting a visual representation that aligns with your unique taste. A thoughtfully crafted watermark can elevate your photo while remaining discreet enough not to divert attention from the focal point.
When creating your watermark there are a few important factors to keep in mind.
- Font Choice: The font should reflect your personality. Whether it's elegant, bold, or playful, choose one that aligns with your photography style. I often experiment with different fonts until I find the one that feels like “me.”
- Color: Keep the color palette consistent with your brand. I usually go for a neutral tone that complements my photos without overpowering them.
- Size and Opacity: A watermark that's too large can overshadow your work, while one that's too small may go unnoticed. Aim for a balance. Adjusting the opacity can also help; a lighter watermark tends to blend better.
- Logo vs. Text: If you have a logo, consider using it as part of your watermark. If not, your name or business name can suffice. Just make sure it’s legible.
Experiment with these components because they represent your unique mark on your creations. The moment you discover the blend, it brings a sense of fulfillment that personalizes each picture you create.
Also Read This: Mastering Sewing with a Machine Like a Pro
Choosing the Right Placement for Your Watermark

After creating your watermark the next step is to choose its placement. It may seem like a detail but believe me it can greatly affect the effectiveness of your watermark. I recall spending time adjusting my watermark in a picture searching for that perfect position that felt just perfect.
Here are a few suggestions to help you select the perfect location for your needs
- Bottom Right Corner: This is a classic choice. It’s often seen as a less intrusive option, allowing viewers to focus on the image while still acknowledging the creator.
- Center of the Image: If you want your watermark to be more prominent, placing it in the center can be effective. Just ensure it doesn’t obscure the subject.
- Diagonal Across the Image: A watermark that spans diagonally can add a creative flair, but use this sparingly. It can distract if not done tastefully.
- Experiment with Placement: Don’t be afraid to try different locations. I often create several versions of the same photo with the watermark in different spots to see what works best.
In the end finding the spot for your watermark can elevate your photo without overshadowing it. Remember that your watermark should appear as an element of the image seamlessly blending in while still asserting your presence.
Also Read This: Insight into Sol price dynamics and grasp the future direction of the market
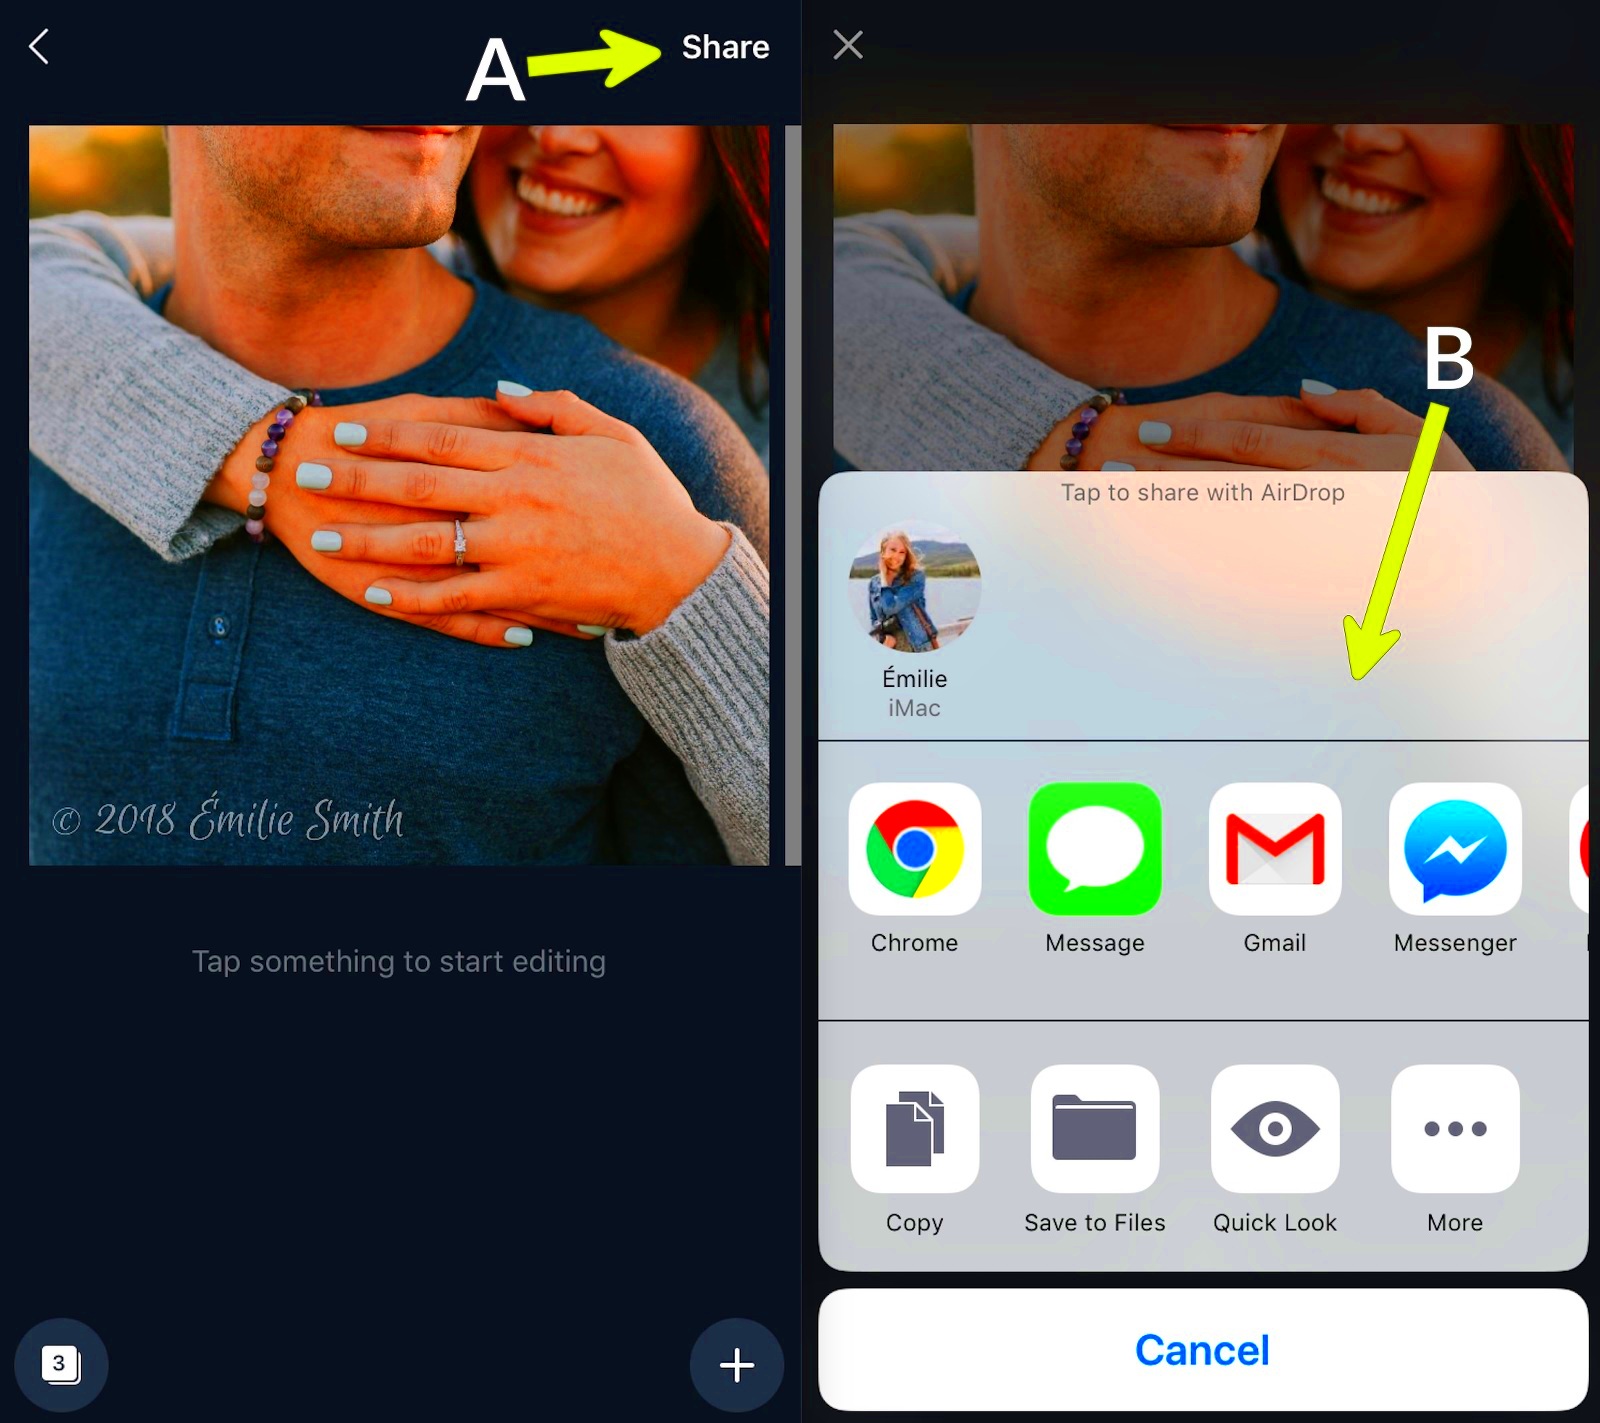
Previewing and Saving Your Watermarked Photos
After putting in the work to design and personalize your watermark the moment of truth comes when you get to preview and save your watermarked pictures. This part is important and I always pause for a moment before hitting that final save button. I want to make sure everything appears exactly as I pictured it.
Here’s how to make the most of this process:
- Preview Feature: ShootProof has a preview option that allows you to see how your watermark appears on the images. Take advantage of this! It’s a great way to spot any adjustments you may need to make.
- Check for Clarity: Ensure that your watermark is clear and legible. If it blends too much into the background, consider adjusting the opacity or size.
- Batch Saving: If you’re watermarking multiple images, utilize the batch save feature. It saves time and ensures consistency across your work.
- File Format: Decide on the file format for saving your images. JPEG is standard for sharing online, but if you need a higher quality for printing, consider saving in PNG or TIFF.
Once you feel happy with your work go ahead and click that save button and take a moment to relish the fact that your pictures are not just stunning but also safeguarded. Its a little but meaningful move towards protecting your artistic path.
Also Read This: 2014 Royal Rumble Winner Highlights and Key Performances
Common Issues and Troubleshooting Tips
While we adore technology it can occasionally catch us off guard. I recall the thrill of using ShootProof for the time to add watermarks to my pictures. However a few bumps along the way left me feeling like I was trapped in quicksand. Rest assured you’re not the only one dealing with difficulties. Here are some issues you may come across and helpful suggestions to navigate through them.
1. Watermark Not Showing Up: Occasionally even when you’ve configured everything properly your watermark might not be visible. Here’s how to address the situation:
- Check your watermark settings to ensure it's applied to the correct images.
- Ensure that you have saved the changes after applying the watermark.
2. Decline in Quality Post Watermarking: This was something that worried me a lot in the beginning. If you notice that your pictures appear to lose their quality after being watermarked
- Ensure you’re saving in a high-resolution format like PNG or TIFF.
- Avoid resizing the images after applying the watermark.
3. Problems With Watermark Placement: If your watermark appears to be misaligned try resizing it and adjusting its transparency.
- Experiment with different placements—sometimes a small tweak can make a big difference.
- Utilize the preview feature before finalizing to see how it looks in context.
4. Problems with Logging In or Accessing Your Account: If you encounter difficulties signing in or reaching your account.
- Double-check your credentials, or try resetting your password.
- Ensure your internet connection is stable.
While these challenges may be exasperating it's important to keep in mind that every hurdle presents a chance to enhance your skills and evolve in your artistry!
Also Read This: How Caleb Wilmington Died – A YouTube Story Explored
Frequently Asked Questions
Watermarking often brings up a lot of questions rather than clear answers. In my early experiences I spent time searching through discussions and writings in search of understanding. Here are some frequently asked questions that could assist you in navigating the realm of watermarking.
Of course! With ShootProof you have the flexibility to modify your watermark whenever you wish. It's a fantastic way to update your design to match your changing style.
2. Can a watermark be removed after it’s been added? Absolutely, you can take off the watermark from your pictures but it’s advisable to do it before wrapping up your project to prevent any loss in quality.
Absolutely! Using different watermarks for various types of images can be beneficial for your branding efforts. You have the option to design and store multiple watermarks within ShootProof.
4. What’s the ideal size for a watermark? There isn’t a response to this. A watermark needs to be noticeable without being too dominant. As a rule of thumb sizing it at about 10 15% of the image width tends to be effective.
These inquiries show our shared interest and worries. Its important to search for solutions and believe me you're not the only one on this path!
Wrapping Up with Key Takeaways
As we wrap up this conversation its worth taking a moment to look back on the path weve traveled. Watermarking goes beyond being a job; it plays a vital role in showcasing and safeguarding your creativity. Here are a few points to remember from our journey.
- Watermarking Protects Your Work: It’s your signature in a vast digital landscape. Never underestimate its importance.
- Customization is Key: Take the time to craft a watermark that represents you. It’s not just about your name; it’s about your brand.
- Placement Matters: Experiment with different placements to find what works best for your photos. It can enhance the overall aesthetic.
- Stay Informed: Keep exploring and learning about troubleshooting common issues. Each problem is a stepping stone in your growth.
Ultimately watermarking is akin to an art form just like photography. Embrace the journey and keep in mind that each click, edit and watermark contributes to your individual narrative as a photographer.