Mehndi, also known as henna, is a beautiful and intricate form of body art that has been practiced for centuries, predominantly in South Asian cultures. It's not just a decoration; it's a tradition that symbolizes joy, celebration, and good fortune. Whether it's for weddings, festivals, or special occasions, mehndi designs bring a touch of elegance and cultural richness to any event.
Applying mehndi is a delightful experience, often enjoyed in the company of friends and family. The process involves creating stunning designs on the hands, feet, and even other parts of the body using a natural dye made from the leaves of the henna plant. With modern approaches, you can even find helpful video tutorials on platforms like Dailymotion that guide you step by step through the intricate art of mehndi application.
Tools and Materials Needed
Before diving into creating stunning mehndi designs, it's essential to gather the right tools and materials. Having the right setup can make the application process smoother and more enjoyable. Here’s a handy list of what you’ll need:
- Henna Paste: The star of the show! You can either make your own using fresh henna leaves or purchase pre-made cones from stores.
- Applicator Cones: These allow for precision in applying the henna. You can buy them or make your own from parchment paper.
- Pencil or Pen: For sketching out your design lightly on your skin before applying the henna.
- Scissors: To cut the tip of the henna cone for a finer application.
- Plastic Wrap: Used to cover your design after application, ensuring the dye sets well.
- Oil or Vaseline: Applying a thin layer around your design helps prevent the henna from staining areas where you don’t want it.
- Water or Lemon Juice: A mixture can be dabbed onto the henna to help intensify the color.
- Cotton Swabs: Useful for correcting mistakes or cleaning up edges.
With these tools in hand, you’re all set to embark on your mehndi journey! Don’t forget to check out the Dailymotion videos for visual guidance that can make the process even easier and more fun!
Also Read This: How to Download Your Files on Behance to Keep Your Portfolio Safe and Organized
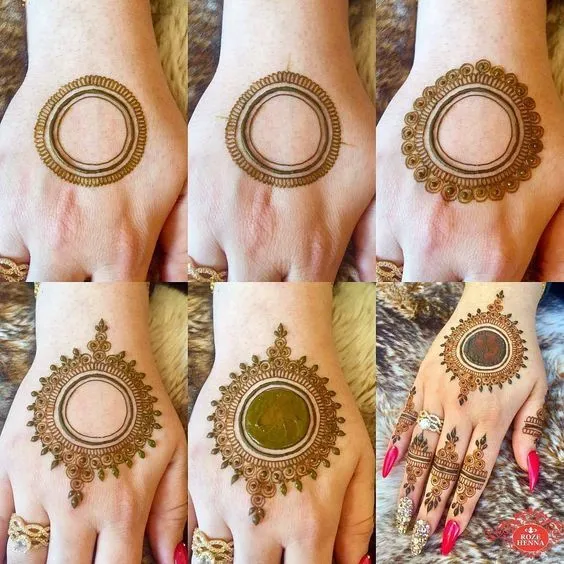
3. Step-by-Step Mehndi Design Instructions
Creating beautiful mehndi designs can be a fun and rewarding experience. Whether you're preparing for a special occasion or just want to practice your skills, following these step-by-step instructions will help you achieve stunning results. Here’s a simple guide to get you started:
- Gather Your Materials: You’ll need mehndi cones, a pencil for sketching, and tissues for cleanup. Don't forget to have a pair of scissors handy!
- Choose Your Design: Before you start, pick a design that suits your skill level. Simple patterns like dots and swirls are great for beginners, while intricate floral designs are perfect for the experienced artist.
- Prep Your Hands: Clean the area where you'll be applying the mehndi. Ensure your hands are free from oils or lotions, as this will help the henna adhere better.
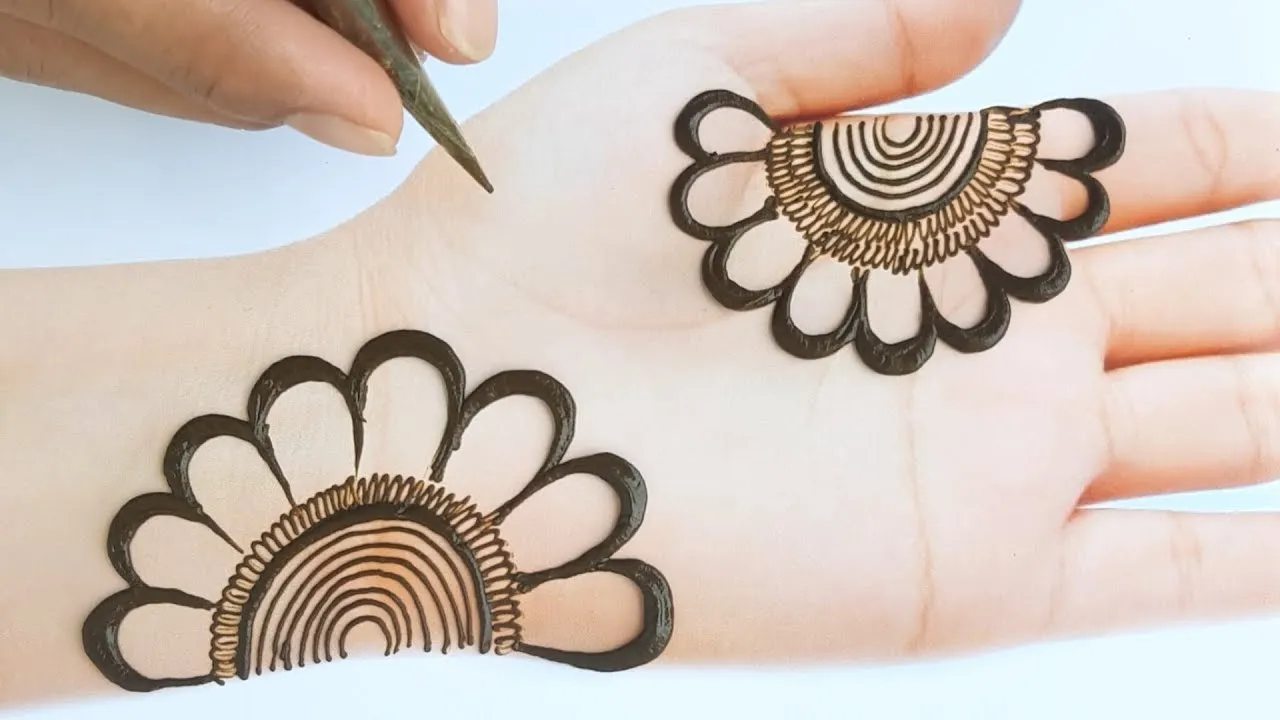
- Sketch Your Design: Lightly draw the outline of your design with a pencil. This will serve as a guide and help you maintain symmetry.
- Fill in the Design: Using the mehndi cone, start filling in your design. Apply steady pressure to create even lines. If you make a mistake, don’t worry! You can simply wipe it away with a damp tissue.
- Let it Dry: Allow the mehndi to dry completely. This can take anywhere from 30 minutes to a few hours, depending on the climate.
- Remove the Mehndi: Once dry, gently scrape off the mehndi with your fingers. Avoid using water for the first 24 hours to let the color set.
For a visual guide, check out the detailed video instructions on Dailymotion. Watching an expert can really enhance your understanding of each step!
Also Read This: How Much Money Does the Average Photographer Earn on Shutterstock
4. Tips for Perfecting Your Mehndi Art
Perfecting your mehndi art takes practice, but a few tips can significantly enhance your results. Here are some practical suggestions to help you along the way:
- Practice Regularly: Like any art form, the more you practice, the better you’ll get. Start with simple designs and gradually work your way up to more complex patterns.
- Use Quality Henna: Invest in good-quality henna powder or pre-made cones. High-quality henna results in richer colors and better texture.
- Stay Steady: A steady hand is essential for clean lines. If you feel nervous, take a deep breath and try to relax before you start.
- Experiment with Techniques: Explore different piping techniques, like varying the pressure on the cone or changing angles to achieve unique designs.
- Consider the Placement: Think about where you will apply the mehndi. Designs may look different on different areas of the body, so be mindful of the space available.
- Seal with Lemon and Sugar: After applying the mehndi, mix lemon juice with sugar and gently dab it on the design. This helps in darkening the color and prolonging the drying time.
Remember, the key to beautiful mehndi art is to enjoy the process. With time and patience, your skills will surely blossom!
Also Read This: Customize Your Slides Using Canva Slides Template
5. Watch the Dailymotion Video for Visual Guidance
One of the best ways to master mehndi designs is by watching visual tutorials. Dailymotion hosts a plethora of videos that can provide you with step-by-step guidance. These videos are perfect for visual learners who benefit from seeing the techniques in action.
When you access a Dailymotion video, look for channels that specialize in henna art. These channels often feature professional artists demonstrating various designs, from simple patterns to intricate motifs. Here’s how you can make the most of these videos:
- Choose Your Design: Before diving into a video, decide on the design you want. Whether it's floral patterns or geometric shapes, having a goal will help you stay focused.
- Follow Along: As you watch, grab your henna cone and practice in real-time. Pause the video whenever you need to catch up.
- Take Notes: Jot down key points or tips that stand out during the tutorial. Some artists share unique techniques or tricks that can elevate your skills.
- Rewind and Repeat: Don’t hesitate to rewind sections that are tricky. Repetition is key to mastering any skill!
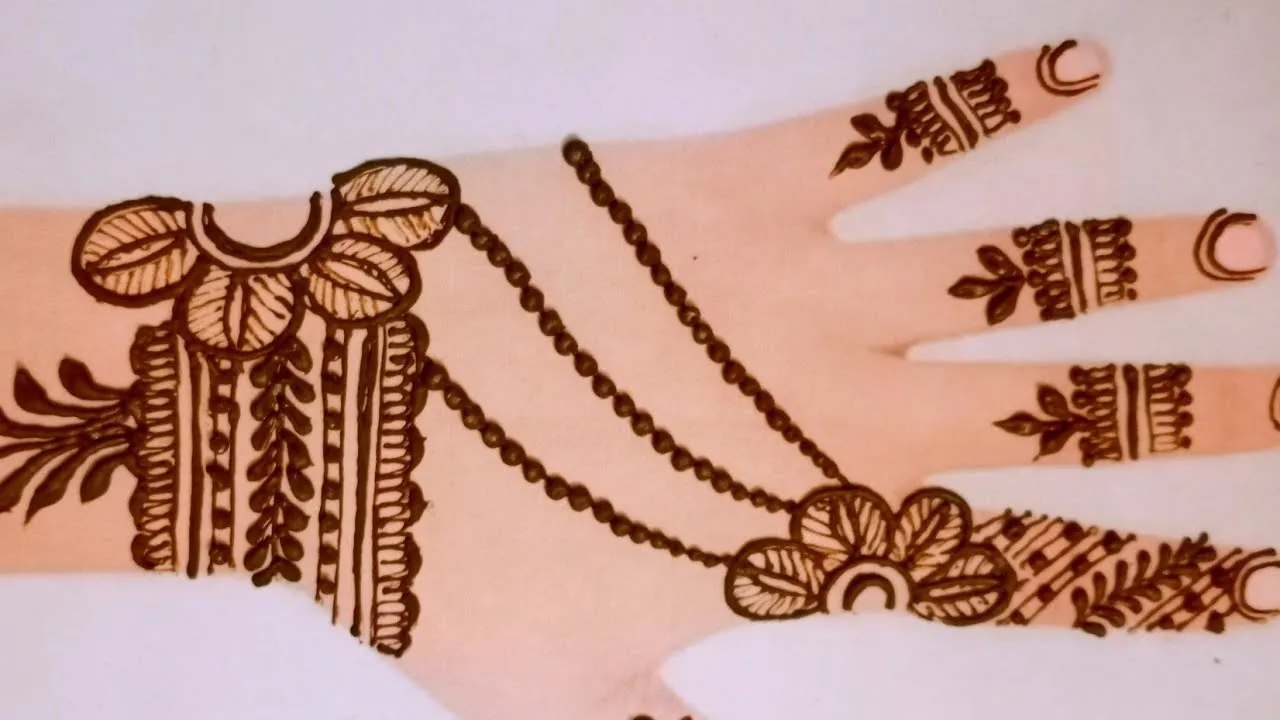
For instance, if you find a video that teaches a stunning paisley design, watch it a couple of times while practicing on a piece of paper. This hands-on approach will significantly improve your confidence and competence in applying mehndi.
6. Conclusion and Final Thoughts
In conclusion, learning mehndi design is an exciting journey that combines creativity and skill. With the right resources, especially visual guidance from Dailymotion, you can elevate your henna application game. Remember, practice is essential. The more you apply your henna, the better you’ll become.
Here are some final thoughts to keep in mind:
- Be Patient: Mastering mehndi takes time. Don't be discouraged by initial challenges; each attempt is a step towards improvement.
- Experiment: Feel free to mix and match different designs. Creating your unique patterns is part of the fun!
- Enjoy the Process: Mehndi should be enjoyable. Relax, turn on your favorite music, and let your creativity flow.
- Engage with the Community: Join online forums or social media groups dedicated to henna art. Sharing your work and receiving feedback can be incredibly motivating.
So, get your henna ready, find an inspiring video on Dailymotion, and start creating beautiful designs. Happy hennaing!