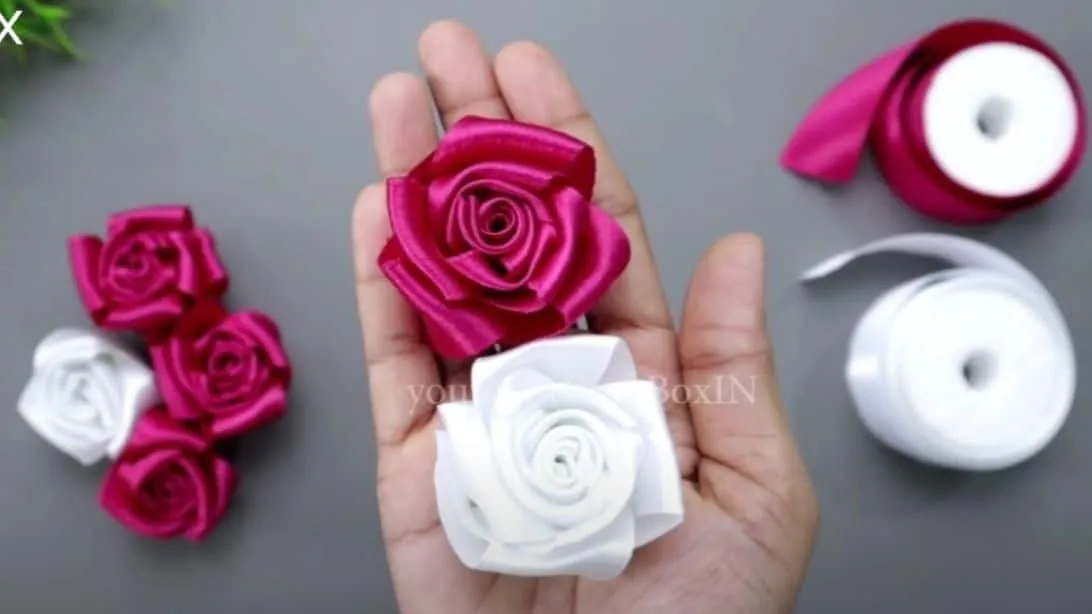
Welcome to our easy DIY video guide for making small ribbon roses! If you're looking to add a touch of elegance to your crafts, these charming little roses are perfect. They can embellish gifts, adorn hair accessories, or even serve as delightful decorations for your home. Whether you’re a crafting newbie or a seasoned pro, you'll find this guide straightforward and enjoyable. So, grab your materials, and let’s get started on creating beautiful ribbon roses that will impress everyone!
Materials Needed
Before we dive into crafting, let’s gather all the materials you’ll need. Having everything ready ensures a smooth crafting experience. Here’s a comprehensive list:
- Ribbons: Choose your preferred colors and widths. A 1-inch wide satin ribbon works beautifully!
- Scissors: Sharp scissors will help you cut the ribbon cleanly.
- Hot Glue Gun: A hot glue gun is essential for attaching your ribbon pieces together.
- Glue Sticks: Make sure you have extra glue sticks for your hot glue gun.
- Needle and Thread: A needle and thread can help secure your roses if you prefer stitching.
- Floral Wire (optional): This can be used for stems if you want to create a bouquet look.
- Floral Tape (optional): Helpful for wrapping stems if you're using floral wire.
- Large Beads or Buttons (optional): These can be used as centers for your ribbon roses.
Gather these supplies, find a comfortable spot, and get ready to unleash your creativity! Let’s make those lovely ribbon roses!
Also Read This: How to Remove Backgrounds from Shutterstock Images Efficiently
Step-by-Step Instructions
Creating small ribbon roses is a delightful and easy craft that can add a touch of elegance to any project. Let's dive into the simple steps you need to follow:
- Gather Your Materials: You'll need some ribbon (satin or grosgrain works well), scissors, a hot glue gun, and a felt circle for the base.
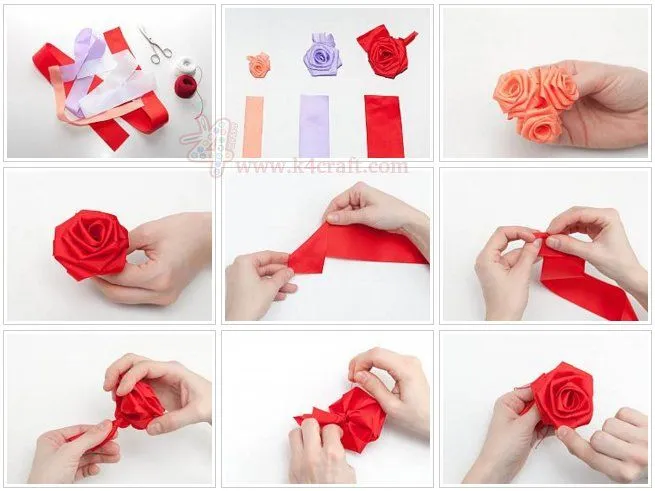
- Cut the Ribbon: Cut a length of ribbon about 24 inches long. The longer the ribbon, the larger your rose will be.
- Start Folding: Take one end of the ribbon and begin to fold it back and forth, creating small loops. Aim for about 6-8 loops, depending on the desired fullness of your rose.
- Secure the Base: Once you've formed your loops, tightly pinch the base and secure it with a small piece of wire or thread to hold the shape.
- Shape the Petals: Gently pull and shape the loops into petals, fluffing them out to create a more natural rose look.
- Attach to the Base: Use your hot glue gun to attach the shaped rose to the felt circle, ensuring it's secure and won’t come apart.
- Add Finishing Touches: If you’d like, you can embellish your rose with a few leaves made from green ribbon, or even add a bit of glitter for sparkle!
And voila! You've made a beautiful ribbon rose. These can be used for hair accessories, greeting cards, or even as part of a floral arrangement!
Also Read This: Using Fortiguard Downloader for Digital Forensics
Tips for Success
To ensure your ribbon roses turn out beautifully, consider the following tips:
- Choose the Right Ribbon: A wider ribbon (about 1.5 inches) gives a fuller look, while narrower ribbons can create delicate roses.
- Practice Your Technique: The first few attempts might not be perfect. Don't hesitate to try again! Each rose will improve with your practice.
- Experiment with Colors: Try using different colored ribbons or even patterned ones to create unique and vibrant roses.
- Use Quality Adhesives: A good hot glue gun makes all the difference. Ensure it heats up properly to quickly secure your petals.
- Stay Organized: Keep your workspace tidy and all materials within reach. This will help you focus on crafting rather than searching for supplies.
- Involve Friends: Crafting can be more fun with friends! Organize a DIY session and share tips and techniques.
With these tips in mind, you're all set to create stunning small ribbon roses. Happy crafting!
Also Read This: Revamp Your Content: Free Stock Photos That Wow from Freerange
Creative Uses for Ribbon Roses
Ribbon roses are not only beautiful but also incredibly versatile! Here are some creative ways you can incorporate these charming little flowers into your projects:
- Hair Accessories: Glue a small ribbon rose onto a hair clip or headband for a sweet, feminine touch. You can use different colors to match various outfits!
- Gift Wrap Embellishments: Add a ribbon rose to your gift packages. It’s a delightful way to personalize your presents. Just attach it with a bit of glue or wire.
- Home Decor: Create a stunning centerpiece by arranging ribbon roses in a vase. Mix different colors and sizes for a vibrant display that brightens up any room.
- Card Making: Use ribbon roses to enhance your handmade cards. Whether it’s for a birthday, wedding, or just a “thinking of you” card, they add a lovely tactile element.
- Wedding Decor: Incorporate ribbon roses into your wedding decorations. They can be used in bouquets, table centerpieces, or even as part of the cake decoration!
These are just a few examples. The possibilities are truly endless! Feel free to experiment and let your creativity shine.
Conclusion
Making small ribbon roses is not just a fun DIY project; it opens up a world of creative possibilities. From hair accessories to home decor, these charming flowers can elevate your crafts with their beauty and versatility.
As you venture into this creative journey, remember to have fun with it! Choose colors that resonate with you, and don’t hesitate to mix and match techniques. Whether you're using them for a special occasion or just to brighten up your day, ribbon roses can bring a touch of elegance and charm to any project.
So, gather your materials, follow the guide, and let those beautiful ribbon roses bloom! Happy crafting!