Welcome to the colorful world of DIY bracelet making with rubber bands! This fun and creative activity is perfect for anyone looking to express their personal style and unleash their artistic flair. Whether you're a beginner or an experienced crafter, making bracelets with rubber bands can be a relaxing and joyful experience. You can create unique pieces that reflect your personality or make thoughtful gifts for friends and family. Let's dive into the materials you'll need to get started on your bracelet-making journey!
Materials Needed
Before you begin crafting your fabulous rubber band bracelets, you'll need a few essential materials. Here's a handy list to ensure you're fully equipped:
- Rubber Bands: Choose a variety of colors and sizes. Standard-sized bands work great for beginners, while mini bands can add intricate details to your designs.
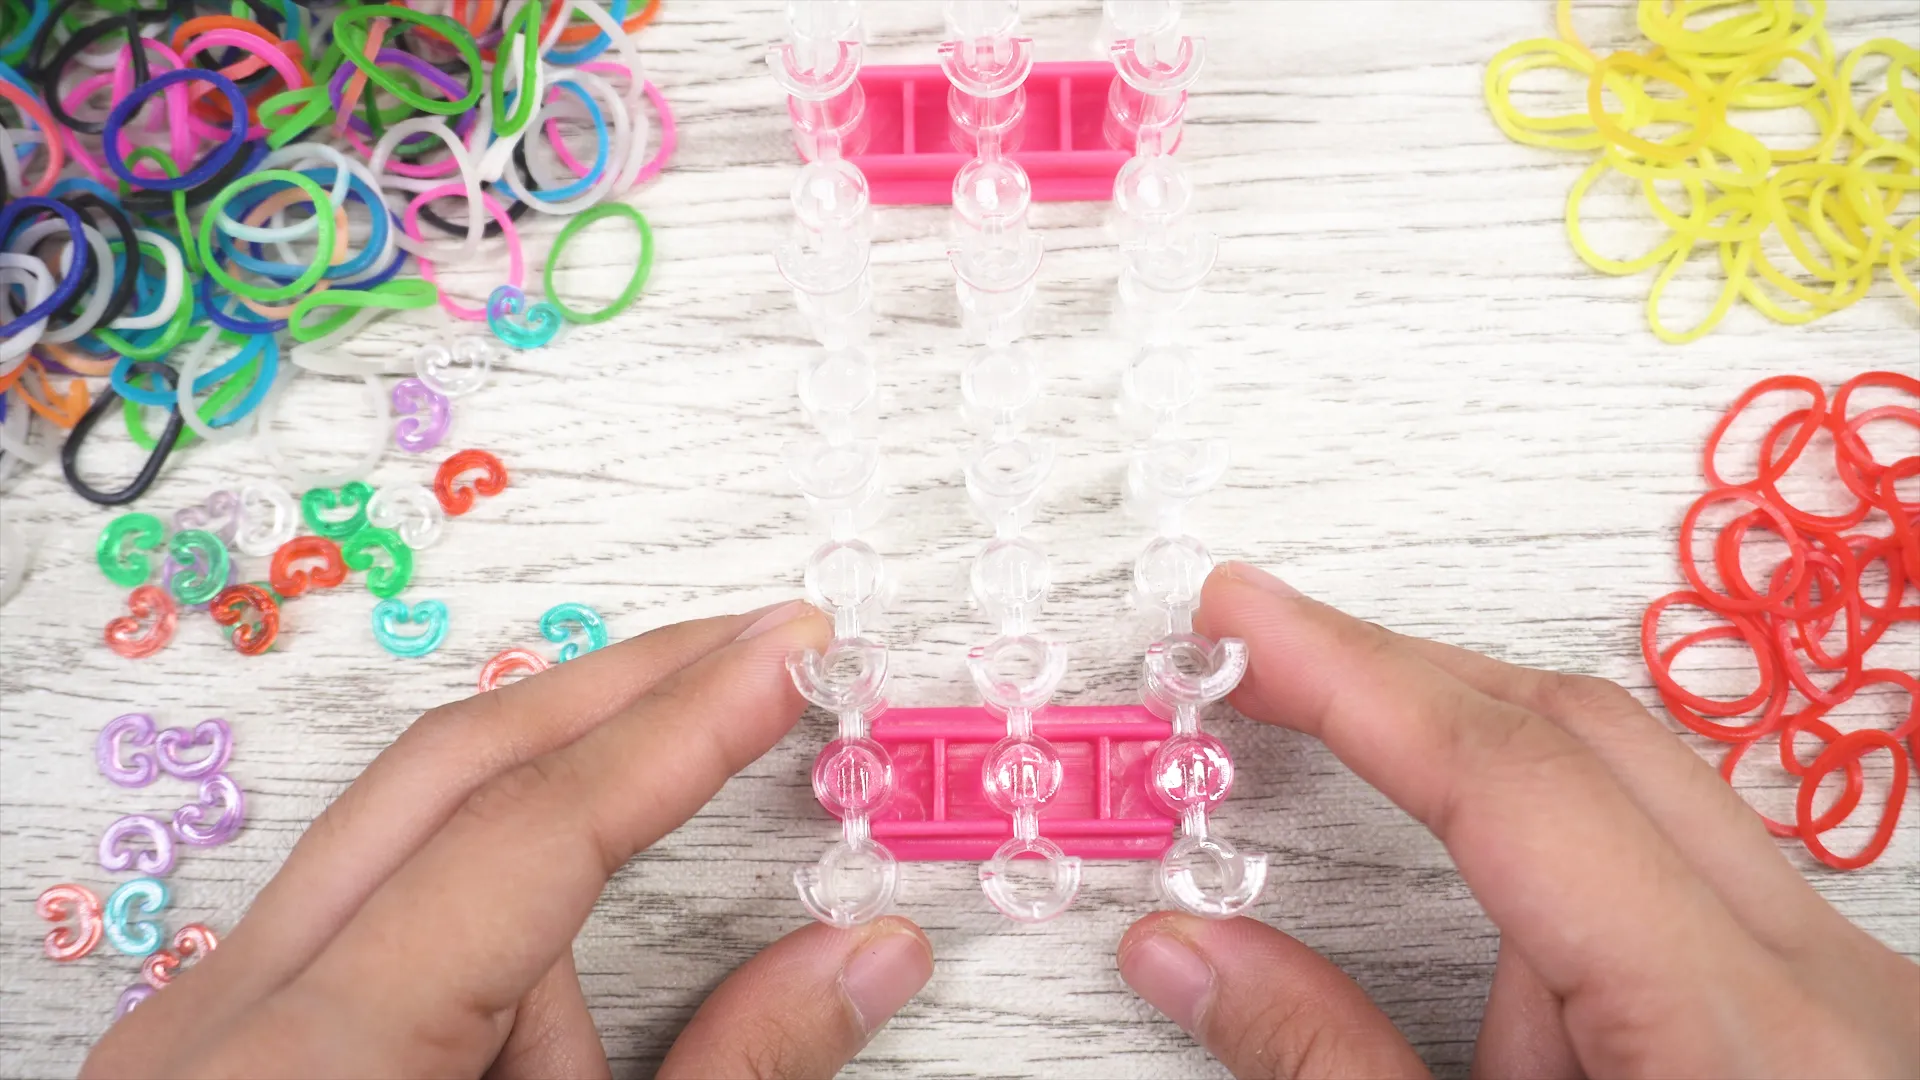
- Bracelet Loom (Optional): If you want to take your bracelet-making to the next level, a loom can help you create more complex patterns. However, you can also create beautiful bracelets without one!
- Hooks or Clips: These tools help secure your rubber bands and hold your bracelet together. You can use crochet hooks, S-clips, or C-clips for this purpose.
- Scissors: Keep a pair handy for trimming any excess bands and ensuring your bracelet looks neat and tidy.
- Workspace: Find a flat surface to work on, like a table or desk, to keep your materials organized and easily accessible.
With these materials in hand, you're all set to start creating your own stunning rubber band bracelets! Remember, the most important part is to have fun and let your creativity shine.
Also Read This: How to Submit Your Photos to Getty Images
Step-by-Step Instructions
Creating a DIY bracelet with rubber bands is not only fun, but it also allows for a burst of creativity! Here’s a simple guide to get you started:
- Gather Your Materials: You will need:
- Rubber bands (various colors)
- A loom (optional, but helps with complex designs)
- A hook or your fingers
- Some clips or a clasp to secure your bracelet
And there you have it! A colorful and stylish bracelet made right at home!
Also Read This: How to View Your Liked Posts on LinkedIn Mobile and Review Your Interactions
Tips for Creating Unique Designs
Now that you know the basics, let’s spice things up! Here are some tips to create unique and eye-catching rubber band bracelets:
- Mix Colors: Use a combination of colors for a vibrant look. Try alternating colors or creating patterns, like a rainbow effect.
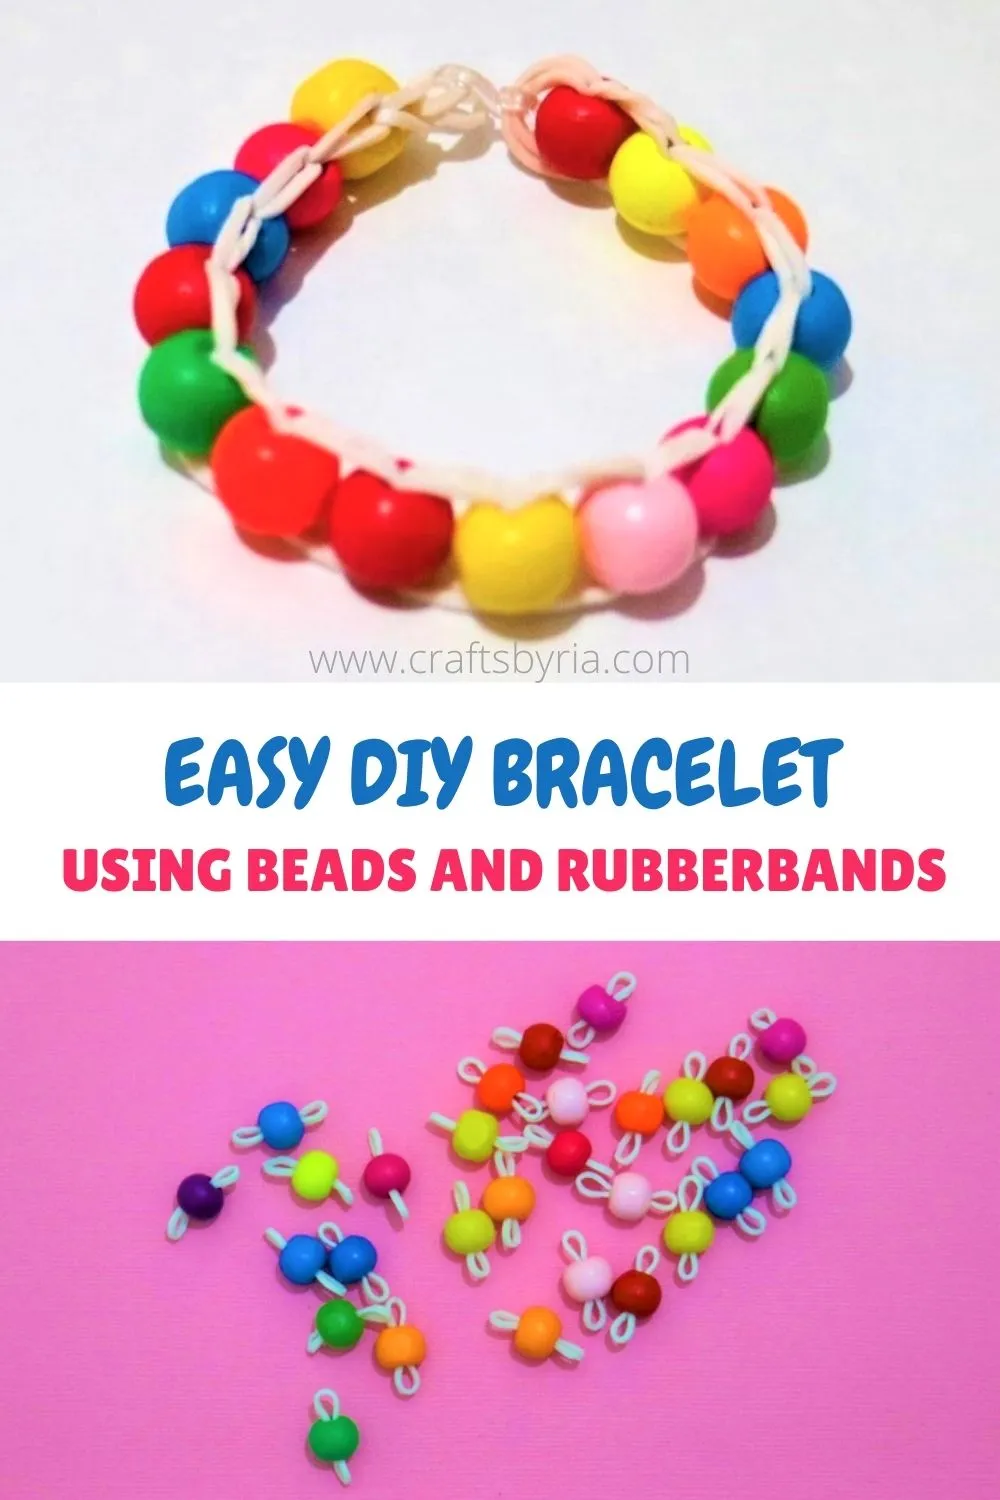
- Add Charms: Incorporate small charms or beads to personalize your bracelet even more.
- Explore Different Patterns: Look online for tutorials on various designs like the starburst, triple single, or dragon scale. Each offers a unique flair!
- Adjust Sizes: Experiment with the number of bands used to create thicker or thinner bracelets tailored to your style.
- Involve Friends: Host a bracelet-making party! Collaborating can lead to innovative designs and fresh ideas.
With these tips, your rubber band bracelets will not only be easy to make but also truly one-of-a-kind! Happy crafting!
Also Read This: How to Remove Watermarks After Purchasing from Shutterstock
Common Mistakes to Avoid
When diving into the fun world of DIY bracelet making with rubber bands, it’s easy to get a bit carried away. However, there are a few common pitfalls that many beginners encounter. Here’s a handy list of mistakes to steer clear of:
- Using the Wrong Type of Bands: Not all rubber bands are created equal! Make sure to use high-quality, stretchy bands designed for crafting. Regular office rubber bands might snap easily.
- Poor Planning: Jumping straight into a design without a plan can lead to frustration. It’s a good idea to sketch out your bracelet or follow a tutorial to stay organized.
- Overstretching the Bands: While it’s tempting to pull on those bands tightly for a secure fit, overstretching can weaken them. Aim for a comfortable tension that allows for flexibility.
- Neglecting Color Coordination: Choosing colors that clash may ruin an otherwise beautiful bracelet. Spend some time picking a harmonious color palette that reflects your style.
- Skipping the Test Fit: Before finishing your bracelet, it’s wise to test the fit. This way, you can adjust any sections that might be too tight or too loose.
By being mindful of these mistakes, you can enhance your crafting experience and create stunning bracelets that you’ll love to wear or gift!
Conclusion
DIY bracelet making with rubber bands is not just a creative outlet; it’s a fantastic way to express your personality and style. Whether you’re making a simple single-band bracelet or a more intricate design, the possibilities are endless.
Remember, crafting should be enjoyable! Embrace the learning process, and don’t be afraid to experiment with different patterns and colors. Here are a few final tips to elevate your bracelet-making journey:
- Keep Practicing: Like any skill, the more you practice, the better you’ll get. Don’t shy away from trying new techniques!
- Share Your Creations: Show off your bracelets to friends and family. You might even inspire them to join in on the fun.
- Join a Community: Consider joining online forums or social media groups dedicated to rubber band crafts. You’ll find a wealth of resources and friendly faces to connect with.
So gather your rubber bands, unleash your creativity, and let the bracelet-making adventure begin! Happy crafting!