Making your own cricket bat can be an incredibly rewarding project. Not only do you get to customize it to fit your playing style, but there's also a unique satisfaction that comes from crafting something with your own hands. Whether you're a seasoned player or just starting out, having a bat that's tailored to you can enhance your performance and enjoyment of the game. Plus, it’s a fantastic way to learn about the materials and craftsmanship involved in creating this essential piece of equipment. Ready to dive in? Let's get started!
Materials Needed
Before you grab your tools and get to work, you’ll need to gather the right materials to ensure your cricket bat turns out just as you envision. Here’s a list of essential items you’ll need:
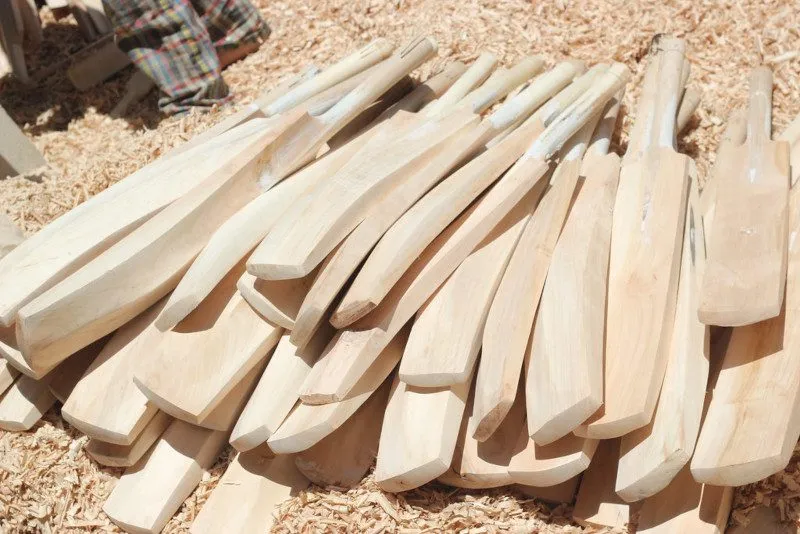
- Wooden Plank: The primary material for your bat. Look for high-quality willow or a similar wood. Willow is preferred due to its lightweight and shock-absorbing properties. Aim for a plank that is at least 3 inches wide and 1 inch thick.
- Bat Handle: You can either buy a pre-made handle or carve one from another piece of wood. A traditional cane handle is recommended for flexibility and grip.
- Wood Glue: Strong adhesive to bond the handle to the blade of the bat.
- Sandpaper: Various grits (from rough to fine) will help you shape and smooth the bat.
- Wood Finish or Oil: This protects the wood and enhances its appearance. Linseed oil is a popular choice.
- Clamps: To hold the bat components together while the glue dries.
- Measuring Tape: For accurate measurements of the bat dimensions.
- Ruler or Straight Edge: To ensure straight cuts and lines.
- Chisels and a Mallet: For carving and shaping the wood.
- Safety Gear: Safety goggles and gloves to protect yourself while working.
Gathering these materials will set you up for success as you embark on your cricket bat-making journey. Take your time to select high-quality items, as they can significantly impact the performance and durability of your finished bat!
Also Read This: Exploring Emotional Themes Through Creative Videos on Dailymotion
Step-by-Step Instructions
Making your own cricket bat can be a rewarding experience, and it’s easier than you might think! Here’s a step-by-step guide to help you through the process:
- Gather Your Materials: Before you get started, make sure you have everything you need. You'll require:
- Wood (preferably willow)
- Woodworking tools (saw, chisel, plane, sandpaper)
- Bat grip
- Varnish or oil (for finishing)
- Measuring tape
- Pencil
And there you have it! Your very own cricket bat, crafted with care and precision. It’s not just a bat; it’s a piece of art you can take to the pitch!
Also Read This: Why Your YouTube Shorts Are Not Getting Views
Choosing the Right Wood
When it comes to crafting a cricket bat, the type of wood you choose can make all the difference in performance and durability. Here are some key points to consider:
- English Willow: This is the most popular choice among professional players. It’s lightweight, yet strong, providing excellent shock absorption. Its grain structure also allows for greater power and control.
- Kashmir Willow: While slightly heavier than English willow, Kashmir willow bats are usually more affordable. They’re a great option for beginners or casual players but may not perform as well at higher levels.
- Grain Structure: Look for bats with straight, even grains. Typically, 6-12 grains are ideal. More grains can indicate a lighter bat, but it’s also about personal preference.
- Moisture Content: The wood should have a low moisture content for optimal performance. Too much moisture can cause the bat to break or warp over time.
Here’s a quick comparison table to summarize your options:
| Type of Wood | Weight | Price | Durability |
|---|---|---|---|
| English Willow | Light | High | Very Durable |
| Kashmir Willow | Medium | Low | Moderately Durable |
Choosing the right wood is vital to creating a bat that suits your playing style. Take your time and select the material that feels right for you!
Also Read This: Control YouTube on PC from Your Phone with Ease
7. Testing Your Cricket Bat
Once you've put in the hard work to craft your own cricket bat, the next step is to put it to the test! Testing your bat is crucial to ensure that it performs well and meets your expectations on the field. Here’s how to go about it:
1. Visual Inspection: Before you start swinging, take a good look at your bat. Check for any cracks or imperfections that could affect performance. Ensure that the handle is securely attached and that the blade is smooth.
2. Weight Test: Hold the bat and feel its weight. It should feel comfortable in your hands. If it feels too heavy or light, you might want to consider some adjustments. A good rule of thumb is to choose a bat that you can lift quickly without straining.
3. Bounce Test: Drop a cricket ball from waist height onto the face of the bat. The ball should rebound well. If it doesn’t, you may need to check the pressing and shaping of your bat. A good bat should have a lively response!
4. Practice Swings: Take some practice swings in the backyard or at a local field. Pay attention to how it feels during your swing. Does it feel balanced? Is it easy to maneuver? The bat should feel like an extension of your arm.
5. Real Game Test: The ultimate test is, of course, a real game! Take your bat to the pitch and see how it performs under pressure. Don’t hesitate to make further adjustments based on your experience.
8. Conclusion
Creating your own cricket bat can be a rewarding experience that deepens your connection to the game. Whether you're a seasoned player or just starting out, a bat tailored to your style can enhance your performance on the field. Here’s a quick recap of what we’ve covered:
- Choosing the Right Wood: Select high-quality willow for the best performance.
- Shaping Your Bat: Pay attention to the bat's shape and weight distribution.
- Finishing Touches: Sanding, oiling, and applying protective coatings are crucial steps.
- Testing: Ensure your bat is up to scratch with various tests before hitting the pitch.
Remember, crafting a cricket bat isn't just about functionality; it’s also about the love for the game. So, whether you hit sixes or get bowled out, take pride in knowing you made that bat with your own hands. Now, go out there, enjoy the game, and let your custom bat shine! Happy batting!