Imagine a cake that looks like it belongs in a fairy tale! Castle cakes are not just desserts; they're edible masterpieces that spark joy and ignite creativity. Perfect for birthdays, anniversaries, or just because, these cakes transport you to a magical realm where imagination reigns. Whether you want a simple design or a grand castle with turrets and flags, the possibilities are endless. In this guide, we’ll dive into the world of castle cakes, sharing tips and tricks to help you create your own stunning confectionary castle!
Essential Ingredients for Your Castle Cake
Before you embark on your castle cake adventure, it's crucial to gather the right ingredients. Here’s a comprehensive list of what you'll need:
- Cake Base: Choose your favorite flavors such as vanilla, chocolate, or red velvet. Aim for a sturdy cake that can support the decorations.
- Buttercream Frosting: This will be your “glue” for sticking the decorations and creating a smooth finish. A classic buttercream or cream cheese frosting works wonders.
- Fondant: Great for covering the cake and creating detailed decorations like bricks, windows, and doors. Consider colored fondant for a whimsical touch.
- Edible Decorations: Think of candy, chocolate, or even edible glitter to bring your castle to life. Items like gumdrops can serve as towers, while pretzel sticks can become battlements.
- Tools: Gather essentials such as baking pans, spatulas, rolling pins, and piping bags for a smoother building experience.
Having these ingredients on hand will set the foundation for your castle cake creation. Feel free to experiment with flavors and decorations to make it uniquely yours—after all, every castle deserves its own royal flair!
Also Read This: Understanding Ranked Rumble in Gaming
3. Tools and Equipment Needed
Before embarking on your castle cake adventure, you'll want to gather all the necessary tools and equipment. Having everything at hand will make the baking process smoother and more enjoyable. Here’s what you’ll need:
- Baking Pans: You'll need a variety of round and square pans, typically 6-inch and 8-inch sizes, to create different tiers of the castle.
- Mixing Bowls: A set of mixing bowls, preferably in different sizes, will help you mix your batter and frosting without any hassle.
- Hand Mixer or Stand Mixer: A powerful mixer is essential for achieving that light and fluffy cake texture.
- Spatula: A good spatula will help with folding in ingredients and smoothing frosting on your cake layers.
- Offset Spatula: This tool is perfect for applying a smooth layer of frosting and creating sharp edges.
- Cake Board: A sturdy cake board is crucial for supporting your castle cake during assembly and transport.
- Fondant Tools: If you plan to use fondant, having tools like a rolling pin, fondant smoother, and cutters will be incredibly helpful.
- Piping Bags and Tips: These are essential for decorating, especially if you want to add intricate designs or roof tiles.
- Edible Glitter or Gold Dust: To give your castle a magical touch, these decorative elements can really elevate your cake.
- Ruler: Precision is key in cake decorating, especially when you want uniform towers and walls!
Also Read This: How to Create a Website Design Portfolio on Behance
4. Step-by-Step Instructions to Bake the Cake
Now that you have all your tools ready, it’s time to dive into the baking process! Here’s a simple step-by-step guide to help you create your stunning castle cake:
- Preheat the Oven: Start by preheating your oven to 350°F (175°C). This ensures that your cake bakes evenly.
- Mix the Batter: In a large mixing bowl, combine your dry ingredients (flour, sugar, baking powder, and salt). In another bowl, mix your wet ingredients (eggs, milk, vanilla extract, and melted butter). Gradually add the wet mixture to the dry ingredients, mixing until just combined.
- Divide the Batter: Pour the batter evenly into your prepared pans. Aim for about two-thirds full to allow room for rising.
- Bake: Place the pans in the oven and bake for 25-30 minutes, or until a toothpick inserted in the center comes out clean.
- Cool the Cakes: Once baked, remove the cakes from the oven and let them cool in the pans for about 10 minutes. Then, transfer them to a wire rack to cool completely.
- Level the Cakes: Once cooled, use a serrated knife to level the tops of your cakes for easier stacking.
- Frosting Time: Apply a layer of frosting on the top of one cake layer, then stack another layer on top. Repeat until all layers are stacked.
- Decorate: Use fondant to create castle towers, walls, and other decorations. Get creative with piping bags to add colorful details!
- Final Touches: Add edible glitter or gold dust for a magical finish. Step back and admire your fantastic castle cake!
With these steps, you're well on your way to creating a delightful castle cake that will wow your guests!
Also Read This: The Benefits of Joining Interest-Based Communities on OK.ru
5. Decorating Your Castle Cake
Decorating your castle cake is where the magic really happens! This is your chance to get creative and transform a simple cake into a delightful fantasy castle. Here are some fun ideas to help you along the way:
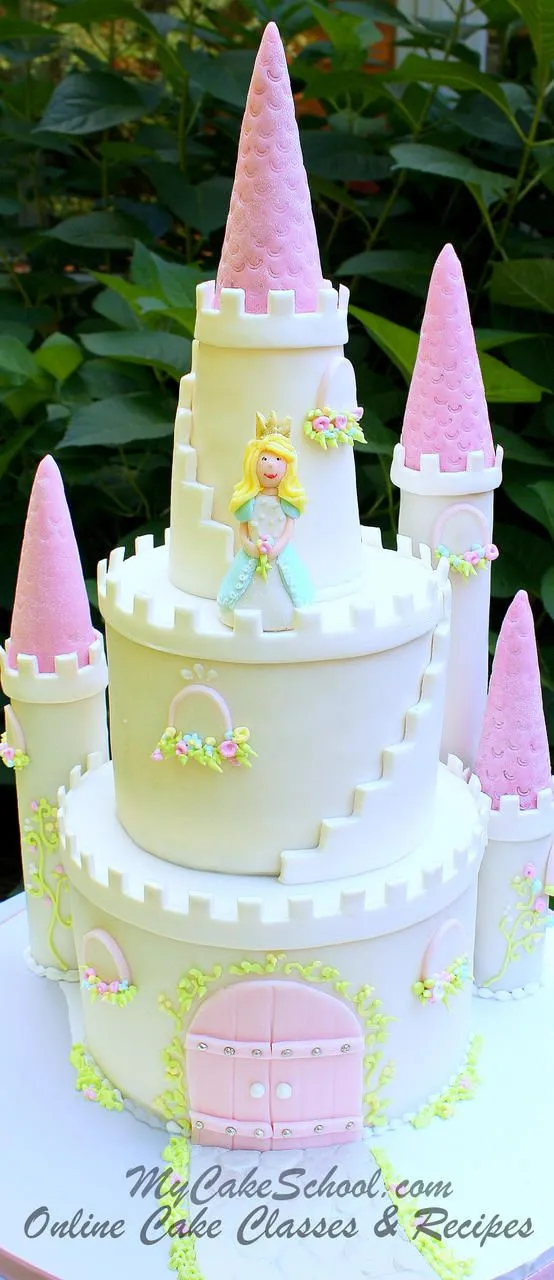
- Fondant Turrets: Use colored fondant to create turrets. Roll the fondant into cone shapes and place them on top of your cake. You can even add edible glitter for a royal touch!
- Wafer Paper Flags: Create miniature flags using colored wafer paper. Cut them into triangles, attach them to toothpicks, and stick them into the turrets. This adds a playful element to your castle.
- Candy Stones: Use chocolate rocks or candy-coated chocolates to mimic the look of a sturdy stone castle. Scatter them around the base of the cake for added texture.
- Buttercream Walls: Pipe buttercream in various shades of gray to create the illusion of stone walls. Use a spatula to create a textured finish for a more realistic effect.
- Edible Flowers: Decorate the perimeter of your cake with edible flowers to give it a whimsical garden feel. Think daisies, violets, or even sugar flowers!
Remember, the key is to have fun and let your imagination run wild. Your castle cake doesn’t have to be perfect; it just needs to reflect your creativity!
Also Read This: Exploring the Holiday Spirit with A Very Vintage Christmas on Dailymotion
6. Tips for a Successful Castle Cake
Baking a castle cake can be an adventurous endeavor, but a little planning goes a long way. Here are some valuable tips to ensure your cake is a towering success:
| Tip | Description |
|---|---|
| Choose the Right Cake Recipe | Opt for a sturdy cake, like pound cake or chocolate cake, which can hold the weight of decorations without collapsing. |
| Level Your Cakes | Use a cake leveler to ensure your layers are even. This helps in stacking and creates a more stable structure. |
| Use Dowels | If you’re stacking multiple tiers, use dowels for support. This prevents the upper tiers from crushing the lower ones. |
| Plan Your Design | Sketch out your design before you start baking. Having a visual guide can help you stay organized and focused. |
| Practice Patience | Take your time with frosting and decorating. Rushing can lead to mistakes. Enjoy the process! |
By following these tips, you'll not only create a stunning castle cake but also enjoy every step of the baking adventure. So roll up your sleeves and get ready to impress!
Also Read This: Understanding the Super Rumble Trend on Instagram Stories
7. Frequently Asked Questions
Baking a castle cake is an exciting adventure, but it can also come with its fair share of questions! Here are some of the most common ones we encounter:
- What type of cake is best for a castle cake?
A sturdy cake, like a pound cake or a layered chocolate cake, works wonderfully. These options hold their shape well and can support the weight of decorations. - Can I use fondant or buttercream for decorating?
While both are great choices, fondant gives a smooth finish that’s perfect for castle walls, whereas buttercream is easier to work with for beginners and can create beautiful textures. - How can I make my castle cake more stable?
Using dowels or cake boards between layers will help prevent the cake from collapsing. Also, chilling your cake before assembly can make the process easier! - What are some creative ideas for castle decorations?
Think about adding edible glitter, marzipan figures, or even using candy cones for turrets. You can also use royal icing to make flags or vines! - How can I transport my castle cake safely?
If possible, assemble the cake at your destination. If it’s already assembled, ensure it’s on a sturdy base and secured in a box to prevent it from shifting during transport.
8. Conclusion and Final Thoughts
Baking a castle cake is not just about following a recipe; it’s a creative journey that can spark joy and imagination! Remember, the process is just as important as the final product. Whether you’re a seasoned baker or a novice, each step allows you to express your creativity and share a piece of art with your loved ones.
As you embark on your castle cake adventure, keep these key points in mind:
- Be patient: Complex designs take time, so don’t rush through the process.
- Experiment: Don’t be afraid to try new techniques and flavors!
- Have fun: Enjoy the journey—after all, it’s about the joy of creating and sharing.
In the end, whether your castle turns out to be a magnificent fortress or a whimsical dream, it will surely bring smiles to those who enjoy it. So, grab your apron, gather your ingredients, and let your imagination soar! Happy baking!