Have you ever looked at a simple sheet of paper and thought it could become something amazing? Paper animal crafts are not just a fun way to spend an afternoon; they’re a great way to unleash your creativity and bring joy into your life. Whether you’re a seasoned crafter or just a beginner, creating paper animals can be an enjoyable and rewarding experience. From colorful origami figures to adorable cut-out creatures, the possibilities are endless!
These crafts are perfect for all ages. Kids can enhance their fine motor skills and boost their imagination, while adults can find relaxation and mindfulness in the process. Plus, making paper animals is an eco-friendly activity that can turn waste paper into something delightful. So, gather around the table, grab some supplies, and let’s dive into the world of paper animal crafts!
Materials Needed for Paper Animal Projects
Before you embark on your paper animal crafting adventure, it’s essential to gather the right materials. Fortunately, you won’t need a lot of fancy supplies! Here’s a handy list of what you’ll need:
- Colored Paper: Vibrant construction paper or recycled paper adds life to your creations.
- Scissors: A good pair of scissors is crucial for cutting out the shapes accurately.
- Glue Stick or Tape: Use these to secure your pieces together. Glue sticks are particularly mess-free!
- Pencil: For sketching your designs before cutting.
- Markers or Crayons: Great for adding details and bringing your animals to life.
- Googly Eyes: These can add a fun touch to your creations, making them even more adorable!
- Templates: Optional, but having templates can help if you’re not comfortable freehanding your designs.
Gathering these materials is the first step in creating your paper animals. It’s all about having fun and experimenting, so feel free to add any additional supplies you think might enhance your projects. Happy crafting!
Also Read This: How Caleb Wilmington Died – A YouTube Story Explored
Step-by-Step Instructions for Making Paper Animals
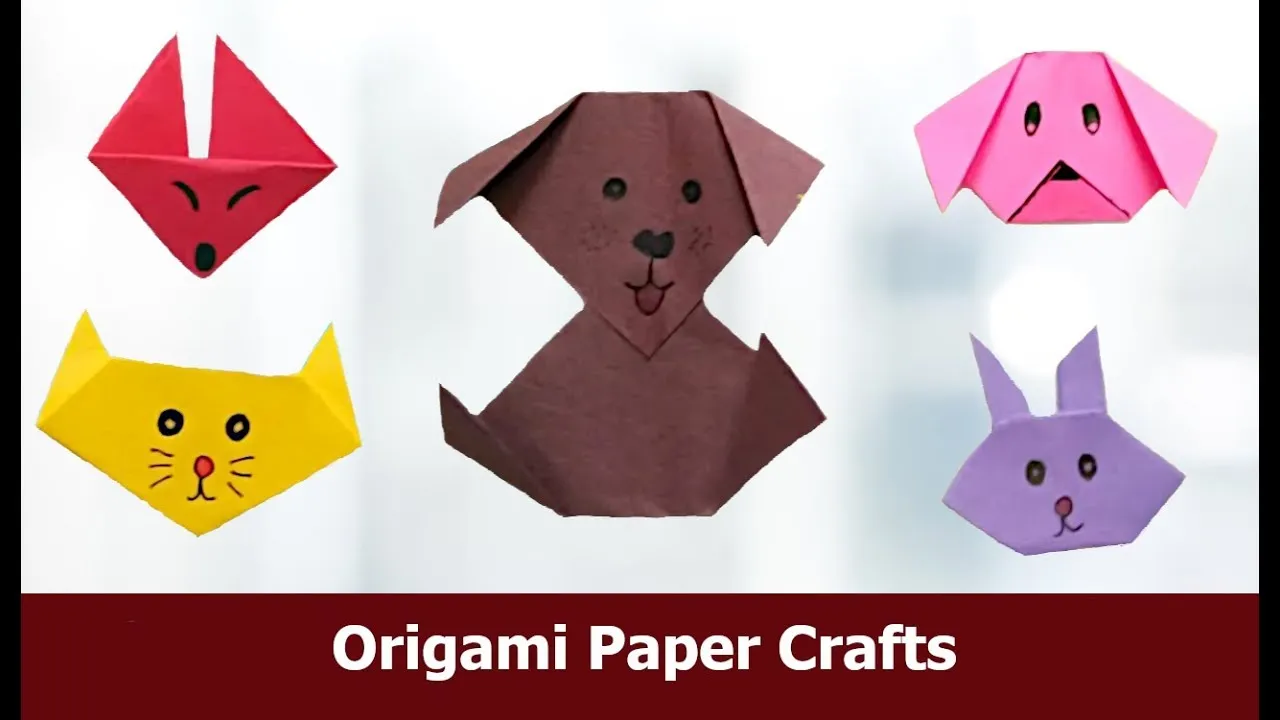
Creating fun paper animals is a delightful activity that sparks creativity and brings joy. Follow these easy, step-by-step instructions to craft your very own paper critters!
-
Gather Your Materials:
- Colored paper (construction paper or origami paper works great)
- Scissors
- Glue or tape
- Markers or crayons
- Googly eyes (optional)
-
Choose Your Animal:
Decide which animal you want to create. Popular choices include:
- Dogs
- Cats
- Bunnies
- Birds
-
Cut Your Paper:
Start by cutting the paper into the shapes you need. For example:
- For a bunny, cut out an oval for the body and two long rectangles for the ears.
- For a bird, cut a circle for the body and a triangle for the beak.
-
Assemble Your Animal:
Using glue or tape, attach the different parts together. Don’t forget to add details like legs, tails, and facial features!
-
Add Final Touches:
Use markers or crayons to draw on additional features, like whiskers or feathers. If you have googly eyes, stick those on for extra fun!
Also Read This: How to Create a Behance Portfolio in 2020
Tips for Customizing Your Paper Animals
Want to make your paper animals truly unique? Here are some fun tips to customize and personalize your creations:
-
Use Different Textures:
Mix and match various types of paper, such as shiny foil or textured cardstock, to give your animals a special touch.
-
Play with Colors:
Don’t limit yourself to natural colors! Try vibrant shades or even patterns to make your animal pop. For example:
- A pink bunny with polka dots
- A blue owl with star patterns
-
Add Accessories:
Give your animals some flair! Consider adding:
- Bow ties for dapper dogs
- Hats for quirky cats
-
Personalize with Names:
Let your imagination run wild! Write names or fun facts about your animals on their bodies for a storytelling element.
-
Incorporate Nature:
Use leaves, flowers, or twigs as part of your design. A paper bird perched on a twig looks especially charming!
Also Read This: Unexpected and Creative Uses for Illustrations Found on VectorStock
5. Creative Ideas for Displaying Your Paper Animals
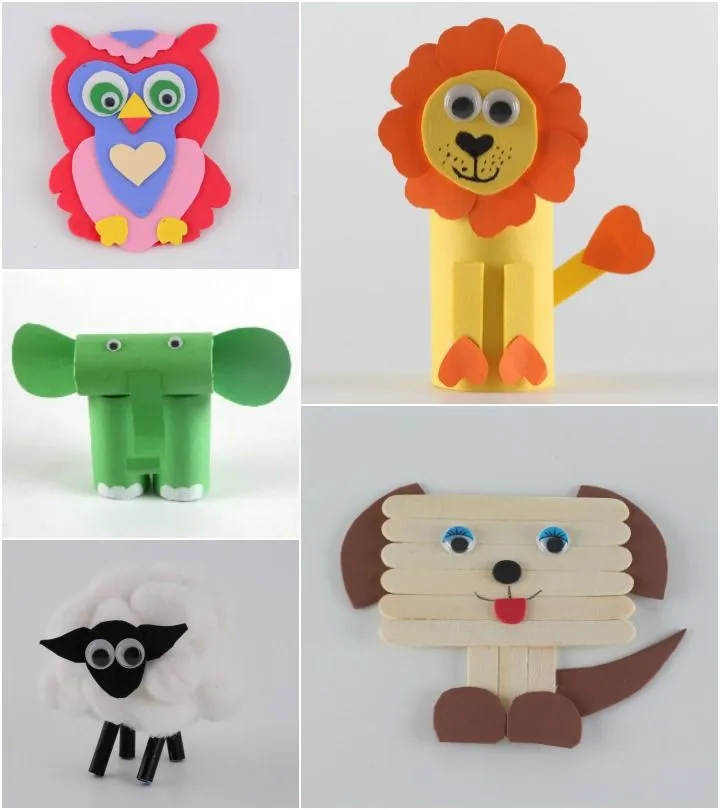
Once you've crafted your charming paper animals, it's time to showcase them in a way that brings joy to your space! Here are some creative ideas for displaying your adorable creations:
- Gallery Wall: Create a vibrant gallery wall by arranging your paper animals in colorful frames. You can mix different sizes and shapes for an eclectic look.
- Mobile Display: Hang your paper animals from the ceiling using fishing line to create a whimsical mobile. This adds movement and a sense of playfulness to any room.
- Crafted Shelves: Find a dedicated shelf, and place your paper animals among other decorative items. You can even add fairy lights to enhance the ambience!
- Table Centerpiece: Arrange a few of your paper animals in a fun basket or decorative bowl as a unique table centerpiece for parties or family gatherings.
- Seasonal Themes: Rotate your displays based on the seasons or holidays. For instance, add autumn leaves around your paper animals in fall or use pastel colors for spring.
Every display can tell a story and infuse your home with creative flair. So, don’t be afraid to experiment with different arrangements!
6. Conclusion and Encouragement to Explore More Crafting
Creating paper animals is not just a delightful activity; it's a wonderful way to unleash your creativity and bring a little whimsy into your life. As you finish your projects, remember that the world of crafting is vast and full of exciting possibilities.
Don’t stop here! Consider trying:
| Craft Idea | Description |
|---|---|
| Origami | Learn the art of folding paper into intricate designs and animals. |
| Paper Mache | Use newspaper and glue to create sturdy sculptures or decorations. |
| Collage Art | Combine various paper types and textures to create stunning visual pieces. |
So grab your scissors, let your imagination run wild, and keep exploring the joy of crafting! You never know what masterpieces you’ll create next. Happy crafting!