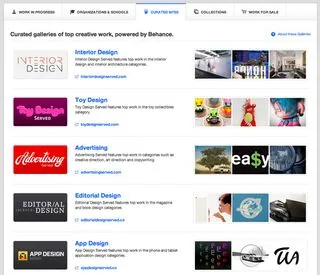
Behance is a vibrant online platform where creatives from all walks of life can showcase their work to a global audience. Whether you're a graphic designer, photographer, or even an illustrator, Behance provides the perfect stage to display your talents. In a world where first impressions matter, having an impressive
Why is it so important? Here are a few reasons:
- Network Building: Behance allows you to connect with like-minded creatives, potential clients, and employers.
- Feedback and Improvement: You can receive constructive feedback that helps refine your skills and projects.
- Portfolio Development: It's an excellent way to build a professional portfolio that showcases your best work to the world.
- Job Opportunities: Employers often scout talent on Behance, making it a key platform for job seekers in the creative field.
Step 1: Planning Your Project

Before diving into your Behance project, taking a moment to plan can make all the difference. A well-thought-out project is not only more engaging but also showcases your professionalism. Here’s how to get started:
- Define Your Audience: Who do you want to reach? Understanding your audience helps shape the content and style of your project. Consider whether you want to attract potential clients, collaborators, or simply inspire fellow creatives.
- Choose Your Best Work: Select pieces that represent your unique style and skills. Aim for quality over quantity; a few standout projects are better than many mediocre ones.
- Craft a Compelling Narrative: Every great project tells a story. Think about the journey behind each piece, the challenges you faced, and the solutions you found. This narrative can make your project more relatable and engaging.
- Organize Your Content: Structure is crucial. Decide on the order of your pieces, and consider how you'll present accompanying text, images, or videos. A clear flow will keep viewers interested.
- Set Clear Goals: What do you want to achieve with your Behance project? Whether it’s gaining followers, landing a job, or simply sharing your passion, having clear objectives can guide your planning process.
Taking the time to plan out your Behance project will not only make the creation process smoother but will also set the stage for a stunning showcase of your creativity!
Also Read This: How to Watch Full Episodes of Have Gun Will Travel on YouTube
Step 2: Collecting Your Work and Materials

Before you can create an impressive Behance project, it's essential to gather all your work and materials in one place. This step is all about setting the foundation for your showcase, ensuring you have everything at your fingertips. So, let’s dive into how to do this efficiently!
First, start by making a list of your best projects. Think about:
- Quality over Quantity: Choose pieces that truly represent your skills and creativity.
- Variety: Include different types of work to showcase your versatility. For instance, if you're a graphic designer, you might want to display logos, posters, and digital illustrations.
- Relevance: Select projects that are relevant to the audience you want to attract on Behance.
Next, gather all the necessary materials for each project. This includes:
- High-resolution images or videos of your work.
- Contextual information, like project descriptions or client briefs, that explain the story behind each piece.
- Any sketches, drafts, or process images that can show your creative journey.
Lastly, consider the format you'll be using. Whether it's digital images, videos, or PDFs, ensure everything is in a compatible format and easily accessible. Remember, the more prepared you are at this stage, the smoother the next steps will be!
Also Read This: LinkedIn Sales Navigator Pricing and Features Is It Worth the Cost
Step 3: Organizing Your Content Effectively
Now that you have all your materials collected, it's time to organize your content effectively. A well-structured project not only enhances visual appeal but also helps viewers understand your creative process and the depth of your work.
Start by categorizing your work. Here are some tips on how to do this:
- Thematic Grouping: Organize your projects by theme or style. For example, if you're showcasing branding work, group items by different companies or personal projects.
- Chronological Order: If you want to show your growth as an artist, consider arranging your work from oldest to newest. This tells a story of your artistic journey.
Next, think about the presentation of your pieces. Use the following techniques:
| Technique | Description |
|---|---|
| Grid Layout: | Utilize a grid format to create a clean and organized look. This works well for multiple images. |
| Sequential Narration: | Present your work in a way that narrates the project’s evolution, from concept to completion. |
Finally, don’t forget about the written content. Add descriptions that provide context and insight into each piece. Be sure to:
- Explain your creative process.
- Share any challenges faced and how you overcame them.
- Highlight the outcomes and any feedback received.
By organizing your content thoughtfully, you’ll make it easier for viewers to engage with your work and understand your creative journey!
Also Read This: How to Change Your YouTube Email and Update Your Account Information
Step 4: Designing Your Behance Project Layout
Designing an engaging Behance project layout is crucial for capturing your audience's attention and showcasing your work effectively. Think of your layout as the first impression visitors will have of your project. A well-structured layout can guide viewers through your creative journey smoothly.
Here are some tips to help you create a visually appealing layout:
- Use Grids and Alignment: A grid system can help you maintain consistency throughout your project. Align images and text to create a clean, organized look.
- Incorporate White Space: Don’t be afraid of white space! It allows your work to breathe and prevents the layout from feeling cluttered.
- Select a Color Palette: Stick to a limited color palette that reflects your brand or the theme of your project. This creates a cohesive feel.
- Vary the Content Types: Mix images, videos, and graphics to keep the viewer engaged. For instance, you could alternate between photos of your work and behind-the-scenes videos.
Consider using Behance's built-in features such as image carousels and interactive elements to enhance the viewer experience. Always preview your project to see how it flows and make adjustments where necessary. A compelling layout not only showcases your work but also tells a story about your creative process.
Also Read This: Credit Crunch: Understanding How Much iStock Credits Really Cost
Step 5: Writing Compelling Descriptions and Narratives
When it comes to Behance projects, the narrative you weave around your work can make all the difference. A compelling description not only provides context but invites viewers into your creative process.
Here are some strategies to write engaging descriptions:
- Tell a Story: Start with the inspiration behind your project. Share what motivated you to create it and any challenges you faced along the way.
- Be Clear and Concise: While storytelling is important, avoid lengthy paragraphs. Use short sentences and paragraphs to enhance readability.
- Highlight Key Features: Use bullet points to list key elements of your project. For example:
- Invite Feedback: Encourage viewers to leave comments and share their thoughts. This not only boosts engagement but helps you connect with your audience.
| Feature | Description |
|---|---|
| Design Concept | Explain the thought process behind your design choices. |
| Techniques Used | Detail any specific techniques or tools you employed during the project. |
| Intended Audience | Discuss who your work is aimed at and why it matters. |
Remember, your descriptions should reflect your unique voice. Be authentic and let your passion shine through; this will resonate with viewers and elevate your project!
Also Read This: How to Obtain High-Quality Photos from Getty Images
Step 6: Uploading Your Project to Behance
Uploading your project to Behance is like the grand unveiling of an art exhibit. It’s the moment where all your hard work comes to life for the world to see! Follow these steps to make your upload seamless and impactful:
- Create a New Project: On your Behance dashboard, click on the "+ Create a Project" button. This action opens a new canvas for your creative expression.
- Upload Your Files: Drag and drop your images, videos, or PDFs into the project uploader. Ensure that your files are high-quality—after all, first impressions matter!
- Organize Your Content: Arrange your visuals in a logical order. Consider telling a story or guiding viewers through your creative process. You can also add text descriptions for each piece to provide context.
- Add Tags: Use relevant tags to improve the discoverability of your project. Think about what terms potential viewers might use when searching for work like yours.
- Finalize Your Project: Once everything is in place, preview your project. Make necessary adjustments and ensure it aligns with your vision. When you're satisfied, hit the "Publish" button!
Remember, the way you present your project can significantly influence how it is perceived. Take your time to curate each detail thoughtfully!
Also Read This: What Happened to Andrea on Dr. Pol YouTube Exploring the Popular Show's Cast Changes
Step 7: Promoting Your Work on Behance and Beyond
Promotion is key to getting your work seen on Behance and beyond. Here are some effective strategies to increase the visibility of your project:
- Share on Social Media: Use platforms like Instagram, Twitter, and LinkedIn. Post snippets or behind-the-scenes content linking back to your Behance project.
- Engage with the Community: Interact with other creatives on Behance. Comment on their projects and appreciate their work. Building relationships can lead to reciprocal promotion.
- Collaborate: Team up with other artists for joint projects. This not only enhances your portfolio but also exposes you to their audience.
- Join Groups: Participate in Behance groups related to your interests. Share your work there for increased visibility among like-minded individuals.
- Utilize Email Newsletters: If you have a mailing list, feature your Behance project in your next newsletter. This creates direct traffic and engagement.
By promoting your work effectively, you not only showcase your projects but also foster connections with potential clients and collaborators. So get out there and let the world see your creativity!
Creating an Impressive Behance Project to Showcase Your Creative Work
Behance is a powerful platform for creative professionals to display their portfolios and gain visibility in their respective fields. When creating a project on Behance, it’s essential to focus on both aesthetics and content. Here are some key steps to effectively showcase your work:
1. Select Your Best Work
Choose pieces that represent your skills and creativity. Consider the following criteria:
- Quality: Only include your best work.
- Variety: Showcase diverse projects to highlight your range.
- Relevance: Choose projects that align with your career goals.
2. Create a Compelling Project Layout
The layout of your Behance project can significantly impact viewer engagement. Consider these elements:
| Element | Description |
|---|---|
| Cover Image | Use a high-quality, eye-catching cover image that represents the project. |
| Project Description | Provide a brief overview, including inspiration and techniques used. |
| Process Images | Include screenshots or sketches that showcase your creative process. |
3. Optimize for Engagement
Engage your audience through thoughtful presentation:
- Tags: Use relevant tags to enhance discoverability.
- Interaction: Respond to comments and feedback.
- Social Sharing: Share your project on social media for wider reach.
By carefully curating your portfolio, designing an appealing layout, and engaging with your audience, you can create an impressive Behance project that effectively showcases your creative work.
Conclusion: Tips for Success on Behance
Always keep your audience in mind, maintain high standards for your work, and engage actively with the community to enhance your presence on Behance.