Creating an Apple ID is your gateway to enjoying the vast ecosystem of Apple products and services. Whether you're a new user or switching from another platform, setting up your Apple ID is a crucial first step. In this guide, we'll walk you through everything you need to know about creating an Apple ID, ensuring you can seamlessly access the App Store, iCloud, and more. Let’s dive in!
Understanding Apple ID and Its Importance
An Apple ID is more than just a username and password; it’s your key to unlocking a world of Apple services. Think of it as your personal hub that connects all your devices and services, allowing you to manage your apps, music, photos, and more, all in one place.
Here’s why an Apple ID is important:
- Access to Services: With your Apple ID, you can access services like iCloud, iTunes, Apple Music, and the App Store. This means you can download apps, store your photos safely, and stream your favorite music without hassle.
- Synchronization Across Devices: An Apple ID allows you to sync your data across all your Apple devices. This includes notes, calendar events, and even your game progress in apps like Apple Arcade.
- Personalized Experience: Your Apple ID helps Apple tailor services to your preferences, from recommendations in the App Store to personalized playlists in Apple Music.
- Security and Privacy: With features like two-factor authentication, your Apple ID provides a secure way to manage your account and protect your personal information.
In summary, creating an Apple ID isn't just a formality; it's a crucial step that enhances your Apple experience. Without it, you might miss out on all the exciting features and conveniences Apple has to offer!
Also Read This: How to Remove Sections from Your LinkedIn Profile – A Simple Guide
3. Prerequisites for Creating an Apple ID

Before diving into the process of creating your Apple ID, there are a few prerequisites you'll want to have in place. This ensures a smooth setup without any unexpected hiccups. Here’s what you need:
- An Apple Device: Whether it's an iPhone, iPad, Mac, or even an Apple Watch, having an Apple device is essential. You can create your Apple ID directly from any of these devices.
- Internet Connection: Make sure you have a stable internet connection. A Wi-Fi or cellular data connection will work, but a strong connection is best for a seamless experience.
- Personal Information: Gather your personal information handy. You’ll need to provide details such as your name, date of birth, and email address. It’s best to use a valid email that you check regularly.
- Security Questions: Be prepared to set up security questions and answers. These will help secure your account and recover it if you forget your password.
- A Strong Password: Think of a strong password that meets Apple’s security requirements. It should be at least eight characters long and include a mix of letters, numbers, and symbols.
Once you have these prerequisites sorted, you’ll be ready to create your Apple ID without any hassle!
Also Read This: Understanding Earnings as an Alamy Contributor: A Guide to Potential Income
4. Step-by-Step Instructions to Create Your Apple ID
Creating your Apple ID is a straightforward process, and I’m here to walk you through it step by step. Let’s get started!
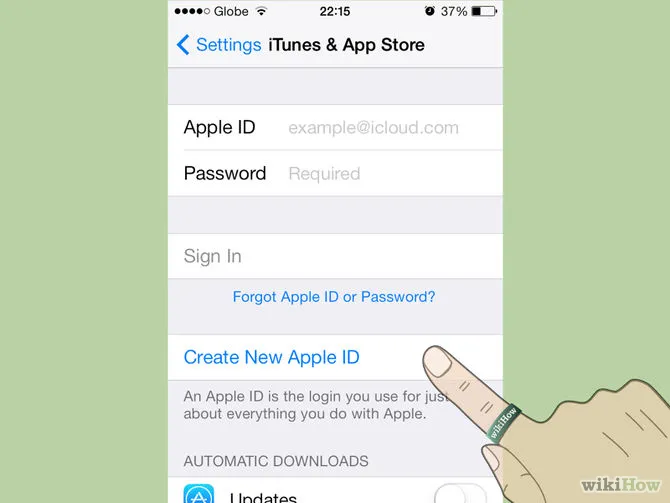
- Open Settings: On your Apple device, find and tap on the Settings app, which looks like a gear icon.
- Sign in to Your iPhone: Scroll down and tap on Sign in to your iPhone. If you’re using a different device, look for a similar option.
- Create Apple ID: Tap on Don’t have an Apple ID or forgot it? Then select Create Apple ID.
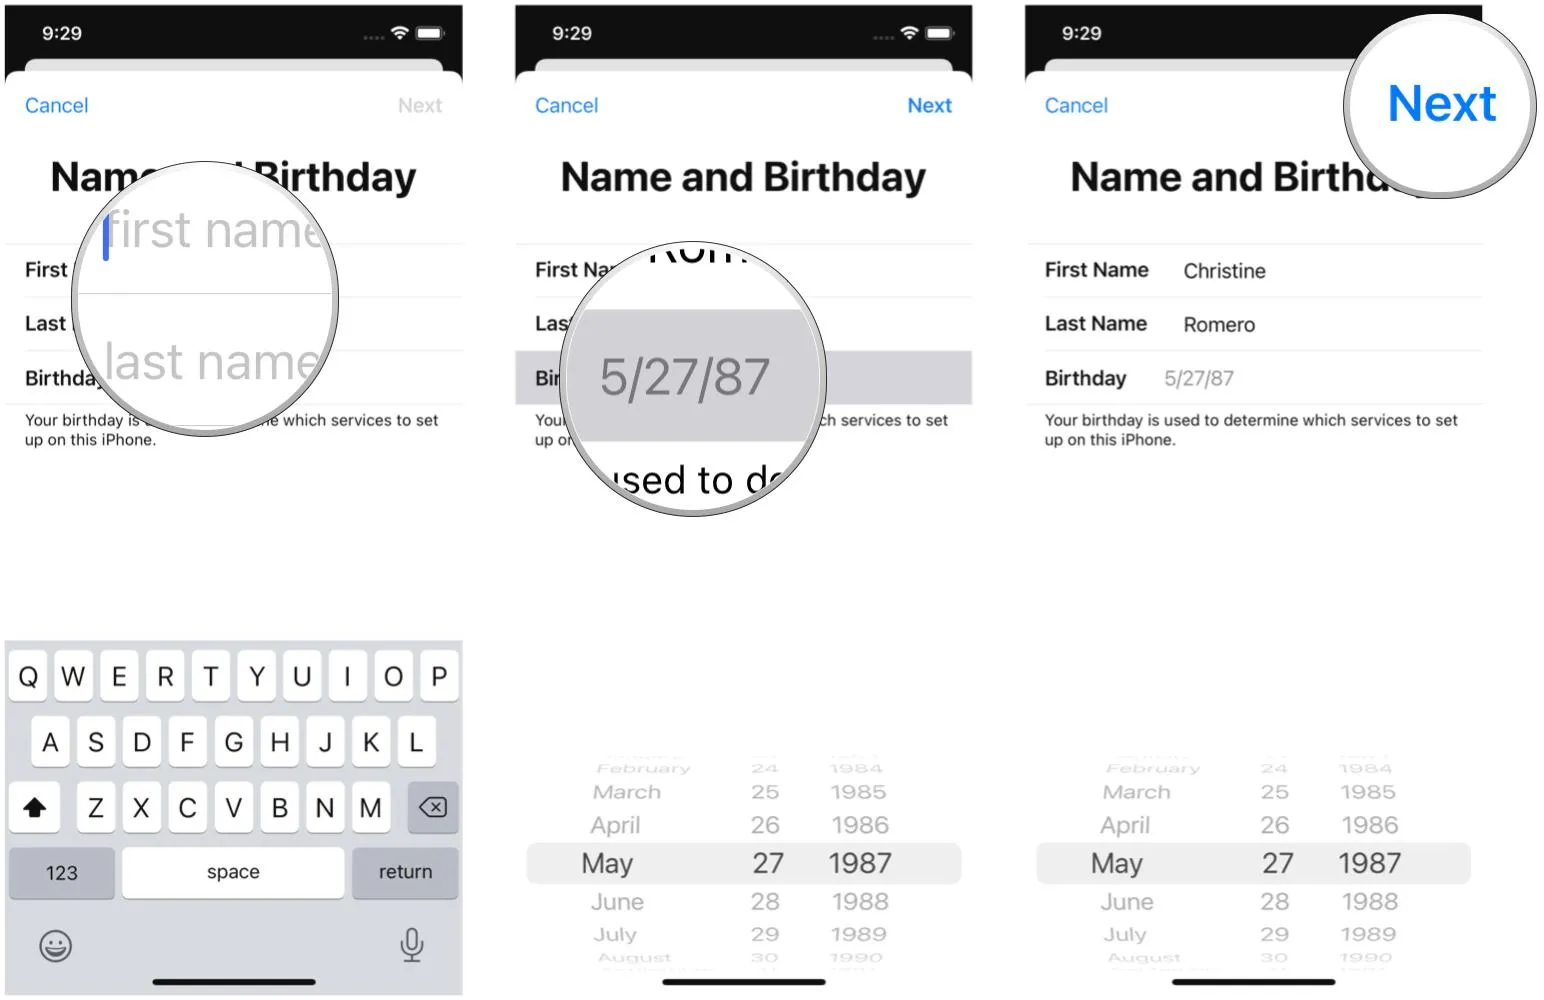
- Enter Your Details: Fill in your first and last name, as well as your birthdate. This information is used for security and personalization.
- Email Address: Enter a valid email address that you can access. This will be your Apple ID.
- Create a Password: Choose a strong password that meets Apple’s requirements. You'll have to enter it twice to confirm.
- Set Up Security Questions: Select and answer the security questions. These can help you regain access to your account if you forget your password.
- Agree to Terms and Conditions: Read and accept Apple’s terms and conditions. You might have to scroll through them before accepting.
- Verification: Check your email for a verification message from Apple. Click the link to verify your email address.
And there you have it! Your Apple ID is ready to use, unlocking a world of Apple services for you. Enjoy exploring!
Also Read This: How to Move YouTube Comments Back Down by Adjusting Your Channel Layout
5. Verifying Your Apple ID
Once you’ve created your Apple ID, the next crucial step is verification. This process ensures that the email address you provided is valid and helps keep your account secure. Here’s how to verify your Apple ID:
- Check Your Email: Apple will send a verification email to the address you used during registration. Open your email inbox and look for a message from Apple, usually titled “Verify your Apple ID.”
- Click the Verification Link: Inside the email, you’ll find a link. Click on it to confirm your email address. This link is typically valid for a limited time, so don’t delay!
- Sign In: After clicking the link, you may be prompted to sign in with your Apple ID credentials. This step confirms that you have access to the email account.
- Check for Confirmation: If everything goes smoothly, you’ll see a message confirming that your Apple ID has been verified. Congratulations! You’re all set to enjoy the full range of Apple services.
Remember, verifying your Apple ID is essential for accessing features like iCloud, the App Store, and more. If you don’t see the verification email, check your spam folder or request a new one through the Apple ID website.
Also Read This: Why Is My YouTube Keyboard Not Working
6. Common Issues and Troubleshooting Tips
Even with a straightforward process, you might encounter a few hiccups when creating or verifying your Apple ID. Here are some common issues and handy troubleshooting tips to resolve them:
- Not Receiving Verification Email: If you didn’t receive the verification email, first check your spam or junk folder. If it’s still missing, try resending it from the Apple ID account page.
- Password Issues: Forgetting your password is common. Use the “Forgot Password” option on the sign-in page to reset it. Ensure your new password meets Apple’s security requirements.
- Account Locked: After multiple failed sign-in attempts, your account may lock for security reasons. You can unlock it by following the prompt in your email or through the Apple ID website.
- Two-Factor Authentication Problems: If you can't receive verification codes via SMS or phone call, check your device settings or ensure you have a strong network connection.
Don’t let these small issues discourage you! Apple provides comprehensive support resources to help you through any challenges. The key is to stay patient and keep trying!
Creating an Apple ID: A Comprehensive Step-by-Step Guide
An Apple ID is essential for accessing a wide range of Apple services, including the App Store, iCloud, iMessage, and Apple Music. This guide will walk you through the process of creating your own Apple ID, ensuring that you can enjoy all the features Apple has to offer.
Step 1: Visit the Apple ID Creation Page
Start by navigating to the official Apple ID account page. Here, you will find options to create a new Apple ID.
Step 2: Fill Out Your Information
You will be prompted to enter the following details:
- First Name: Your first name
- Last Name: Your last name
- Email Address: A valid email address that will be your Apple ID
- Password: Create a strong password (minimum of 8 characters, including a number and a symbol)
- Security Questions: Choose and answer security questions for account recovery
Step 3: Verify Your Email
After submitting your information, check your email inbox for a verification email from Apple. Click the link in the email to verify your address.
Step 4: Set Up Two-Factor Authentication (Optional)
For added security, consider enabling two-factor authentication. This will require verification through a trusted device whenever you sign in.
Step 5: Sign In to Your Apple ID
Once your Apple ID is created, sign in on your devices to access Apple services.
Table: Benefits of Creating an Apple ID
| Benefit | Description |
|---|---|
| Access to Apple Services | Use iCloud, App Store, iMessage, and more. |
| Device Synchronization | Sync your content across all Apple devices. |
| Security Features | Utilize two-factor authentication for enhanced security. |
In conclusion, creating an Apple ID is a straightforward process that opens the door to a world of Apple services. By following these steps, you can set up your Apple ID quickly and enjoy seamless integration across your devices.