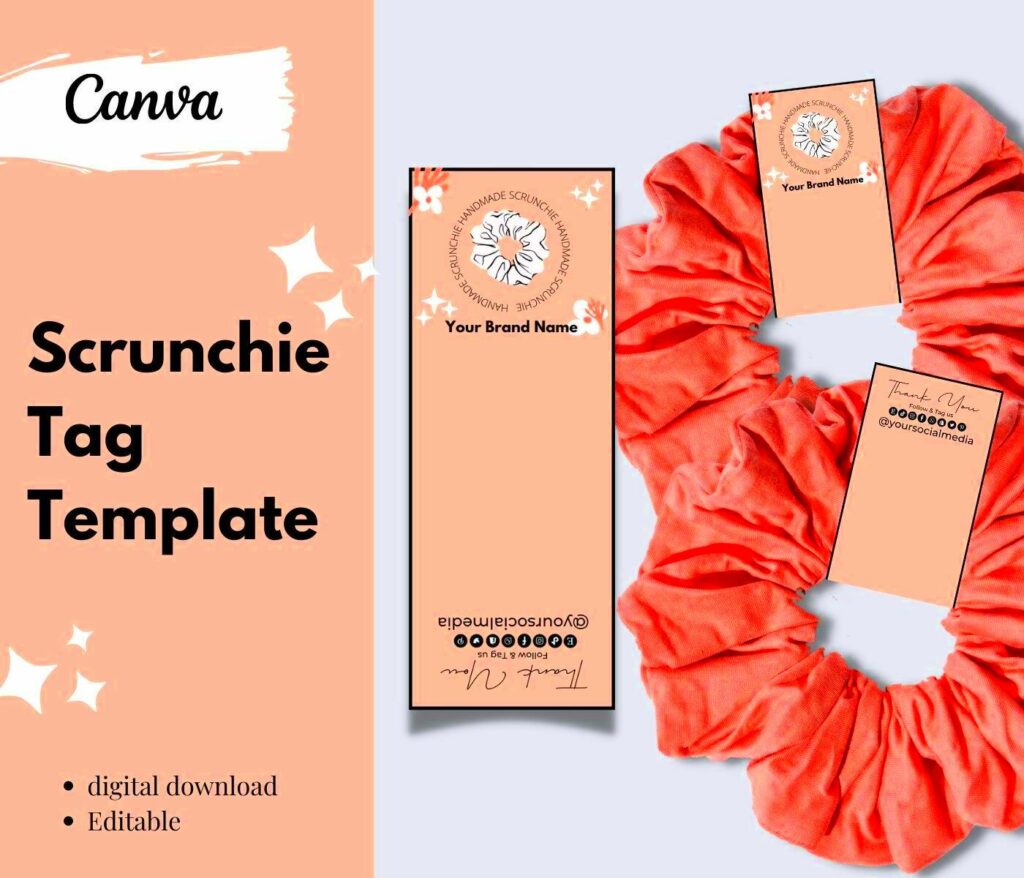
Custom scrunchie tags are a fun way to add a personal touch to your accessories. Whether you are making scrunchies for yourself, gifts, or for selling, tags can elevate your product. They not only provide essential information but also showcase your creativity. With the right design, these tags can enhance the overall look of your scrunchies and help them stand out.
Importance of Using Tags for Scrunchies
Using tags for your scrunchies comes with several benefits. Here are a few key reasons why they matter:
- Brand Recognition: Tags help customers remember your brand. A unique design can make a lasting impression.
- Information Sharing: Tags can include care instructions, material details, or even your social media handles, making it easier for customers to connect with you.
- Professional Look: Adding tags gives your scrunchies a polished appearance, making them more appealing to potential buyers.
- Customization: You can personalize tags to fit any theme or occasion, adding an extra layer of creativity.
Overall, custom tags are a small detail that can significantly impact how your scrunchies are perceived.
Also Read This: How to Include Your ShootProof Gallery on Your Website
How to Access Canva Scrunchie Tag Template
Getting started with Canva's scrunchie tag template is simple. Follow these steps to access and customize your template:
- Visit Canva: Go to the Canva website.
- Create an Account: If you don’t have an account, sign up for free. If you already have one, just log in.
- Search for Templates: In the search bar, type “scrunchie tag” to find relevant templates.
- Select a Template: Browse through the options and choose a template that you like.
- Start Customizing: Click on the template to open it in the editor. Here, you can change colors, fonts, and text to make it your own.
Canva offers various tools to help you create beautiful and effective tags. Don’t hesitate to explore their design options!
Also Read This: How to Check Fortiguard Downloader Server Status
Steps to Customize Your Scrunchie Tags
Customizing your scrunchie tags is a creative process that can be done easily with Canva. Here’s a simple guide to help you get started:
- Open Your Template: After selecting your scrunchie tag template, open it in the Canva editor.
- Edit Text: Click on the text areas to enter your details. This can include your brand name, product name, and any other information you want to add.
- Add Images: If you want to include a logo or any graphics, simply upload your images and place them on the tag. Resize them as needed.
- Change Background: Experiment with background colors or patterns. You can keep it simple or go for something eye-catching!
- Adjust Layout: Move elements around to achieve the perfect balance. Ensure that your design looks good from different angles.
- Preview Your Design: Take a moment to preview your tag. Make sure everything is aligned and looks great.
Once you are satisfied with your design, you’re ready to move on to printing!
Also Read This: Mastering Privacy on Behance to Safeguard Your Creative Projects
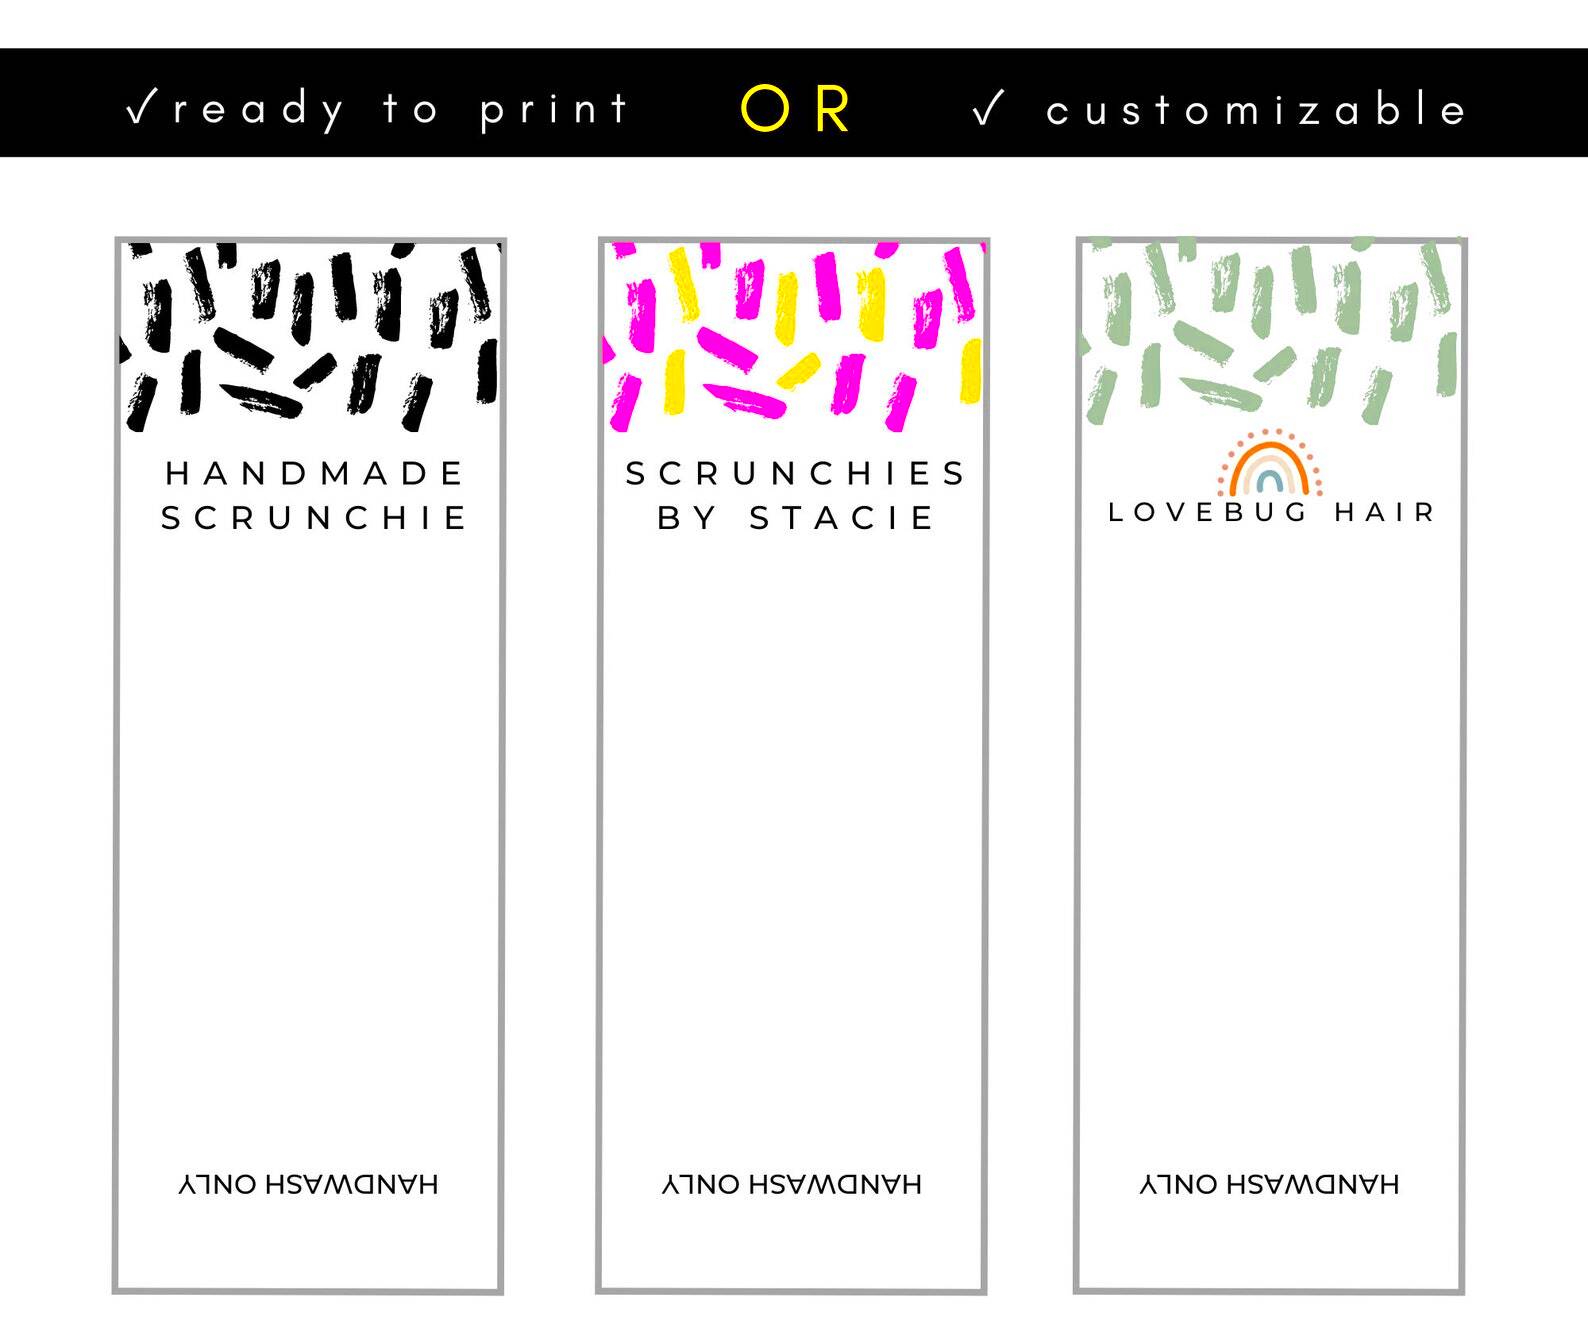
Choosing the Right Colors and Fonts
Colors and fonts play a crucial role in the overall look of your scrunchie tags. Here’s how to choose wisely:
- Understand Color Psychology: Colors can evoke emotions. For example, soft pastels may convey a calm and playful vibe, while bold colors can grab attention. Consider what message you want to send with your tags.
- Limit Your Palette: Stick to 2-3 colors that complement each other. This helps keep your design clean and focused.
- Select Appropriate Fonts: Choose fonts that match your brand style. For a playful look, try fun, whimsical fonts. For a more professional appearance, opt for sleek, modern fonts.
- Ensure Readability: Make sure your text is easy to read. Avoid overly decorative fonts, especially for important information.
Testing different combinations can help you find the perfect match for your scrunchie tags!
Also Read This: Quick Tips for Finding Entry-Level Jobs on LinkedIn
Printing Your Custom Scrunchie Tags
Once your scrunchie tags are designed, it’s time to print them! Here’s how to get the best results:
- Select Paper Type: Choose a sturdy paper or cardstock for durability. If your tags will be used for retail, a thicker paper gives a more professional look.
- Check Print Settings: Before printing, make sure your printer settings are correct. Use the highest quality settings for the best results.
- Test Print: Print a test page to check colors, alignment, and overall appearance. This step helps avoid wasting materials.
- Trim the Tags: Use scissors or a paper cutter to cut out your tags neatly. Consider leaving a little border for a polished look.
- Attach Tags to Scrunchies: Use a string, ribbon, or safety pin to attach your tags to your scrunchies. This adds a nice finishing touch!
With these steps, your custom scrunchie tags will look fantastic and be ready to impress!
Also Read This: Incorporating Adobe Stock Assets into Premiere Pro for Video Editing Projects
Using Tags for Branding Your Scrunchies
Tags are more than just decorative pieces; they are a powerful tool for branding your scrunchies. When done right, they can communicate your brand’s identity and values. Here’s how you can effectively use tags to boost your brand:
- Showcase Your Logo: Including your logo on the tag helps customers easily recognize your brand. This builds familiarity and trust.
- Share Your Story: Use the tag to convey your brand story or mission. A short message about why you create scrunchies can connect emotionally with customers.
- Use Consistent Branding: Make sure the colors, fonts, and design elements match your overall brand aesthetic. Consistency across all products reinforces your brand image.
- Encourage Social Engagement: Include your social media handles on the tags. This encourages customers to follow you and share their experiences with your products.
- Highlight Unique Selling Points: If your scrunchies are made from eco-friendly materials or handmade, mention that on the tag. This can attract customers who value sustainability.
By using tags strategically, you can elevate your scrunchies from just accessories to a meaningful brand experience.
Also Read This: Downloading Vector Stock Images for Free: A Quick Guide
FAQs About Custom Scrunchie Tags
Here are some common questions people have about custom scrunchie tags:
- What materials should I use for my tags? It's best to use sturdy paper or cardstock. If you want something more durable, consider using synthetic materials.
- Can I create tags without any design skills? Absolutely! Canva provides user-friendly templates that make it easy for anyone to design tags.
- How do I attach the tags to my scrunchies? You can use strings, ribbons, or safety pins. Choose a method that complements your design.
- Are there size requirements for scrunchie tags? There are no strict size rules, but ensure your tags are big enough to include all necessary information without overwhelming the design.
- How can I ensure my tags are eye-catching? Use vibrant colors, unique shapes, and creative designs. Experiment with textures and finishes to make them stand out.
These answers should help clarify any doubts about creating and using custom scrunchie tags.
Conclusion on Creating Scrunchie Tags with Canva
Creating custom scrunchie tags with Canva is an enjoyable and rewarding process. Not only do these tags enhance the look of your scrunchies, but they also provide an opportunity to express your brand's personality. Remember to choose designs, colors, and fonts that reflect your unique style. Utilize tags to tell your story and connect with your customers. With the steps outlined above, you can easily create tags that are not only functional but also visually appealing. So, dive into your creative journey and start designing your custom scrunchie tags today!