Warning: Undefined array key 4 in /home/imgpanda.com/public_html/wp-content/themes/astra/template-parts/single/single-layout.php on line 176
Warning: Trying to access array offset on value of type null in /home/imgpanda.com/public_html/wp-content/themes/astra/template-parts/single/single-layout.php on line 179
Creating a picture frame with paper is a fun, creative project that anyone can enjoy! Whether you're looking to display your favorite memories or make a unique gift, a handmade paper frame adds a personal touch to your decor. Plus, it’s an excellent way to recycle old paper or use up scraps from other projects. In this guide, we’ll walk you through the entire process step-by-step, ensuring you have all the tips and tricks to create a stunning frame that showcases your cherished photos beautifully.
Materials Needed

Before diving into the crafting process, let’s gather everything you’ll need to create your picture frame. Here’s a handy list to ensure you're fully prepared:
- Cardstock or Construction Paper: Choose colors that complement your photo or match your decor. You’ll need a sturdy paper for the frame.
- Scissors: A good pair of scissors will help you cut precise shapes for your frame.
- Glue or Double-Sided Tape: Use a strong adhesive to ensure your frame holds together well.
- Ruler: A ruler will help you measure and keep your lines straight, which is crucial for a neat finish.
- Pencil: For marking measurements before cutting. It’s always better to draw first!
- Decorative Elements (optional): Think stickers, washi tape, or stamps to add a personal touch to your frame.
- Craft Knife (optional): If you want to create intricate designs, a craft knife can be handy for more detailed cuts.
- Photo to Frame: Of course, don’t forget the picture you want to display!
With these materials in hand, you're ready to embark on your crafting adventure and create a stunning paper picture frame!
Also Read This: Why Are Imgpanda’s SEO and PDF Tools the Secret to Streamlining Your Digital Workflow?
Step 3: Assemble the Frame

Alright, now that you’ve got all your pieces cut out and ready to go, it’s time to put everything together! This part is where your creativity starts to shine, and you’ll see your picture frame come to life.
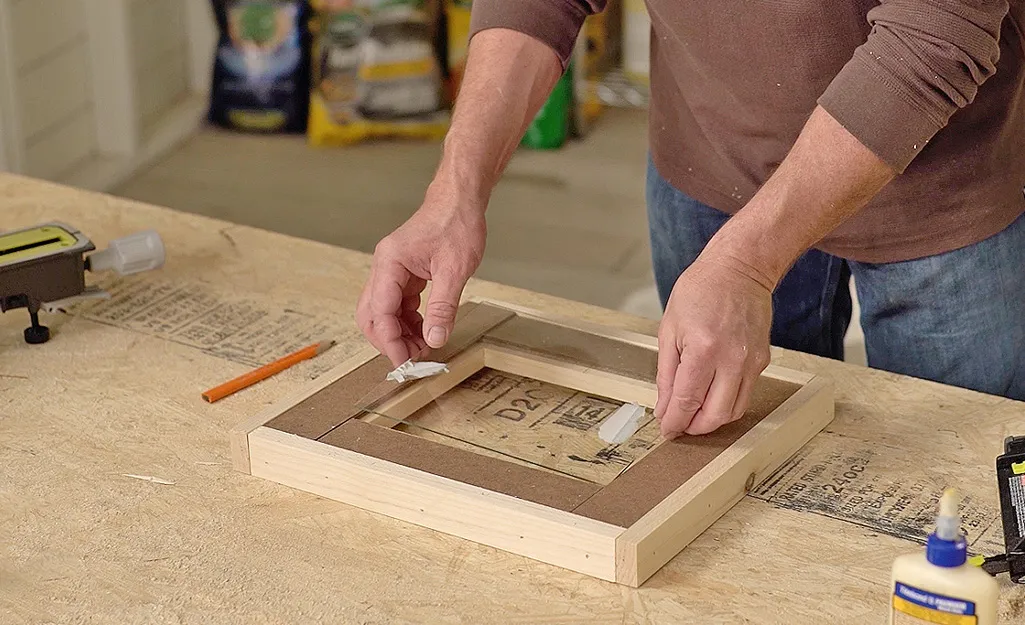
First, take your *outer frame piece and lay it flat on your surface. Next, grab your inner frame piece—this is the part that will hold your picture. You’ll want to place it carefully in the center of the outer frame. If you’re using glue, a glue stick works great for this step. Just apply a thin layer around the edges of the inner frame and press it down firmly onto the outer frame.
Now, if you’re using any corner pieces or decorative edges that you cut out earlier, this is the time to attach them. You can use glue or double-sided tape for these as well. Simply adhere them to the corners where the outer and inner frames meet. Make sure everything is aligned properly, so your frame looks neat and tidy!
After attaching all the pieces, give everything a few minutes to dry. If you’re feeling extra crafty, consider using a piece of cardboard* as a backing to add stability to your frame. Cut the cardboard to match the dimensions of the outer frame and glue it in place. This will ensure that your frame holds its shape and can stand upright or hang on the wall.
Also Read This: Ultimate Guide to Uploading a 360 Video on YouTube for Maximum Engagement
Step 4: Add Decorative Elements

Now comes the fun part—decorating your frame! This step is all about personal expression, so don’t hold back. You can embellish your frame in countless ways. Here are a few ideas:
- Paint: Use acrylic paints to add splashes of color. You can create patterns, designs, or even paint a solid color that complements your picture.
- Stickers: Adorn your frame with stickers that reflect your personality or the theme of your photo.
- Washi Tape: This decorative tape comes in various patterns and colors. You can use it to outline the edges of your frame or create fun designs.
- Natural Elements: If you’re feeling adventurous, consider gluing on some twigs, leaves, or flowers for a rustic touch.
- Text: Use letter stickers or write a meaningful quote or date on the frame to make it even more special.
As you add these decorative elements, remember to step back occasionally and see how it all looks together. You want your frame to be a true reflection of your style! Once you’re satisfied with the decorations, let everything dry completely before putting your photo inside. And voilà, you’ve created a stunning picture frame that’s uniquely yours!
Also Read This: Easy Steps to Cancel Your Shutterstock Account
Step 5: Insert Your Picture
Now that you've crafted your beautiful paper frame, it's time for the most exciting part – inserting your picture! This step is crucial, as it brings your creation to life and showcases your favorite memories. Here’s how to do it seamlessly:
- Choose Your Picture: Select a photo that fits perfectly within the dimensions of your frame. It could be a cherished family portrait, a scenic landscape, or even a fun snapshot from a recent event. Make sure it’s printed or cut to the right size.
- Prepare the Backing: If your frame has a back piece, ensure it’s clean and free from dust. This will help your picture look its best. You might also want to use a piece of sturdy cardboard or cardstock as a backing for extra support.
- Position the Picture: Carefully place your picture into the frame, ensuring it aligns with the edges and is centered. If you’re using a backing board, lay it on top of the picture to hold it in place.
- Secure It: Depending on your frame design, you can use tape, glue, or even small clips to keep the picture in place. If you’re using glue, apply it gently around the edges to avoid any mess.
- Final Check: Take a moment to step back and admire your handiwork. Make sure everything looks just how you want it. Adjust if necessary.
And there you have it! Your picture is now securely framed and ready to be displayed. Whether it’s for your home, office, or as a heartfelt gift, you can be proud of your creation.
Also Read This: Guide to Uploading HD Videos to Dailymotion with Easy Tips
Conclusion
Congratulations! You’ve successfully created a stunning picture frame using paper! Isn’t it amazing how something so simple can transform a cherished photo into a beautiful piece of art? Let’s quickly recap the steps you took:
- You gathered your materials, ensuring you had everything you needed.
- You designed and cut your frame, allowing your creativity to shine.
- You decorated it, adding personal touches that reflect your style.
- You inserted your picture, bringing your frame to life.
Creating a picture frame with paper is not only a fun and engaging project, but it also allows for endless personalization. You can experiment with different colors, patterns, and embellishments to make each frame unique. Plus, it’s a great way to recycle paper materials, so you can feel good about your eco-friendly choice!
Now that you’re equipped with this step-by-step guide, don’t hesitate to explore more designs. Whether it’s for holidays, birthdays, or just a cozy decoration for your home, your handmade frames will undoubtedly add a personal touch to any space. So, gather your supplies, invite some friends over, and start creating beautiful memories that can be displayed with pride!
Create a Picture Frame with Paper - Step-by-Step Guide
Creating a picture frame with paper is an enjoyable and creative project that allows you to personalize your space. Whether you want to display a cherished memory or give a handmade gift, this guide will walk you through the process step-by-step.
Materials Needed
- Colored paper or cardstock
- Scissors
- Glue or double-sided tape
- Ruler
- Pencil
- Decorative items (stickers, washi tape, etc.)
Step-by-Step Instructions
- Measure Your Picture: Start by measuring the dimensions of the picture you want to frame. This will help you create a frame that fits perfectly.
- Cut the Frame Base: Using your ruler and pencil, draw a rectangle on the colored paper that is larger than your picture. Cut it out to form the base of the frame.
- Create the Picture Opening: For a classic look, cut a smaller rectangle in the center of the frame base. This should be the same size as your picture.
- Decorate the Frame: Before assembling, use decorative items to embellish your frame. Apply stickers or washi tape for added flair.
- Assemble the Frame: Place your picture behind the opening and secure it with glue or double-sided tape. Ensure everything is aligned well.
- Final Touches: Allow the glue to dry completely. If desired, add a stand or a hook for hanging.
With just a few simple materials and steps, you can create a beautiful picture frame that showcases your favorite memories. This DIY project is not only budget-friendly but also allows for endless customization!
Watch the Tutorial on Dailymotion to get a visual guide and enhance your crafting experience.