Canva is a goldmine for those who want to craft eye catching visuals. However grasping the concept of image shapes can take your design skills to the next level. Imagine having an idea for a social media post but the usual rectangular image falls short of capturing your vision. This is when Canvass image shapes come in handy providing a distinct avenue, for showcasing your creativity.
In Canva shapes serve a purpose beyond looking good; they can impact how your audience interprets your message. They have the power to stir emotions direct attention and make your designs pop in a saturated online environment. With an array of options available such as circles, triangles and unique shapes you can tailor your visuals to align seamlessly with your narrative.
In addition being able to play around with these shapes can really enhance the overall design. When I began using Canva I was struck by how a small adjustment in shape could turn my visuals from something commonplace into something remarkable. Its all about trying things out and discovering what clicks with both you and your audience.
Steps for Modifying Image Shapes in Canva
Sure let's go through the process of changing image shapes in Canva step by step. It's not as complicated as it seems! Here's a straightforward guide to assist you with it.
- Open Canva: Log into your Canva account and open the design you want to work on.
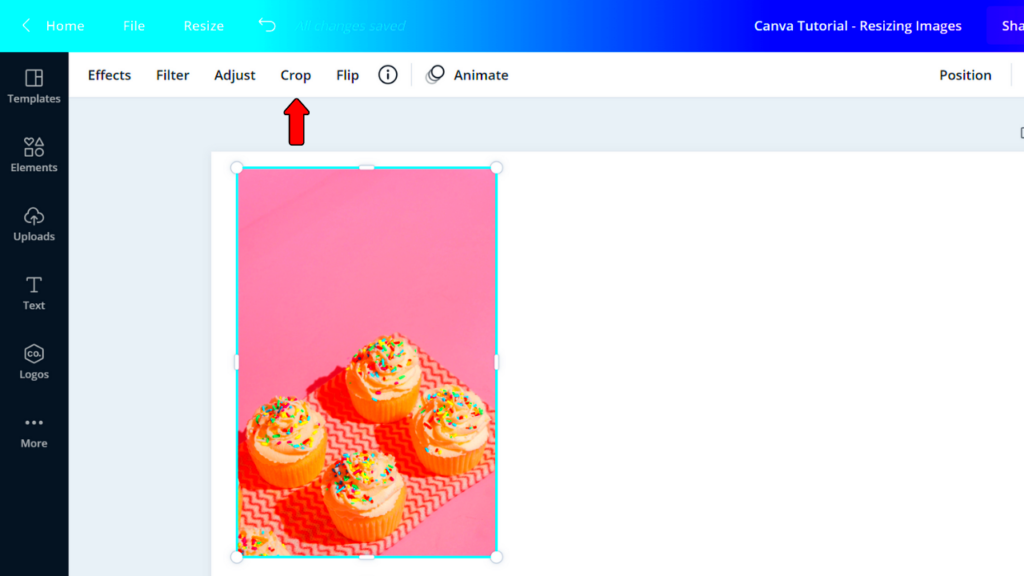
- Select the Image: Click on the image you wish to modify.
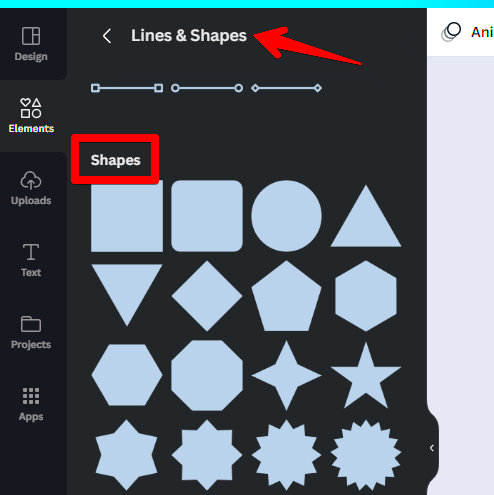
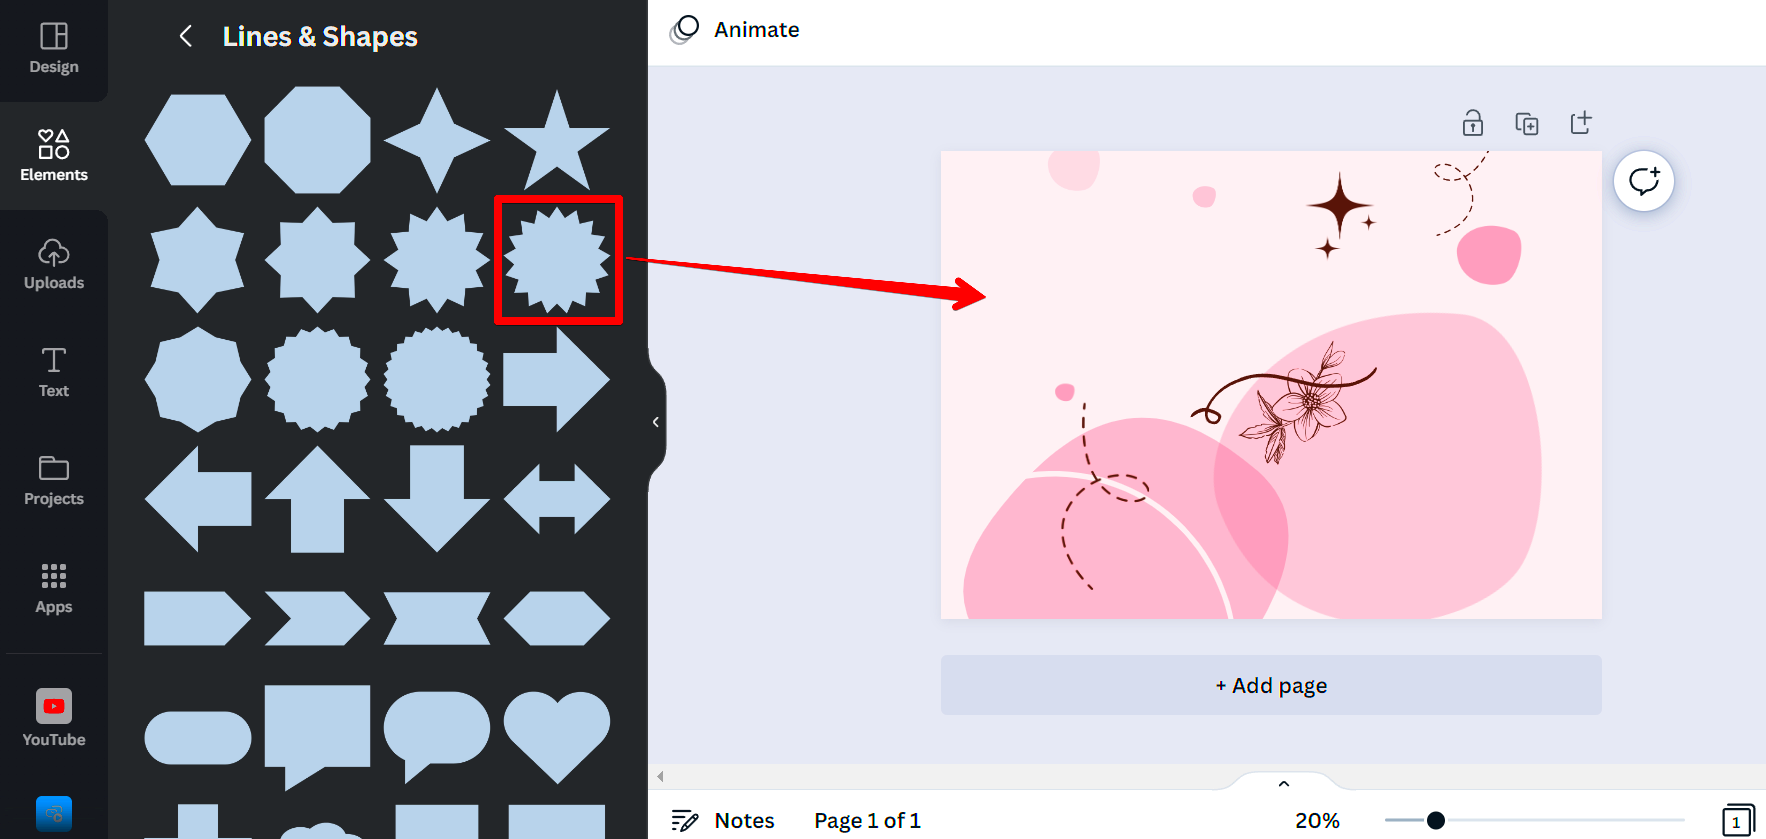
- Choose the Shape: Click on the 'Elements' tab and select the shape you want to use.
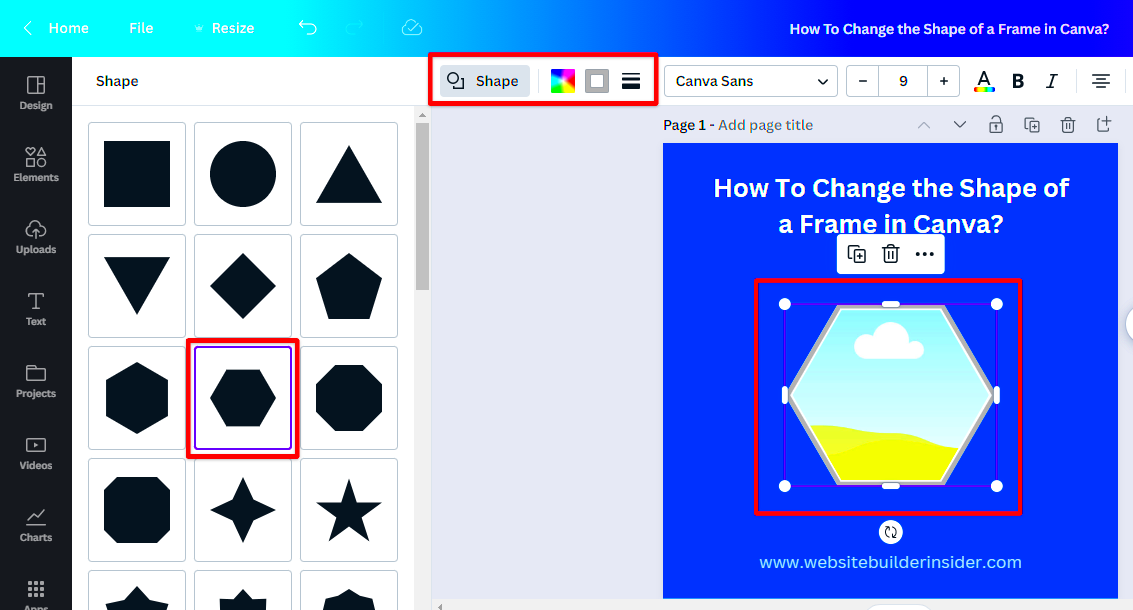
- Adjust the Shape: Resize and position the shape over your image. You can use the corners to stretch or shrink the shape.
- Clip the Image: Right-click the image, select 'Send to Back,' and then 'Crop.' This will allow you to fit your image inside the shape.
- Fine-Tune Your Design: Adjust the colors, borders, and shadows to give your shape a polished look.
While these steps may appear simple the true enchantment comes from your imagination. Playing around with various forms and arrangements can result in stunning creations that showcase your individuality.
Also Read This: Mastering Knorr Noodles at Home with Easy Recipes
Using Canva’s Shape Tools Effectively
Now that you have grasped the art of changing image shapes lets delve into the effective use of Canvass shape tools. These tools go beyond aesthetics; they can elevate the impact of your designs message.
For instance you might want to incorporate shapes to achieve a contemporary look or opt for shapes to evoke a more earthy ambiance. Here are some suggestions to maximize the potential of Canvas shape features.
- Combine Shapes: Don’t hesitate to layer multiple shapes. This technique can add depth and interest to your design.
- Play with Transparency: Adjusting the transparency of shapes can create stunning effects, allowing images to peek through.
- Use Colors Wisely: Choose colors that complement your brand or message. A well-thought-out color scheme can significantly impact viewer perception.
- Experiment with Effects: Canva offers various effects like shadows and glows. Try them out to see what enhances your design.
While using these tools I discovered that the secret lies in welcoming the process of learning. Initially it may feel a bit daunting but with each click and tweak you gain insights. So instead of hurrying through it take your to delve into and craft something genuinely one of a kind!
Also Read This: How to Find the Best Street Photography Groups on Flickr
Combining Shapes with Images
Merging shapes and visuals is akin to sprinkling some spice onto a classic recipe it can truly elevate the flavor. When I began my design journey in Canva I was hesitant about how to seamlessly integrate shapes with images. However through trial and error I found that this fusion can infuse my creations with vibrancy leaving a lasting impression.
Using shapes as frames or backdrops can really help draw attention to your pictures. For example positioning a circle behind a photo can add a touch of warmth and friendliness whereas using a rectangular shape can lend a more contemporary and polished vibe. Here's a guide on how to perfect this approach.
- Select Your Image: Start with the image you want to use. It could be a photo, illustration, or even a logo.
- Choose a Shape: Go to the 'Elements' tab and pick a shape that complements your image. Think about the story you want to tell.
- Layering: Place the shape behind or around your image. Adjust the size to create a balanced look.
- Color Coordination: Use colors that resonate with your overall theme. A cohesive color palette will tie your design together beautifully.
While incorporating shapes into my work I discovered that they not only assisted in structuring my designs but also brought an air of sophistication. Every creation turned out to be a true representation of my individuality and artistic flair. So feel free to get creative; merging shapes with visuals is an enjoyable method to showcase your uniqueness!
Also Read This: Canva Transparent Image Addition
Common Issues in Image Shape Modification
Transforming image shapes in Canva, like any creative endeavor has its hurdles. Its a journey that every designer goes through and believe me, I’ve encountered my share of bumps along the way. By familiarizing yourself with these challenges you can navigate through the frustrations more smoothly and enjoy a more seamless design process.
Here are a few common issues you may come across.
- Image Distortion: One of the most frustrating issues is when an image doesn’t fit the shape properly, leading to awkward cropping. Always check the aspect ratio of your images.
- Layering Confusion: Sometimes, you may lose track of which element is in front or behind. Use the 'Arrange' tool to bring elements forward or send them back as needed.
- Color Clashes: If the colors of your shapes and images don’t mesh well, the design can look chaotic. Stick to a cohesive color palette to avoid this issue.
- Inconsistent Styles: Mixing too many styles can dilute your message. Aim for a uniform style that aligns with your brand identity.
In the beginning when I encountered these obstacles I found it to be quite overwhelming. However each challenge brought a lesson with it. Through perseverance and effort I became adept at foreseeing these problems and steering clear of them. Keep in mind that every designer encounters these bumps along the road; it’s an essential aspect of the creative process.
Also Read This: How to Remove Your Phone Number from Telegram for Increased Privacy
Tips for Better Image Shape Design
Creating designs using shapes and visuals can be an exciting adventure, particularly as you begin to uncover your distinct flair. While navigating through Canva I came across several insights that greatly enhanced my creations. Here’s what I discovered.
- Keep It Simple: Sometimes, less is more. A clean design with a few well-placed shapes can be more impactful than cluttered visuals.
- Use Contrast: High contrast between your shapes and images can draw attention. For example, a bright shape can make a dark image pop and vice versa.
- Explore Patterns: Incorporating patterns into your shapes can add depth and interest. Just be careful not to overwhelm your design.
- Seek Inspiration: Don’t shy away from looking at other designs. Platforms like Pinterest and Instagram are great for finding ideas that spark your creativity.
- Trust Your Instincts: At the end of the day, design is personal. If something feels right to you, go with it. Your unique perspective is what will make your designs stand out.
Whenever I put these suggestions into action I found myself feeling more self assured about my creations. It’s similar to cooking; honing your skills and infusing your love for what you do lead to excellence. So let your imagination flow and relish the journey of crafting with forms and visuals!
Also Read This: How Much Will I Earn with Shutterstock
Exploring Advanced Shape Features
As you explore the depths of Canva you'll discover a wealth of advanced shape features that can elevate your designs to new heights. When I first came across these options it felt like unlocking a hidden gateway, to a world of creative opportunities. While being familiar with the essentials is great delving into these advanced settings can turn your designs from run of the mill to truly exceptional.
One of the highlights is how you can play around with shapes by rotating, resizing and even merging them to come up with original designs. For instance I once made a logo by blending two basic shapes. A triangle and a rectangle. With some rotation and tweaks I ended up with a design that truly reflected the essence of my project.
Check out these cool features that you should definitely take a look at
- Shape Merging: Combine different shapes to create a new one. This can give a fresh look to your designs.
- Curved Shapes: Use the curvature tool to create flowing shapes that can add elegance to your visuals.
- Gradient and Pattern Fill: Experiment with gradients and patterns to fill shapes, adding depth and texture.
- Shadow Effects: Incorporate shadows to create a three-dimensional feel, making your designs pop off the page.
- Animation Options: Don’t forget about animations! Adding subtle movements can breathe life into your static designs.
Adopting these cutting edge functionalities truly transformed my experience. They pushed me to broaden my perspective try out various approaches and cultivate a distinct design style. So go ahead and enjoy the process of experimentation!
Also Read This: Guide to Saving Dailymotion Videos on iPhones for Offline Viewing
FAQ on Canva Image Shape Modification
Like any tool people often have questions when using Canva particularly about changing the shape of images. Having encountered many of these inquiries myself I understand how exasperating it can be to find yourself in a situation. Here are some commonly asked questions that may help clarify some uncertainties.
-
How do I change the shape of an image?
- You can change the shape of an image by selecting the image, going to the 'Elements' tab, choosing a shape, and cropping your image to fit the shape.
-
What if my image looks distorted?
- To avoid distortion, always maintain the aspect ratio when resizing your image. Use the corner handles to adjust the size without altering the proportions.
-
Can I combine multiple shapes?
- Yes! You can select multiple shapes, go to the 'Arrange' option, and choose to group them. This will allow you to move and modify them as one unit.
-
How do I adjust the transparency of a shape?
- Select the shape, click on the 'Transparency' option in the top-right corner, and adjust the slider to make it more or less transparent.
-
Can I use custom shapes?
- Absolutely! You can create custom shapes by combining existing ones or drawing your own with the pen tool.
While going through these queries it struck me that grasping the fundamentals could really help streamline things. Its beneficial to get acquainted with the support options provided by Canva. Feel free to delve into the platform and seek clarification; it’s all part of enhancing your skills!
Conclusion on Modifying Image Shapes in Canva
Altering the outlines of images in Canva goes beyond being a mere ability; it serves as a means of showcasing individuality and artistic flair. My experience with Canva has been a mix of experiments and challenges yet each moment has imparted a lesson. I discovered that each shape has a narrative to convey and every hue can stir up a feeling.
While working on honing your design abilities keep in mind that the most important thing is to have fun. Embrace the opportunity to try out new ideas, stumble a bit and grow through the journey. Whether you're putting together social media content, presentations or personal endeavors being able to tweak image shapes will elevate your creations and give them a unique touch.
Ultimately, the most captivating creations stem from true ingenuity, enthusiasm and an openness to venture into uncharted concepts. So grab your digital tool, immerse yourself in Canva and unleash your creativity. The realm of design eagerly awaits, your distinctive flair!