In the era where pictures convey more than text the quality of images is vital in our communication. Whether you're running a business, engaging with social media or just enjoying crafting visuals grasping the concept of image quality is crucial. I recall my initial experience designing a poster for a friends event using Canva. I was thrilled by the creative potential but soon came to understand that not all images are on par. The sharpness, resolution and overall appeal of an image can significantly impact your design.
Canva is a great tool for beginners and experienced designers alike. However it’s important to understand how different factors influence image quality. The resolution of an image which refers to the pixel count plays a role in determining its quality. Images with resolutions provide greater detail and clarity making them more visually appealing. Moreover the image format such as JPEG or PNG impacts its quality and presentation on various platforms.
Common Image Quality Issues
Weve all experienced the frustration of creating a beautiful design only to have the image appear fuzzy or pixelated when we download it. Here are a few common problems you may come across.
- Low Resolution: Using images that are too small can lead to pixelation, especially when scaled up.
- Incorrect File Formats: Using a format that compresses images too much can degrade quality. For example, JPEGs can lose quality each time they are saved.
- Overcompression: This happens when images are saved at low quality to reduce file size, leading to loss of detail.
- Improper Color Settings: Sometimes colors can appear washed out or incorrect, especially if the original image is in a different color profile.
Looking back on my experience I remember uploading a stunning picture from a nearby market to Canva only to have it lose its brilliance upon export. It was quite disappointing! Being aware of these pitfalls can help you avoid wasting time and feeling frustrated.
Also Read This: How to Hide Your Print List in ShootProof
How to Improve Image Quality in Canva
Now that weve identified the problems lets delve into ways to enhance image quality in Canva. Here are some actions you can take.
- Use High-Resolution Images: Always opt for images with at least 300 DPI (dots per inch) for print projects and 72 DPI for online use.
- Choose the Right File Type: For graphics with transparency, use PNG. For photographs, JPEG might be better, but always check the quality before saving.
- Avoid Resizing Images: Try to use images at their original size to prevent pixelation. Canva allows you to maintain the aspect ratio when resizing.
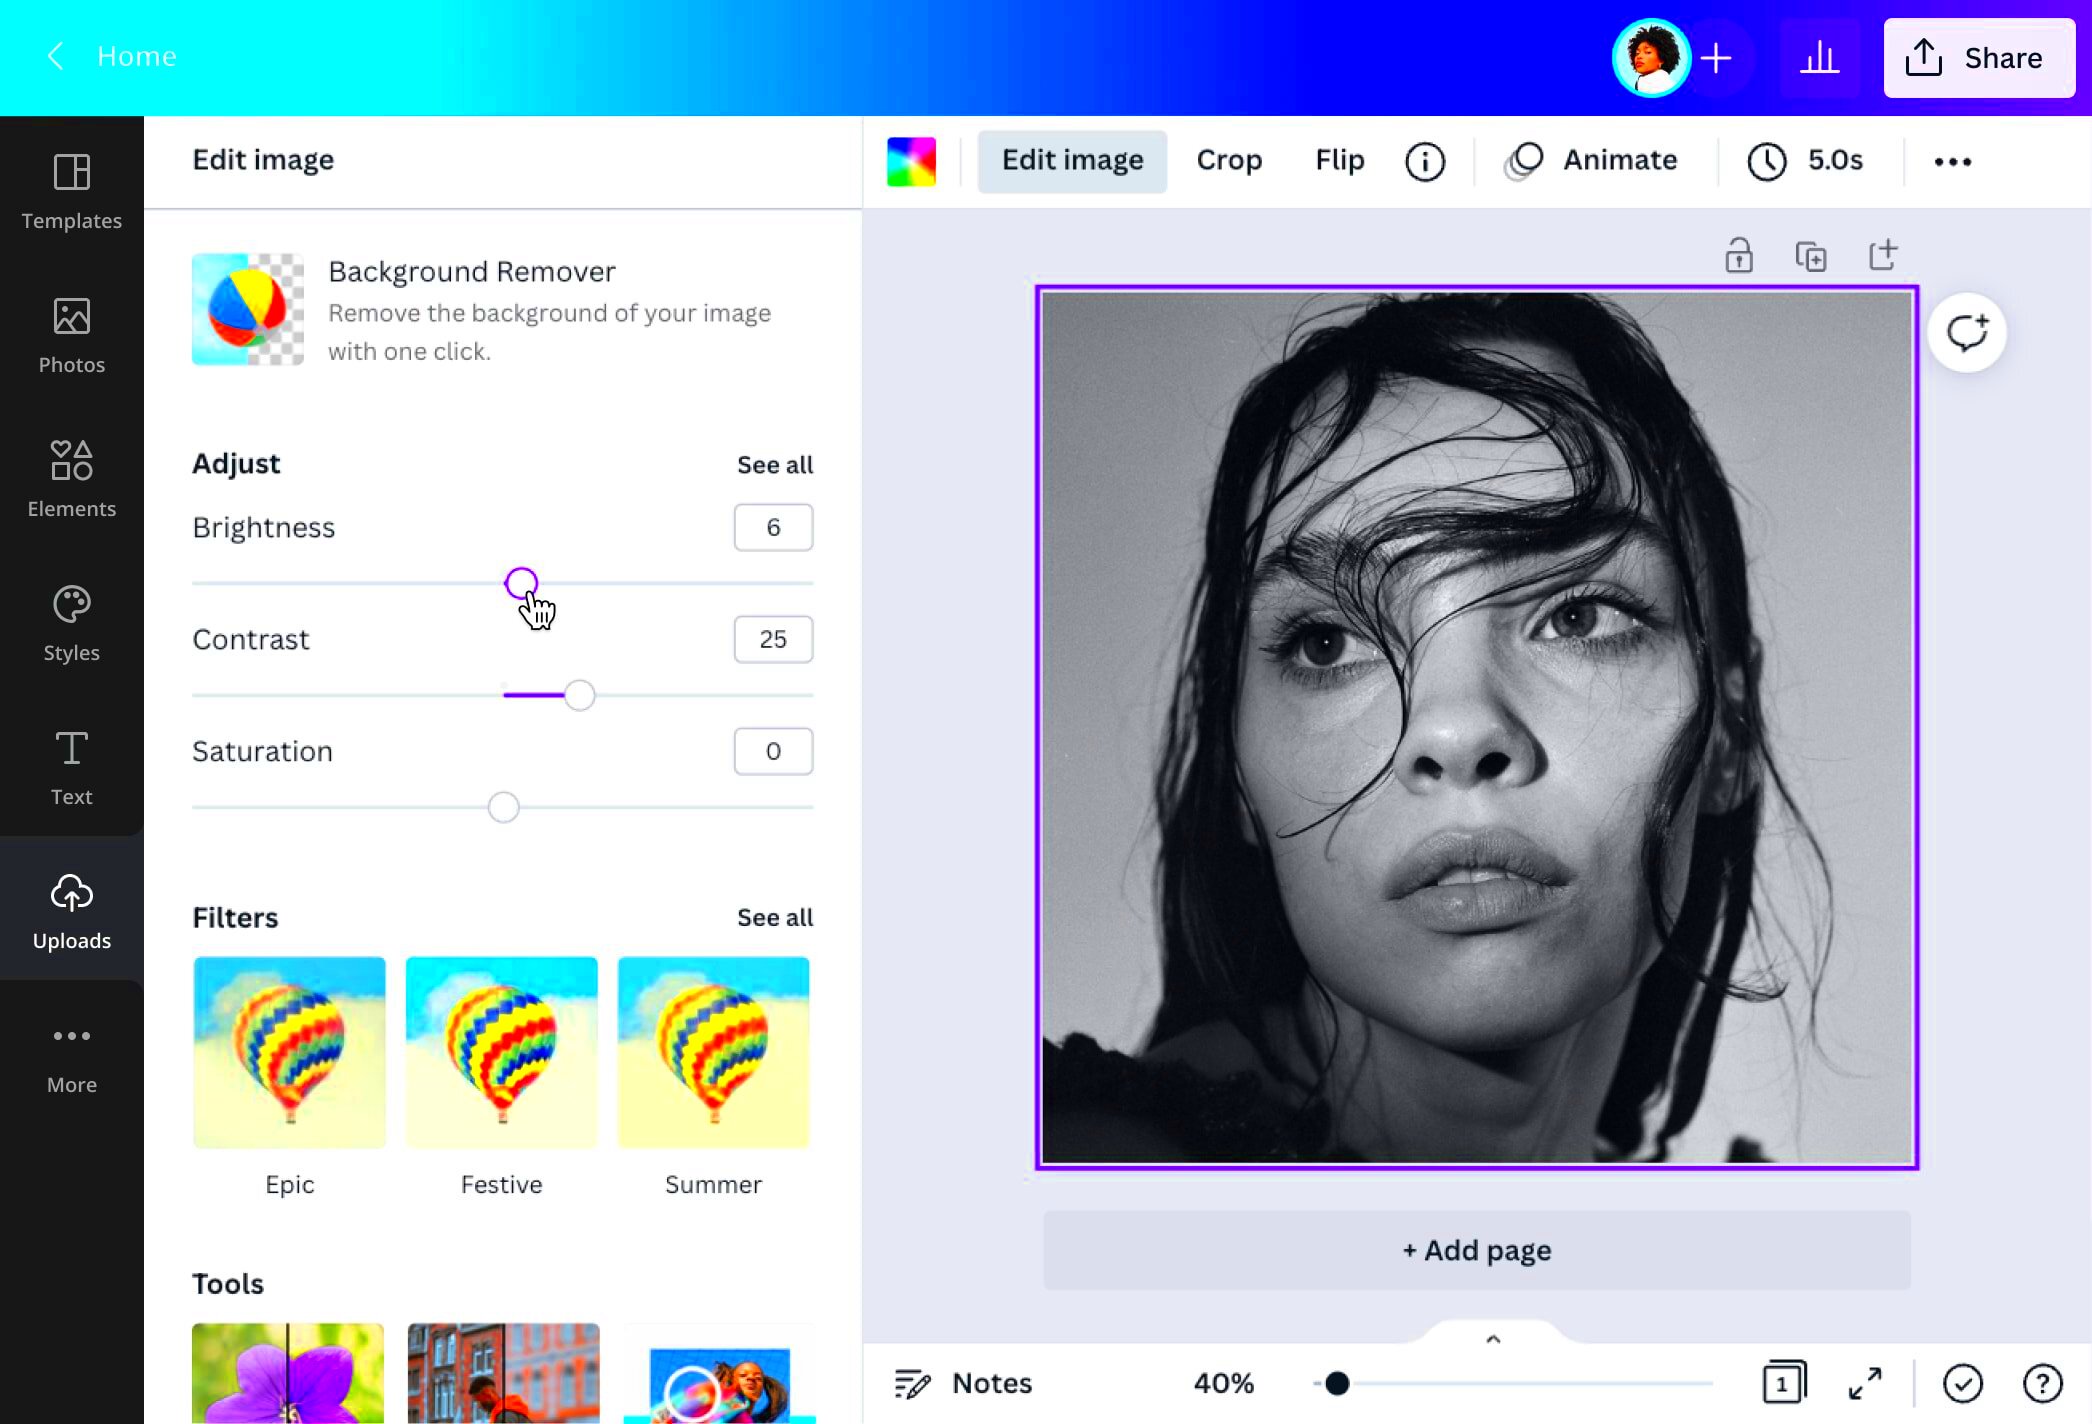
- Adjust Image Settings: Use Canva’s editing tools to adjust brightness, contrast, and sharpness, giving your images that extra touch.
- Keep Layers Organized: Ensure that overlapping elements are positioned correctly to prevent blurriness.
Based on what I’ve seen putting in the effort to grasp these elements can elevate a design from being good to truly exceptional. Keep in mind that every little detail counts and putting in the work for excellence will be rewarded in your end result!
Also Read This: Shutterstock vs Adobe Stock: Decoding the Battle of Visual Giants
Using the Canva Image Downloader Effectively
When I stumbled upon the Canva Image Downloader it was like unearthing a precious jewel during a quest. Being someone who often creates visuals for social media and personal endeavors I was overjoyed to have a dependable resource at hand. The Canva Image Downloader is more than a mere utility; it’s a game changer for anyone seeking to save their creations with top notch quality intact.
Making use of it can really impact the appearance of your images after theyve been downloaded. Here are a few suggestions that I have found beneficial.
- Choose the Right Size: Before downloading, make sure to select the correct dimensions for your project. Canva allows you to adjust the size, which can be crucial for maintaining quality.
- File Type Matters: When you click on the download button, you’ll see options like PNG, JPEG, and PDF. Choosing the right format depends on your intended use. For instance, PNG is best for transparent backgrounds.
- Check Quality Settings: Canva offers options to adjust the quality of the download. Always opt for higher quality to preserve details in your images.
- Preview Before Downloading: Take a moment to preview your design. Sometimes, minor adjustments can significantly enhance the final look.
From what I have seen these actions can really enhance your experience with the Canva Image Downloader. Theres something special about witnessing your design come to life in top notch quality that simply cannot be beaten!
Also Read This: How to Add Private Work to Behance
Choosing the Right Image Format for Quality
Navigating through the realm of image formats can feel quite daunting, particularly for individuals who aren’t well versed in technology. I recall struggling with this concept when I began using Canva. It appeared to be a labyrinth with JPEG, PNG and GIF competing for my focus. Each format comes with its own set of advantages and drawbacks and selecting the one can significantly impact the overall quality.
Here’s a rundown of formats to assist you in finding your way through this labyrinth.
| Image Format | Best For | Pros | Cons |
|---|---|---|---|
| JPEG | Photographs | Small file size, supports millions of colors | Can lose quality when edited and saved multiple times |
| PNG | Graphics with transparency | High quality, supports transparency | Larger file size compared to JPEG |
| GIF | Simple animations | Supports animation, great for simple graphics | Limited to 256 colors, not suitable for detailed images |
Through my own experiences I’ve discovered the importance of selecting PNG for images that require transparency and opting for JPEG when it comes to colorful pictures. Choosing the format elevates the aesthetic of your design making it appear well crafted and refined.
Also Read This: Accessing Members-Only Videos on YouTube Without a Membership
Optimizing Images for Different Platforms
As an avid sharer of my designs on different platforms, I’ve come to understand the importance of image optimization to make them stand out. Each social media platform has its own preferred sizes and formats for images. It’s similar to choosing an outfit for different occasions; you wouldn’t show up in attire for a formal event, would you?
Here are a few suggestions tailored to each platform that I think you might find useful.
- Facebook: Ideal image size is 1200 x 630 pixels for shared links. Use JPEG for photos and PNG for logos.
- Instagram: For posts, square images (1080 x 1080 pixels) work best, while stories thrive on 1080 x 1920 pixels. PNG is excellent for graphics and JPEG for photos.
- Twitter: Use 1200 x 675 pixels for shared images. A mix of JPEG for photos and PNG for graphics is effective here too.
- LinkedIn: 1200 x 627 pixels is the recommended size for posts. Professional photos work well in JPEG format.
Throughout the years, I’ve come to realize that investing effort in optimizing visuals for different platforms greatly boosts interaction. Its crucial to create a lasting impact and showcase your dedication effectively!
Also Read This: How to Order Getty Images for Your Marketing and Content Needs
Tips for Maintaining Quality After Downloading
Doesn't it feel like a win when you download an image? You've put your heart into creating something special and now you want to show it off to everyone. But I've discovered that the true test comes after hitting that download button. How do you make sure the image stays top notch, especially when sharing it on different platforms? Over time I've picked up a few tricks that can really help with this.
Here are a few suggestions to assist you in preserving the quality of your images after downloading them.
- Check Your Export Settings: Before you hit that download button, double-check the settings. Opt for the highest quality and appropriate format that suits your needs.
- Avoid Resizing: Once you’ve downloaded your image, avoid resizing it as much as possible. Stretching or shrinking can lead to pixelation and loss of quality.
- Store Images Properly: Use cloud storage or external drives to keep your downloaded images safe. Make sure to label them clearly so you can find them easily later.
- Test on Different Platforms: Before sharing your image, test it on various devices to see how it appears. What looks great on a computer may not look as good on a smartphone.
- Maintain Original Files: Keep the original file in Canva or your editing software so you can return to it if needed. This way, you can always make adjustments without starting from scratch.
Throughout my experience, these suggestions have been valuable in helping me present my creations with assurance, trusting that theyll appear just as stunning online as they do on my display. Ultimately, the objective is to leave a lasting impression through our visuals!
Also Read This: How to Use Transparent Vector Files from Shutterstock in Your Projects
Frequently Asked Questions
While exploring Canva and the process of downloading images, I've stumbled upon inquiries that seem to be on the minds of many. Here are a few commonly asked questions that may strike a chord with your own encounters.
- What is the best file format for high-quality images?
For the highest quality, PNG is ideal for graphics with transparency, while JPEG is suitable for photographs. - How can I improve image quality before downloading?
Make sure to use high-resolution images, adjust brightness and contrast, and select the best export settings in Canva. - Can I recover a lower-quality image?
Unfortunately, once an image is saved in a lower quality format, it’s challenging to recover its original detail. Always keep a copy of your original design. - Why do my images look different after downloading?
This could be due to color settings or the format used. Always preview your image before finalizing the download.
Looking back on my own challenges with these thoughts I came to understand that gaining a clear perspective can truly enable us to come up with designs. Its important to note that there are no foolish inquiries particularly in the realm of design!
Conclusion and Final Thoughts
As I conclude this conversation I find myself pondering the impact of visuals in our daily lives. Be it crafting a birthday flyer for a friend or developing a marketing initiative for your company the significance of our visuals cannot be overstated. They influence how we are perceived convey narratives and establish connections with our audience.
In my experience with Canva I’ve come to realize that preserving image quality goes beyond skills; it’s rooted in passion and meticulousness. Every design we create is a part of who we are showcasing our imagination and dedication. As you set out on your design journey remember these insights and allow your creativity to radiate!
Lets continue to push the limits of our creativity making sure that our visuals are not only visually appealing but also memorable. I appreciate you accompanying me on this journey to enhance image quality. Wishing you a joyful design experience!