Canva has become a tool for those of us looking to create eye catching designs without the need for a graphic design background. One standout feature is image highlighting. Picture this you’re putting together a stunning poster for a gathering or a lively social media post and you want specific images to stand out. That’s where image highlighting comes in handy. It allows you to focus on the aspects that are most important and believe me perfecting this skill can take your designs from average to exceptional.
Understanding the Importance of Image Highlighting
Emphasizing visuals is not merely a design tactic; it serves as a means to convey your message with greater impact. Recall an instance when you skimmed through a brochure or social media update and something piqued your interest. That’s the enchantment of emphasis. Here’s why it’s significant.
- Captures Attention: In a world full of distractions, grabbing attention is crucial. Highlighted images stand out, making your audience stop scrolling.
- Guides the Viewer: By highlighting key images, you guide your viewer’s focus, ensuring they don’t miss essential details.
- Enhances Aesthetic Appeal: Properly highlighted images add a professional touch to your designs, making them look polished and well thought out.
From what I’ve seen the posts where I take the time to showcase particular images tend to get more interaction. It’s like those spotlighted images bring a certain charm that connects with the viewers on a level.
Also Read This: Exploring the Submission Criteria: Does Alamy Accept AI-Generated Images?
How to Highlight Images Using Canva
Beginning to highlight pictures in Canva is easy and enjoyable. Here’s a simple guide to help you through the process.
- Open Canva: Log in to your Canva account or create one if you haven’t already. The interface is user-friendly, so you’ll feel at home quickly.
- Select Your Template: Choose a template that fits your project. Whether it's a social media post, flyer, or presentation, Canva has a plethora of options.
- Upload Your Images: Click on the ‘Uploads’ tab and add the images you want to highlight. Make sure you choose high-quality images for the best results.
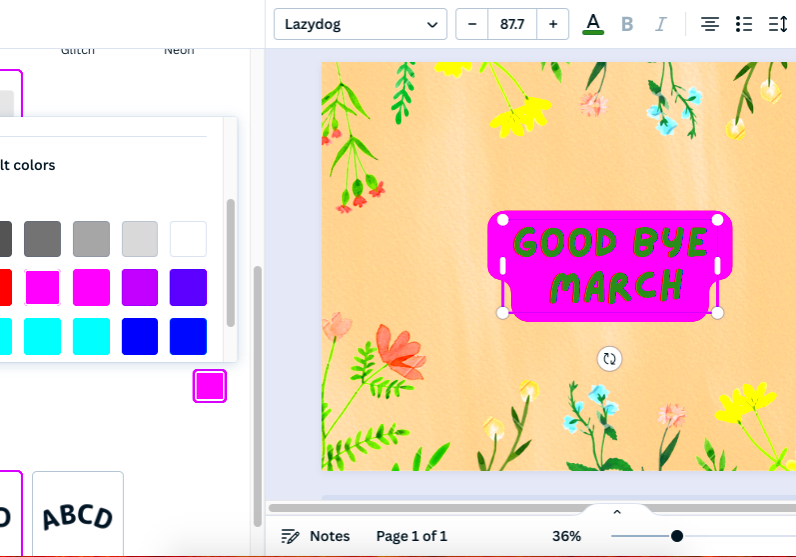
- Use Filters and Effects: To highlight an image, you can apply filters or effects. Click on the image, then select ‘Edit Image’ to explore options like brightness, contrast, and shadows.
- Add Shapes or Text: Sometimes, a simple shape or text overlay can effectively draw attention. Use the ‘Elements’ tab to find shapes and customize them to your liking.
- Preview and Adjust: Always take a moment to preview your design. Adjust placements or effects until it feels just right.
Keep in mind that the key is to give things a go. Feel free to explore various methods until you discover what aligns most with your unique flair and the preferences of your audience.
Also Read This: Understanding Adobe Stock Photo Licensing for Buyers and Contributors
Tips for Creating Stunning Highlights
When it comes to adding highlights to your pictures a bit of careful consideration can make a big difference. Through my experiences with different design ventures over the years I've picked up some valuable insights. Here are a few suggestions that have assisted me in crafting eye catching highlights.
- Choose the Right Colors: Colors can evoke emotions and set the mood. For instance, warm colors like red and yellow can create excitement, while cooler tones like blue and green can offer calmness. When highlighting, make sure the colors complement your main image. This creates harmony rather than chaos.
- Use Contrasting Elements: A highlighted image should stand out. Utilize contrasting colors and shapes to ensure that your highlighted section pops. For example, if your image has a lot of blue tones, consider a yellow or orange highlight.
- Keep It Simple: Sometimes, less is more. Avoid overcrowding your design with too many highlighted elements. Instead, focus on one or two key images that truly convey your message.
- Add Shadows and Depth: By adding shadows or 3D effects to your highlighted images, you can give them a sense of depth. This makes your design more dynamic and engaging.
- Test Different Layouts: Don’t settle for the first layout you create. Experiment with various arrangements to see which one feels the most balanced and visually appealing.
In my design journey I constantly remind myself that crafting something lovely requires both time and perseverance. So don't hesitate to try new things and let your imagination run wild!
Also Read This: How to Download from Dailymotion with Access Denied Troubleshooting Guide
Common Mistakes to Avoid When Highlighting Images
When adding highlights to your designs it's important to be mindful of potential pitfalls. Having experienced these missteps firsthand I can attest that steering clear of them can yield results. Here are a few key points to keep in mind.
- Ignoring the Background: Sometimes, we get so caught up in highlighting the main image that we forget about the background. A busy or distracting background can pull focus away from your highlights. Always consider how your background complements the highlighted image.
- Overusing Effects: Effects can be a double-edged sword. While they can enhance your image, overusing them can make your design look amateurish. Stick to one or two effects that truly enhance your highlights.
- Not Testing for Different Devices: In today’s digital age, your designs might be viewed on various devices. Always test how your highlighted images look on mobile, tablet, and desktop screens to ensure they maintain their impact.
- Forgetting About Accessibility: It’s essential to remember that not everyone perceives colors the same way. Make sure your highlighted images are accessible to all viewers by ensuring there's enough contrast and clarity.
- Skipping the Preview: I can’t stress this enough—always preview your work! Sometimes, what looks good on the design board may not translate well when viewed in real life.
By recognizing these pitfalls you can craft designs that not only catch the eye but also convey messages effectively.
Also Read This: A Haunting Full Episodes and Clips Available on YouTube
Exploring Canva’s Tools for Image Enhancement
Canva is loaded with features that can take your design skills to the next level, particularly in showcasing images. Throughout the years I’ve stumbled upon a wealth of functionalities that can assist in turning your artistic ideas into reality. Lets delve into a few of these tools.
- Image Filters: Canva offers a variety of filters that can dramatically change the look of your images. Whether you want to add a vintage touch or create a modern vibe, filters can help you achieve that effortlessly.
- Adjustment Tools: Fine-tuning your images is crucial. Use tools like brightness, contrast, saturation, and sharpness to ensure your highlighted images look their best. A small adjustment can often make a huge difference.
- Text Effects: Sometimes, highlighting isn’t just about images. Adding text overlays with effects like shadows or outlines can further draw attention to key messages. Canva provides various typography styles that can complement your highlighted images.
- Background Remover: If you want your highlighted image to really shine, consider using the background remover tool. This feature allows you to eliminate distractions from the background, allowing your main focus to stand out.
- Collage Maker: If you have multiple images to highlight, try using Canva’s collage maker. It helps you arrange multiple images in a way that looks cohesive and organized.
The more I dive into Canva the more I discover that experimenting with its tools leads to designs that are one of a kind and captivating. So don't hesitate to tinker with these features and see what suits your style!
Also Read This: Does ShootProof Reduce Image Resolution? What You Need to Know
How to Download Your Highlighted Images
Once you’ve put in the work to craft eye catching highlighted images in Canva the last thing you want is to face difficulties during the download process. Believe me I’ve experienced that frustration too pouring hours into a design only to stumble, at the final hurdle. Allow me to walk you through the simple steps to download your highlighted images smoothly and effortlessly.
- Complete Your Design: Before you download, ensure that your design is exactly how you want it. Take a moment to preview it and make any last-minute adjustments.
- Click on the Download Button: In the top right corner of the Canva interface, you’ll find the download button. It usually looks like a downward arrow. Click on it to reveal the download options.
- Select the File Type: Canva offers several file formats such as PNG, JPG, PDF, and even GIF. For images, I often recommend PNG for better quality, especially if you have transparency. Choose the format that suits your needs best.
- Adjust the Settings: If you selected PNG, you’ll see options to adjust the size and whether to include a transparent background. Make your selections based on how you plan to use the image.
- Click Download: Finally, hit the download button. Depending on your internet speed and file size, it might take a few seconds. Once downloaded, your highlighted images are ready to shine!
Dont forget that the satisfaction of sharing your creations is well worth the time and energy you invest in them. I usually feel excited to share my designs with loved ones as soon as I finish them!
Also Read This: Canva Image Masking
Frequently Asked Questions
When exploring something fresh like Canva image highlighting it's common to have queries. Here are some commonly asked questions I've come across along with my thoughts on them.
- Can I highlight multiple images in one design? Absolutely! You can highlight as many images as you want. Just make sure to maintain balance in your layout, so it doesn’t become overwhelming.
- Is there a limit to the number of downloads I can do? With a free Canva account, you can download as many designs as you want, but premium features may have restrictions. Always check your account type for specifics.
- Can I edit my highlighted images after downloading? Once downloaded, the images are in their final state. If you need to make changes, it’s best to do so in Canva and re-download.
- Are there any tips for sharing my highlighted images on social media? Yes! Ensure your images are sized correctly for each platform. Using Canva’s templates for social media can help you create the perfect dimensions.
- What if I encounter technical issues while downloading? If you face problems, try refreshing the page or checking your internet connection. You can also reach out to Canva’s support for assistance.
I frequently encounter these queries during my design process and it brings me comfort to realize that others also strive for understanding!
Conclusion and Final Thoughts
As we conclude our deep dive into the art of highlighting images with Canva I trust that you’ve found these takeaways insightful. Every creative process is distinct and yours is no different. Embracing the skill of emphasizing visuals can genuinely revolutionize how you convey your message through visuals.
Grasping the significance of image highlights and exploring Canv, a features enhance your design abilities at every turn. Looking back on my journey I recall the excitement of crafting my initial standout design. The feeling of achievement was overwhelming! With dedication you too will discover your unique flair and expression in your artwork.
So go ahead, explore, try things out and above all, savor the journey. Your creations are a true expression of your imagination and enthusiasm. Showcase them to the world and feel free to infuse your unique flair into every picture you feature!
Happy designing!