Creative Ways to Use Blurred Images in Your Designs
Blurring serves a purpose than concealing elements; it also enhances their visibility. When I stumbled upon the blur feature in Canva I was struck by the added depth and artistic flair it brought to my creations. It’s akin to nudging your artwork closer to an ideal without making things too intricate. Here are some suggestions that I’ve found incredibly beneficial in my own endeavors and I hope they spark some inspiration for you as well.
Background Focus: One of the easiest and most effective ways to use blurred images is for backgrounds. Instead of a plain white or black backdrop, blur a scenic photo slightly. This way, the text in the foreground really pops, but the design still looks interesting.
Emphasizing Key Elements: Imagine you have a beautiful landscape photo but want to draw attention to a person or an object. You can blur the entire background, leaving the person in sharp focus. This effect not only creates a stunning visual but also guides the viewer's eyes where you want them.
Creating Soft, Dreamy Effects: I’ve often used blur when designing wedding invitations or romantic flyers. A soft blur can make an image look ethereal and dreamy, perfect for that extra touch of warmth. It's like turning reality into a gentle memory.
Artistic Storytelling: Sometimes, I blur parts of a photo to hint at a story without giving everything away. A sharp object in a blurred background tells you there’s more happening beyond what’s immediately visible. It leaves room for imagination, which I think is a beautiful touch in any design.
Ultimately blending is a creative expression. It involves exploring and discovering what suits your style. Embrace the idea of attempting approaches and see how they influence your design journey!
Also Read This: Understanding YouTube TV's Inclusion of the Ion Channel and What to Expect
Common Mistakes to Avoid When Blurring Images
Ah the blur tool – a handy companion but it can have consequences if not used properly. I’ve had my moments when I began using it and let me tell you it can be a bit annoying to come to that realization later on! But you know what? We grow wiser through our experiences! Here are some typical mistakes I’ve observed in my work and in others' that you might want to be cautious about.
Over-blurring: This is by far the most frequent mistake. I once blurred an image so much that it became unrecognizable! You want to blur just enough to soften edges or de-emphasize the background, not make the whole thing look like an abstract painting.
Blurring Text: I can't stress this enough. Text is meant to be readable, and blurring it is a big no-no. I learned this the hard way when a poster I created had blurred text that no one could read. Now, I make sure to keep all text sharp, even if the background is soft and blurry.
Ignoring the Focal Point: Sometimes, we get so carried away with the blur effect that we lose sight of the focal point. If your main subject is getting lost in the blur, then you’re defeating the purpose. Always make sure the part you want to emphasize is clear and prominent.
Not Checking on Different Devices: Another mistake I’ve made is not testing how the blur looks on different screens. What looks great on a laptop might be too blurry on a phone. Always check your design on various devices to ensure the effect translates well.
While blurring can be great it’s important to strike a balance just like with any other aspect of design. Remember these suggestions to steer clear of the usual mistakes!
Also Read This: How to Download Dailymotion Videos with FreeMake
How to Adjust the Blur Intensity in Canva
The enchantment of blurring comes down to the balance in its application. If you use it sparingly its effect may fall flat but if you overdo it the picture turns into a smudge. When I began experimenting with the blur option on Canva I discovered that the key lies not in simply adding the blur but in tweaking its strength. Here are some tips on how to refine your blur skills, like an expert.
- Choose Your Image: First, either upload an image or pick one from Canva’s extensive library. I often use my own photos because it gives a personal touch to my designs.
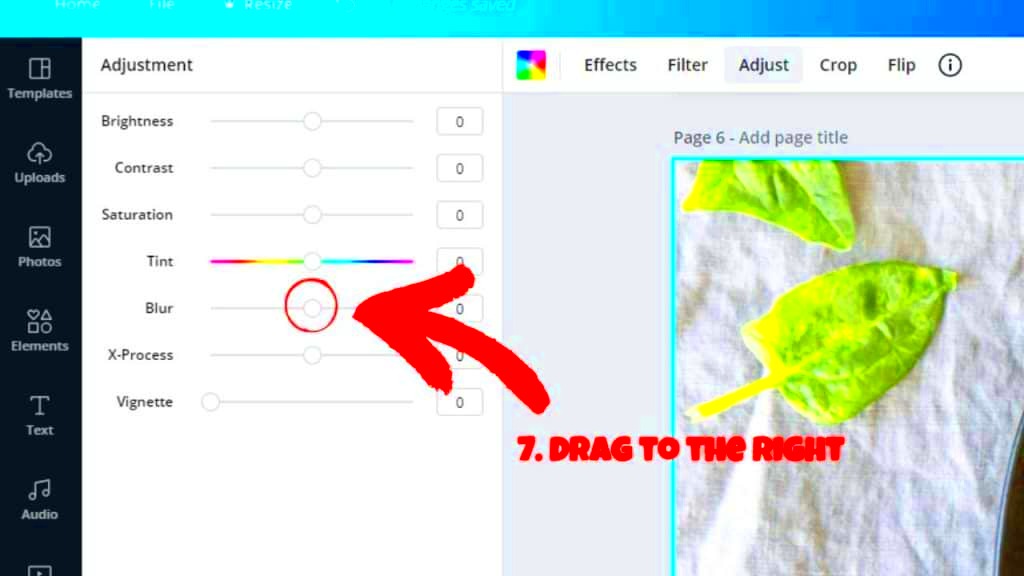
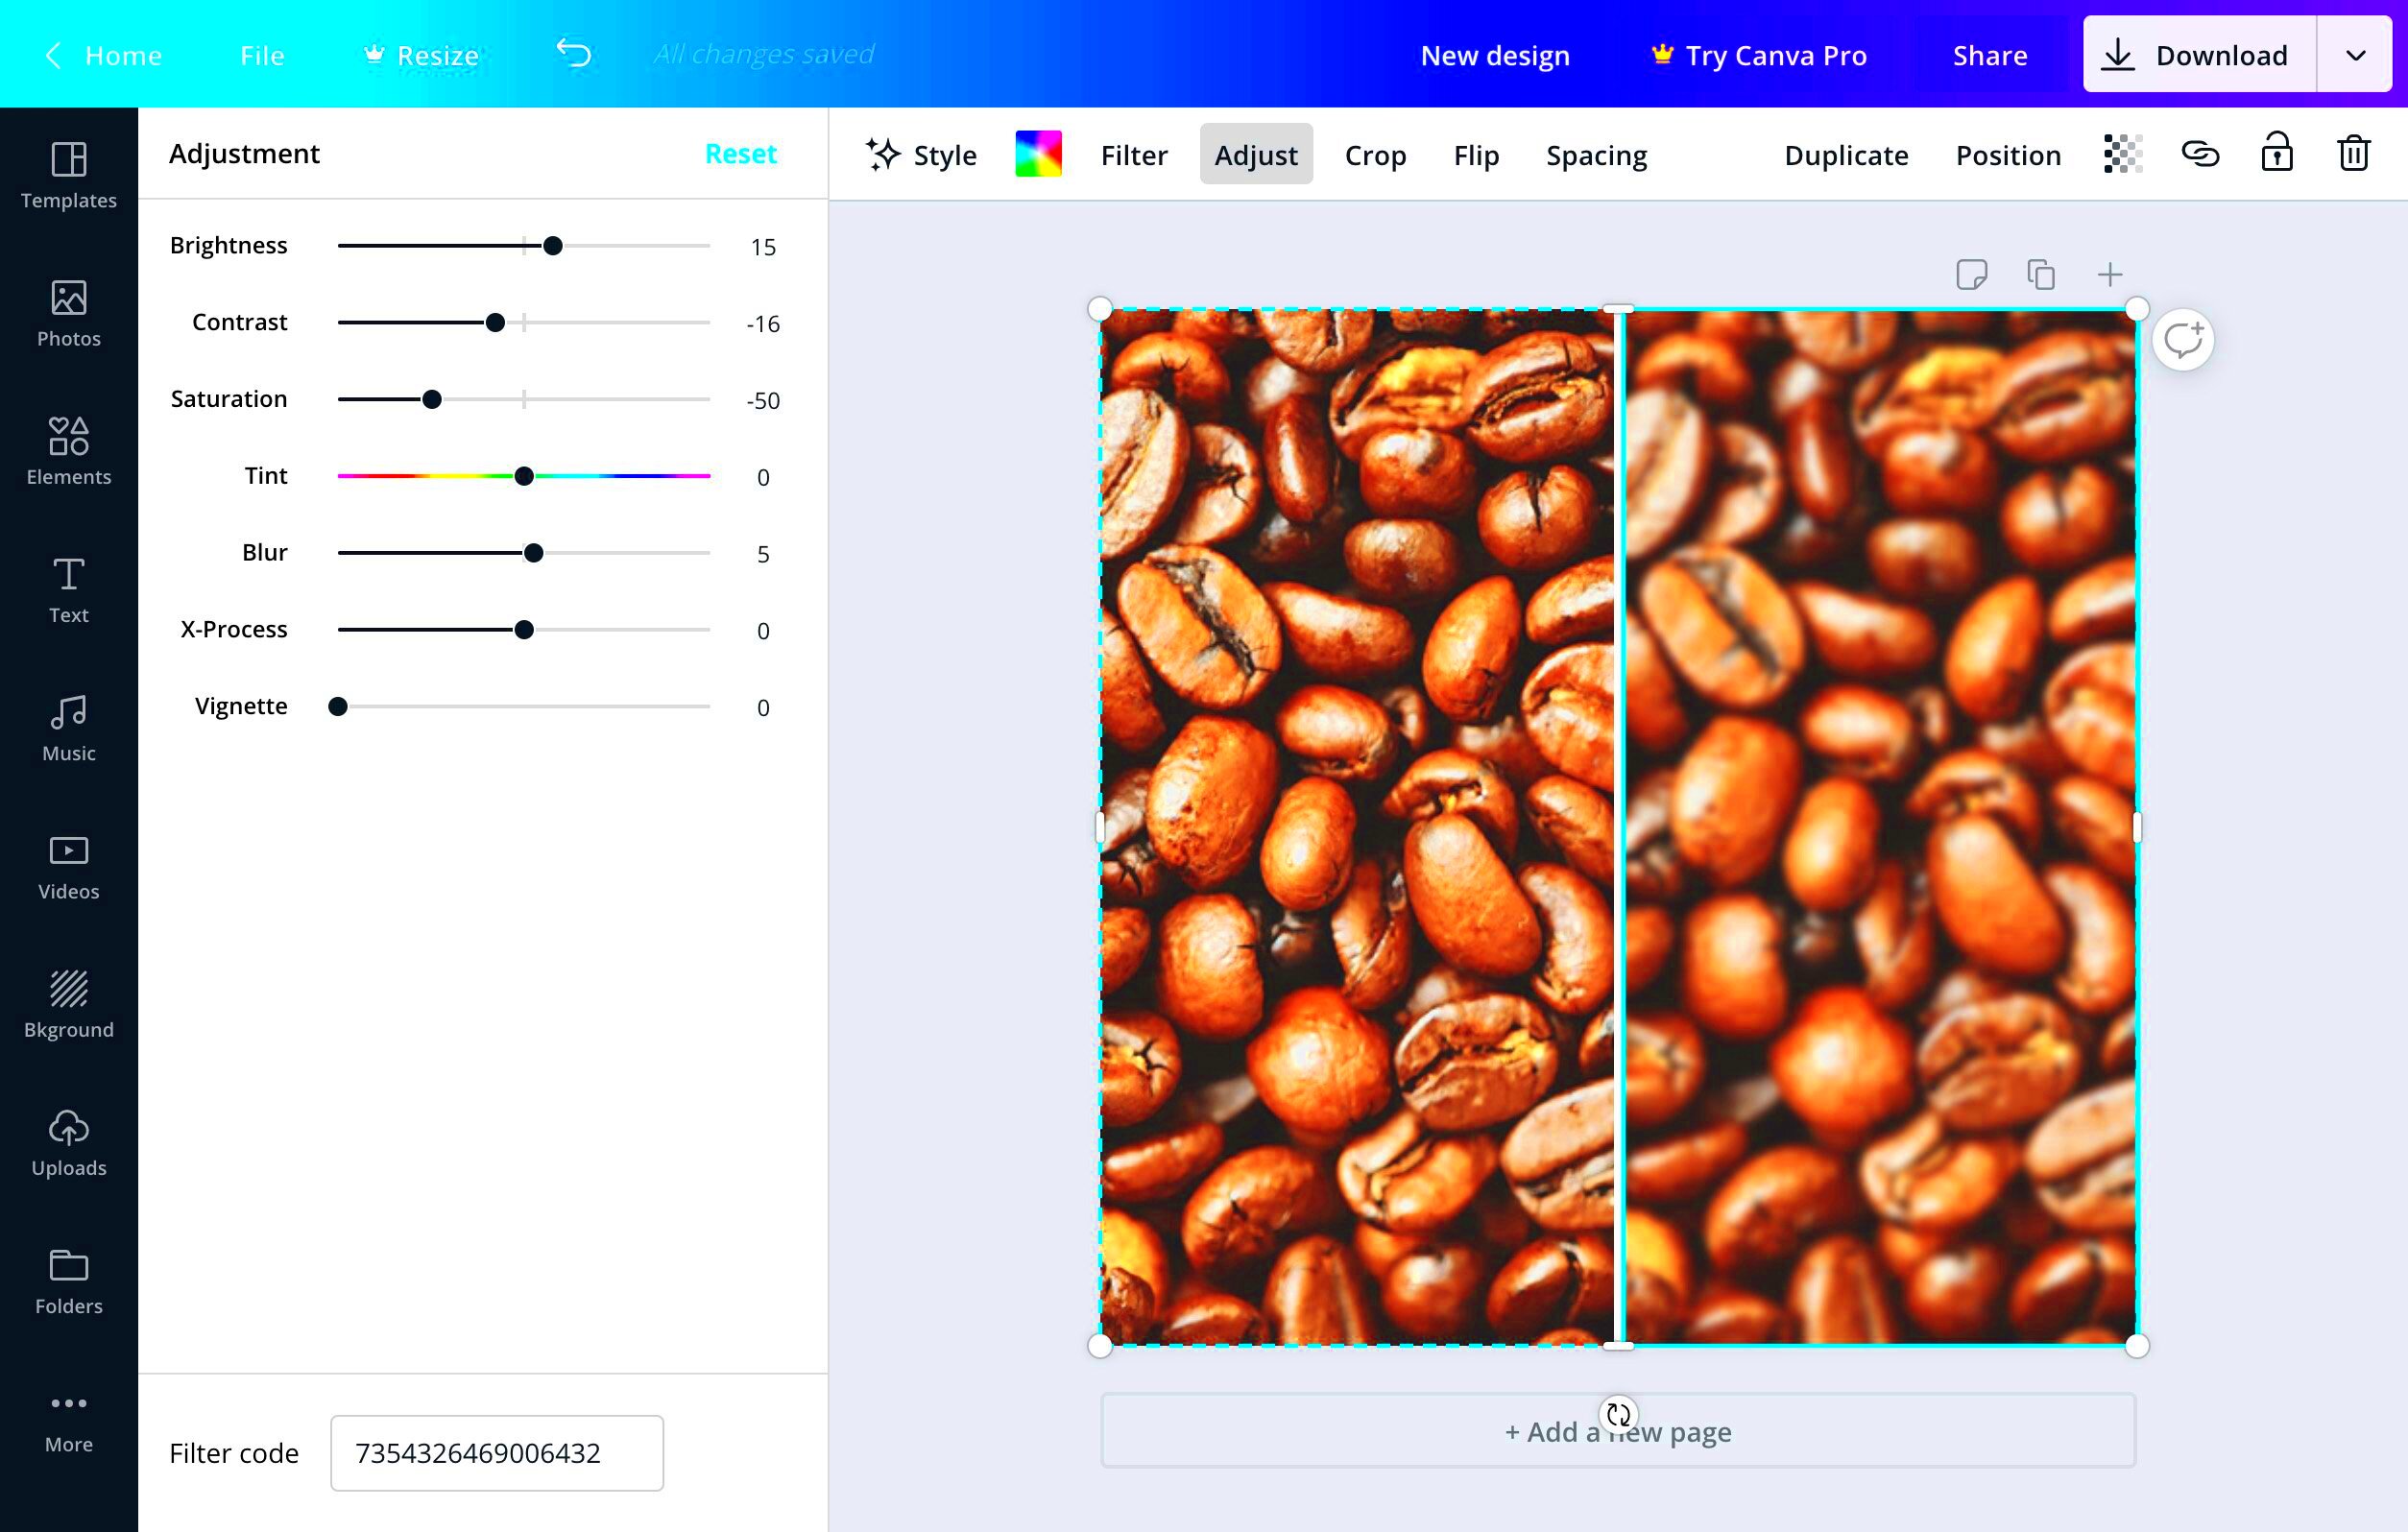
- Select the Image: Once your image is in place, click on it to open the editing options. The blur tool is hidden under the 'Adjust' section, so don’t worry if you don’t see it right away.
- Adjust the Blur Slider: Under 'Adjust', you’ll find a slider specifically for blur. The key is to move it slowly. I like to start with a very slight blur, then gradually increase it until I get the desired effect.
- Test at Different Levels: Sometimes, I toggle between high and low blur levels to see what works best. A light blur is great for soft backgrounds, while a heavy blur works for artistic or abstract designs.
- Fine-tune Other Settings: Don’t just stop at blurring. Canva also allows you to adjust brightness, contrast, and saturation. I often play around with these to make sure the blur fits seamlessly into the overall design.
- Save Your Work: Always preview your design before saving. Canva’s preview mode shows you how your blurred image will look on different devices, so take advantage of that!
Tweaking the level of blur can have a big impact on making your designs look impressive. So when you’re using Canva for your next project take a moment to get the blur just right. You’ll be surprised at how much of a difference it can make!
Also Read This: Services Offered by Fortiguard Downloader Labs
FAQs about Canva Image Blurring
When I began using Canva I found myself puzzled about how to blur images. As time went on I discovered that many people have similar questions. So, in this post I’ll address some of the queries I frequently encountered along with insights drawn from my own experiences.
1. Can I blur only a specific part of an image in Canva?
Canva doesn’t offer the option to blur only a specific area of an image. But there’s an easy solution you can try by stacking two images on top of each other. You can apply a blur effect to the background image while keeping the top layer clear and focused. I’ve utilized this technique in various designs and it truly works wonders!
2. How do I undo a blur effect in Canva?
Undoing a blur in Canva is quite straightforward. If you've applied too much blur and want to revert it simply head to the 'Adjust' settings and move the blur slider back to zero. There have been times when I've gone overboard with the blur effect so it's reassuring to see that Canva offers a way to easily undo it.
3. Can I use blurred images for professional projects?
For sure! I’ve incorporated images in various things like social media content and client pitches. The trick lies in being subtle. When used sparingly blurred images can add a touch of sophistication and refinement to your creative work.
4. Does Canva have pre-blurred images?
Absolutely, while Canva does offer some pre-blurred images I personally enjoy tweaking the blur to my liking. It allows me to have a say in the appearance of the final design. However if you're short on time the pre-blurred options can be a convenient time saver.
5. Can I blur images in Canva’s free version?
Absolutely! The blur tool is included in the free version of Canva, which is awesome. When I initially began using Canva I stuck with the free version and the blur tool became one of my favorite effects.
Conclusion on Canva Image Blurring
Using the blur effect in Canva can really enhance your designs, whether it's for a personal project or a professional one. It's easy to use and can give your visuals a more polished and intentional look. In my opinion the blur feature adds a level of sophistication that can elevate even the simplest designs. So when you're using Canva don't hesitate to play around with the blur tool – you might be surprised at how it brings your creative ideas to life!