Canva has become a popular tool for many people, especially for those who may not be professional designers but still want their creations to look polished. One feature that really stands out is image blending. This technique allows you to seamlessly combine two or more images to create visuals that can evoke emotions or tell stories. I vividly remember my first experiment with blending images; it felt like an artist exploring a new medium. It was thrilling to witness how two ordinary photos could merge to produce something truly one of a kind.
Image blending has the power to elevate your work be it for a social media update or a flyer design. Rather than simply stacking two images blending enables you to seamlessly merge them to enhance the visual appeal. Think of it as cooking where the perfect mix of ingredients can result in a dish that's even better than its individual components.
How to Use Canva for Image Blending

Starting with image blending in Canva is simpler than you may imagine. Here’s an easy to follow step by step guide to assist you in navigating the process.
- Create a new design: Open Canva and select the type of project you want to work on.
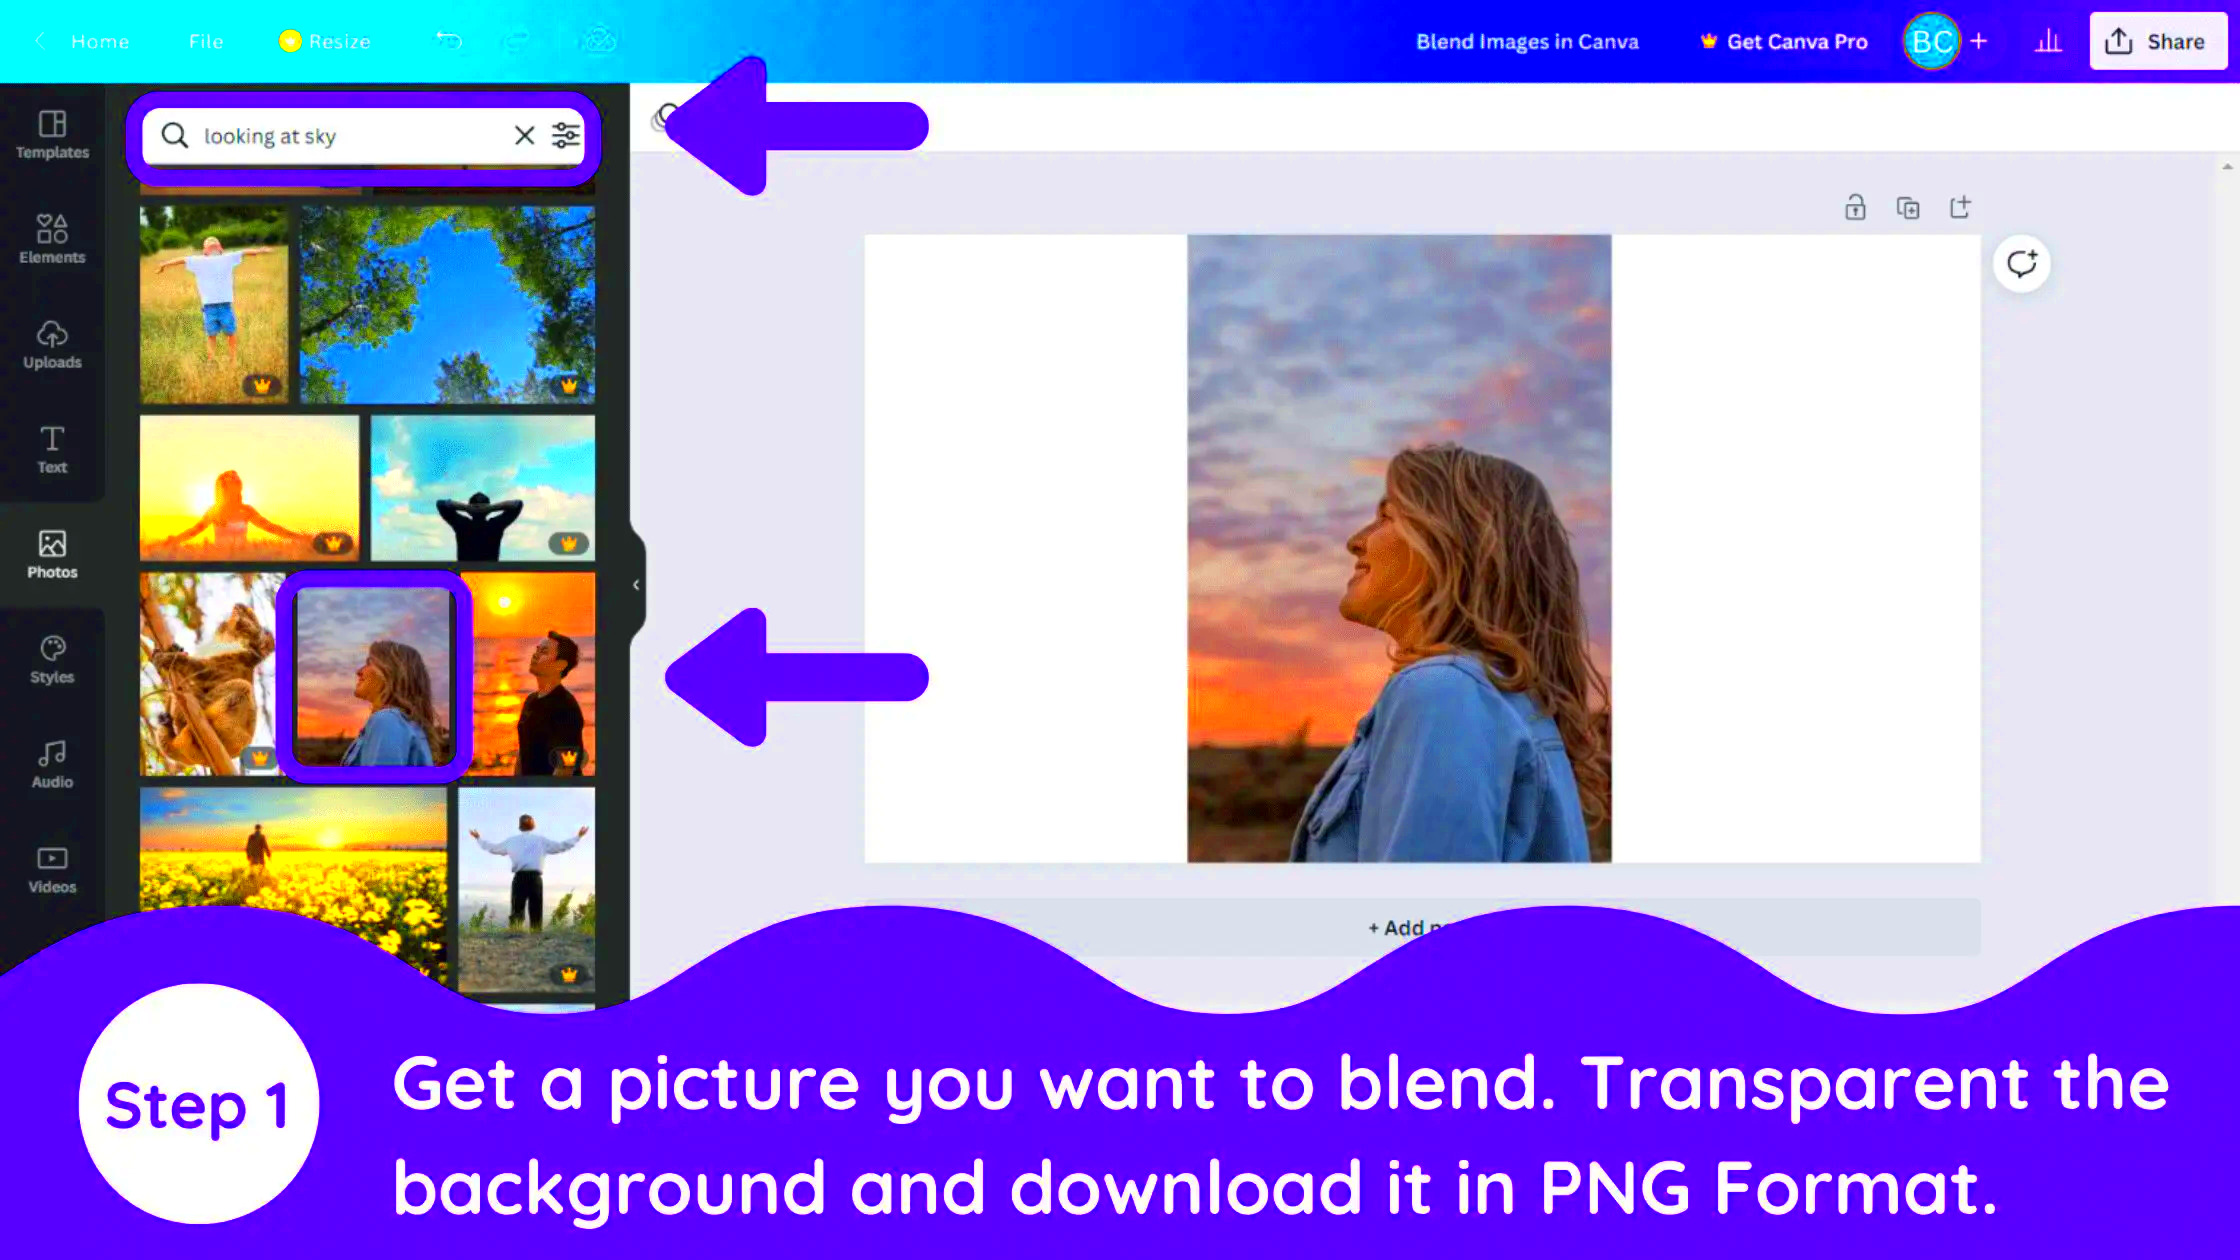
- Upload your images: Click on the "Uploads" tab and add the images you want to blend.
- Drag and drop: Place your first image onto the canvas, and then layer the second image on top of it.
- Select the top image: Click on the top image to bring up the editing options.
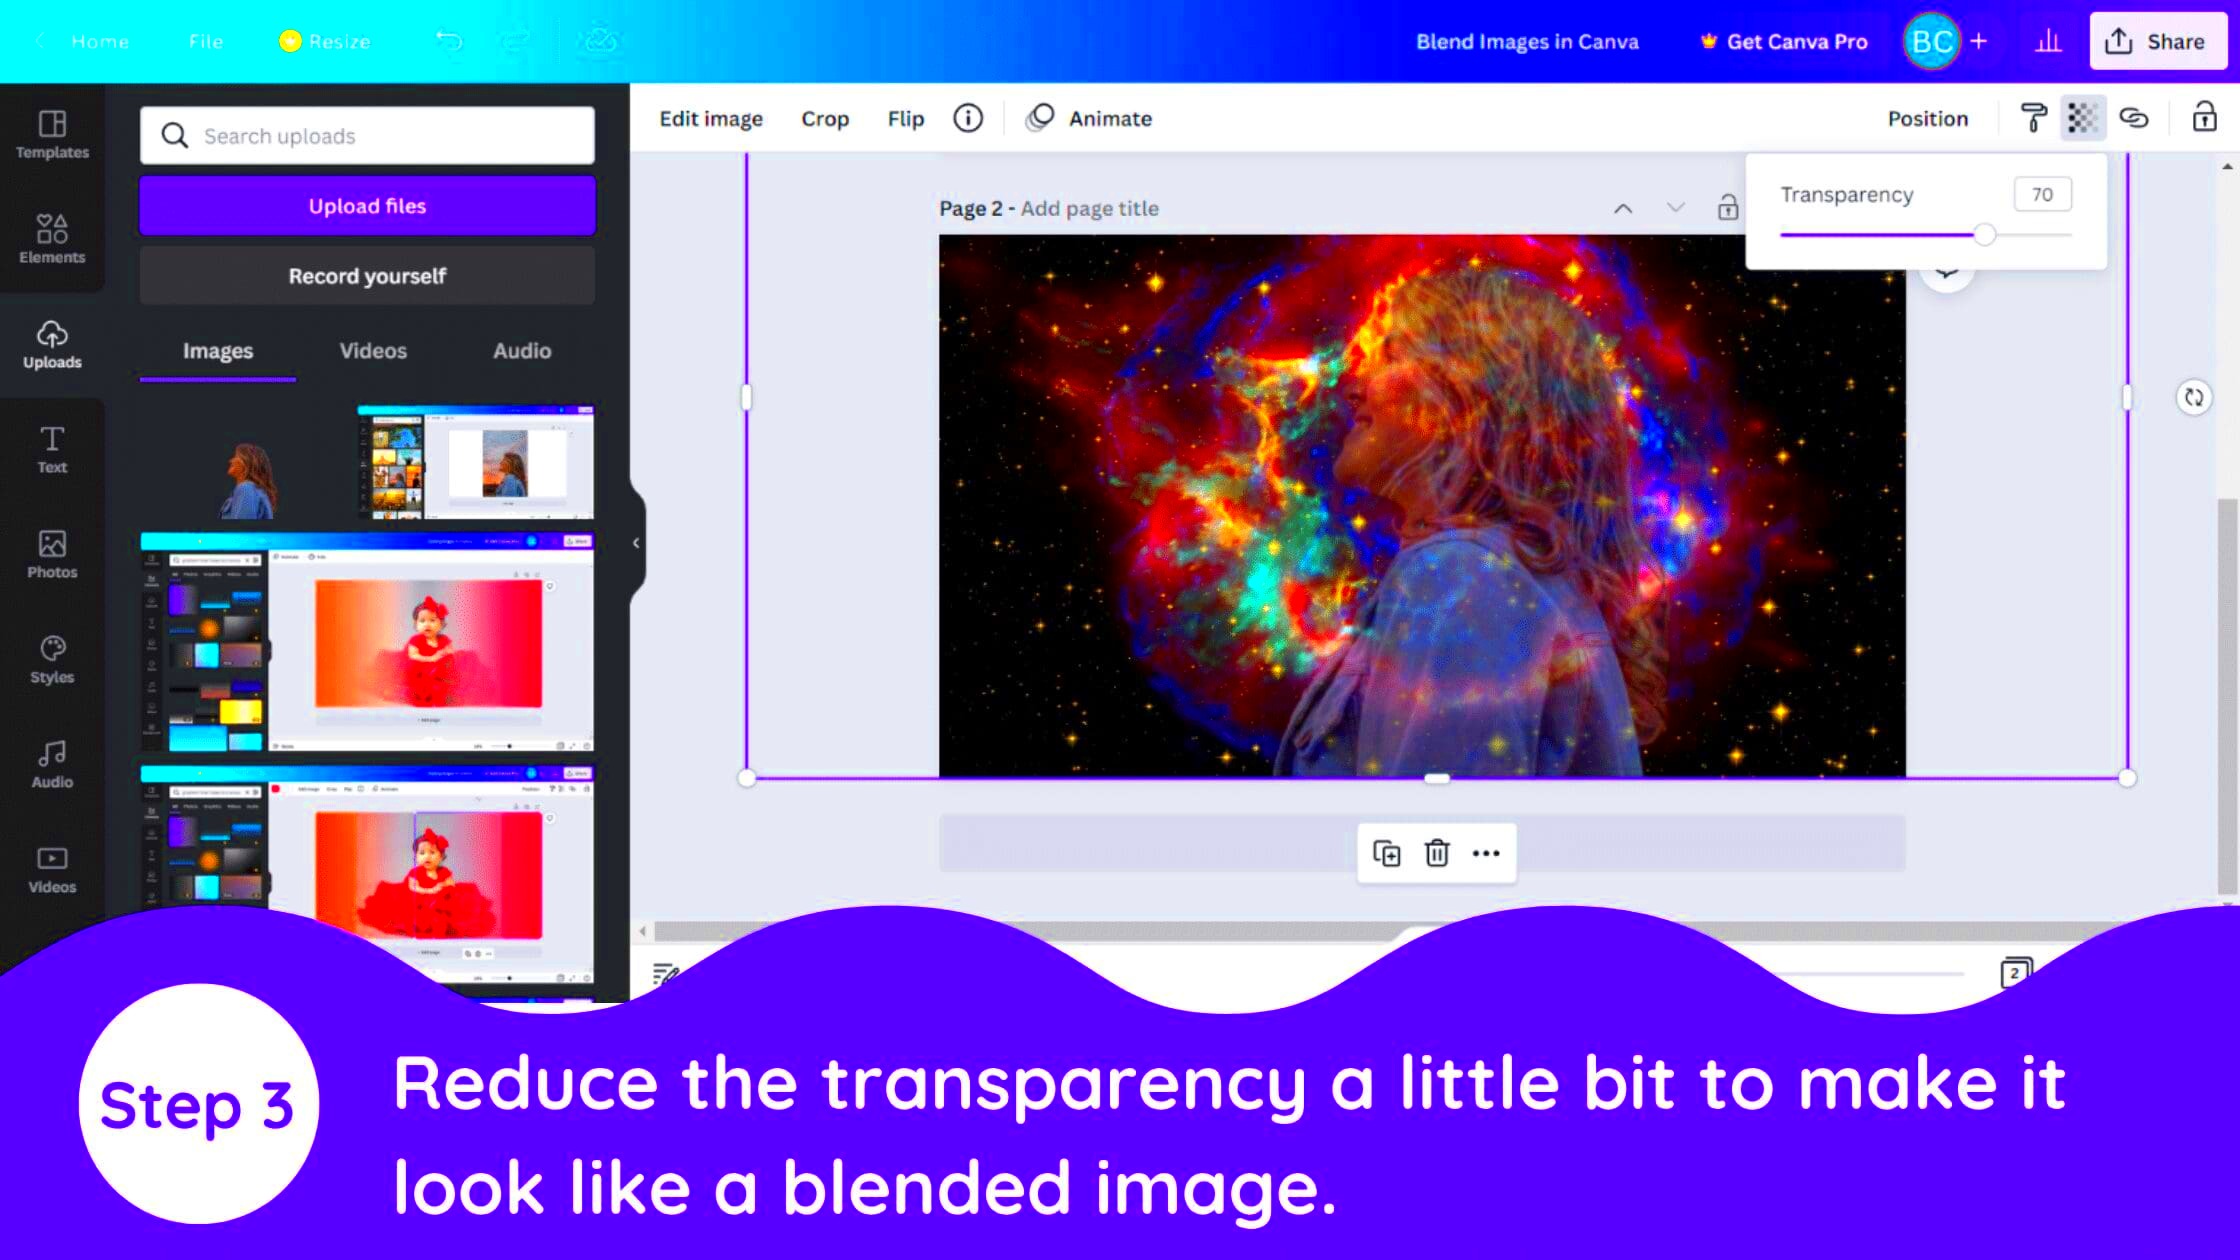
- Experiment with transparency: Adjust the transparency slider until you find a blend that feels right.
- Use blending modes: Explore various blending modes to see how they affect your images.
With these steps you’ll quickly become skilled at blending images. It’s all about getting creative and discovering what suits your style best, similar to trying out new recipes in a kitchen!
Also Read This: How to Manage Video Files on Shootproof
Exploring Different Blending Modes in Canva

Canva provides various blending modes that can significantly alter the way images blend together. Each mode brings its own touch and grasping these can take your designs to the level. Here’s a quick summary.
| Blending Mode | Description |
|---|---|
| Multiply | This mode darkens the base image by blending it with the top image, making it ideal for adding depth. |
| Screen | This lightens the base image by blending it with the top image, perfect for creating airy effects. |
| Overlay | This combines Multiply and Screen modes, enhancing contrast while maintaining brightness. |
| Soft Light | This adds a gentle highlight to your images, creating a dreamy, soft appearance. |
Diving into these blending modes felt like stumbling upon a hidden gem of artistic potential. Each mode has the power to stir emotions in ways—some radiate coziness while others deliver a more intense and impactful vibe. The trick lies in trying things out to discover which modes align with your creative vision.
Also Read This: How to Delete a Contact in Telegram
Creating Stunning Visuals with Image Blending

Crafting visuals is a true skill and image blending is one of the tools we have at our disposal. Whether you’re working on social media content, a blog post or personal projects merging images can take your creations to another level. I still recall the thrill of witnessing my first blended image; it was like opening up a world of boundless imagination. By fusing different pictures together you can express ideas stir feelings and grab attention in ways that a single image usually falls short of achieving.
To craft stunning visuals selecting images that harmonize with one another is crucial. Here are a few suggestions to kick off your creativity.
- Contrast: Pair light and dark images to create a dynamic effect.
- Color Harmony: Use images with a similar color palette to achieve a cohesive look.
- Thematic Connection: Blend images that tell a story together, such as nature scenes with wildlife.
As you mix things up pay attention to how different parts work together. I like to play around with stacking images for instance putting one slightly askew can bring in more dimension and excitement. The trick is to let your imagination run wild and not shy away from taking risks. Believe me the outcomes can be truly enchanting!
Also Read This: How to Add a Project on Behance – A Quick Tutorial for New Users
Tips for Effective Image Blending
Merging images is an art form where you need to sync up your movements. To help you seamlessly blend images and craft eye catching visuals consider these suggestions.
- Choose High-Quality Images: Start with clear, high-resolution images. Quality matters!
- Play with Opacity: Adjust the opacity of the top image to reveal parts of the background image, creating a smooth blend.
- Utilize Grids: Canva has grid options that can help in aligning your images perfectly.
- Embrace Textures: Adding textures can enrich your visuals, giving them a more tactile feel.
- Seek Feedback: Share your designs with friends or family. Sometimes, an outside perspective can offer invaluable insights.
Based on what I’ve seen the most innovative designs usually stem from a process of trial and error. So feel free to explore various combinations and configurations. It’s all an essential aspect of the creative path!
Also Read This: Opening and Playing MOV Files from Depositphotos: A Guide
Common Mistakes to Avoid When Blending Images
Image blending can be a thrilling process but it does come with its challenges. I’ve made my share of mistakes along the way that have taught me important lessons. Here are some common pitfalls to be mindful of:
- Ignoring Image Quality: Using low-resolution images can lead to pixelated designs. Always opt for high-quality visuals.
- Overcomplicating Blends: Sometimes, less is more. Avoid blending too many images at once, as it can create visual chaos.
- Neglecting Color Balance: Ensure that the colors in your images work harmoniously. Clashing colors can distract rather than engage.
- Forgetting About Composition: Pay attention to how images are arranged. A balanced composition enhances the overall appeal.
- Skipping Final Touches: Always review your work for any necessary adjustments before finalizing it.
Every misstep has taught me a lesson that has enhanced my design abilities. So dont let obstacles get you down; they serve as building blocks on your artistic journey!
Also Read This: Name Makeover: Changing Your Store Name on Shopify
Frequently Asked Questions about Canva Image Blending
When it comes to blending images in Canva, there are usually a lot of questions. After trying out this feature I’ve come across some common queries that could help clarify things. The goal is to make the experience more enjoyable and user friendly!
- What is image blending in Canva?
Image blending involves merging two or more images to create a visually appealing composition. It allows for creative layering and can enhance the storytelling aspect of your designs. - How can I adjust the blending mode of an image?
Simply click on the image you want to blend, then navigate to the transparency and blending options in the top menu. This lets you play around with how your images interact. - Can I use images from different sources?
Absolutely! You can upload images from your computer or use Canva’s extensive library. Just make sure you have the rights to use the images you choose. - Is there a limit to how many images I can blend?
While there's no hard limit, I suggest keeping it manageable. Too many layers can create visual clutter, so aim for clarity and cohesion. - What file formats work best for blending?
PNG and JPG formats work well in Canva. PNGs, especially with transparent backgrounds, can provide great results when blending.
These frequently asked questions can be a helpful resource as you explore the thrilling realm of merging images. Keep in mind that trying out different approaches is crucial!
Wrapping Up the Importance of Image Blending in Design
In conclusion its evident that blending is a valuable asset for designers. It offers a way to showcase creativity enabling the creation of eye catching visuals that narrate stories. After exploring the various facets of blending I can confidently state that this approach has the potential to elevate designs into remarkable works of art. Embrace the process experiment with elements and unleash your creativity because ultimately it revolves around making your designs connect with people. Enjoy the blending process!
