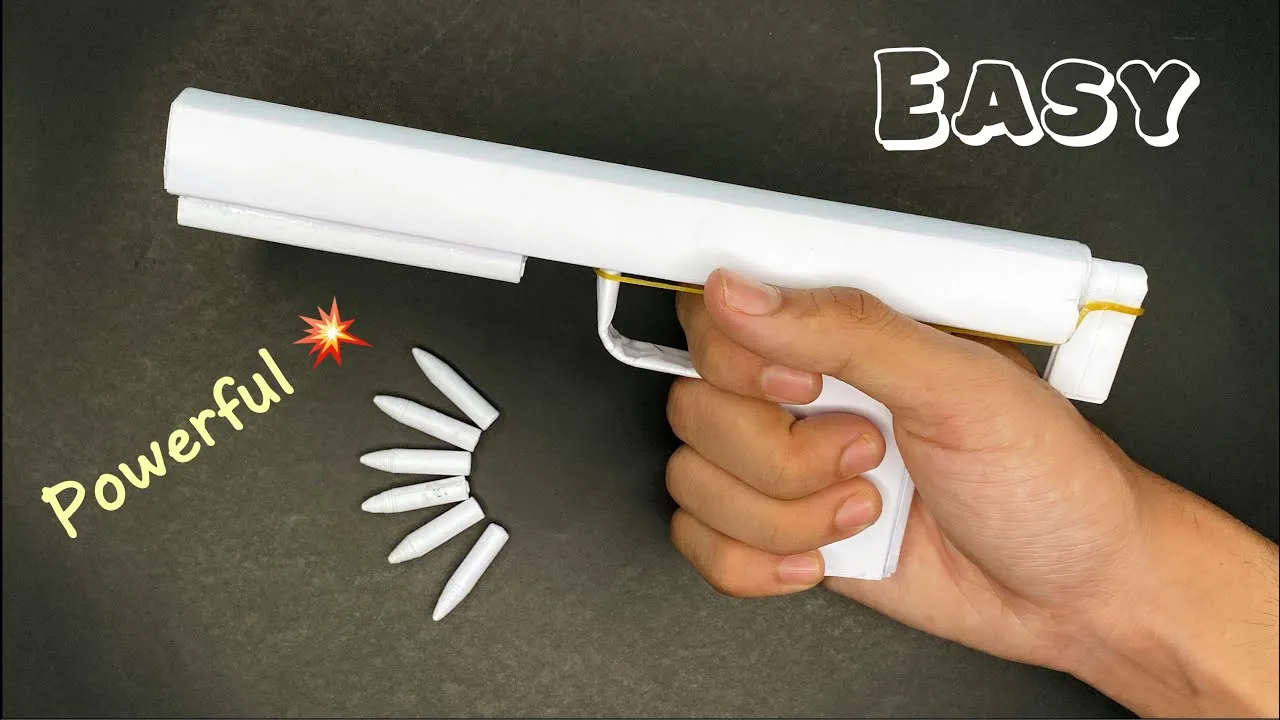
Are you looking for a fun and creative project to dive into? Building a paper gun that shoots can be a thrilling way to unleash your inner craftsman! Not only is this a fantastic activity for kids, but it can also serve as an engaging pastime for adults. With just a few simple materials, you can create a paper gun that’s both functional and entertaining. In this DIY guide, we’ll walk you through the steps to make your own paper gun that actually shoots projectiles. So, gather your supplies, roll up your sleeves, and let’s get started!
Materials Needed
Before we jump into the construction process, let’s gather the necessary materials. You’ll find that most of these items are common household items, making this project accessible and budget-friendly. Here’s what you’ll need:
- Sheet of Paper: A standard sheet of A4 or letter-size paper will work perfectly. You can choose colored paper for a fun twist!
- Scissors: Sharp scissors are essential for cutting the paper into the right shapes.
- Tape or Glue: Use tape or glue to secure the parts together. Tape is often easier for quick assembly.
- Straws: A standard drinking straw will be used to create the barrel of the gun.
- Rubber Bands: These will be used as the launching mechanism for your projectiles.
- Projectiles: Small paper balls or lightweight objects that can be shot from the gun.
Once you have everything gathered, you’ll be ready to embark on this exciting DIY journey. Grab your materials, and let’s get crafting!
Also Read This: Sharing a resume from Behance
Step-by-Step Instructions

Building a paper gun might sound tricky, but with the right guidance, you can create your own fun little shooter in no time! Let’s break it down into simple steps.
- Gather Your Materials: You’ll need a few basic items:
- A4 paper or cardstock
- Scissors
- Tape or glue
- A rubber band
- A pencil or straw (for the barrel)
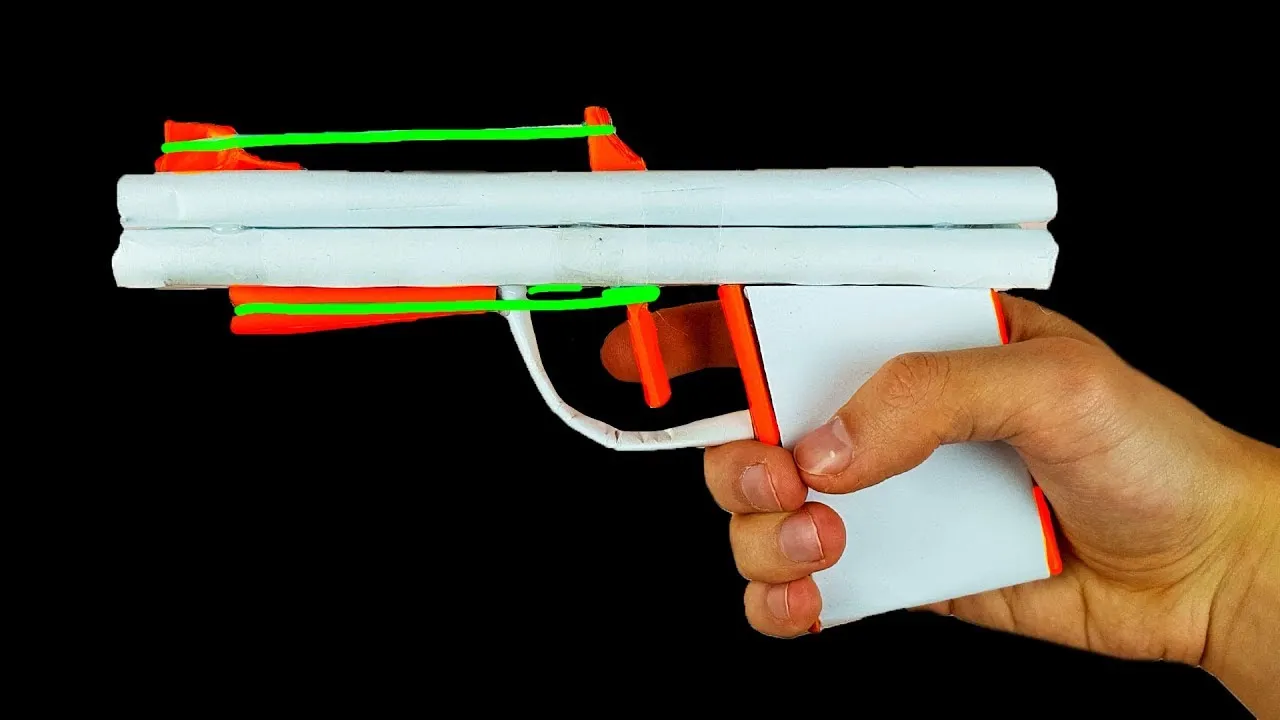
- Cut the Paper: Start by cutting a strip of paper, about 2 inches wide and 10 inches long. This will form the body of your gun.
- Create the Trigger: Cut a smaller strip, about 1 inch wide and 4 inches long. Fold it in half and tape it to the body just below the midpoint. This will act as a trigger.
- Make the Barrel: Use a pencil or straw to create the barrel. Tape or glue it to the front of the gun body, ensuring it’s secure.
- Add the Rubber Band: Loop the rubber band around the back of the gun and attach it to the trigger. This is crucial for the shooting mechanism!
- Prepare Your Ammo: Crumple small pieces of paper to make your “bullets.” They should fit snugly in the barrel.
- Final Touches: Decorate your paper gun with markers or colored paper to give it some personality!
And there you have it! Once you're done assembling, load your paper bullet, pull the trigger, and watch it fly!
Also Read This: Understanding Why Your YouTube Shorts Are Not Appearing in Your Feed
Safety Precautions
Before you dive into your paper gun project, it’s essential to keep safety in mind. While a paper gun is relatively harmless, follow these precautions to ensure a fun and safe experience:
- Use Safe Materials: Stick to paper and non-sharp materials. Avoid anything that could splinter or cause injury.
- Supervise Children: If kids are involved in the project, make sure an adult is supervising the entire process.
- Aim Away from Faces: Always aim your paper gun away from people’s faces or sensitive areas. It’s all fun and games until someone gets hit!
- Test in Open Spaces: When shooting your paper bullets, do it in an open area to prevent damage or injuries to people or property.
- Check for Small Parts: Ensure that any parts used (like rubber bands) are safe and won’t pose a choking hazard for younger children.
By following these safety tips, you can enjoy your DIY paper gun project while keeping everyone safe and sound. Happy shooting!
Also Read This: How to Fix Issues When Uploading Images to ShootProof
5. Testing Your Paper Gun
Now that you've crafted your paper gun, it's time to put it to the test! Testing is crucial not only for ensuring that your creation works but also for refining your technique. Here’s how you can effectively test your paper gun:
- Find a Safe Space: Choose an open area where you can shoot your paper gun without the risk of hitting anything valuable—or anyone! A backyard or a park is ideal.
- Gather Ammunition: Use small paper wads or lightweight objects that won't cause damage. Make sure they fit well in the barrel of your gun to avoid jams.
- Check for Stability: Hold your paper gun firmly and ensure it feels stable in your hands. Adjustments may be needed if it feels flimsy.
- Aim and Fire: Take aim at a target (like a cardboard box or a plastic bottle) and shoot. Notice how far the projectile travels and how accurately it hits the target.
- Adjust and Improve: Based on your first round of tests, you might find areas for improvement. Maybe the barrel is too tight, or perhaps the launch mechanism isn’t powerful enough. Tweak those aspects!
Remember, the more you test and adjust, the better your paper gun will perform. Plus, it’s a fun excuse to get outside and play around with your creation!
6. Conclusion
Building a paper gun can be an incredibly rewarding DIY project, blending creativity with a bit of engineering. Not only do you get to unleash your artistic side, but you also engage in a bit of problem-solving as you refine your design through testing.
As you wrap up this fun journey, keep in mind the following points:
| Key Takeaways |
|---|
| Always prioritize safety during your testing process. |
| Experiment with different designs and materials to find what works best for you. |
| Don’t hesitate to share your creation with friends or online communities for feedback and ideas. |
| Keep it fun! Building and testing is all about creativity and enjoyment. |
So, gather your materials, unleash your creativity, and let the fun begin! Happy crafting!