Behance is a popular platform for showcasing creative work. Each project you upload gets a unique URL, which can affect how easily people find your work. Understanding the structure of these URLs is essential for anyone looking to improve their online presence.
A typical Behance URL looks like this:
- https://www.behance.net/username/project-title
In this example:
- username: This is your Behance profile name.
- project-title: This is the title of your specific project.
Customizing the project title part of the URL can make it more appealing and easier to remember. It can also improve search engine visibility, which is crucial for attracting more viewers.
Why Modify Your Behance URL

Modifying your Behance URL can be beneficial for several reasons:
- Branding: A custom URL helps reinforce your brand. It allows you to create a memorable link that represents your work.
- SEO Benefits: Search engines favor URLs that are clean and descriptive. A well-structured URL can help improve your project's visibility in search results.
- Shareability: A shorter, simpler URL is easier to share on social media, emails, and business cards.
- Professional Appearance: A custom URL looks more professional, making a positive impression on potential clients or collaborators.
Overall, modifying your Behance URL can enhance your online presence and attract more visitors to your projects.
Also Read This: How to Download Private YouTube Videos Safely and Legally
Steps to Modify Your Behance URL

Changing your Behance URL is a straightforward process. Here are the steps to follow:
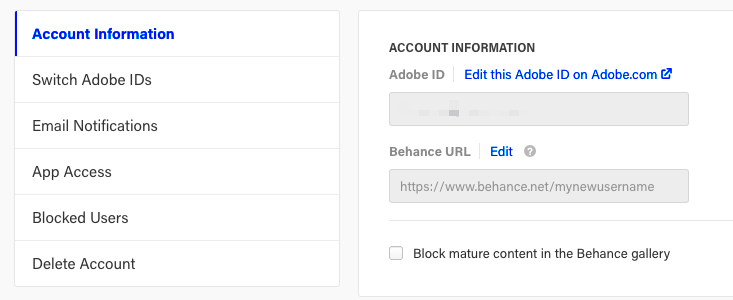
- Log In to Your Behance Account: Start by logging into your Behance account with your username and password.
- Go to Your Profile: Click on your profile picture or name to access your profile page.
- Select the Project: Choose the project for which you want to modify the URL.
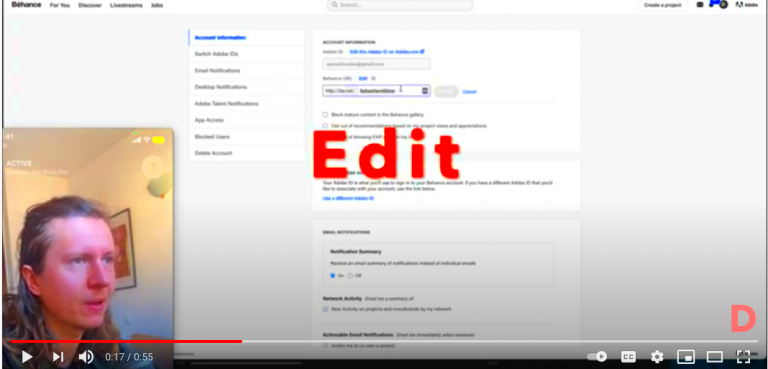
- Edit Project Settings: Look for the edit option (usually a pencil icon) and click it.
- Change the Project Title: In the settings, you will find an option to change the project title. Edit it to reflect the content accurately.
- Save Changes: After making the necessary changes, make sure to save them. This will update your project's URL.
And that's it! Your new URL will now be active. Remember to test the modified URL to ensure it directs properly to your project. Making these adjustments can significantly improve how others perceive your work.
Also Read This: How to Remove Your YouTube Account from a TV Using Your Phone
Checking Your Modified URL
After modifying your Behance URL, it's important to ensure that everything is working correctly. A simple check can save you from potential issues down the line. Here’s how to effectively verify your new URL.
First, you want to click on the modified link. This should lead you directly to your project. If you encounter any errors, don’t worry. Follow these steps to troubleshoot:
- Ensure the URL is Correct: Double-check the spelling and formatting. Even a small typo can lead to a broken link.
- Test in Different Browsers: Sometimes, your browser settings can affect how a page loads. Try opening the URL in another browser like Chrome, Firefox, or Safari.
- Clear Your Cache: If the page doesn't load as expected, clearing your browser cache can help. This ensures you’re viewing the most recent version of your project.
- Share with Friends: Ask a few friends or colleagues to click on the link. This helps verify that it works for others, not just you.
Taking these steps ensures that your modified URL functions properly and leads viewers directly to your creative work. Keeping your link functional is key to maintaining a professional presence online.
Also Read This: Canva Layering Images
Tips for a Custom URL
Creating a custom URL for your Behance projects can boost your branding and improve user experience. Here are some tips to help you craft the perfect link:
- Keep It Short: Aim for a concise URL. A shorter link is easier to remember and share.
- Make It Descriptive: Use words that clearly describe your project. This helps users understand what to expect before clicking.
- Include Keywords: If possible, add relevant keywords related to your work. This can enhance SEO and help attract more viewers.
- Avoid Special Characters: Stick to letters and numbers. Special characters can make your URL confusing and harder to type.
- Test Before Sharing: Always test your custom URL to ensure it leads to the correct project before sharing it widely.
By following these tips, you’ll create URLs that not only look good but also effectively promote your work.
Also Read This: Who Claimed Victory in the 2008 Royal Rumble and Its Historic Significance
Common Issues When Modifying URLs
While modifying your Behance URL is usually a simple task, some common issues can arise. Here are a few problems you might encounter and how to address them:
- URL Already Taken: If your desired URL is already in use, consider adding a number or a keyword to differentiate it.
- Broken Links: If your modified URL leads to a 404 error, ensure you typed it correctly and that the project is still published.
- Changes Not Saving: Sometimes, changes may not save due to a poor internet connection. If this happens, try refreshing the page or logging out and back in.
- SEO Impact: Changing your URL can affect your search rankings. To mitigate this, update any external links pointing to the old URL.
By being aware of these common issues, you can troubleshoot effectively and ensure your modified URL works as intended. Keeping a close eye on these aspects can help you maintain a strong online presence.
Also Read This: Create Eye-Catching Price Tags with Canva Price Tag Template
Best Practices for URL Modification
Modifying your Behance URL can enhance your project’s visibility and professionalism. To ensure you're making the most of this opportunity, here are some best practices to follow when modifying your URLs.
- Plan Your URL Structure: Before making changes, plan how you want your URLs to look. Consider consistency across your projects to create a cohesive brand image.
- Be Clear and Concise: A clear URL is user-friendly. Avoid unnecessary words and focus on what represents your project best.
- Use Hyphens Instead of Underscores: When separating words, use hyphens (e.g., project-name) rather than underscores (e.g., project_name). Hyphens are more SEO-friendly.
- Consider Future Changes: Think ahead about how your work may evolve. Choose a URL that won’t quickly become outdated as your portfolio grows.
- Document Changes: Keep a record of all URL modifications. This helps track links across your marketing materials and ensures consistency.
By following these best practices, you can create URLs that not only represent your work well but also contribute to your online success.
Also Read This: Download Free PowerPoint Templates from Canva PowerPoint Templates Free Download
FAQ
Here are some frequently asked questions about modifying Behance URLs:
- Can I change my Behance username? Yes, changing your username can also affect your URL. Make sure to consider this if you plan to make changes.
- Will modifying my URL affect existing links? Yes, if you change the URL, any existing links pointing to the old URL will break. Update all shared links accordingly.
- How often can I change my URL? You can change your URL as often as you want, but frequent changes might confuse your audience.
- What if I encounter issues when changing my URL? If you face issues, check the Behance help center for troubleshooting tips or reach out to their support team.
These FAQs should help clarify any concerns you might have regarding URL modifications on Behance.
Conclusion
In summary, modifying your Behance URL is a valuable step toward enhancing your online presence. A well-structured URL can improve your brand recognition, search engine visibility, and user experience. Remember to keep it clear, concise, and relevant to your work.
As you navigate this process, keep in mind the best practices and common issues we discussed. With a little planning and attention to detail, you can create URLs that not only look professional but also help drive traffic to your projects. Good luck with your Behance journey!