
The dimensions of your template can greatly impact the success of your design project. Whether you're working on a birthday party poster or an important work presentation getting the measurements right is essential. I vividly recall my experience creating a flyer for an event. I was so engrossed in the creative aspect that I overlooked the size. The outcome? A stunning design that simply didn't fit! It was then that I understood the significance of being mindful, about template sizes.
Selecting the size can impact both the visual attractiveness and the practicality of your design. A template that is too small may result in the loss of intricate details whereas an excessively large template may appear awkward and lack professionalism. In a society where first impressions hold significance it's crucial to get this aspect right.
Exploring Canva's Features for Template Size Adjustment
Canva has really simplified the design process especially when it comes to resizing templates. It provides a wide range of tools that assist everyone, from novices to experienced designers in crafting eye catching visuals.
- Predefined Sizes: Canva offers a wide range of predefined sizes for various projects like Instagram posts, business cards, and presentations.
- Custom Dimensions: If you need something unique, Canva allows you to set custom dimensions. This feature is a lifesaver for those of us who want our designs to fit a specific space.
- Drag and Drop: One of the best features is the ability to drag and drop elements. This makes it easy to see how your design fits into the new size.
- Alignment Tools: Canva provides alignment tools to ensure your elements are perfectly placed, which is especially helpful when changing sizes.
These functions aim to streamline your journey so you can prioritize creativity over the nitty gritty details.
Also Read This: How to Lock Your Screen While Watching YouTube to Avoid Accidental Touches
Step-by-Step Guide to Adjusting Template Size in Canva
Resizing your template in Canva is a breeze. Follow this easy step by step guide to get it done.
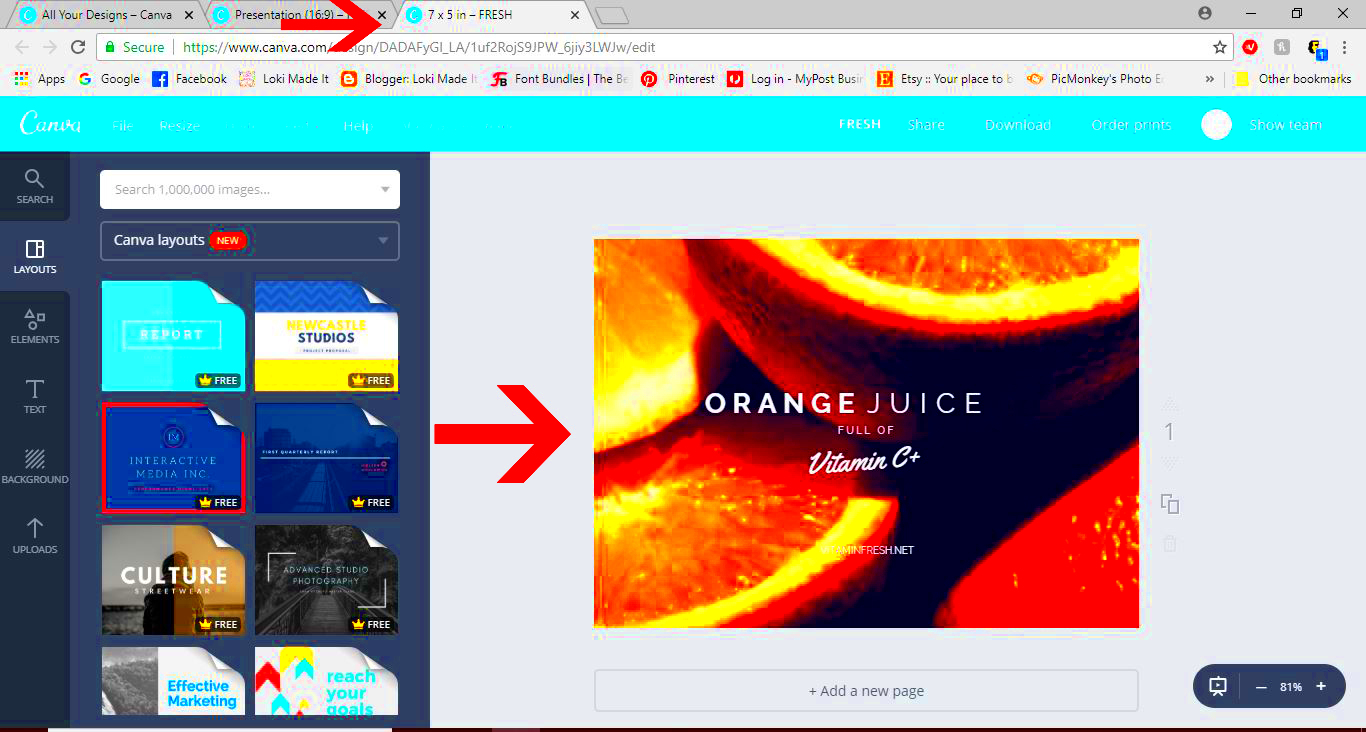
- Open Your Design: Start by opening the design you want to adjust in Canva.
- Select Resize: On the top menu, find the “Resize” option. Click on it to open the resizing options.
- Choose Your Size: You can either select from predefined sizes or enter your own custom dimensions. If you choose custom, make sure to specify both width and height.
- Adjust Elements: After resizing, you may need to reposition or resize individual elements. Use the drag-and-drop feature for this.
- Preview Your Design: Once you’re satisfied, take a moment to preview your design to ensure everything looks great.
- Save Your Changes: Finally, save your design, and you're good to go!
This straightforward approach lets you craft visuals that not only appear polished but also seamlessly blend into the areas you envision. Keep in mind that the secret lies in trying out different ideas and discovering what suits your personal taste!
Also Read This: Client Services Provided by Fortiguard Downloader
Tips for Maintaining Design Quality During Size Changes
When I started out in graphic design I naively believed that resizing a template would be as easy as just dragging a corner. Little did I know I was in for quite the shock! My once stunning designs ended up appearing distorted or squeezed ruining their appeal. With time though I picked up some tips that can assist anyone in maintaining the quality of their designs while making size adjustments.
Here are some handy tips:
- Use High-Quality Images: Always start with high-resolution images. When you resize, low-quality images tend to blur and pixelate. It's like cooking with stale ingredients; the final dish just won't taste right!
- Keep the Aspect Ratio: Maintaining the aspect ratio is crucial. When you resize, hold down the Shift key (in most tools) to keep your images proportionate. This prevents that dreaded stretching.
- Check Alignment: After resizing, always check the alignment of your elements. Canva’s alignment tools are perfect for ensuring everything sits perfectly on your canvas.
- Test Your Design: Before finalizing, view your design on different devices. What looks great on a desktop might not translate well to a mobile view.
- Utilize Layers: If you’re using multiple layers, make sure to adjust them individually. It can prevent some elements from getting lost or hidden behind others during the resizing process.
If you keep these suggestions in mind youll be on track to crafting amazing designs that hold up beautifully regardless of their scale!
Also Read This: Learn to Create Princess Cakes with Step-by-Step Instructions on Dailymotion
Common Mistakes to Avoid When Resizing Templates
During my initial years in design I messed up a lot when it came to resizing templates. I discovered through experience that even a small slip up can cause significant problems. Here are a few common traps to be cautious of.
- Ignoring the Purpose: Always remember the end use of your design. A flyer for a local event needs different dimensions than a social media post. Ignoring this can waste time and effort.
- Not Saving a Copy: Always save a copy of your original design before resizing. It’s like having a safety net. If things go wrong, you can always revert to the original.
- Overcrowding Elements: When resizing, some elements might get crammed together. Avoid making the design too busy, as it can confuse the viewer.
- Forgetting Text Size: Text can often get lost when resizing. Ensure your font sizes remain readable and consistent across different formats.
- Neglecting Margins and Spacing: Adequate margins and spacing are essential for a polished look. Make sure these elements adjust accordingly when resizing.
Steering clear of these errors can help you save time and make sure your designs appear polished regardless of their scale.
Also Read This: Can YouTube Creators See Who Disliked Their Videos
How to Use Canva's Custom Dimensions Tool
Canva's Custom Dimensions feature is a game changer for those who want to make personalized designs. When I stumbled upon this option it was like uncovering a hidden gem brimming with opportunities! Allow me to guide you on how to make the most of this amazing tool.
Here's how to get started:
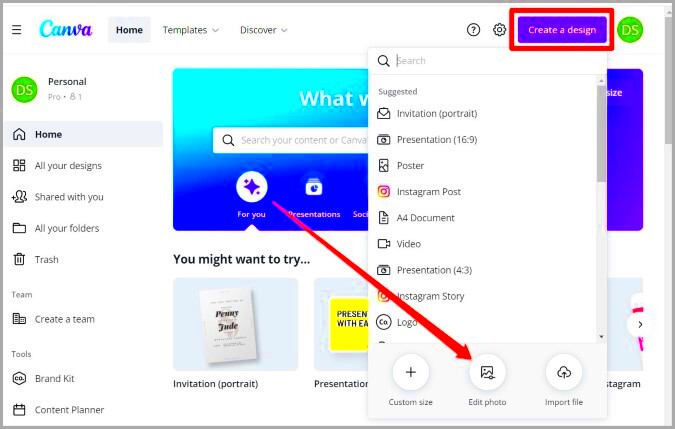
- Open Canva: Log into your Canva account and navigate to the homepage.
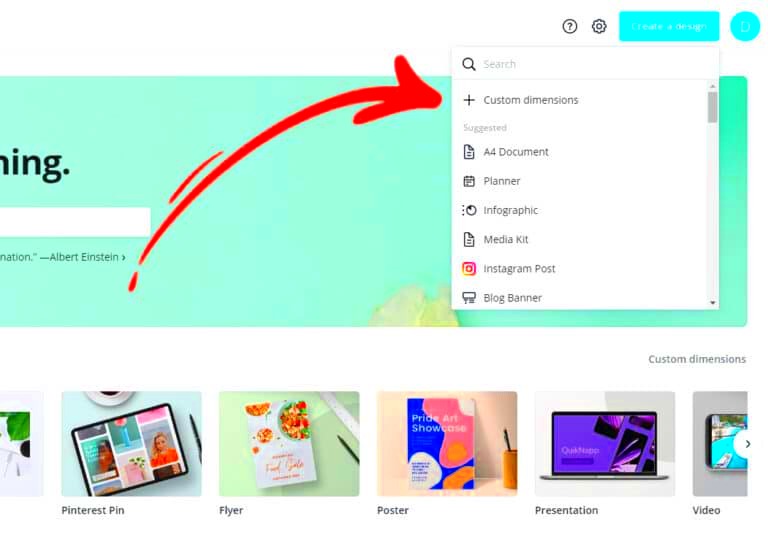
- Select Custom Size: On the top right, you’ll find the “Create a design” button. Click on it, and you'll see the option for "Custom size." This is your gateway to freedom!
- Enter Dimensions: A pop-up will appear asking for width and height. Enter your desired measurements in pixels, inches, or millimeters. Remember, think about where your design will be used!
- Choose Orientation: Decide if you want your design to be in landscape or portrait mode. It’s crucial for the overall feel of your project.
- Start Designing: Click on “Create new design” to open up a fresh canvas. Now you’re ready to unleash your creativity!
- Save Your Work: Don’t forget to regularly save your design. It’s like keeping a little bookmark in a good book—you never know when you might need to revisit!
This feature unlocks a world of options to tailor your creations giving you the freedom to craft something truly one of a kind. Immerse yourself in the journey and relish the artistry!
Also Read This: Watching Dailymotion on the Wii U with Troubleshooting Tips
Real-Life Applications of Adjusted Template Sizes
As I explored the realm of design I soon discovered that resizing templates goes beyond being a mere skill – it's like having a special power! Being able to tailor designs to suit different platforms and formats has become crucial in my creative journey. Whether it's for social media visuals or printed assets choosing the template size can significantly impact how your message is perceived.
Here are some practical scenarios in which customized template sizes really stand out.
- Social Media Posts: Each platform has its own ideal dimensions. For example, Instagram loves square images, while Facebook prefers horizontal ones. By adjusting your template size, you can create eye-catching posts that stand out in the crowded feed.
- Event Flyers: Whether it's a community event or a wedding invitation, the size of your flyer can impact its visibility. A larger format allows for more detail, while smaller sizes can be perfect for handouts or bookmarks.
- Business Cards: This is where first impressions matter. A well-sized business card that fits perfectly in wallets can make networking smoother and more professional.
- Presentations: Adjusting template sizes for presentations ensures your visuals look crisp on screens of all sizes, whether you're in a small meeting room or a large conference hall.
- Digital Ads: Different advertising platforms have specific size requirements. By customizing your ad templates, you can ensure your ads look great everywhere they appear.
These instances highlight the importance of tailoring your designs to their purpose, enhancing the impact of your visuals on your audience.
Also Read This: How to Find Your Bookmarks on LinkedIn and Access Saved Content
Frequently Asked Questions
Throughout my experience as a designer I've come across inquiries regarding template dimensions and modifications. It's common for aspiring creators to feel a bit daunted by these matters. So I decided it would be beneficial to tackle some of the questions that come up most frequently. Here are the ones I often receive.
- What is the best size for social media posts? Each platform has its guidelines, but generally, aim for square (1080 x 1080 pixels) for Instagram and landscape (1200 x 628 pixels) for Facebook.
- How do I maintain quality when resizing images? Start with high-resolution images and use Canva’s lock aspect ratio feature to prevent distortion while resizing.
- Can I resize my design after it's created? Absolutely! Canva makes it easy to resize existing designs without losing your layout.
- What should I do if my text looks too small after resizing? Always review your text size and adjust it to ensure readability, especially for print materials.
- How do I create custom dimensions? Click on “Create a design,” select “Custom size,” and enter your desired width and height. Canva will create a blank canvas for you!
These inquiries shed light on worries and tackling them can enhance your assurance in the creative journey.
Conclusion
In a time when conveying messages through visuals is paramount honing the skill of resizing templates is crucial. Based on my experiences I've come to realize that grasping and applying the dimensions not only elevates the visual charm of creations but also boosts their practicality. Whether its social media graphics or professional cards each design has a role to play and the size can play a significant role in that.
Unleash your creativity without limits! With resources such as Canva readily available you can craft visuals that resonate with your audience. Embrace the journey of adjusting and personalizing your templates as it opens up a world of endless creative opportunities. So dive in, explore and allow your designs to dazzle in their ideal dimensions!