Adding new projects to your Behance profile is essential for showcasing your creativity and skills. Each new project offers a chance to connect with your audience, attract potential clients, and gain feedback from fellow creatives. Regularly updating your portfolio not only keeps your work fresh but also demonstrates your growth as a designer or artist.
Here are a few reasons why adding new projects is important:
- Visibility: More projects mean more chances to be seen by a wider audience.
- Networking: Each project can connect you with other creatives and industry professionals.
- Skill Showcase: Regular uploads showcase your evolving skills and creativity.
- Feedback: New projects invite constructive criticism, helping you improve.
How to Prepare Your Project for Upload
Before you upload your project to Behance, some preparation is key to making it stand out. Here are the steps you should consider:
- Gather Your Materials: Collect all the files, images, and text you'll need. Make sure they represent your work well.
- Organize Your Content: Arrange your visuals and descriptions in a logical order. Consider how they tell a story.
- Edit Your Visuals: Use editing software to enhance your images. Ensure they are high quality and visually appealing.
- Write a Clear Description: Prepare a brief overview of your project. Explain what inspired you, the process, and the outcome.
Taking the time to prepare can significantly improve the quality of your project upload.
Also Read This: Canva Vector Image Conversion
Step by Step Process to Add a New Project
Now that you have prepared your project, let’s go through the steps to add it to Behance:
- Log into Behance: Access your account on Behance. If you don’t have an account, sign up for free.
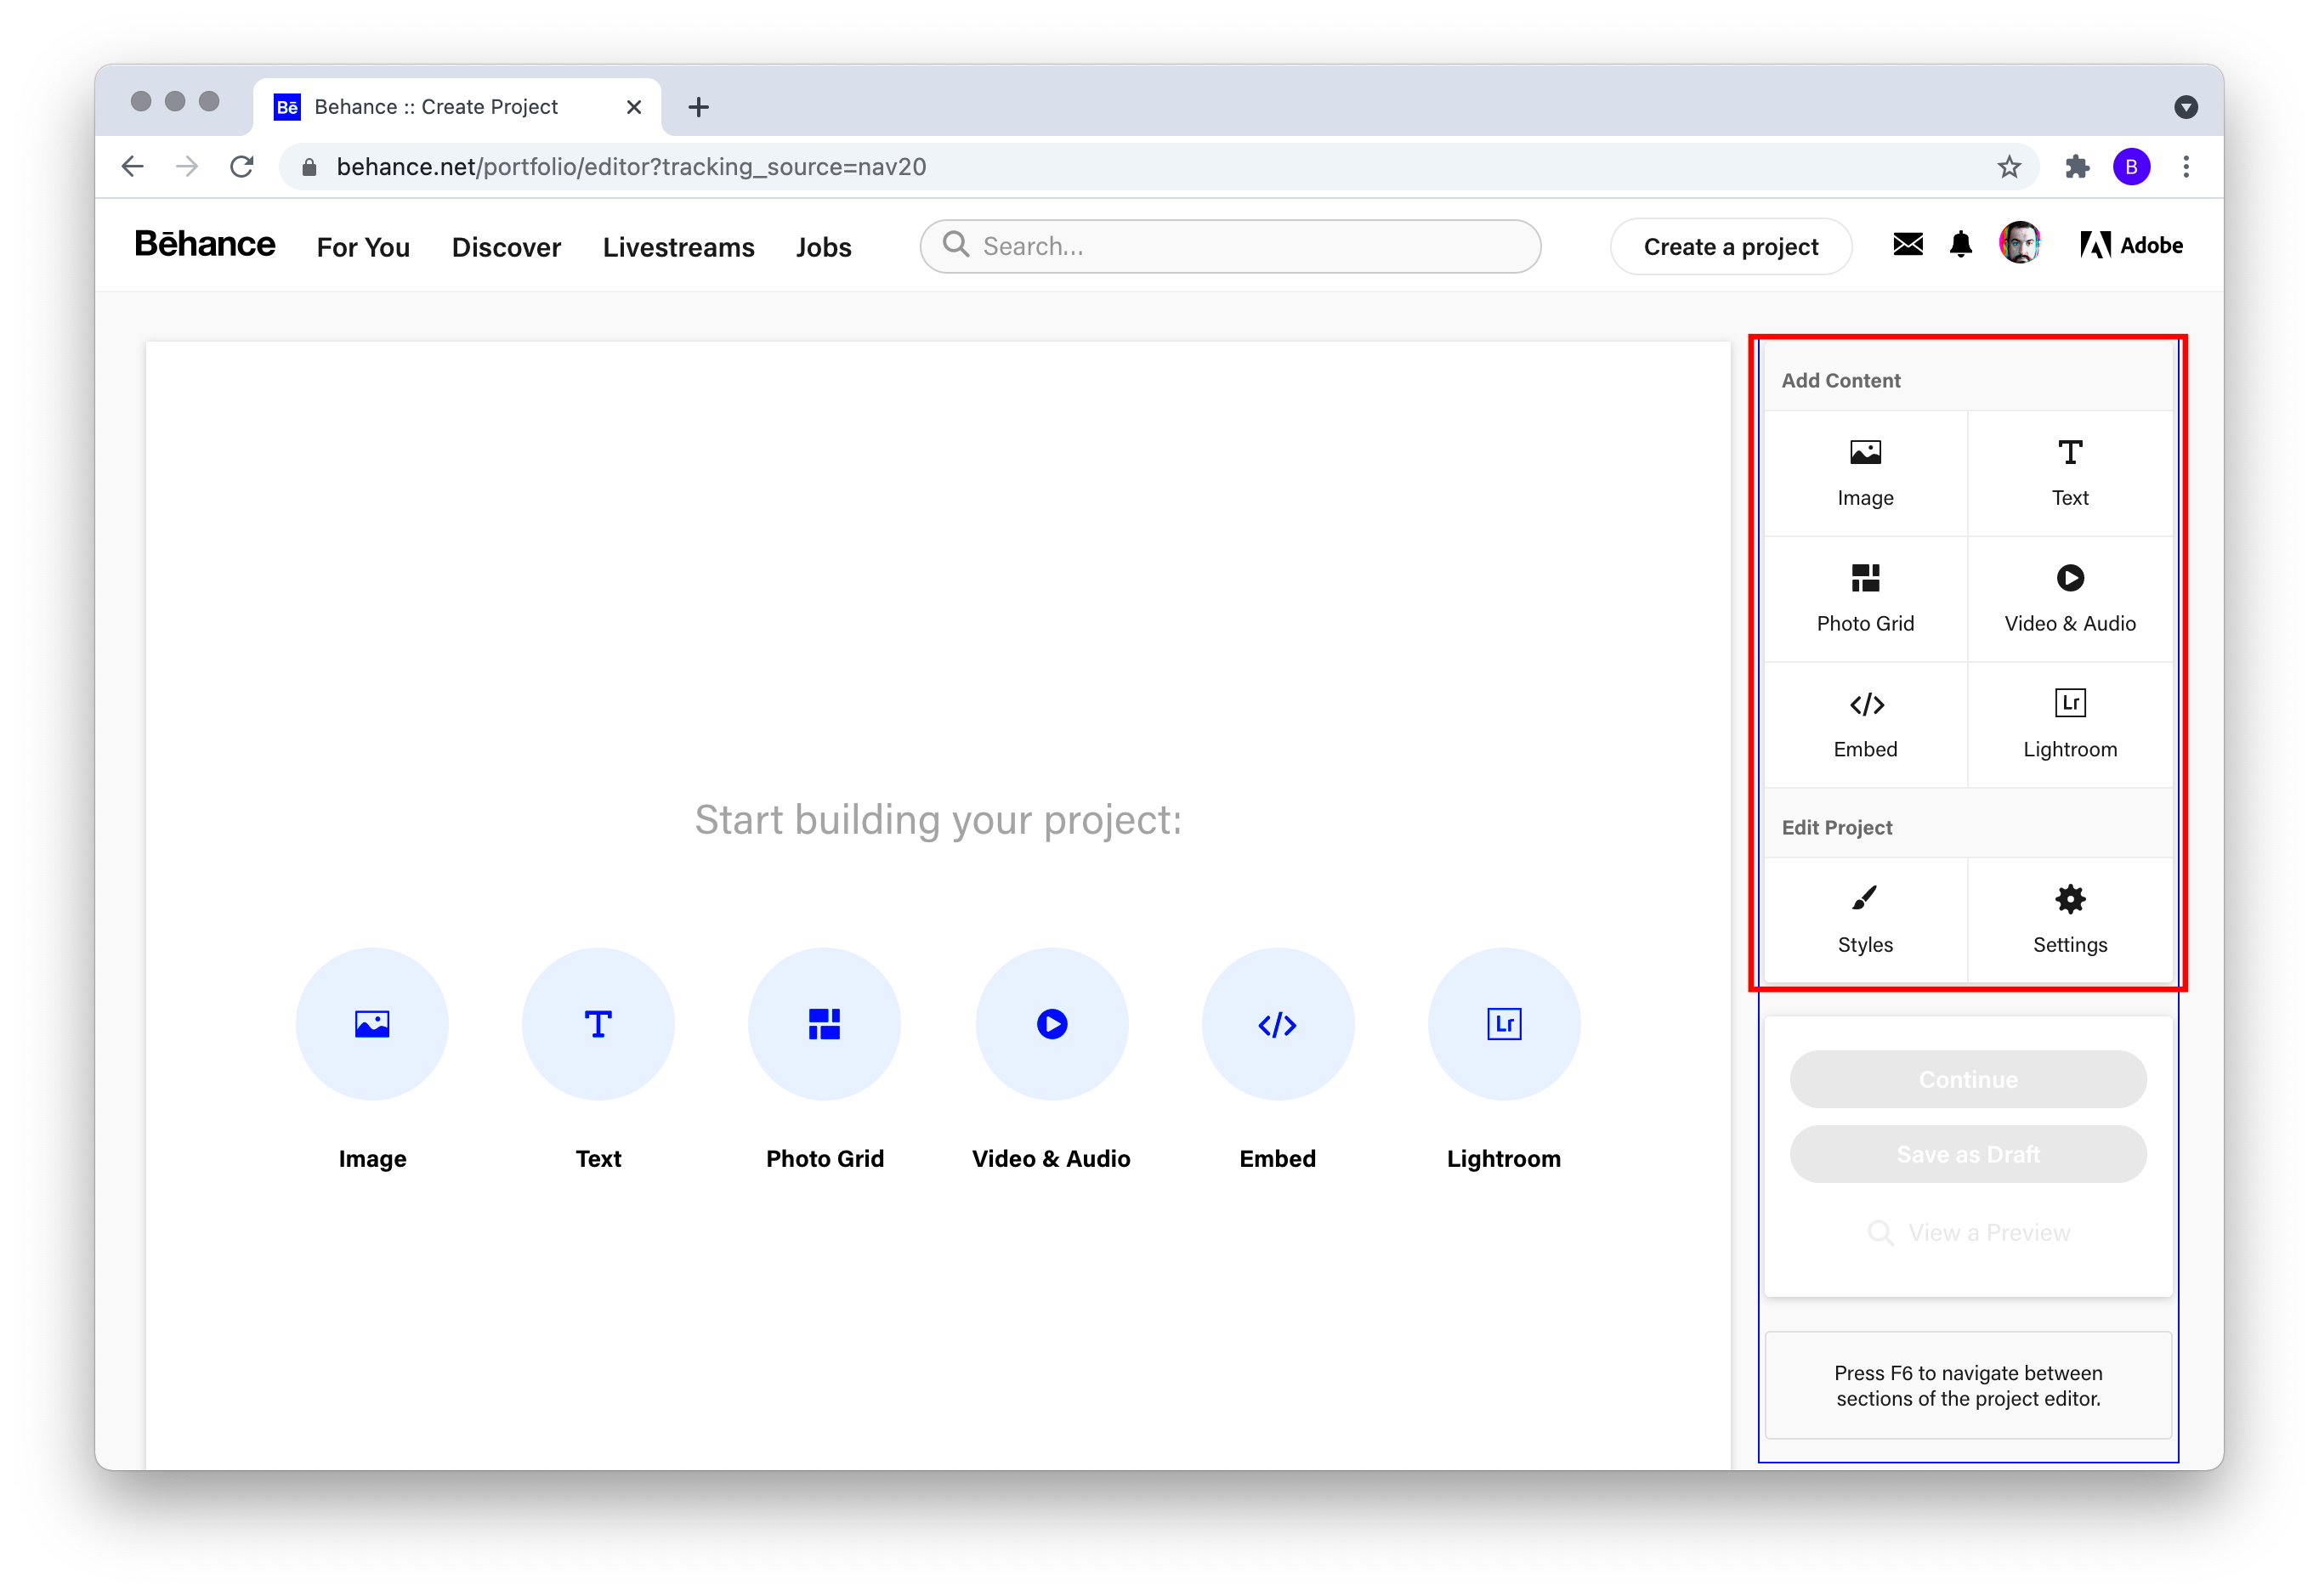
- Click on the “Create a Project” Button: Look for the “Create a Project” button on your profile page.
- Upload Your Files: Drag and drop your files into the designated area or click to select them from your device.
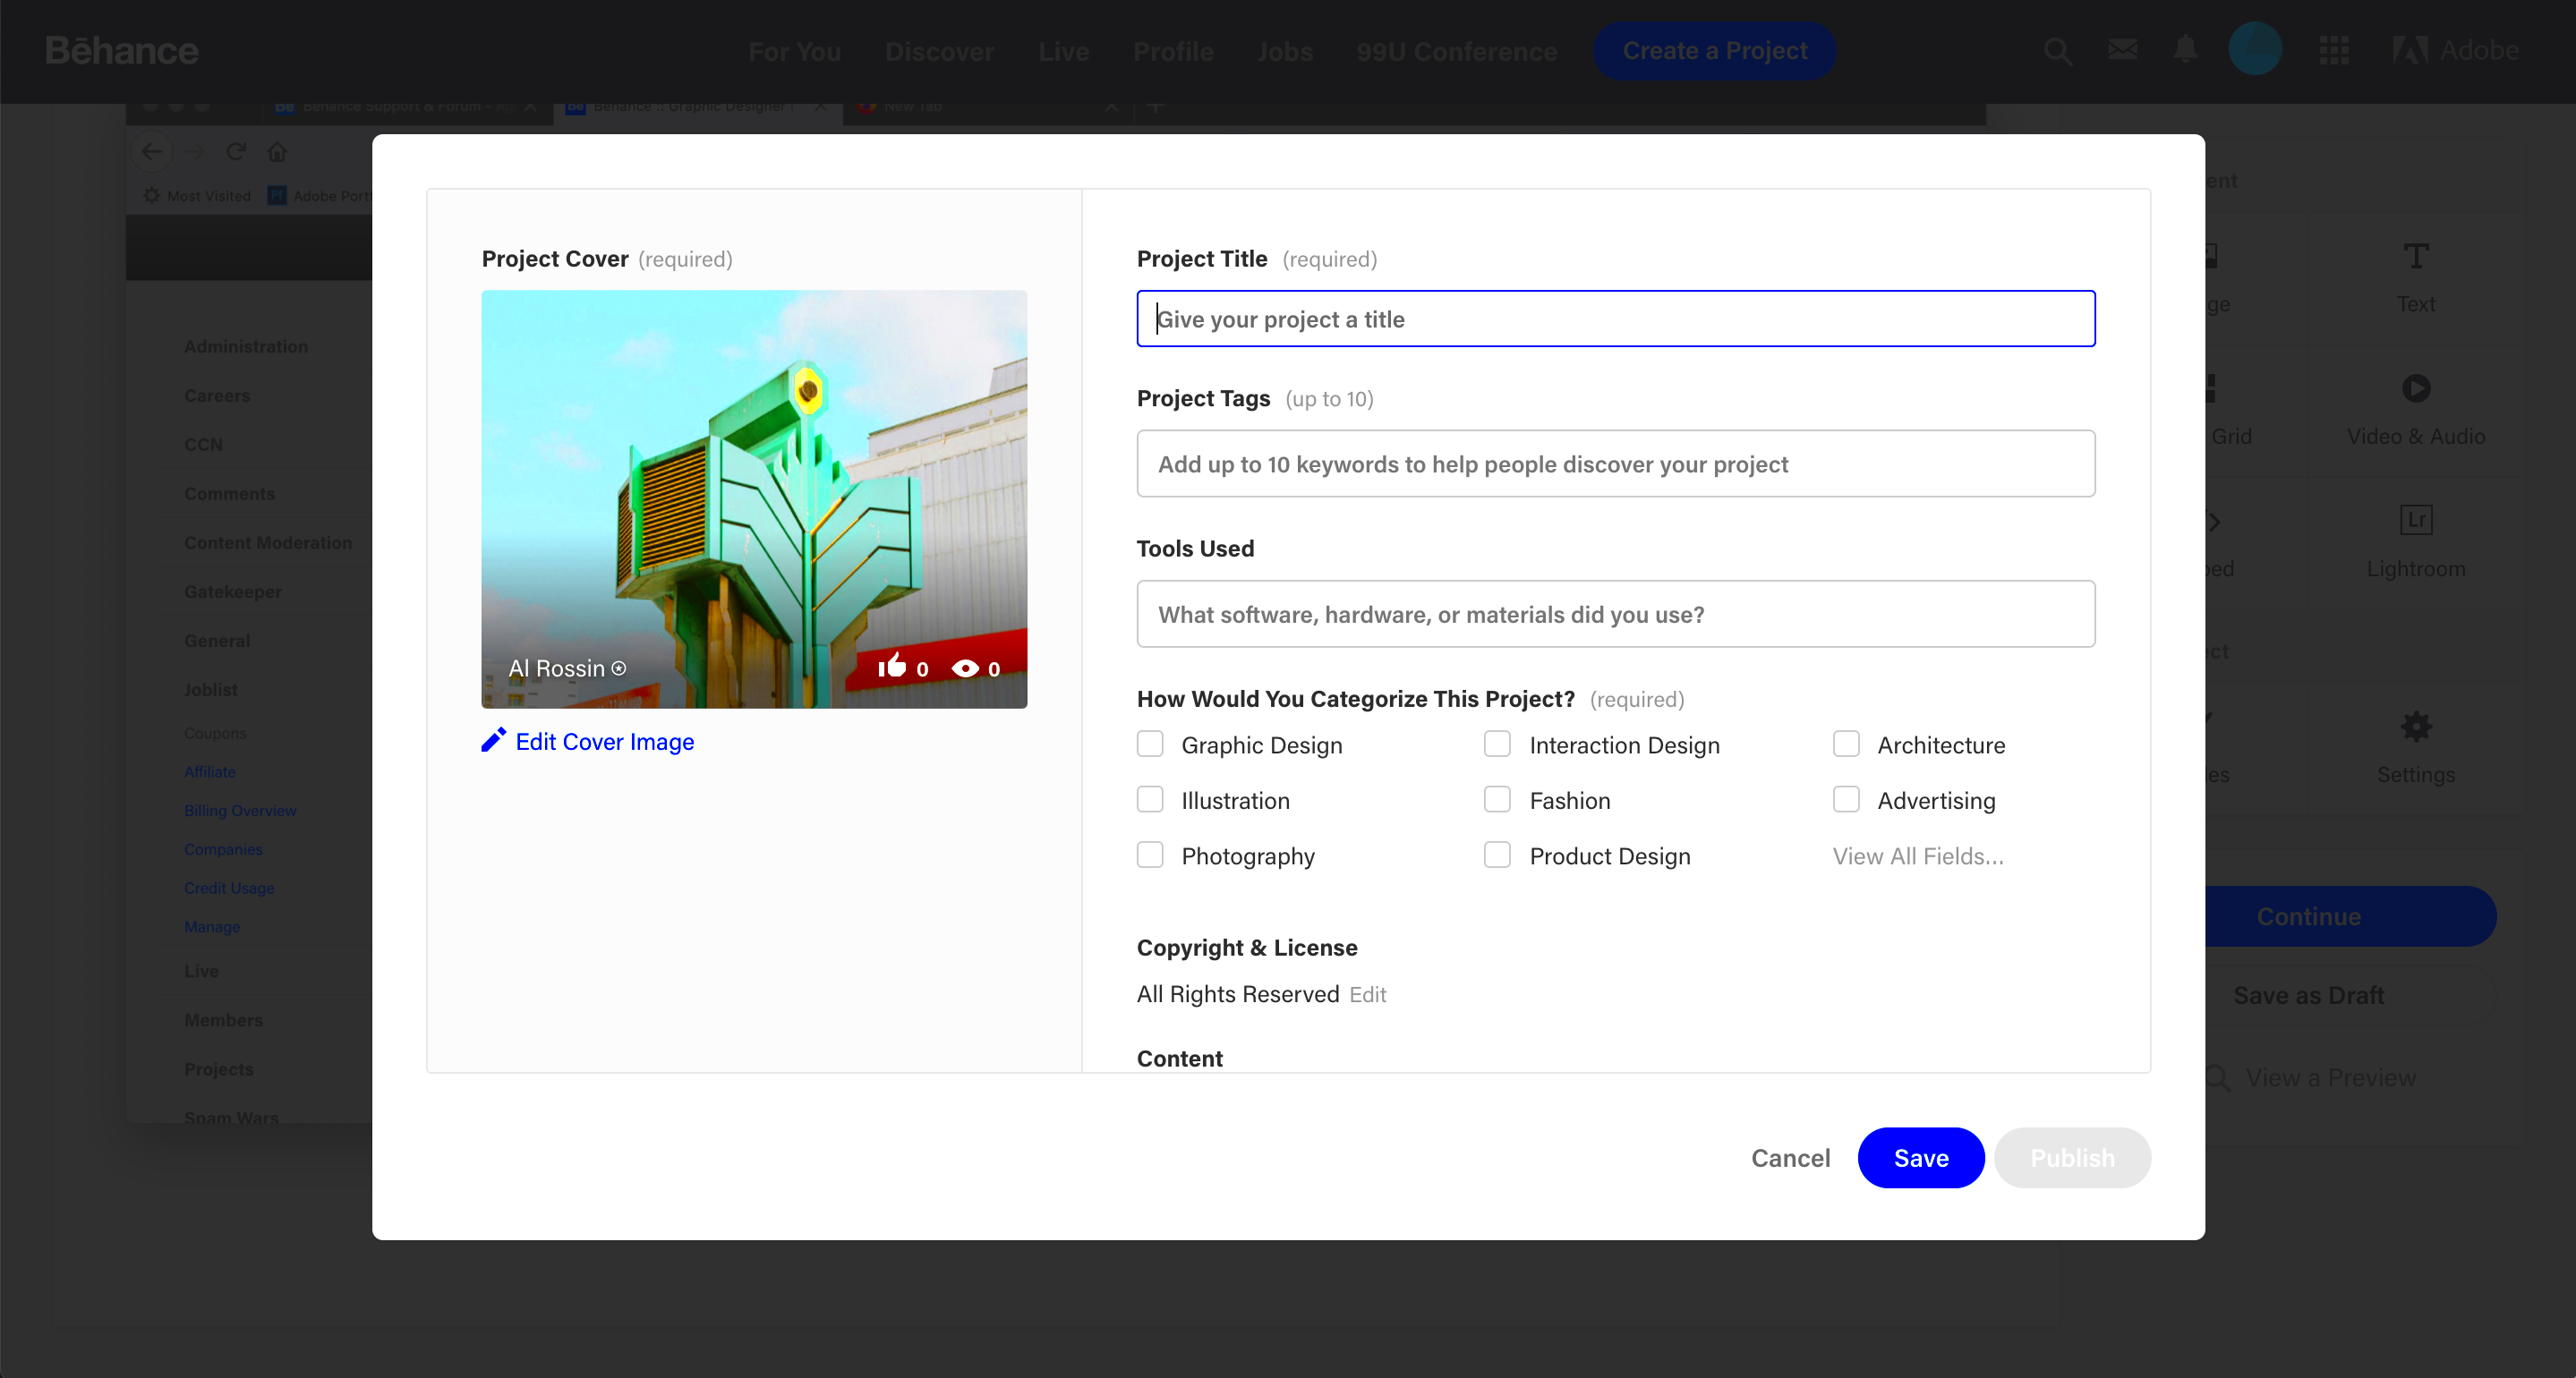
- Add Project Details: Fill in the project title, description, and tags to help users find your work.
- Adjust Settings: Choose visibility options, such as whether the project is public or private.
- Preview Your Project: Review how your project looks. Make any necessary adjustments before publishing.
- Publish Your Project: Once satisfied, hit the publish button to share your project with the world!
Following these steps will ensure a smooth process for adding your new project to Behance.
Also Read This: Sharing Your Experience on LinkedIn Effectively
Tips for Writing a Compelling Project Description
Writing a compelling project description is crucial for engaging your audience on Behance. A well-crafted description not only provides context for your work but also tells your story as a creator. This is your opportunity to connect with viewers and give them insights into your process and inspiration.
Here are some tips to help you write a captivating project description:
- Be Clear and Concise: Start with a clear overview of your project. Avoid jargon and keep your language simple.
- Tell a Story: Share the journey behind your project. Explain your inspiration, the challenges you faced, and the outcomes.
- Highlight Your Process: Describe the methods and techniques you used. This helps viewers appreciate your effort and skill.
- Use Keywords: Include relevant keywords that describe your project. This makes it easier for others to find your work.
- Engage with Questions: Ask questions to provoke thought or encourage feedback. This makes the audience feel involved.
- Edit and Revise: After writing, take the time to edit. A polished description is more likely to attract attention.
Remember, your description is just as important as the visuals. Take the time to make it engaging!
Also Read This: How High Can Rumble Stock Go in Terms of Future Growth Potential
Choosing the Right Visuals for Your Project
The visuals you choose for your Behance project are crucial in capturing the attention of your audience. High-quality images and well-thought-out layouts can significantly enhance the presentation of your work.
Here’s how to select the right visuals:
- Use High-Quality Images: Always use clear, high-resolution images. Blurry or pixelated visuals can detract from your project’s quality.
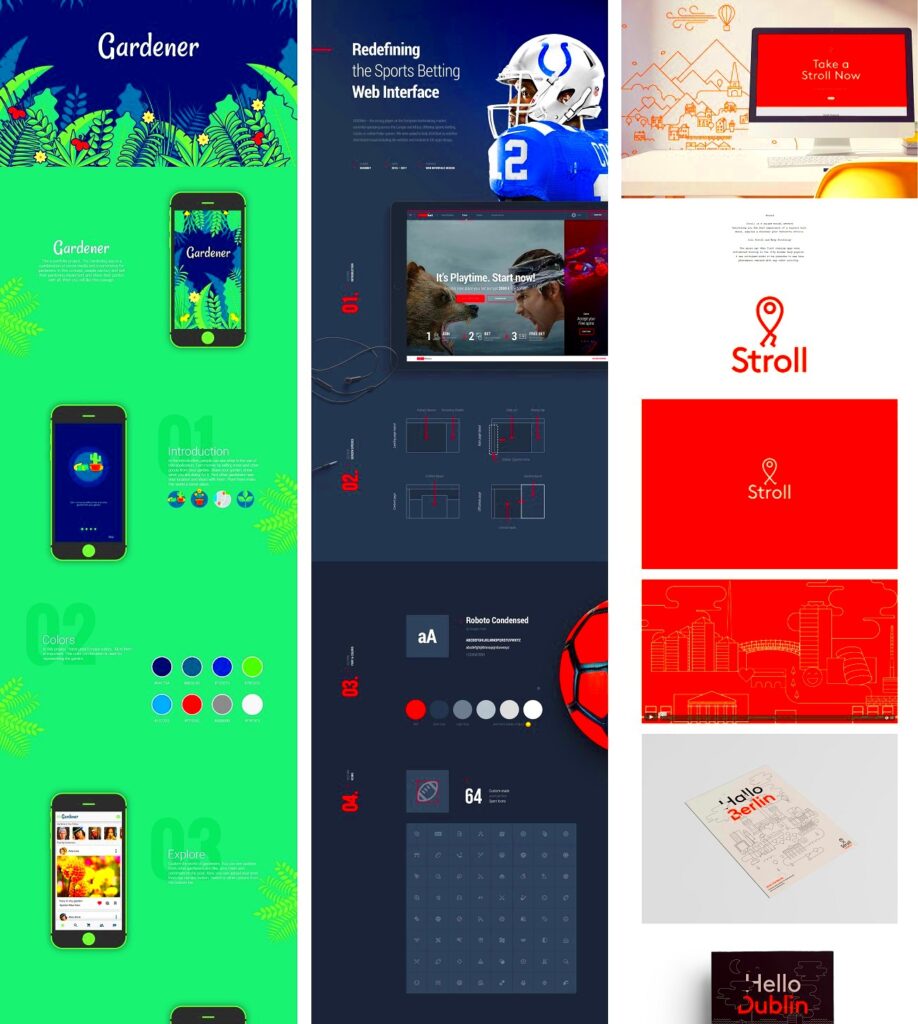
- Showcase a Variety: Include different types of visuals, such as sketches, final images, and process shots. This gives a comprehensive view of your work.
- Focus on Composition: Pay attention to how you arrange your visuals. A balanced composition can make your project more appealing.
- Consider Color Schemes: Use colors that reflect your brand or the mood of your project. Consistent colors can unify your visuals.
- Use Annotations: If necessary, add annotations to highlight specific features or details in your images.
Choosing the right visuals will not only enhance your project but also help convey your message effectively.
Also Read This: How to Find and Access Videos on Telegram
Setting the Right Privacy and Visibility Options
When uploading your project to Behance, setting the right privacy and visibility options is essential. These settings control who can see your work and how it is shared, impacting your project's reach and engagement.
Here are some important points to consider:
- Public vs. Private: Decide if you want your project to be public, accessible to everyone, or private, visible only to you or selected users.
- Shareability: If your project is public, think about whether you want others to be able to share it on social media. This can help increase exposure.
- Project Tags: Use tags to categorize your project. This helps users find your work based on interests and relevance.
- Control Comments: Decide if you want to allow comments on your project. Engaging with feedback can be beneficial, but some may prefer to disable it.
- Update Settings as Needed: You can always change your privacy settings later if your preferences change over time.
Taking time to set these options can enhance your project's visibility while ensuring it aligns with your goals.
Also Read This: Behance portfolio creation tips
Promoting Your New Project on Behance
Once you’ve added your new project on Behance, the next step is to promote it effectively. While Behance itself is a great platform for showcasing your work, reaching a wider audience requires some extra effort. Promoting your project can help you attract more views, gain followers, and connect with potential clients.
Here are some effective strategies for promoting your project:
- Share on Social Media: Use platforms like Instagram, Twitter, and Facebook to share your project. Include a captivating image and a link to your Behance project.
- Engage with the Community: Comment on other projects and interact with fellow creatives. Engaging with the community can increase your visibility.
- Use Relevant Hashtags: When sharing on social media, use hashtags that relate to your project. This helps attract people interested in your niche.
- Join Groups and Forums: Participate in online groups or forums related to your work. Share your project there to reach a targeted audience.
- Send Newsletters: If you have a mailing list, consider sending a newsletter to your subscribers featuring your new project. Highlight what makes it special.
- Collaborate with Others: Partnering with other creatives can help promote your project to their audience as well, increasing your reach.
By actively promoting your project, you’ll enhance its chances of gaining traction and recognition in the creative community.
Also Read This: How Much Can You Earn as a Contributor on 123RF
FAQs About Adding New Projects in Behance
When adding new projects to Behance, you might have some questions. Here are answers to some common FAQs that can help clarify the process:
- How many projects can I upload?
You can upload as many projects as you like. There’s no limit to how much you can showcase. - Can I edit my project after publishing?
Yes, you can go back and edit your project at any time. Just click on the “Edit” option. - What file formats are allowed?
Behance supports various formats, including JPEG, PNG, GIF, and even video formats like MP4. - How can I get more views on my projects?
Promoting your work on social media and engaging with the Behance community can help increase views. - Can I change the visibility of my project later?
Absolutely! You can change your project’s privacy settings whenever you need.
If you have more questions, exploring the Behance help center or community forums can provide additional insights.
Conclusion on Successfully Adding Projects
Adding new projects on Behance is a rewarding process that allows you to showcase your creativity and skills. By understanding the importance of project uploads, preparing effectively, and following the right steps, you can make a significant impact in the creative community.
Remember to write compelling descriptions, choose the right visuals, and set your privacy options wisely. Promoting your work actively will help you reach a broader audience and engage with fellow creatives. Don’t forget to keep updating your portfolio to reflect your growth and evolving skills.
In the end, the more you share your work, the more opportunities you’ll create for collaboration, feedback, and potential clients. Happy creating and sharing!