Dough flowers are not just beautiful creations; they're a delightful way to express your creativity and bring a touch of nature indoors. Whether you're looking to decorate a cake, add an element to your craft project, or simply enjoy a new hobby, making dough flowers can be both fun and rewarding. Imagine crafting delicate petals and vibrant blooms using just a few simple ingredients. This art form allows for endless possibilities, and with a little practice, you can create stunning floral arrangements that look almost lifelike. In this guide, we’ll walk through each step of the process, making it easy for anyone to jump in and start creating!
Materials Needed for Dough Flowers
Before diving into the wonderful world of dough flowers, it's crucial to gather all the materials you'll need. Having everything on hand not only makes the process smoother but also enhances your overall crafting experience. Here’s a list of essential items to get you started:
- Dough Base: You can use air-dry clay, homemade dough (like salt dough), or polymer clay. Each has its unique properties, so choose one that suits your project.
- Floral Wire: This will give your flowers structure and stability. Choose the thickness based on the size of your blooms.
- Floral Tape: Ideal for wrapping the stems of your flowers together and providing a natural finish.
- Paints and Brushes: Use acrylic paints to add color to your flowers. A variety of brushes will help you achieve different effects.
- Cutting Tools: Sharp scissors or flower cutters will help shape your petals and leaves with precision.
- Molds (optional): If you want to create intricate designs, using silicone molds can make the process easier.
- Rolling Pin: Useful for flattening your dough to the desired thickness.
- Texture Tools: These can be anything from a toothpick to specialized tools for adding detail to your petals and leaves.
Once you've gathered these materials, you're ready to roll up your sleeves and start creating your very own dough flowers!
Also Read This: How to Get iStock Images for Free: A Simple Trick
3. Step-by-Step Guide to Making Dough Flowers
Creating dough flowers can be a delightful and rewarding activity! Whether you’re crafting for a special occasion or just looking to express your creativity, following this step-by-step guide will help you create beautiful floral designs. Let’s get started!
Step 1: Gather Your Materials
- Dough (you can use homemade or store-bought)
- Rolling pin
- Flower cutters in various shapes
- Food coloring (optional)
- Floral wire and tape (for support)
- Scissors
- Brush (for applying color)
- Oven or air-drying space (depending on your dough type)
Step 2: Prepare the Dough
If you’re using homemade dough, ensure it’s well-kneaded and pliable. If you want to add a splash of color, mix in food coloring until you achieve your desired hue.
Step 3: Roll Out the Dough
Using your rolling pin, flatten the dough to about ¼ inch thick. Make sure it’s even to avoid any uneven flowers. You can always add more flour if the dough becomes sticky!
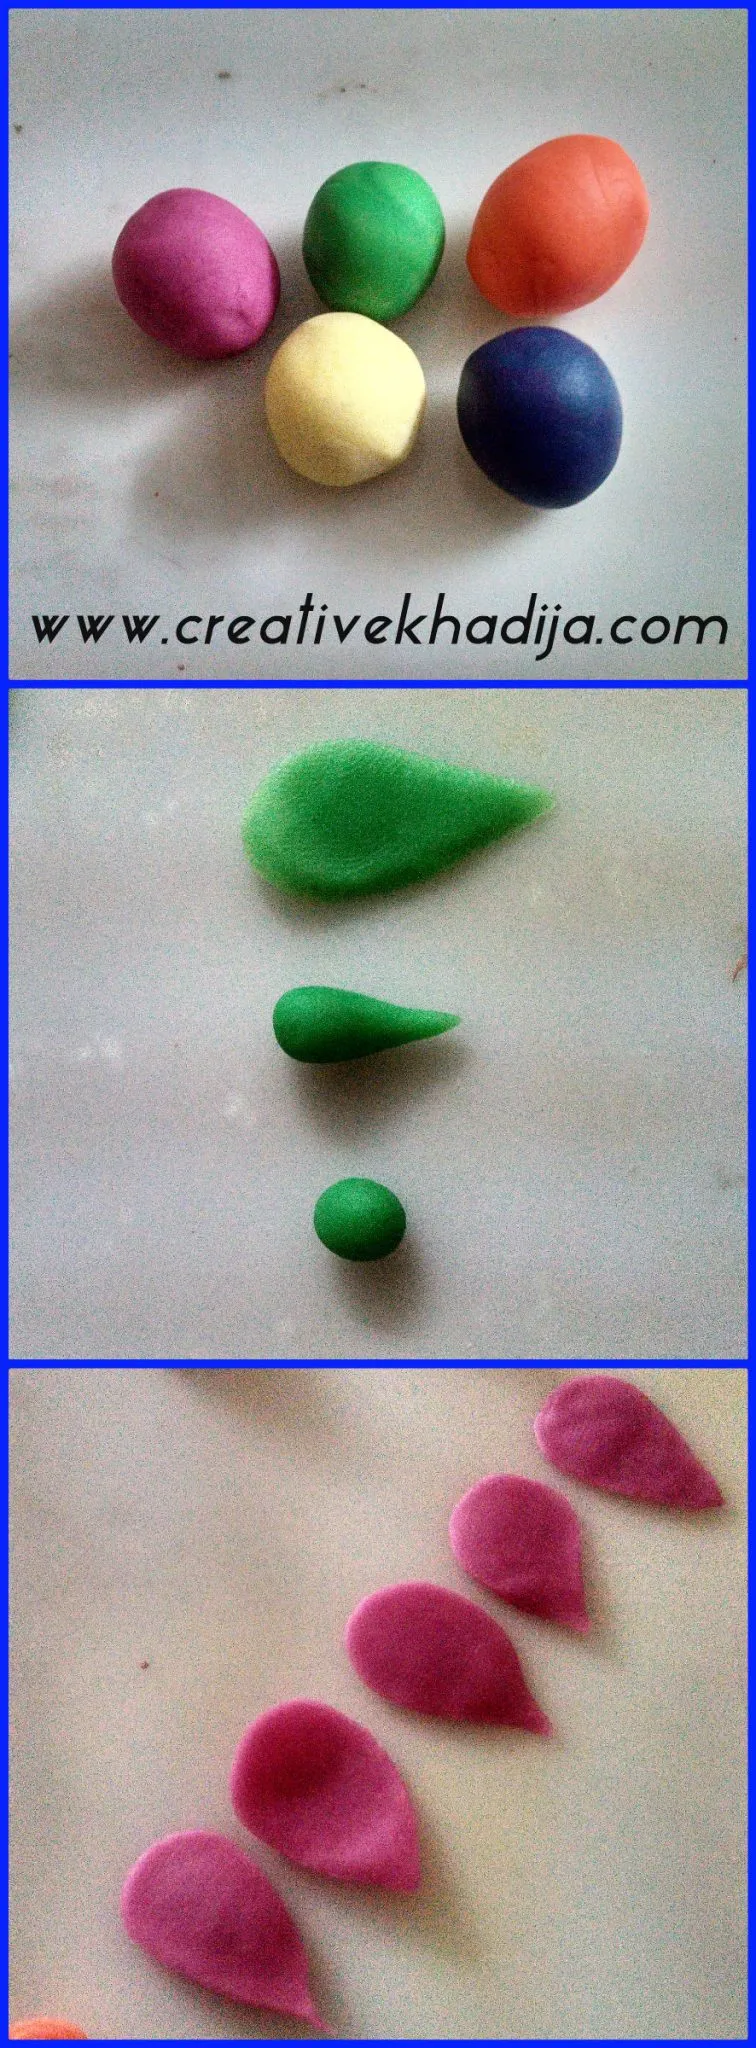
Step 4: Cut Out Your Flower Shapes
Grab your flower cutters and start cutting out shapes. You can create a variety of flowers by using different cutters. Don’t forget to make some leaves too!
Step 5: Assemble Your Flowers
Layer the flower shapes to give them depth. Use a bit of water on the edges to help them stick together. For a more realistic look, you can pinch the edges or use tools to add texture.
Step 6: Add Support
If you’re using floral wire, insert it into the base of your flower for support. Wrap the base with floral tape to secure it.
Step 7: Dry or Bake
Depending on your dough type, either let it air dry or bake according to your dough’s instructions. Once dry, your flowers will be ready to shine!
Also Read This: Exploring the Vibration Features of Nintendo Switch Lite
4. Different Techniques for Shaping Flowers
There’s no one-size-fits-all approach to making dough flowers. Different techniques can yield stunning results, so let’s explore some popular methods that can elevate your flower-making game!
1. Petal Layering
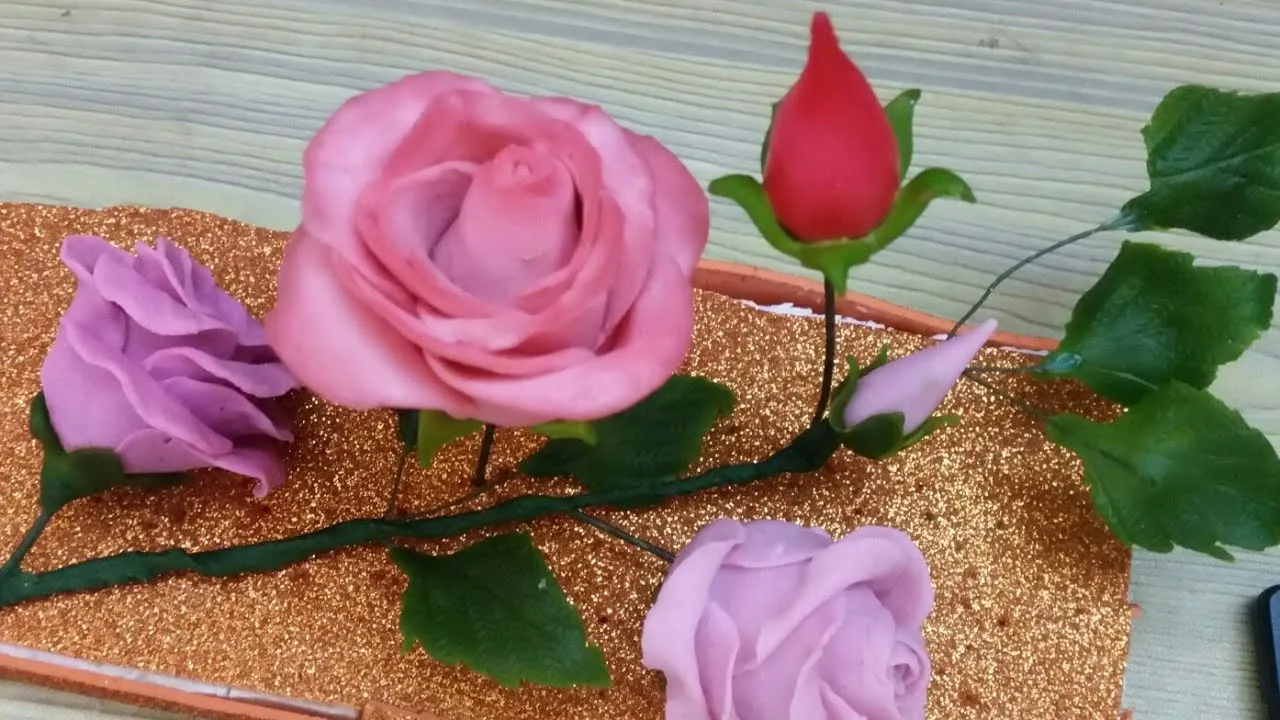
This technique involves stacking multiple petal shapes on top of each other. Start with a larger petal as the base and gradually add smaller petals on top, creating a layered effect. This method works beautifully for flowers like roses and daisies!
2. Frilling
To achieve a delicate and elegant look, frilling is a go-to technique. Use your fingers or a tool to gently pinch and curl the edges of the petals. This adds a touch of realism and makes the flowers appear more lifelike.
3. Texturing
Adding texture can make your dough flowers stand out. Use tools like toothpicks, veining tools, or even a fork to create lines and patterns on the petals. This technique is perfect for flowers like lilies or orchids.
4. Using Molds
If you’re looking for consistency, consider using silicone molds. Simply press your dough into the mold, remove it, and you’ll have perfectly shaped flowers every time. This is especially useful for complex flower designs!
5. Painting and Finishing Touches
Once your flowers are dry, you can enhance them with paints or markers. A little shimmer or glitter can also add a magical touch! Don’t shy away from experimenting with colors and finishes to make each flower unique.
With these techniques, you’ll be well on your way to creating stunning dough flowers that will impress anyone who sees them. Happy crafting!
Also Read This: Duration and Events of the Rumbling in Attack on Titan
5. Painting and Decorating Your Dough Flowers
Once your dough flowers have dried and taken shape, the next exciting step is painting and decorating them! This part allows you to unleash your creativity and personalize your flowers. Here’s how to go about it:
- Choose Your Paints: Acrylic paints work wonderfully for dough flowers. They are vibrant and dry quickly. You can also use food coloring or watercolors for a softer effect.
- Gather Your Tools: You’ll need a few basic tools: brushes of various sizes, a palette for mixing colors, and a cup of water for rinsing your brushes.
- Base Color First: Start with a base color for each flower. Use lighter shades as the base, then layer on darker shades for depth.
- Adding Details: Once the base color dries, add details like veins on the petals or centers of flowers. A fine brush works best for intricate designs.
- Seal the Paint: To protect your artwork, consider sealing your painted flowers with a clear acrylic spray. This will add a nice shine and help the colors last longer.
And don’t forget about embellishments! You can use glitter, beads, or even fabric leaves to make your dough flowers pop. Just let your imagination run wild!
Also Read This: Visionary Pursuits: Unveiling the Founder of Getty Images
6. Ideas for Displaying Your Dough Flowers
Now that your dough flowers look stunning, you’ll want to show them off! Here are some creative ways to display your beautiful creations:
| Display Idea | Description |
|---|---|
| Vases | Place your dough flowers in a decorative vase for a classic look. You can even fill the vase with pebbles or colored sand for added flair. |
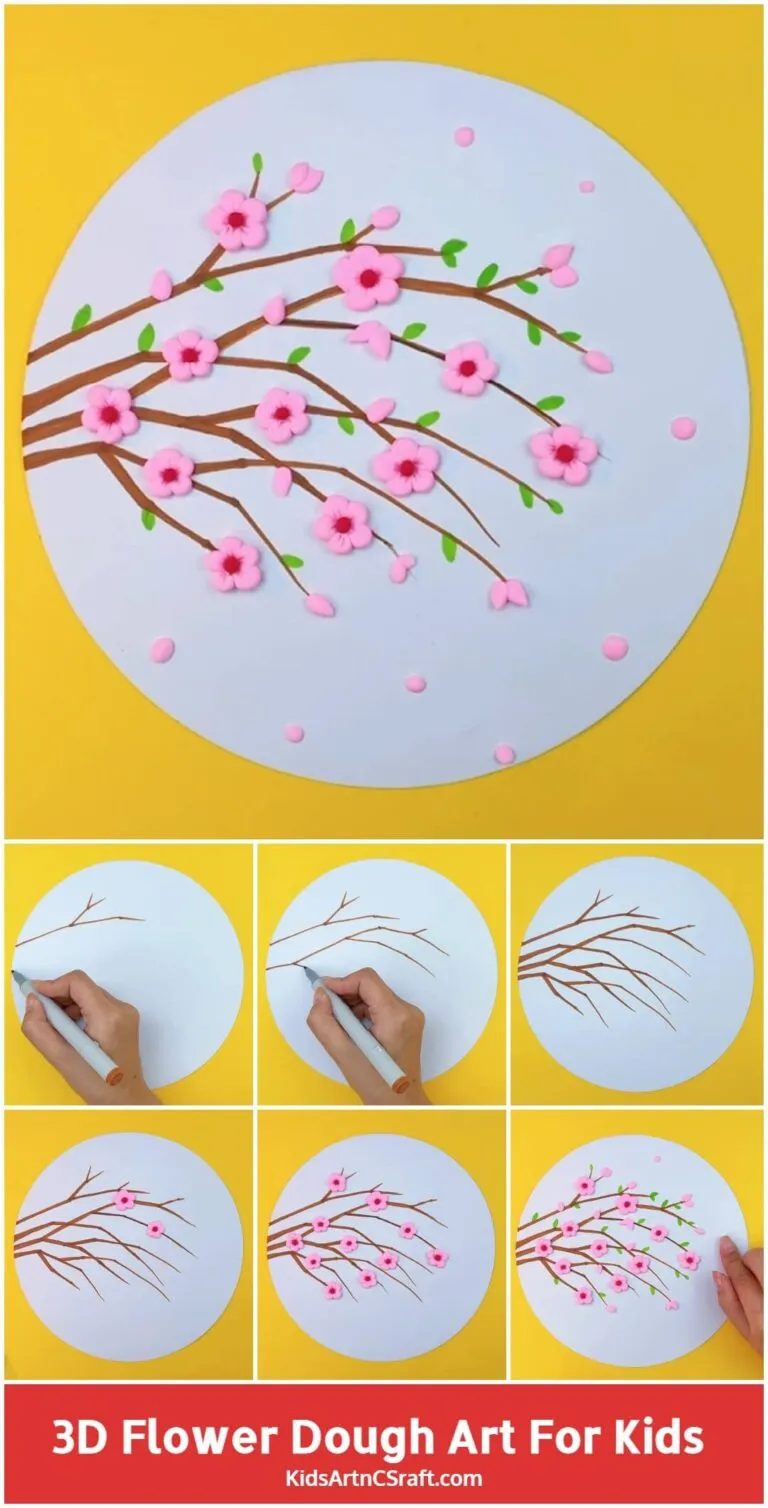
| Wall Art | Create a stunning wall display by attaching your flowers to a canvas or a wooden board. You can arrange them in a bouquet pattern or scatter them for a more whimsical look. |
| Table Centerpieces | Use your dough flowers as centerpieces for dining tables. Pair them with candles or other decorative items to create a beautiful setting. |
| Gift Wrapping | Add a personal touch to gifts by attaching a dough flower to the wrapping. It’s a lovely way to make your present stand out. |
Whether you opt for a simple vase or a creative wall art piece, your dough flowers will surely brighten any space. Enjoy displaying your handiwork and share the beauty with friends and family!
How to Make Dough Flowers Step by Step
Creating dough flowers can be a delightful and rewarding craft project. Whether you’re looking to decorate a cake, make ornaments, or simply enjoy a fun activity, dough flowers are a great choice. Follow these simple steps to create beautiful dough flowers.
Materials Needed
- Flour
- Salt
- Water
- Food coloring (optional)
- Rolling pin
- Flower-shaped cookie cutters
- Knife or craft tool for detailing
- Oven (for drying)
Step-by-Step Instructions
- Prepare the Dough: In a bowl, mix 2 cups of flour, 1 cup of salt, and 1 cup of water. Knead until smooth.
- Add Color: If you want colored flowers, divide the dough and add food coloring. Knead until the color is evenly distributed.
- Roll Out the Dough: Use a rolling pin to flatten the dough to about 1/4 inch thick.
- Cut Flower Shapes: Use flower-shaped cookie cutters to cut out your desired shapes.
- Detailing: Use a knife or craft tool to add details like petals and leaves.
- Dry the Flowers: Place the flowers on a baking sheet and dry in a preheated oven at 200°F (93°C) for 1-2 hours.
Conclusion and Final Tips
Making dough flowers is a fun and creative way to express yourself. Experiment with different shapes, sizes, and colors to create unique designs. Remember to store any leftover dough in an airtight container to keep it fresh for your next crafting session.