Creating a rubber band star craft is not just a fun activity; it's also a fantastic way to unleash your creativity! Whether you’re looking for a unique decoration or a playful gift, this craft is perfect for all ages. With just a few simple materials, you can transform ordinary rubber bands into a delightful star shape that can brighten up any space. Let’s dive into the materials you’ll need to get started!
Materials Needed
To create your rubber band star, you’ll need a handful of basic materials. Here’s a comprehensive list to ensure you have everything ready before you begin:
- Rubber Bands: Choose a variety of colors to make your star vibrant and eye-catching. You’ll need several rubber bands, preferably medium-sized.
- Cardboard or Stiff Paper: This will serve as the base for your star. You can use an old cereal box or any scrap cardboard you have at home.
- Scissors: Handy for cutting your cardboard into the desired star shape.
- Marker or Pencil: To outline your star shape on the cardboard before cutting.
- Ruler: Useful for measuring and ensuring your star is symmetrical.
- Glue (optional): If you want to secure the rubber bands in place more permanently, a strong craft glue can be helpful.
- Decorative Items (optional): Think glitter, stickers, or paint to add a personal touch to your star once it’s complete!
Gather these materials, and you'll be ready to embark on a fun crafting journey! The best part is, you can customize your star however you like, so let your imagination run wild!
Also Read This: Import Canva Templates to Google Slides with Import Canva Template to Google Slides
Step-by-Step Instructions

Creating a rubber band star craft is a fun and engaging project that anyone can enjoy. Let's break it down into simple steps:
- Gather Your Materials: You'll need the following items:
- Rubber bands (various sizes)
- Cardboard or a sturdy base
- Scissors
- Glue (optional)
- Markers or paint for decoration (optional)
- Cut Cardboard: Start by cutting out a star shape from your cardboard. It can be any size, but a 6-8 inch star works well for beginners.
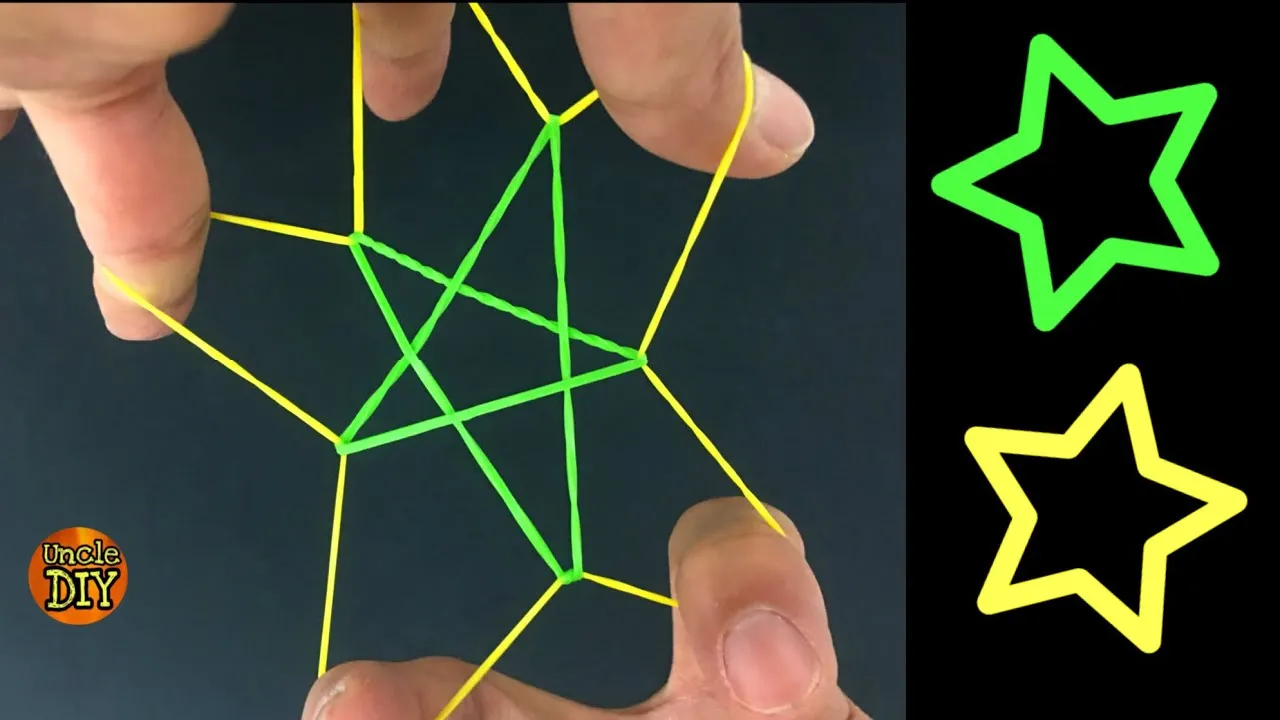
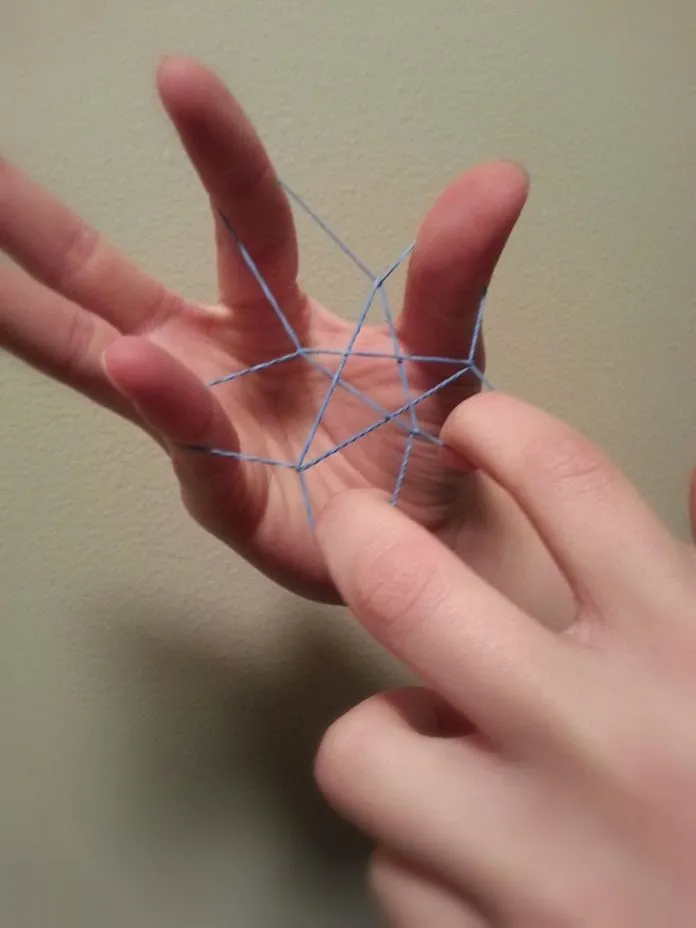
- Attach Rubber Bands: Begin wrapping the rubber bands around the star. You can use different colors and sizes to create a unique pattern. Make sure to cover all points of the star!
- Layering: If you want added depth, layer smaller rubber bands over larger ones. This will give your star a more textured look.
- Secure Ends: If the rubber bands are lifting, use a little bit of glue to secure the ends. Just a dab will do!
- Decorate: Once your star is complete, feel free to paint or draw on it. Personal touches make it really special.
- Display: Find a fun spot to display your rubber band star. You can hang it, place it on a shelf, or gift it to someone!
Also Read This: Alamy vs Shutterstock: Selecting the Ideal Stock Photography Platform
Tips for Success
Want to ensure your rubber band star turns out beautifully? Here are some handy tips to keep in mind:
- Mix Colors: Don’t be afraid to combine bright and vibrant colors. This will make your star eye-catching and fun!
- Use Different Sizes: Experimenting with various rubber band sizes can create interesting textures and dimensions.
- Take Your Time: Enjoy the process! There’s no rush, so take your time to get your design just right.
- Be Mindful of Tension: When wrapping rubber bands, ensure they’re not too tight. You want a snug fit, but not so tight that they snap!
- Involve Others: This is a great craft to do with friends or family. Collaborating can spark creativity and lead to unique designs!
Remember, the most important part is to have fun and express your creativity! Happy crafting!
Also Read This: Publish Your Project from Behance to Adobe Portfolio Effortlessly
5. Conclusion
Creating a rubber band star craft is not just a fun activity; it’s a fantastic way to unleash your creativity and spend quality time with friends or family. Whether you’re a seasoned crafter or a beginner, this project is simple enough for anyone to enjoy. By using just a few materials, you can make stunning decorations that add a pop of color to your space.
As you tie, twist, and shape your rubber bands, you’ll not only develop your crafting skills but also exercise your patience and attention to detail. Plus, it’s a project that allows for endless customization. Want a neon star? Go for it! Prefer a more subdued pastel palette? That works too! The only limit is your imagination.
Don't forget: once you've made your rubber band stars, you can display them in various ways. Here are a few ideas:
- Hang them from the ceiling to create a whimsical atmosphere.
- Use them as a centerpiece for your table.
- Attach them to gift wraps for a unique touch.
So gather your materials, invite a friend, and start crafting! You’ll be amazed at what you can create with just a handful of rubber bands.
6. Watch the Craft Video on Dailymotion
Ready to see the magic of rubber band stars in action? Watching a video can make the crafting process even more enjoyable and informative. Check out our detailed tutorial on Dailymotion, where we walk you through each step of the crafting process. You’ll see the techniques used to manipulate the rubber bands, tips on choosing colors, and ways to enhance your stars with additional decorations.
Here’s why watching the video can be beneficial:
- Visual Learning: Sometimes seeing it done is much easier than reading instructions.
- Tips and Tricks: The video includes special techniques that can save you time and boost your crafting efficiency.
- Creative Inspiration: Get inspired by different styles and ideas you might not have considered!
Join us on Dailymotion to explore the world of rubber band crafts and start making your own beautiful stars today!