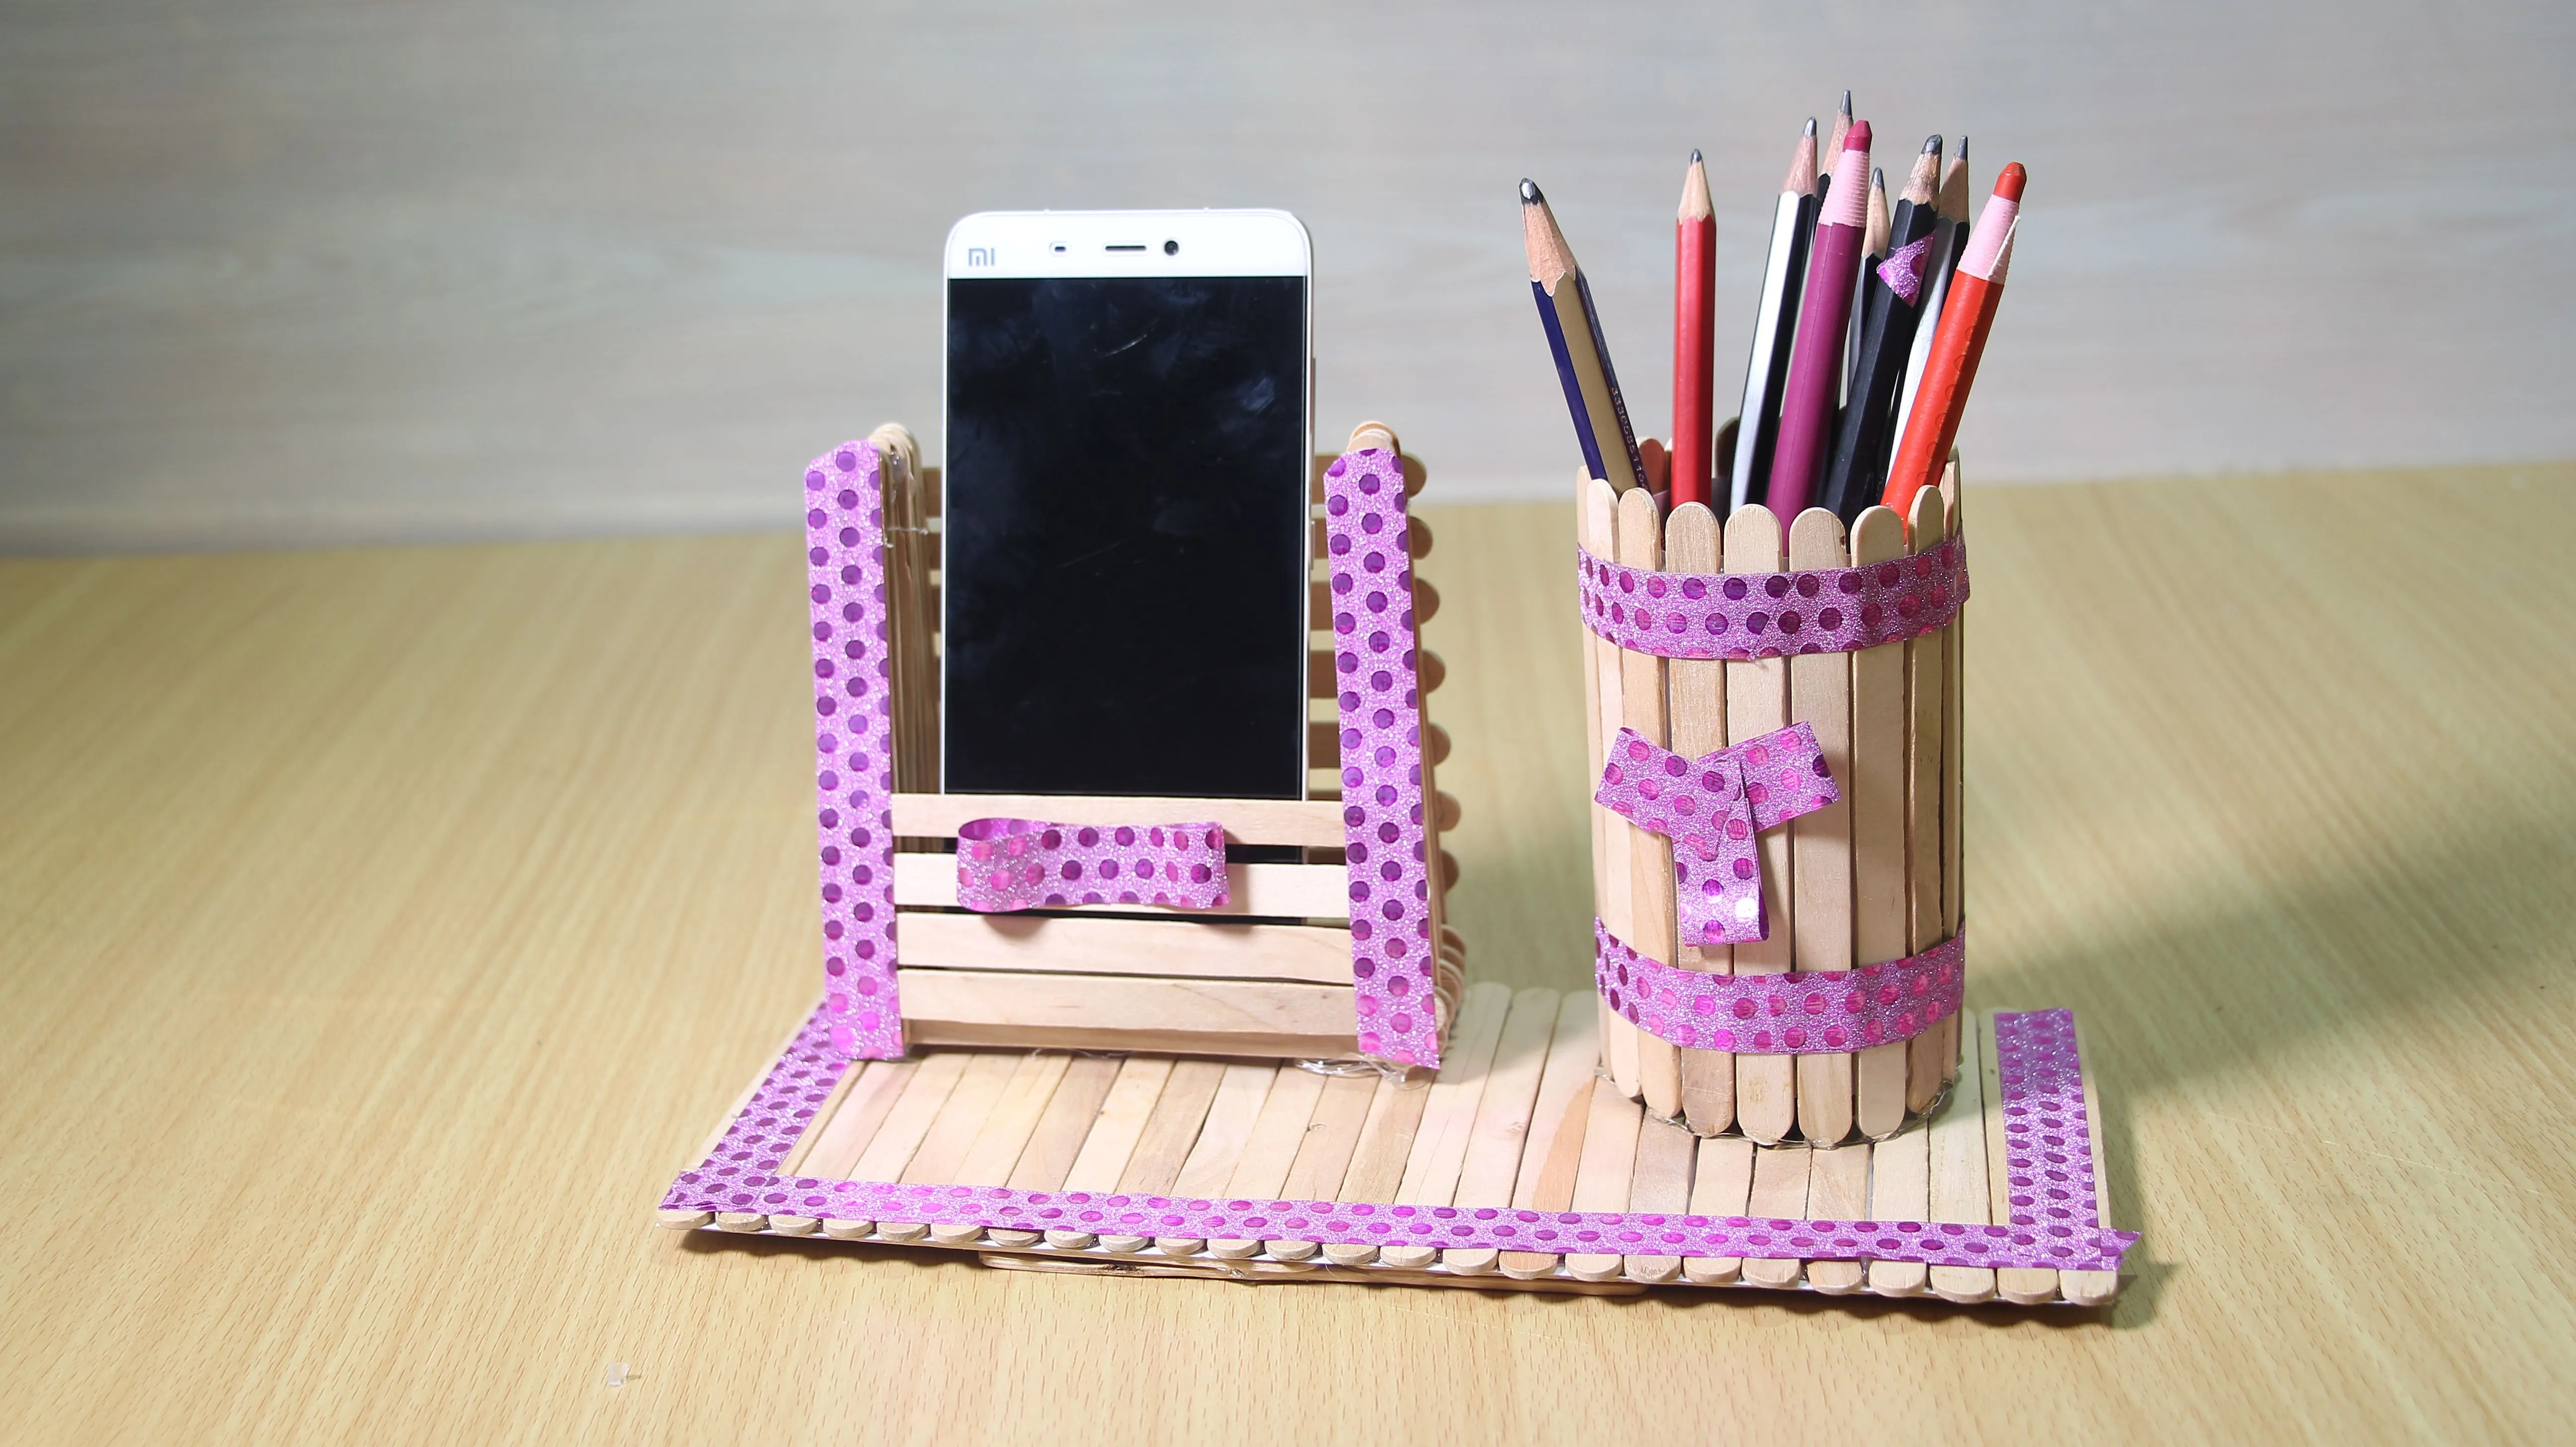
Have you ever found yourself searching for a pen or pencil only to realize they’re scattered all over your desk? Creating a pencil holder using ice cream sticks is a fun and easy DIY project that can help organize your workspace while adding a touch of creativity. Not only is it a fantastic way to repurpose items you might already have at home, but it also makes for a lovely decorative piece. Let’s dive into the materials you’ll need to get started!
Materials Needed
To create your very own pencil holder, you’ll need a few simple materials. Here’s a comprehensive list to guide you:
- Ice Cream Sticks: Around 20-30 sticks, depending on the desired size of your holder.
- Hot Glue Gun: For securely attaching the sticks together. Make sure you have enough glue sticks!
- Scissors: To trim any excess material, if necessary.
- Decorative Paint or Markers: Optional for personalizing your holder with colors and designs.
- Ruler: To measure your sticks for even cuts and spacing.
- Pencil or Pen: To mark measurements on your ice cream sticks.
- Base Material: A small piece of cardboard or a sturdy base to support your pencil holder.
With these materials on hand, you're all set to unleash your creativity! The best part is, most of these items are easily accessible and can be found around your home. So gather your supplies and let’s get crafting!
Also Read This: Techniques to Bypass Fortinet Fortiguard Downloader Web Filters
Step-by-Step Instructions
Creating a pencil holder from ice cream sticks is not only a fun project but also a great way to recycle! Here’s a simple guide to help you through it:
- Gather Your Materials: You’ll need:
- Ice cream sticks (around 20-30)
- Glue (hot glue or craft glue)
- Scissors
- Paint or markers (optional for decoration)
- Cardboard or a small base (for stability)
Also Read This: The Death of Hurrem Sultan Unveiled
Tips for Customization
Customization is where your creativity shines! Here are some fun ideas to make your pencil holder uniquely yours:
- Paint Patterns: Use different colors to paint stripes, dots, or even ombre effects. You can use acrylic paint for vibrant colors.
- Add Embellishments: Stick on gems, washi tape, or decorative stickers to personalize the look. These small details can make a big impact!
- Label It: Consider adding a label like “My Art Supplies” or “Office Essentials” using a label maker or hand-drawn tags.
- Experiment with Shapes: Instead of a standard rectangular holder, try making it triangular or circular for a more dynamic design.
- Incorporate Other Materials: Mix in some colored paper, fabric, or even additional materials like twine or burlap for a rustic touch.
Remember, the goal is to have fun and let your personality shine through in your creation!
How to Create a Pencil Holder Using Ice Cream Sticks
Creating a pencil holder using ice cream sticks is a fun and easy craft that adds a personal touch to your workspace. This DIY project is perfect for kids and adults alike, making it an excellent way to recycle materials while enhancing your organization skills. Below is a step-by-step guide to help you create your own unique pencil holder.
Materials Needed
- Ice cream sticks (around 20-30 sticks)
- Glue (hot glue or craft glue)
- Scissors
- Paint or markers (optional, for decoration)
- Decorative items (like beads, stickers, or washi tape, optional)
Instructions
- Prepare Your Workspace: Clear a flat surface and gather all your materials.
- Base Construction: Take 5-7 ice cream sticks and glue them side by side to form the base of your pencil holder.
- Build the Walls: Start stacking more sticks vertically around the edges of the base. Secure each stick with glue. Make sure to leave space for the top.
- Continue Layering: Repeat the stacking process, gluing sticks together until you achieve your desired height.
- Finish and Decorate: Once the glue is dry, you can paint or decorate your pencil holder as desired. Use markers, stickers, or other decorative items to personalize it.
- Let It Dry: Allow your pencil holder to dry completely before using it.
Tips
For added stability, consider placing small stones or marbles at the bottom of the holder. This will help prevent it from tipping over when filled with pencils.
Creative Variations
| Variation | Description |
|---|---|
| Colorful Holder | Use colored ice cream sticks or paint them in various shades. |
| Multi-Compartment Holder | Divide the holder into sections using additional sticks for organization. |
In conclusion, creating a pencil holder using ice cream sticks is not only a simple and enjoyable craft but also an effective way to keep your desk organized. With a little creativity and some basic materials, you can transform ordinary ice cream sticks into a functional and decorative item for your workspace.