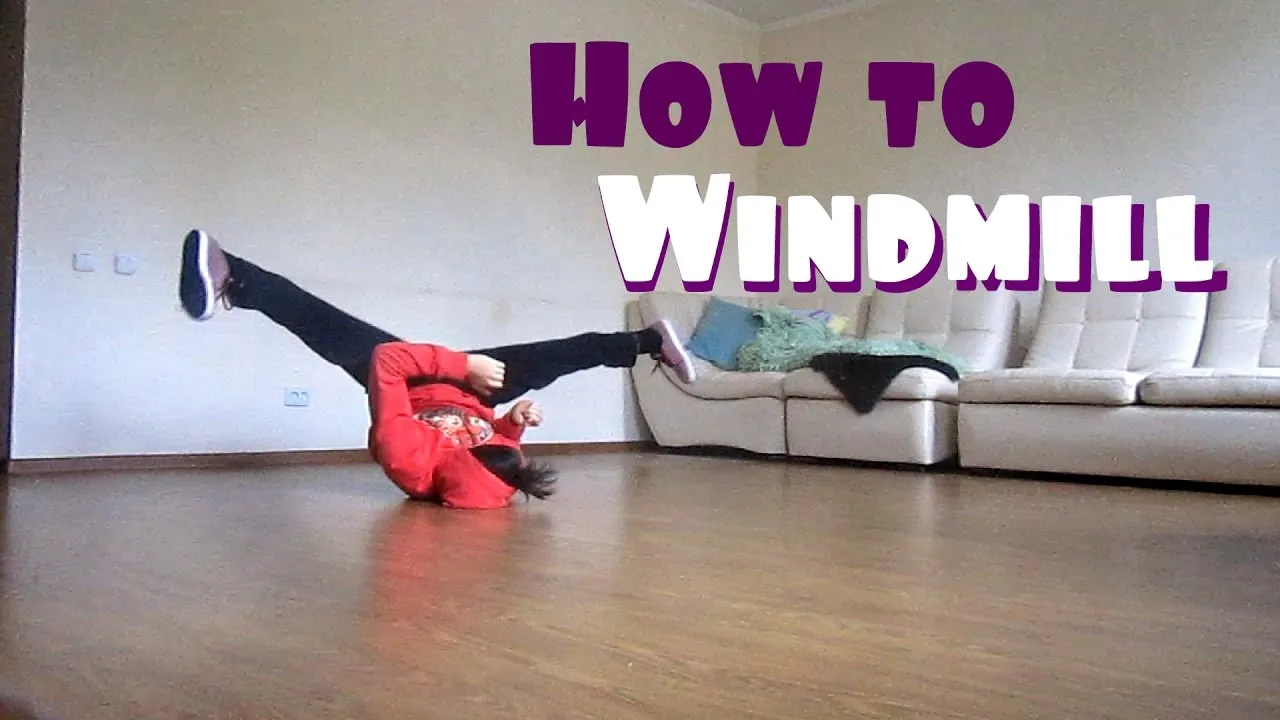
Are you ready to elevate your dance skills and impress your friends? The Windmill move is a classic breakdancing technique that showcases not only your style but also your physicality. Originating from the vibrant streets of the 1970s, this move has become a staple in both breakdancing and various hip-hop dance forms. It’s all about dynamic movement, fluidity, and a touch of creativity! In this guide, we’ll dive into the Windmill move, breaking it down step by step to ensure that you master it with ease. Let’s get spinning!
Essential Preparations and Warm-Up
Before you jump into learning the Windmill move, it’s crucial to prepare your body. Proper warm-up routines not only enhance your performance but also reduce the risk of injuries. Here’s how to set yourself up for success:
- Cardio Warm-Up: Start with 5-10 minutes of light cardio, like jogging in place or jumping jacks. This helps to get your blood flowing and warms up your muscles.
- Dynamic Stretching: Engage in dynamic stretches, such as arm circles, leg swings, and torso twists. These movements increase your flexibility and range of motion, essential for executing the Windmill smoothly.
- Strengthening Exercises: Focus on your core, shoulders, and arms. Try exercises like planks, push-ups, and sit-ups. A strong core is vital for maintaining balance while spinning.
- Practice Basic Moves: Before attempting the Windmill, practice foundational moves like the baby freeze or the six-step. These will help build your confidence and technique.
By following these preparations, you’ll be better equipped to learn the Windmill move effectively. Remember, it’s about enjoying the process, so have fun and let your creativity shine!
Also Read This: Shipping Times with Millers and ShootProof: What to Expect
Step-by-Step Guide to Performing the Windmill
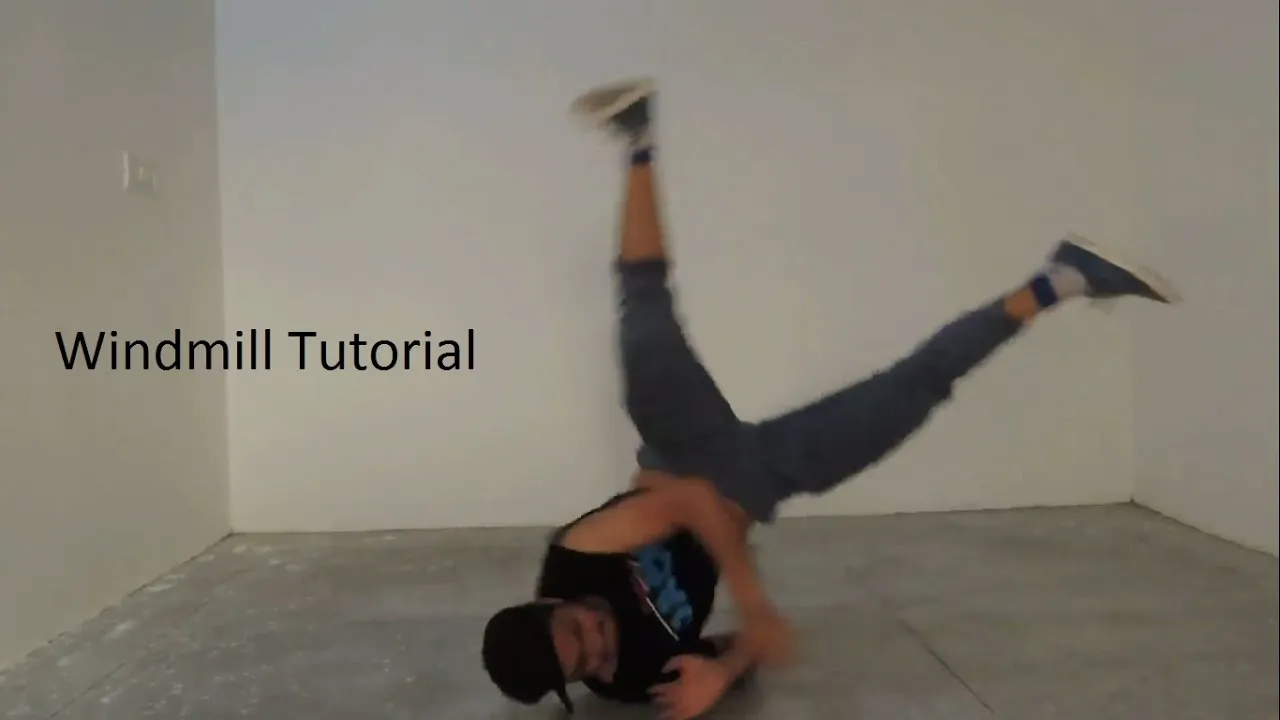
Ready to master the windmill? Let’s break it down into simple, digestible steps so you can nail this move with confidence!
- Start with Your Stance: Begin by standing with your feet shoulder-width apart. Bend your knees slightly to maintain a relaxed posture.
- Position Your Arms: Extend your arms out to the sides at shoulder height. This helps with balance and gives you a solid foundation.
- Initiate the Movement: Rotate your torso to one side while pushing your opposite arm down towards the ground. Think of winding up like a coiled spring!
- Leg Action: As you drop your arm, step forward with the leg on the same side as your extended arm. This step is crucial for momentum.
- Follow Through: As your arm sweeps towards the ground, allow your body to follow. Your opposite foot should come around to meet your stepping foot.
- Practice the Flow: Once you’re comfortable, practice transitioning from one side to the other smoothly. This is where the magic happens!
Each step builds on the last, so take your time. Remember, practice makes perfect, and soon you’ll be executing windmills like a pro!
Also Read This: Avoiding Copyright Issues on YouTube When Using Music
Common Mistakes to Avoid

Even seasoned dancers can trip up while learning the windmill. Here are some common pitfalls and how to sidestep them:
- Too Much Tension: Avoid locking your knees or tensing your arms. Staying relaxed is key to a smooth windmill.
- Inadequate Footwork: Failing to step in rhythm with your arm movement can throw you off balance. Ensure your leg movement matches your arm's flow.
- Not Engaging Your Core: A strong core stabilizes your movements. If your core is weak, you might lose your balance.
- Skipping Warm-Up: Always warm up! Your muscles need to be ready for the dynamic movements of the windmill.
- Overthinking the Motion: Sometimes we can think too much about each movement. Trust your body and let it flow naturally!
By keeping these points in mind, you’ll not only avoid common mistakes but also enhance your windmill technique. Happy practicing!
Also Read This: How to Watch the Royal Rumble and Streaming Options
5. Tips for Mastering the Windmill Technique
Mastering the Windmill Technique can be exhilarating, but like any skill, it requires practice and a few handy tips to do it effectively. Here are some key pointers to help you along your journey:
- Start Slow: Don’t rush into it. Begin with slow, deliberate movements to get a feel for the technique.
- Focus on Form: Proper posture is essential. Keep your back straight and your arms relaxed. This will help you maintain balance and control.
- Break it Down: Divide the technique into manageable steps. Focus on one part of the motion at a time, such as arm movement, before combining everything together.
- Use a Mirror: Practicing in front of a mirror can help you visualize your movements and correct your form.
- Stay Consistent: Dedicate time each day to practice. Consistency is key in mastering any technique.
Additionally, consider recording yourself to track your progress. This can also help you identify areas that need improvement.
6. Conclusion and Additional Resources
In conclusion, the Windmill Technique is not only an impressive skill but also a fun way to enhance your coordination and rhythm. With dedication and practice, you can master it! Remember, everyone learns at their own pace, so be patient with yourself.
For those looking to dive deeper, here are some valuable resources:
| Resource | Type | Description |
|---|---|---|
| Video Tutorial | Video | A comprehensive guide showcasing each step of the Windmill Technique. |
| Online Class | Class | Join a live online class for interactive learning and feedback. |
| Community Forum | Forum | Engage with fellow learners, share tips, and seek advice. |
So, gear up, have fun, and happy practicing!