Creating a handmade explosion box birthday card is not just a delightful craft but also a heartfelt gift that can leave a lasting impression. It’s a unique way to celebrate someone special in your life, combining artistry with personal touches. As you open the box, layers of surprises, sweet messages, and cherished memories unfold, making it an unforgettable experience. In this guide, we’ll walk you through the essentials needed to craft your own explosion box birthday card, ensuring your loved ones feel valued and appreciated.
Materials Needed
Before diving into the fun of crafting your explosion box birthday card, let’s gather the materials you’ll need. Having everything ready will streamline the process and allow you to focus on unleashing your creativity. Here’s a detailed list:
- Cardstock Paper: Choose a sturdy cardstock in colors of your choice. You’ll need several sheets for the box and decorations. Popular choices include:
- Black
- Bright Pastels
- Metallics
- Scissors: A good pair of scissors is essential for precise cutting.
- Adhesive: Use double-sided tape or glue. For quick and strong bonding, consider:
- Hot Glue Gun
- Craft Glue
- Ruler and Pencil: For accurate measurements and markings.
- Decorative Items: Personalize your card with:
- Stickers
- Washi Tape
- Ribbon and Twine
- Photos
- Markers or Pens: To write heartfelt messages and doodles inside the box.
- Embellishments: Consider adding:
- Sequins
- Glitter
- Craft Flowers
With these materials in hand, you’re all set to embark on your explosion box birthday card journey. Let your imagination run wild and enjoy the creative process!
Also Read This: Amazon Shopping Secrets Unveiled: Hacks for Finding Hidden Gems
Step-by-Step Instructions
Creating a handmade explosion box birthday card is a delightful project that adds a personal touch to any celebration. Follow these simple steps to craft your own unique card:
- Gather Your Supplies: You'll need:
- Cardstock in various colors
- Scissors
- Glue or double-sided tape
- Decorative elements (stickers, ribbons, etc.)
- Photos or personal messages
- 1 piece: 12 x 12 inches (base)
- 3 pieces: 6 x 6 inches (inner layers)
- 4 pieces: 3 x 3 inches (small flaps)
- For the 12 x 12 base, score at 4 inches and 8 inches on all sides.
- Fold to create a box structure.
Also Read This: Is Dailymotion Safe from COPPA Violations and How to Protect Childrenâs Privacy
Design Ideas for Explosion Boxes
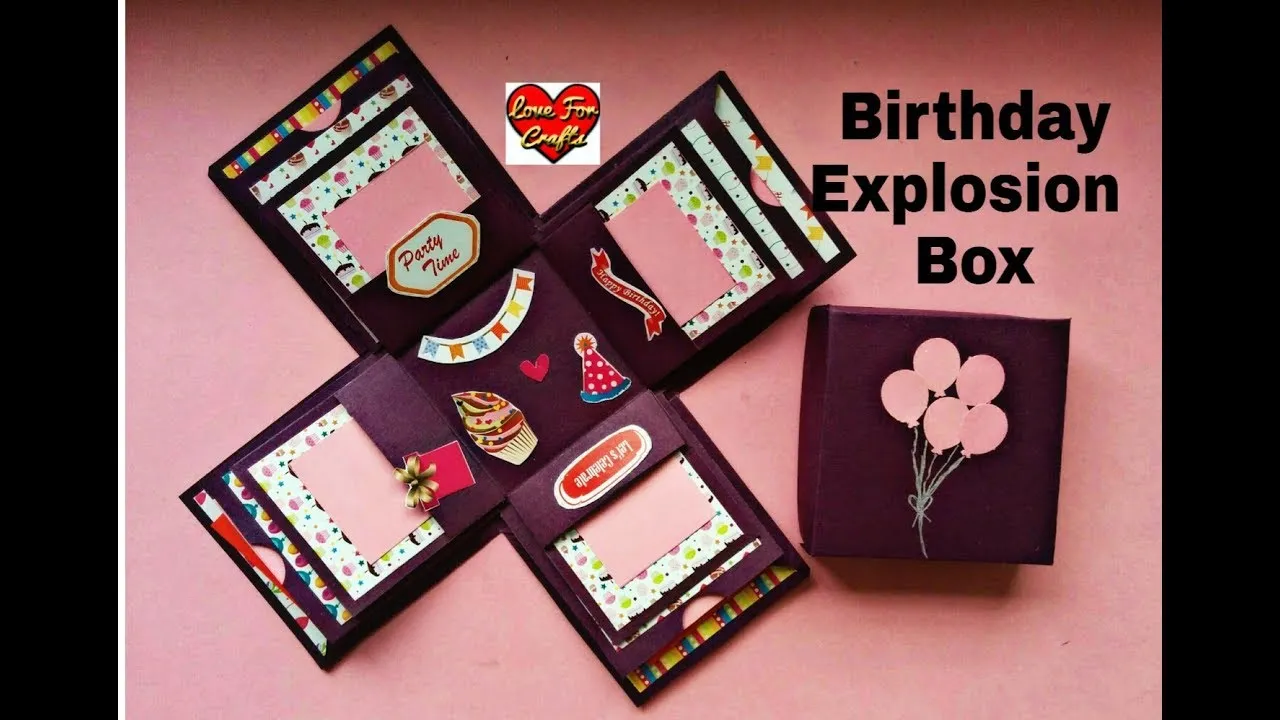
When it comes to designing your explosion box birthday card, the possibilities are endless! Here are some creative ideas to inspire you:
- Themed Boxes: Create a theme that reflects the birthday person's interests, like:
- *Travel: Include maps, photos from trips, and travel stickers.
- Hobbies: If they love gardening, use floral designs and gardening-themed elements.
- Color Schemes: Choose a color palette that resonates with the birthday person's favorite colors or the party theme:
- Interactive Features: Include fun surprises like:
- Mini Envelopes: Hide little notes or gift cards.
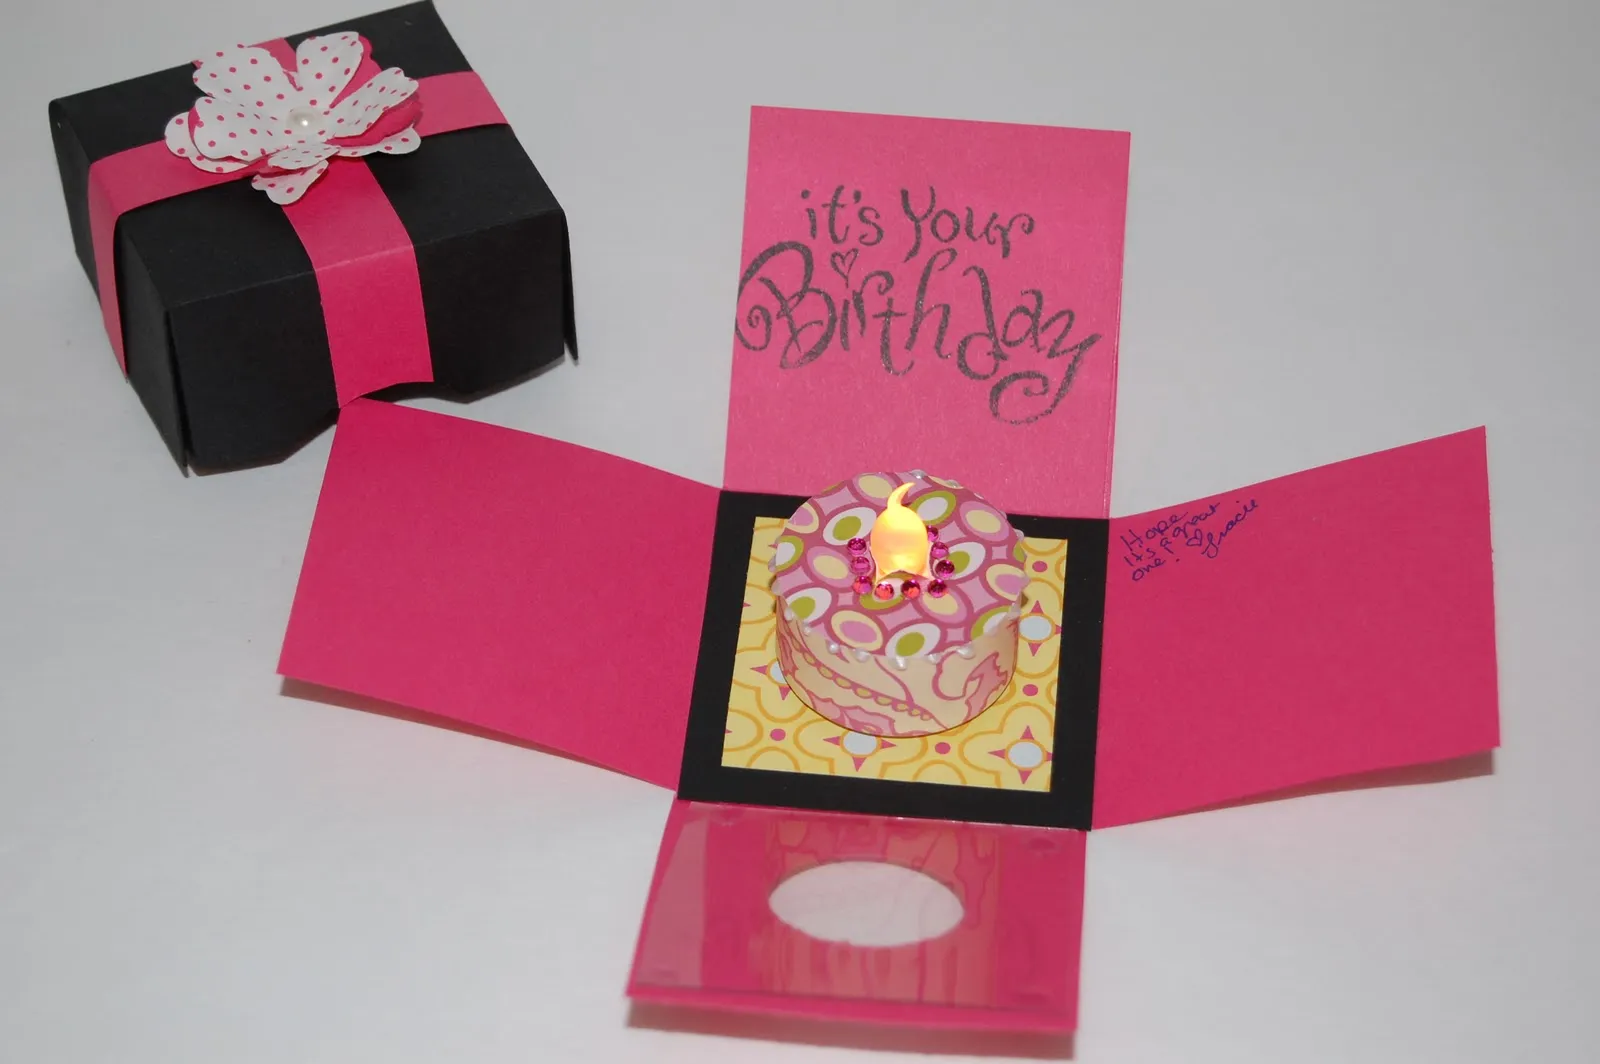
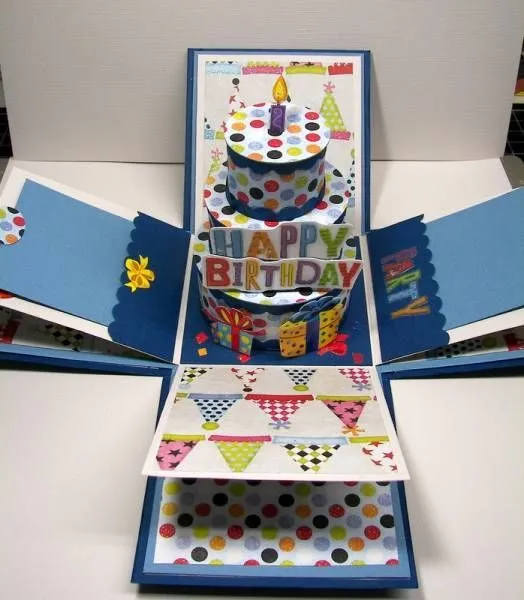
- Pop-up Elements*: Create a 3D cake or birthday candles that pop up when the box is opened.
- Personal Touch: Don’t forget to add personal messages, quotes, or even a heartfelt letter that the recipient can cherish.
| Color Combo | Perfect For |
|---|---|
| Blue & Silver | Elegant or Winter Birthdays |
| Pink & Gold | Feminine and Glamorous Celebrations |
With these ideas and steps, your explosion box will not only be a stunning gift but also a cherished keepsake for years to come!
Also Read This: Design Notebooks Using Canva Notebook Template
Tips for Personalizing Your Card
Creating a handmade explosion box birthday card is all about making it special and unique. Here are some fantastic tips for personalizing your card to reflect the personality of the birthday person:
- Choose Their Favorite Colors: Start by selecting a color palette that resonates with the recipient. If they love blue and gold, incorporate these colors into your design.
- Add Personal Photos: Include small photos of memorable moments shared with the birthday person. You can print them in mini sizes and attach them creatively inside the box.
- Incorporate Meaningful Quotes: Think of quotes or phrases that hold significance for the birthday person. Handwriting these quotes adds a personal touch that printed text cannot replicate.
- Use Decorative Elements: Utilize stickers, washi tape, or other embellishments that reflect their hobbies or interests. For instance, if they love gardening, include floral designs or gardening tools.
- Handwritten Notes: Inside the box, add little notes or messages from friends and family. This not only personalizes the card but also creates a keepsake filled with love.
By incorporating these personal touches, your explosion box will not just be a card, but a cherished memory that the birthday person will treasure for years to come!
Also Read This: Using Incognito Mode on YouTube and Its Benefits
Where to Find Inspiration and Tutorials
When it comes to crafting a stunning explosion box birthday card, inspiration can come from various sources. Here are some great places to find ideas and tutorials:
- YouTube: There are countless video tutorials that can guide you step by step through the process of creating an explosion box. Channels like "The Paper Princess" or "Mixed Up Craft" offer fantastic insights.
- Pinterest: This platform is a treasure trove of creative ideas! Simply search for “explosion box birthday card” to find unique designs and techniques that catch your eye.
- Craft Blogs: Websites like "Splitcoast Stampers" or "Crafty Chica" often have detailed blog posts that include supply lists and templates. They can be incredibly helpful for beginners.
- Instagram: Follow hashtags such as #ExplosionBox or #HandmadeCards to discover beautiful creations from fellow crafters. You might just stumble upon a design you want to replicate!
- Craft Stores: Sometimes, local craft stores hold workshops or have bulletin boards featuring classes and tutorials. It’s a great way to learn directly from experienced crafters.
With these resources at your fingertips, the creative possibilities are endless! Dive in, and let your imagination soar as you craft a one-of-a-kind birthday card!
Creating a Handmade Explosion Box Birthday Card
Exploding box cards are a delightful and creative way to celebrate birthdays! These unique cards not only serve as a greeting but also as a special keepsake. When opened, the box reveals layers of decorations, messages, and surprises that can be tailored to fit the recipient's personality. Here’s how to create your own handmade explosion box birthday card.
Materials Needed
- Cardstock in various colors
- Scissors
- Glue or double-sided tape
- Ruler and pencil
- Embellishments (stickers, ribbons, etc.)
- Markers or pens for writing messages
Step-by-Step Instructions
- Prepare the Base: Cut a square piece of cardstock (e.g., 12x12 inches). Fold it diagonally in both directions to create an “X” crease.
- Create the Box: Fold the edges toward the center to form the sides of the box. Cut slits on the edges to create flaps for securing.
- Add Layers: Cut smaller squares (e.g., 11x11 inches, 10x10 inches) for the inner layers. Decorate each layer with photos, messages, or embellishments.
- Assemble the Box: Stack the decorated layers inside the box and secure with glue or tape.
- Decorate the Lid: Create a lid using another square piece of cardstock, slightly larger than the base for a snug fit. Decorate as desired.
Customization Ideas
Personalize your explosion box card with:
- Favorite colors and themes
- Photos of memorable moments
- Handwritten messages or quotes
- Fun pop-up elements or 3D shapes
Creating a handmade explosion box birthday card is a fun and rewarding project that adds a personal touch to birthday celebrations. Not only does it showcase your creativity, but it also conveys heartfelt sentiments that the recipient will cherish forever.