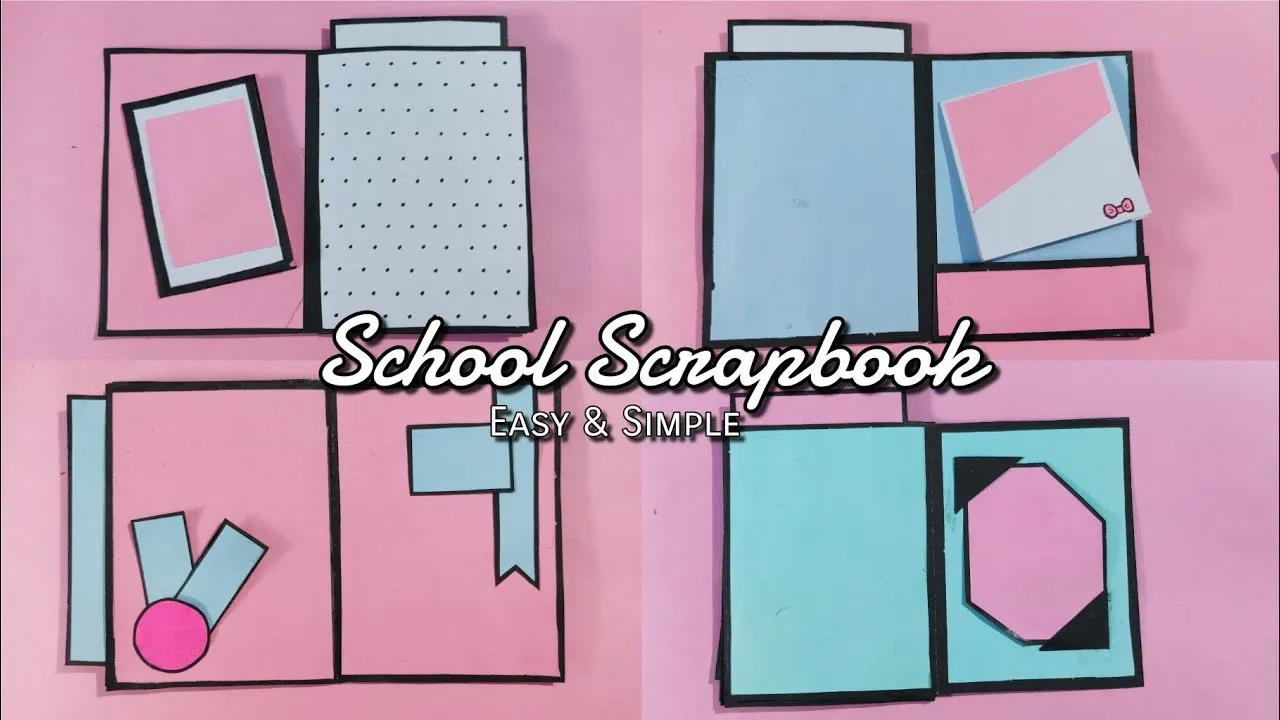
Creating a scrapbook for your school project is not just about collecting papers or pictures; it’s a wonderful way to express your creativity! Whether it's for a history report, a science project, or a personal reflection, a scrapbook can make your project stand out. In this guide, we’ll walk through the steps to gather materials and tips to design a scrapbook that reflects your unique style and the essence of your project.
Gathering Your Materials
Before you dive into designing your scrapbook, it’s essential to gather all the materials you'll need. Here’s a list of items to consider:
- Scrapbook Album: Choose a size that suits your project. A standard 12x12 inch album offers ample space for creativity.
- Decorative Paper: Look for colorful, patterned, or themed papers to serve as backgrounds. Craft stores often have packs specifically for scrapbooking.
- Adhesives: You'll need glue sticks, double-sided tape, or photo corners to attach your items securely.
- Scissors and Craft Knife: Use sharp scissors for cutting paper and a craft knife for detailed work.
- Markers and Pens: Grab a variety of colors to write captions, quotes, or your project’s title. Consider using gel pens for a shiny finish!
- Embellishments: This includes stickers, ribbons, washi tape, and buttons that can add personality and depth to your pages.
- Photos and Printouts: Collect images that relate to your project. These could be personal photos, printouts from the internet, or even hand-drawn illustrations.
Once you’ve gathered your materials, consider laying everything out before you start putting it all together. This planning stage can spark ideas and help you visualize your scrapbook’s overall design. Happy crafting!
Also Read This: How to Log YouTube Out of Other Devices for Better Privacy Control
5. Adding Photos and Artwork
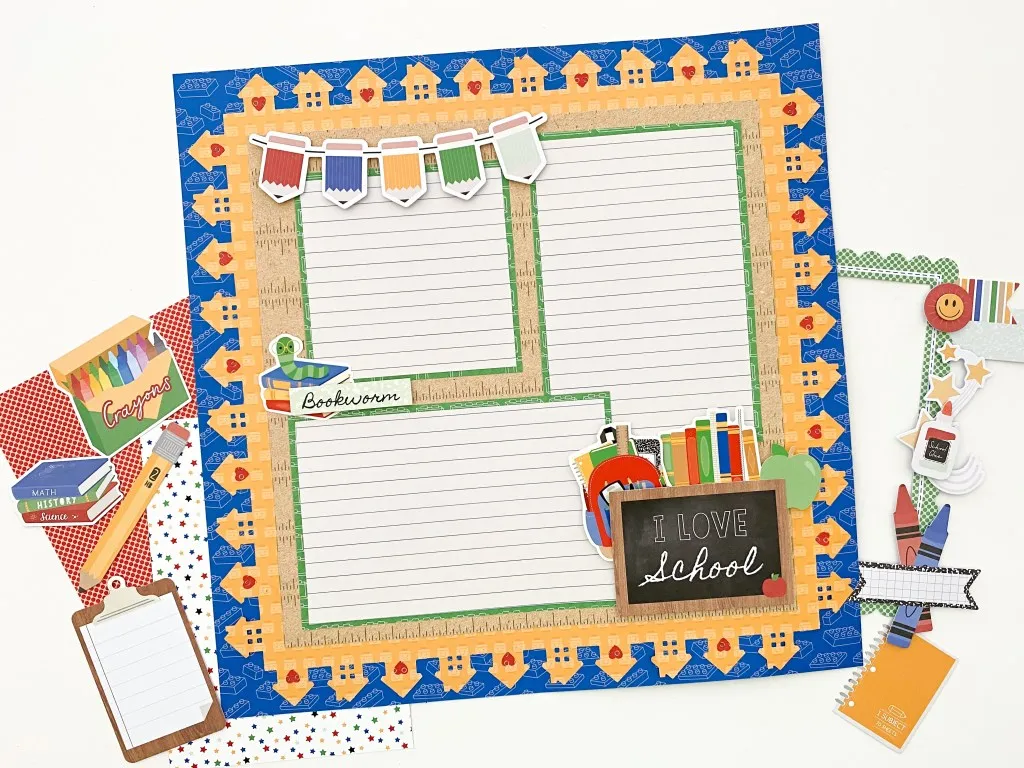
One of the most exciting parts of creating a scrapbook for your school project is adding photos and artwork. This is where your project comes to life! Start by selecting photos that reflect your theme or project topic. If you're working on a history project, for instance, photos from that era can be quite impactful. Consider using images that evoke emotions or tell a story.
Here are some tips to enhance your scrapbook:
- Choose Quality Images: Ensure the photos are clear and high resolution. Blurry or pixelated images can detract from your overall presentation.
- Mix and Match: Don’t just stick to photos. Include drawings, sketches, or even printed images that relate to your project. This adds a unique touch.
- Creative Layouts: Play with the arrangement. Instead of placing all photos in a straight line, try layering them or creating a collage effect for a more dynamic appearance.
- Use Borders: Adding colored borders or frames around your photos can make them pop and draw attention.
- Personal Artwork: If you enjoy drawing, consider adding your illustrations. This personal touch can make your scrapbook one-of-a-kind!
Remember, the goal is to create a visual narrative that complements your project. Whether you’re aiming for a clean and organized look or a more whimsical, artistic vibe, make sure every image and piece of artwork serves a purpose in telling your story.
Also Read This: How to Access High-Resolution Getty Photos for Your Projects
6. Incorporating Text and Captions
Text and captions are essential elements of your scrapbook. They provide context and enhance the storytelling aspect of your project. Think about what you want to convey with your text. Are you explaining a photo, providing background information, or sharing your personal reflections? Your words can add depth and engagement to your visual elements.
Here are some ways to effectively incorporate text and captions:
- Be Concise: Keep your captions short and sweet. Aim for 1-2 sentences that capture the essence without overwhelming the reader.
- Use Various Fonts: Experiment with different font styles, sizes, and colors to create visual interest. Just be sure they are legible!
- Highlight Important Points: Use bold or italic text to emphasize key phrases or important facts. This draws the reader’s attention to what matters most.
- Add Quotes: Including relevant quotes can add a personal touch and provide insights into your project topic.
- Text Boxes and Labels: Consider using colored text boxes or labels to create distinct sections for your captions. This can help organize information in a visually appealing way.
Incorporating text effectively not only supports your images but also engages your audience. Make sure your writing style reflects your personality and the overall theme of your scrapbook. With thoughtful captions and well-placed text, your scrapbook will not only inform but also inspire!
Also Read This: How to Italicize YouTube Comments
7. Personalizing Your Scrapbook
When it comes to scrapbooking, personalization is key! Your scrapbook should reflect your unique personality and the theme of your school project. Here are some creative ways to make it uniquely yours:
- Use Your Favorite Colors: Choose a color scheme that resonates with you. Whether it's vibrant and bold or soft and pastel, colors can set the tone for your scrapbook.
- Add Personal Touches: Incorporate elements like photographs, doodles, or even fabric swatches that are meaningful to you. These little details can tell your story better than words alone.
- Custom Titles and Captions: Instead of generic titles, come up with catchy phrases or quotes that relate to your project. Use different fonts or even handwritten notes for a more personal touch.
- Stickers and Embellishments: Find stickers that represent your interests or the theme of your project. You can also use washi tape, buttons, or glitter to enhance the visual appeal.
- Theme-Based Layout: Consider a theme for your scrapbook. For example, if your project is about the environment, use nature-inspired backgrounds and colors.
Personalizing your scrapbook not only makes it visually appealing but also allows you to express yourself creatively.
Also Read This: Making a good portfolio on Behance
8. Tips for Presentation and Sharing
Once your scrapbook is completed, it’s time to showcase your hard work! Here are some helpful tips for presenting and sharing your scrapbook effectively:
- Choose the Right Format: Depending on the occasion, decide whether your scrapbook will be presented digitally, in print, or even as an interactive display.
- Practice Your Presentation: If you need to present your scrapbook, practice what you’ll say. Highlight key sections and explain why certain elements are significant.
- Engage Your Audience: While sharing, ask questions or encourage feedback. This makes your audience feel involved and can lead to interesting discussions.
- Use Clear Lighting: If you’re displaying your scrapbook in a physical space, ensure it’s well-lit so that all the details are visible and appealing.
- Share Digitally: Consider taking high-quality photos of your scrapbook and sharing them online. Platforms like Instagram or Pinterest can showcase your work to a wider audience.
Remember, the goal is to share your creativity and hard work, so be enthusiastic and enjoy the process!
How to Create a Scrapbook for Your School Project
Creating a scrapbook for your school project is a fun and creative way to present your research and findings. It allows you to combine various elements such as text, images, and crafts, making your project visually appealing and engaging. Here’s a step-by-step guide to help you craft the perfect scrapbook:
- Gather Your Materials:
Before starting, collect all the necessary materials:
- Scrapbook or blank notebook
- Colored paper and cardstock
- Scissors and glue
- Markers, pens, or colored pencils
- Stickers and embellishments
- Printed images or photographs
- Plan Your Layout:
Sketch a rough layout of your scrapbook pages. Consider the following:
- Title Page
- Table of Contents
- Sections for different topics or themes
- Visual elements and text placement
- Organize Your Content:
Gather and categorize your research. Use headings and subheadings to organize information clearly.
- Start Assembling:
Begin placing your content on the pages, adding images, and writing descriptions. Be sure to:
- Use colorful backgrounds
- Incorporate decorative borders
- Highlight important points with bullet lists
- Final Touches:
Review your scrapbook for any last additions. Add a personal touch with your signature style.
Creating a scrapbook is not just an assignment; it's an opportunity to express your creativity while showcasing your hard work. With the right materials and layout, your scrapbook can become a memorable representation of your school project.
Conclusion: In summary, a well-crafted scrapbook can elevate your school project, making it both informative and visually captivating, allowing you to stand out and leave a lasting impression.