Uploading photos to Behance is essential for any creative professional looking to showcase their work to a global audience. Behance serves as a digital portfolio, making it easy for others, including potential clients and employers, to view your work. By sharing your photos here, you also gain exposure within the creative community, which can open doors for collaboration and networking opportunities. Moreover, your work on Behance is easily discoverable through search engines, increasing your visibility.
Whether you're a photographer, graphic designer, or digital artist, keeping an updated portfolio on Behance allows you to stay relevant in the industry. It's a platform where your talent can shine through well-curated visuals, so others can appreciate the skill and creativity you put into every photo.
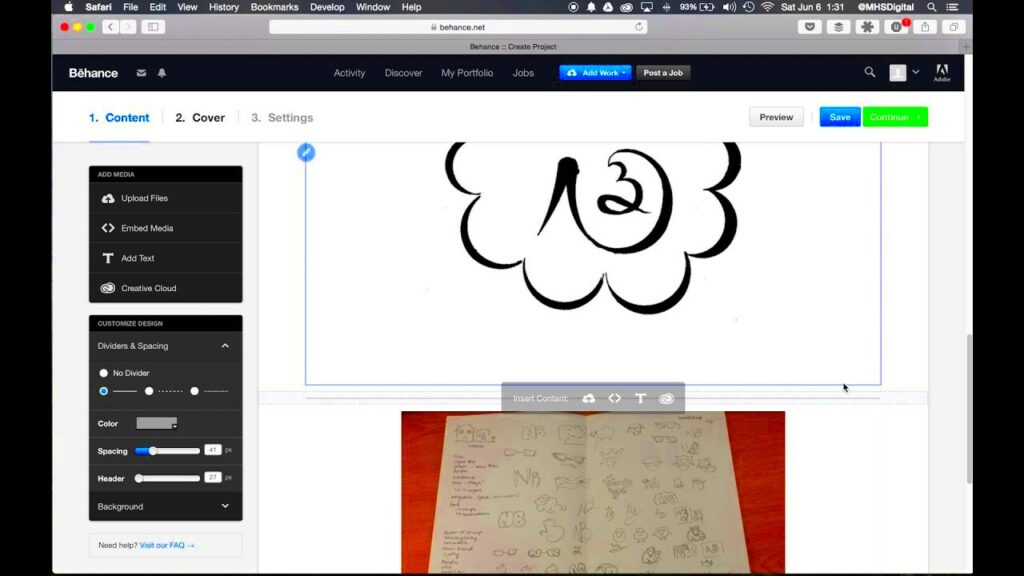
Steps to Upload Photos on Behance
Uploading photos on Behance is a straightforward process, but it helps to know each step to ensure your project looks its best. Here's how you can upload your photos with ease:
- Log into your Behance account: Make sure you're signed in to start uploading.
- Click the "Create a Project" button: This option is usually located on the top right corner of the dashboard.
- Add your photos: Drag and drop the images you want to showcase, or select them from your computer by clicking the upload button.
- Organize and arrange: Arrange the photos in a way that tells a visual story or highlights the best aspects of your work.
- Write a project description: Give viewers context about your photos, explaining the project, techniques used, or inspiration behind the images.
- Add tags: Tags help categorize your work and make it more discoverable to those searching for similar content.
- Publish your project: Once you're happy with the arrangement and details, hit the publish button to share your project with the Behance community.
Taking the time to upload your photos correctly helps in presenting your work in a professional manner, which can lead to more engagement and recognition on the platform.
Also Read This: Where to Find Your Saved Posts on LinkedIn
Choosing the Right Photos for Your Behance Portfolio
Choosing the right photos for your Behance portfolio can make a significant difference in how you're perceived by others. It's important to be selective about what you upload since this platform is often used as a professional showcase. Consider the following when deciding which photos to include:
- Quality over quantity: Only upload high-quality photos that represent your best work. Fewer but stronger images are better than many average ones.
- Consistency in style: Your portfolio should reflect a consistent style or theme, helping to establish your personal brand. Whether it's minimalism, bold colors, or black-and-white photography, keep the style coherent.
- Diverse range of work: Show variety in your skills by including different types of photos. If you're a photographer, include portraits, landscapes, and creative shots to demonstrate versatility.
- Relevance to your audience: Think about who will be viewing your portfolio. If you're aiming to attract certain clients, tailor your portfolio to their interests and needs.
Being intentional about the photos you upload ensures that your Behance portfolio reflects your strengths, skills, and unique vision.
Also Read This: Unlocking Android Pattern Locks Without Data Loss
Editing and Organizing Your Uploaded Photos
Editing and organizing your uploaded photos on Behance is crucial for making a lasting impression. Properly edited photos not only enhance the visual appeal but also convey professionalism. Once you upload your photos, take the time to make necessary adjustments before publishing. Here’s how to effectively edit and organize your images:
- Use Editing Tools: Utilize photo editing software to enhance your images. Adjust brightness, contrast, and saturation to make your photos pop.
- Crop and Resize: Ensure your photos are properly cropped and resized to fit the Behance layout. This prevents awkward cuts and maintains focus on the subject.
- Create a Cohesive Look: Stick to a consistent editing style across all photos. This helps create a unified look for your project.
- Organize by Theme or Project: Group your photos into relevant themes or projects. This makes it easier for viewers to navigate your work.
- Sequence for Storytelling: Arrange your photos in a logical order that tells a story or guides the viewer through your creative process.
By taking the time to edit and organize your photos effectively, you ensure that your work is presented in the best possible light. This not only attracts more viewers but also enhances your professional reputation on the platform.
Also Read This: The Pros and Cons of Using Stock Images for Your Business
Adding Descriptions and Tags to Your Photos
Adding descriptions and tags to your photos on Behance is an important step that can significantly boost visibility and engagement. Descriptions provide context, while tags help categorize your work, making it easier for others to find it. Here are some tips for crafting effective descriptions and tags:
- Write Clear Descriptions: Use simple language to explain the concept behind each photo. Include details about your inspiration, techniques used, or the story you want to tell.
- Incorporate Keywords: Think about keywords that potential viewers might use to search for your work. Include these in your descriptions to enhance discoverability.
- Limit Length: Keep descriptions concise yet informative. Aim for a few sentences that clearly communicate your message without overwhelming the reader.
- Choose Relevant Tags: Use tags that accurately reflect the content of your photos. Consider using general tags (like "photography" or "landscape") and more specific ones related to your project.
- Update as Needed: Don’t hesitate to revise descriptions and tags as your work evolves. Keeping this information current can improve how your photos are found.
Effective descriptions and tags not only help viewers understand your work but also enhance the chances of your photos being discovered by a wider audience.
Also Read This: Say Goodbye to Watermarks: Removing Shutterstock Watermarks
Making Your Photos Stand Out with Behance Features
Behance offers a range of features that can help your photos stand out and attract attention. By utilizing these tools, you can elevate your projects and engage with your audience in a more meaningful way. Here’s how to make your photos shine using Behance features:
- Use Cover Images: Select an eye-catching cover image for your project. This is the first impression viewers will have, so choose an image that truly represents your work.
- Incorporate Videos: If applicable, consider adding short video clips alongside your photos. This can provide additional context and showcase your creative process.
- Utilize the Project Layout Options: Experiment with different layouts that Behance offers. A well-structured layout can draw viewers in and make your project more engaging.
- Highlight Featured Projects: Regularly feature your best work on your profile. This allows visitors to see your top pieces right away, creating a strong impression.
- Engage with the Community: Take advantage of Behance’s community features by following other creatives, commenting on their projects, and sharing your own insights. Building connections can lead to more visibility.
By using these Behance features effectively, you can create a compelling and visually appealing portfolio that attracts attention and encourages interaction from viewers.
Also Read This: Can You Post YouTube Videos on Instagram and What to Keep in Mind
Sharing Your Photo Projects on Social Media
Sharing your photo projects on social media is a fantastic way to gain more exposure and engage with a broader audience. By promoting your Behance work through various platforms, you can connect with fans, potential clients, and other creatives. Here’s how to effectively share your projects:
- Choose the Right Platforms: Focus on platforms that align with your audience. Instagram, Facebook, and Twitter are great for visual content, while LinkedIn can be effective for professional connections.
- Create Engaging Posts: Use eye-catching visuals and compelling captions. Highlight what makes your project unique and invite viewers to check it out on Behance.
- Use Hashtags Wisely: Incorporate relevant hashtags to increase the visibility of your posts. Research trending hashtags in your niche to attract more views.
- Share Stories and Reels: Utilize stories or short video reels to showcase behind-the-scenes content or a quick overview of your project. This can create buzz and drive traffic to your Behance page.
- Engage with Your Audience: Respond to comments and messages. Engaging with your audience builds a community around your work and encourages them to share it.
By sharing your projects effectively on social media, you can drive more traffic to your Behance portfolio, leading to increased recognition and potential opportunities in your creative journey.
Also Read This: Mastering Your LinkedIn Connections for a Cleaner Network
Common Mistakes to Avoid When Uploading Photos to Behance
Avoiding common pitfalls when uploading photos to Behance can make a significant difference in how your work is perceived. Here are some mistakes to steer clear of:
- Uploading Low-Quality Images: Always upload high-resolution images. Blurry or pixelated photos can diminish the professionalism of your portfolio.
- Neglecting to Edit: Failing to edit your photos can lead to missed opportunities. Always make basic adjustments for brightness, contrast, and cropping.
- Ignoring Descriptions and Tags: Not including detailed descriptions and relevant tags can make your photos harder to find. Take time to write clear descriptions and use appropriate tags.
- Overloading with Too Many Photos: Avoid uploading too many images in one project. Select only your best work to maintain viewer interest and create a stronger impact.
- Neglecting to Update Your Portfolio: Your portfolio should reflect your current skills and projects. Regularly update it to keep it fresh and relevant.
By being mindful of these common mistakes, you can enhance your Behance portfolio and present your work in the best possible light, attracting more attention and appreciation.
Also Read This: How to Save YouTube Videos as MP4 Files for Offline Viewing
FAQ on Photo Uploading to Behance
Have questions about uploading photos to Behance? You’re not alone! Here are some frequently asked questions that can help clarify the process:
What file types can I upload to Behance?
Behance supports various file types, including JPEG, PNG, GIF, and even videos. Just ensure your files meet the platform's size requirements.
Is there a limit on the number of photos I can upload?
There’s no strict limit on the number of photos per project, but it's best to keep it to a manageable amount to maintain viewer engagement.
Can I edit my project after publishing it?
Yes, you can edit your project at any time. You can add or remove images, update descriptions, and change tags to keep your project fresh.
How can I make my photos more discoverable?
Using relevant tags and writing clear descriptions can significantly enhance the discoverability of your photos. Engaging with the community also helps.
What’s the best way to promote my Behance projects?
Promote your projects on social media, engage with other creatives, and participate in Behance groups or forums to increase visibility.
These FAQs should help you navigate the photo uploading process on Behance more effectively, ensuring you make the most of your creative work.
Conclusion on Uploading Photos to Behance
Uploading photos to Behance is an essential step for any creative looking to showcase their work and connect with a wider audience. By taking the time to edit and organize your images, add thoughtful descriptions and tags, and share your projects on social media, you can enhance your portfolio's visibility and engagement. Remember to avoid common pitfalls like uploading low-quality images or neglecting to update your work regularly. Instead, focus on presenting your best pieces in a cohesive manner that reflects your unique style. Utilizing Behance's features can further elevate your projects, making them more appealing to potential clients and collaborators. With these strategies in mind, you can effectively showcase your creative talents and make a lasting impression on the Behance community.